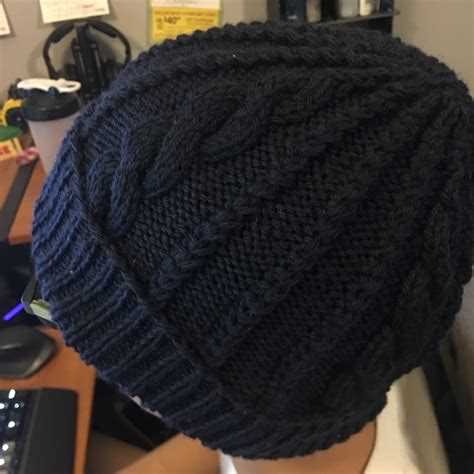
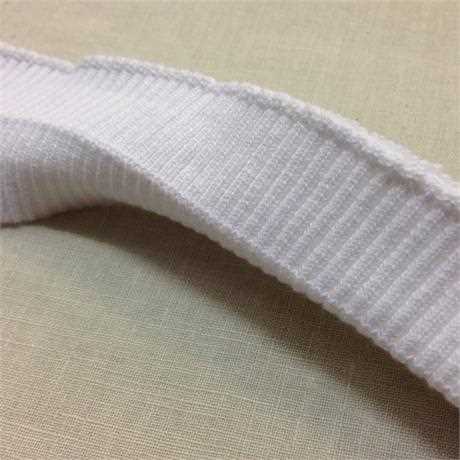
One of the most versatile and essential knitting techniques is rib knitting. Whether you are a beginner or an experienced knitter, ribbing is a skill that you’ll want to learn and master. Ribbing is commonly used to create stretchy and elastic fabric, making it perfect for cuffs, collars, and waistbands.
Rib knitting is accomplished by alternating knit and purl stitches in a specific pattern. The most common type of ribbing is 1×1 rib, where one knit stitch is followed by one purl stitch, creating a series of vertical columns. Another popular variation is 2×2 rib, where two knit stitches are followed by two purl stitches. This creates a wider ribbing pattern that is often used for scarves, hats, and sweaters.
Not only does rib knitting create a stretchy fabric, but it also adds texture and depth to your knitting projects. The raised columns and valleys created by the alternating knit and purl stitches give ribbed fabric a distinctive look and feel. Additionally, ribbing can be used as a decorative element, allowing you to add visual interest to your designs.
Rib knitting is a versatile technique that can be used in a variety of knitting projects. It’s not only functional but also adds a touch of sophistication and style to your creations. Whether you’re knitting a cozy sweater or a simple beanie, incorporating ribbing into your design will elevate it to the next level.
So, whether you’re a beginner looking to expand your knitting repertoire or an experienced knitter wanting to add more texture to your projects, learning rib knitting is a must. With its versatility, stretchiness, and visual appeal, ribbing is an essential technique that every knitter should have in their toolbox.
What is Rib Knitting
Rib knitting is a technique commonly used in knitting to create fabric that has a stretchy and flexible texture. It is often used for the cuffs, hem, and collars of sweaters, as well as for the waistbands of hats and socks. Rib knitting is characterized by alternating columns of knit stitches and purl stitches, which creates a ribbed pattern.
The ribbing pattern is achieved by working alternating rows of knit and purl stitches. The knit stitches create the raised columns, while the purl stitches create the recessed columns. This combination of raised and recessed columns creates the stretchy quality of ribbed fabric.
Rib knitting can be done with different combinations of knit and purl stitches, resulting in various rib patterns. The most common rib patterns are 1×1 rib (alternating one knit stitch with one purl stitch), 2×2 rib (alternating two knit stitches with two purl stitches), and 1×2 rib (alternating one knit stitch with two purl stitches).
One of the main advantages of rib knitting is its ability to contract and expand easily, making it ideal for creating garments that need to fit snugly. The stretchiness of ribbed fabric allows it to conform to the shape of the wearer, providing a comfortable and flexible fit.
Additionally, rib knitting is often used as an edging technique to prevent the edges of the fabric from curling. The ribbed borders act as a stabilizing element, keeping the garment flat and preventing it from rolling inward.
Rib knitting can be worked in different types of yarn, from thin and delicate to thick and chunky. The type of yarn used will affect the final appearance and texture of the ribbed fabric. Thin yarns will create a more tightly knit rib, while thicker yarns will result in a bulkier and looser rib.
Overall, rib knitting is a versatile and essential technique for knitters. It provides a stretchy and flexible fabric that is both functional and visually appealing.
Why Rib Knitting is Essential
Rib knitting is an essential technique in knitting that creates a stretchy and versatile fabric. It is commonly used to create cuffs, collars, and hems on garments, as well as to add texture and visual interest to knitted items. There are several reasons why rib knitting is considered essential in the knitting community.
- Elasticity: Rib knitting creates a fabric with natural elasticity, allowing it to stretch and recover without losing its shape. This makes it an ideal choice for cuffs and bands that need to fit snugly but still be comfortable to wear.
- Texture: The alternating pattern of knit and purl stitches in ribbing creates a textured fabric that can add visual interest to knitted items. It can be used to create simple and classic designs or more intricate patterns.
- Structure: Ribbing provides structure and stability to knitted garments. It helps to prevent edges from rolling and can be used to strengthen areas that need extra support, such as button bands or collars.
- Versatility: Rib knitting can be used in a variety of projects and for different purposes. It can be used as a decorative element, a functional component, or a combination of both. Its versatility makes it a valuable technique for knitters of all levels.
Overall, rib knitting is an essential technique in knitting due to its elasticity, texture, structure, and versatility. Whether you’re a beginner or an experienced knitter, mastering rib knitting will open up a world of design possibilities and enhance the quality and durability of your knitted items.
How to Get Started with Rib Knitting
Rib knitting is a versatile technique that creates a stretchy and textured fabric. It is often used for cuffs, collar, and hems in knitting projects. If you are new to rib knitting, here are some steps to get started:
- Select the Right Yarn and Needles: Choose a yarn that is appropriate for rib knitting. A medium-weight yarn made of wool or a wool blend works well. Select needles that are suitable for the yarn weight, typically a size smaller than what is recommended on the yarn label.
- Cast On: Start by casting on the desired number of stitches. Rib knitting is typically done in multiples of two, but it can also be done in multiples of three or more for more complex rib patterns.
- Set Up the Rib Pattern: Decide on the rib pattern you want to use. The most common rib pattern is the 1×1 rib, which alternates knit and purl stitches. Other variations include the 2×2 rib, 3×1 rib, and more. Repeat the pattern across the row.
- Work the Rows: Continue working the rib pattern for the desired length. Remember to alternate between knitting and purling stitches according to the pattern. Keep an even tension and try to avoid any gaps or loose stitches.
- Bind Off: Once you have reached the desired length, bind off the stitches following the rib pattern. This will maintain the stretchiness of the fabric.
Rib knitting is a great technique to add texture and elasticity to your knitting projects. As you become more comfortable with rib knitting, you can experiment with different rib patterns and combinations of knit and purl stitches to create unique designs.
Remember to practice and be patient as you learn rib knitting. With time and practice, you will master this essential knitting technique and be able to create a variety of beautiful ribbed projects.
Tips and Techniques for Rib Knitting
Rib knitting is a commonly used technique in knitting that creates a fabric with a lot of stretch and flexibility. It is typically used for cuffs, collars, and hems of garments. Whether you are new to knitting or have been knitting for years, here are some tips and techniques to help you master rib knitting:
- Choose the right yarn: When knitting ribbing, it is important to choose a yarn that has good stitch definition so that the rib pattern will stand out. Yarns with a smooth and crisp texture, such as cotton or wool, work well for rib knitting.
- Use the right needles: To achieve the desired rib pattern, it is important to use the right size of knitting needles. Typically, a smaller needle size is used compared to the main body of the project. This helps to create a tighter and more elastic ribbing.
- Pay attention to tension: Maintaining consistent tension is crucial in rib knitting to create an even and uniform fabric. Take your time when changing from knit to purl stitches and make sure to adjust your tension accordingly.
- Count your stitches: It is easy to lose track of stitches in rib knitting, especially if you are using a complex rib pattern. To avoid mistakes, count your stitches regularly and use stitch markers to mark the beginning of each repeat.
- Experiment with different rib patterns: Rib knitting doesn’t have to be limited to the traditional 1×1 or 2×2 rib. Explore different rib patterns, such as cables or lace ribbing, to add texture and interest to your knitting projects.
- Block your ribbed fabric: Blocking is an essential step in finishing your ribbed fabric. It helps to even out the stitches, relax the yarn, and give your project a professional finish. Follow the blocking instructions for your specific yarn and project.
By following these tips and techniques, you will be able to confidently knit ribbing for a variety of knitting projects. Rib knitting is a versatile and essential technique for creating beautiful and functional garments.
Common Mistakes to Avoid when Rib Knitting
While rib knitting is a versatile and popular technique, it can be easy to make mistakes, especially if you’re a beginner. Here are some common mistakes to avoid when rib knitting:
- Uneven tension: One of the most common mistakes is having uneven tension in your knitting. This means that your ribbing might have areas that are tighter or looser than others, resulting in an uneven appearance. To avoid this, make sure to maintain consistent tension throughout your knitting. Practice keeping your stitches even and pay attention to your tension as you work.
- Inconsistent ribbing pattern: Another mistake to avoid is an inconsistent ribbing pattern. Ribbing typically consists of alternating knit and purl stitches, so it’s important to follow the pattern consistently. Accidentally adding or skipping a stitch can throw off the entire ribbing pattern, making it look messy and uneven. Take your time and double-check your work to ensure you’re following the pattern correctly.
- Not using the correct needle size: Using the wrong needle size can also affect the look of your ribbing. If you’re using needles that are too large, your ribbing may appear loose and floppy. On the other hand, using needles that are too small can result in tight, stiff ribbing. Make sure to use the recommended needle size for your chosen yarn and pattern to achieve the desired ribbing effect.
- Forgetting to count your stitches: It’s important to keep track of your stitches when rib knitting, especially if you’re working on a large project. Forgetting to count your stitches can lead to mistakes, such as accidentally adding or missing stitches. Use stitch markers or count your stitches regularly to ensure accuracy and prevent any errors from going unnoticed.
- Not blocking your finished ribbing: Blocking is an essential step in knitting, and it’s particularly important for ribbing. By blocking your finished ribbing, you can even out any uneven stitches and give your project a more polished look. Follow the blocking instructions for your specific yarn and project to achieve the best results.
Avoiding these common mistakes will help you create beautiful, professional-looking ribbed knitting projects. With practice and attention to detail, you’ll soon become a master of this essential knitting technique. Happy knitting!
Advanced Rib Knitting Patterns
Rib knitting is a versatile technique that can be used to create a variety of patterns. Once you have mastered the basic ribbing stitch, you can experiment with more advanced patterns to add texture and visual interest to your knitting projects. Here are a few advanced rib knitting patterns to try:
- Twisted Ribbing: Twisted ribbing is a variation of traditional ribbing that adds an extra twist to each stitch, creating a more defined and textured pattern. To create twisted ribbing, simply knit into the back loop of each stitch instead of the front loop.
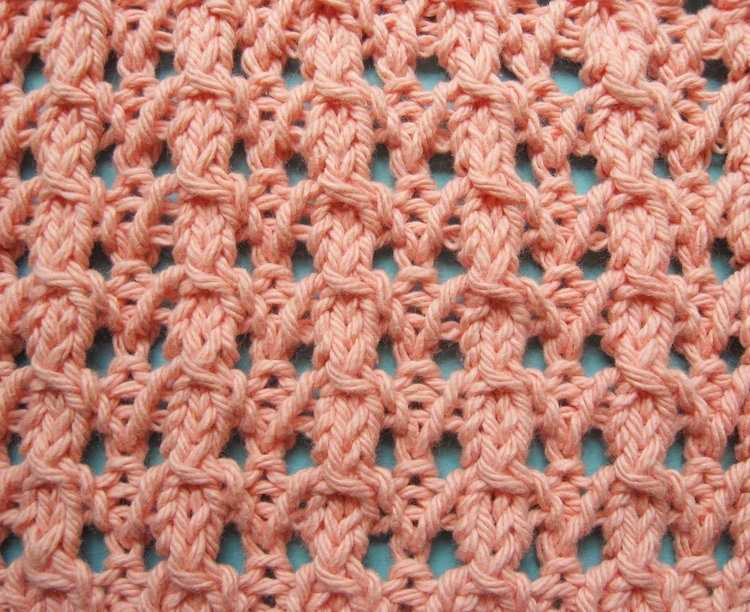
- Cable Ribbing: Cable ribbing combines traditional ribbing with cable stitches to create a more intricate and decorative pattern. To create cable ribbing, simply insert a cable needle into the stitches that you want to cross over, hold it to the front or back, depending on the desired effect, and then knit the next stitches before knitting the stitches from the cable needle.
- Seed Stitch Ribbing: Seed stitch ribbing is a combination of ribbing and seed stitch, which alternates knit and purl stitches to create a bumpy texture. To create seed stitch ribbing, alternate between knitting two stitches and purling two stitches for the desired number of rows.
- Rib and Lace: Rib and lace is a delicate and feminine pattern that combines ribbing with lace stitches. To create rib and lace, alternate between knitting or purling the ribbing stitches and working the lace pattern, which often involves yarn overs and decreases, for the desired number of rows.
These are just a few examples of the advanced rib knitting patterns that you can try. Feel free to experiment with different stitch combinations and pattern variations to create unique and personalized designs.
FAQ:
What is rib knitting?
Rib knitting is a technique in knitting where you alternate between knit stitches and purl stitches to create a stretchy and textured fabric.
Why is rib knitting considered an essential knitting technique?
Rib knitting is considered essential because it is commonly used for creating cuffs, collars, and hems, adding elasticity and structure to knitted garments.
What are the benefits of rib knitting?
The benefits of rib knitting include the ability to create stretchy fabric, allowing for a better fit of garments, as well as adding visual interest to the design.
Can rib knitting be used for more than just cuffs and collars?
Yes, rib knitting can be used for a variety of projects, such as scarves, hats, and even full garments like sweaters. It can add texture and stretch to any knitted piece.
Are there different types of rib knitting?
Yes, there are different types of rib knitting, such as 1×1 rib, 2×2 rib, and so on. The numbers refer to the number of knit stitches and purl stitches in each repeat.
What types of yarn are best for rib knitting?
Yarns with good stitch definition and elasticity work best for rib knitting. Wool and wool blends are popular choices, but other fibers like cotton or acrylic can also be used depending on the desired drape and stretchiness.
Can rib knitting be combined with other stitch patterns?
Yes, rib knitting can be combined with other stitch patterns to create interesting and unique designs. For example, you can alternate between a rib stitch and a lace stitch to add texture and visual appeal.


