Knitting is a popular craft that allows you to create beautiful and practical items using just a pair of needles and some yarn. If you’re just starting out, it can feel overwhelming with all the different stitches and techniques to learn. One of the basic stitches that every beginner knitter should know is the purl stitch.
The purl stitch is the reverse of the knit stitch and creates a loop that sits on the front of your work. It’s used to add texture, create ribbing, and can be combined with other stitches to create intricate designs. Learning how to purl opens up a whole new world of possibilities in your knitting projects.
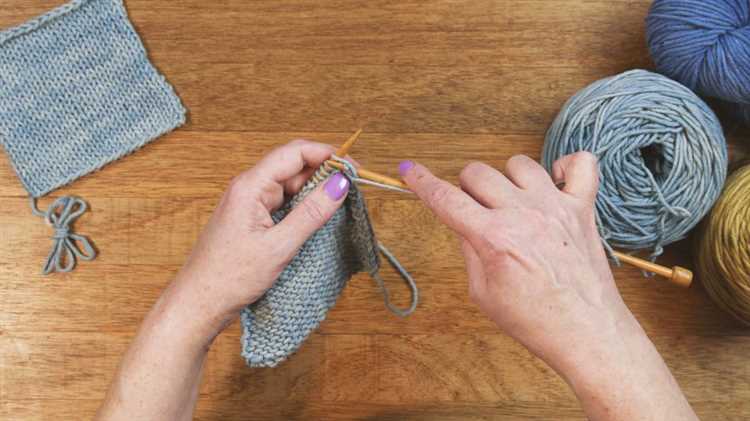
To purl, you simply insert your right needle into the front of the stitch on your left needle, from right to left. Then, wrap the yarn counterclockwise around the right needle and pull it through the stitch, slipping the old stitch off the left needle. The new stitch will now be on your right needle, creating a purl stitch.
As a beginner, it’s important to practice the purl stitch until you feel comfortable with it. You can start by creating simple swatches of purl stitches, or incorporate the purl stitch into a larger project. With time and practice, you’ll become more confident in your knitting skills and be able to tackle more advanced stitch patterns.
Understanding the Basics of Knitting
Knitting is a versatile craft that allows you to create beautiful and functional pieces using just a pair of knitting needles and yarn. Whether you’re a complete beginner or have some experience, it’s important to understand the basics of knitting before diving into more complex projects. Here are some key concepts to grasp:
- Casting On: The first step in knitting is casting on, which is the process of creating the foundation row of stitches. There are various methods to cast on, such as the long-tail cast on or the knitted cast on. Choose a method that you find comfortable and suits your project.
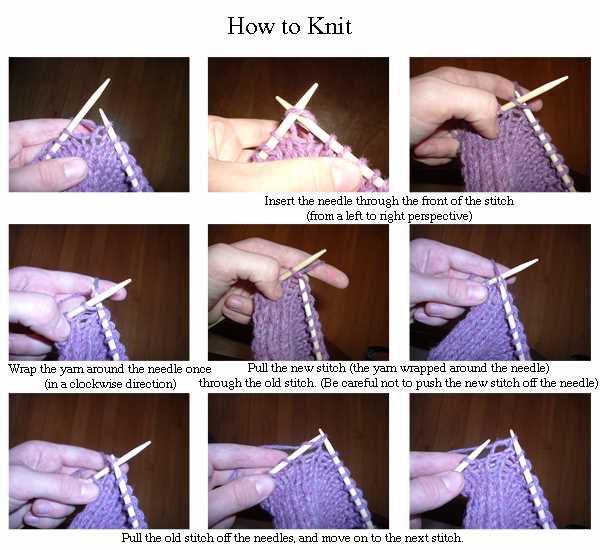
- Knit Stitch: The knit stitch is the most basic stitch in knitting. It creates a smooth and flat fabric with “v” shaped stitches. To knit, insert the right needle into the front of the stitch on the left needle, wrap the yarn around the right needle, and pull it through the stitch.
- Purl Stitch: The purl stitch is the opposite of the knit stitch. It creates a bumpy texture on the fabric, with the stitches looking like little bumps or loops. To purl, insert the right needle into the front of the stitch on the left needle, bring the yarn to the front of the work, wrap the yarn around the right needle, and pull it through the stitch.
- Knit and Purl Rows: By combining knit and purl stitches in different sequences, you can create various stitch patterns. Knit stitches on one side of the fabric and purl stitches on the other side result in a fabric known as stockinette stitch, which is commonly used in many knitting projects.
- Increasing: Increasing is the process of adding stitches to your knitting. There are several ways to increase, such as knitting into the front and back of a stitch or making a yarn over. Increasing is often used to shape garments or create decorative elements.
- Decreasing: Decreasing is the process of removing stitches from your knitting. This is done by knitting or purling two stitches together or by slipping stitches. Decreasing is used to shape garments or create interesting stitch patterns.
- Binding Off: Binding off, also known as casting off, is the final step in knitting. It creates a finished edge by securing the stitches and preventing them from unraveling. To bind off, knit two stitches, insert the left needle into the first stitches worked, lift it over the second stitch, and drop it off the needle.
These are just the basics to get you started on your knitting journey. As you become more comfortable with these techniques, you can explore more advanced stitches, patterns, and projects. Knitting is a relaxing and enjoyable hobby that allows you to unleash your creativity and create beautiful handmade items.
Differentiating Purl Stitch from Knit Stitch
When it comes to knitting, there are two basic stitches that form the foundation of all knitting patterns: the knit stitch and the purl stitch. While these stitches may look similar, there are key differences that set them apart.
The Knit Stitch
The knit stitch is one of the most common stitches used in knitting. It creates a smooth V-shaped pattern on the right side of the fabric and a bumpy texture on the wrong side. To knit, you insert the right-hand needle into the front of the stitch on the left-hand needle, wrap the yarn around, and pull it through to create a new loop on the right-hand needle.
The Purl Stitch
The purl stitch is the reverse of the knit stitch. It creates a bumpy texture on the right side of the fabric and a smooth pattern on the wrong side. To purl, you insert the right-hand needle from right to left into the front of the stitch on the left-hand needle, wrap the yarn around the right-hand needle, and pull it through to create a new loop on the right-hand needle.
Key Differences
While both stitches are used to create different textures in knitting, there are a few key differences that make them distinct:
- The position of the stitch: In the knit stitch, the stitch is positioned with the front leg of the loop facing the knitter. In the purl stitch, the stitch is positioned with the back leg of the loop facing the knitter.
- The way the yarn is wrapped: In the knit stitch, the yarn is wrapped around the needle counterclockwise. In the purl stitch, the yarn is wrapped around the needle clockwise.
- The direction of the needle insertion: In the knit stitch, the right-hand needle is inserted from left to right into the front of the stitch on the left-hand needle. In the purl stitch, the right-hand needle is inserted from right to left into the front of the stitch on the left-hand needle.
Combining Knit and Purl Stitches
Knitting patterns often use both knit and purl stitches in combination to create various patterns and textures. By alternating between these two stitches, you can create simple ribbing, seed stitch, stockinette stitch, and many other patterns.
Understanding the differences between the knit and purl stitches is essential for learning and following knitting patterns. With practice, you’ll quickly become comfortable with both stitches and be able to create a wide range of knitting projects.
Benefits and Uses of Purl Stitch
The purl stitch is essential in knitting and has several benefits and uses. Understanding how to purl will expand your knitting repertoire and allow you to create a wide range of textures and patterns.
1. Versatility: The purl stitch is incredibly versatile and can be used in various knitting projects. It is often combined with the knit stitch to create intricate patterns and designs.
2. Ribbing: The purl stitch is commonly used in ribbing, which is a knitting technique used to create stretchy and flexible fabric. Ribbing is often found at the cuffs, collars, and hems of sweaters, hats, and socks.
3. Seeding Stitch: The purl stitch is also used in the seeding stitch pattern, which creates a textured fabric with alternating rows of knit and purl stitches. This pattern is great for adding visual interest to projects like scarves and blankets.
4. Garter Stitch: The purl stitch is essential in creating the garter stitch, which is achieved by knitting every row. This stitch pattern creates a squishy and reversible fabric that is commonly used in scarves and baby blankets.
5. Decreases and Increases: The purl stitch is used in various decreasing and increasing techniques, such as purl two together (p2tog) and purl front and back (pfb). These techniques are crucial for shaping garments and creating a tailored fit.
6. Texture: The purl stitch adds texture to knitted fabric, creating a bumpy or raised surface. This makes it ideal for creating patterns like cables, bobbles, and seed stitch.
7. Combination Stitches: By combining knit and purl stitches in different ways, you can create an endless variety of stitch patterns. This allows you to personalize your knitting projects and experiment with different textures.
8. Reverse Stockinette Stitch: The purl stitch is used to create the reverse stockinette stitch, which features purl stitches on the right side of the fabric. This stitch pattern creates a smooth surface on the wrong side and is often used as a background for other stitch patterns.
In conclusion, the purl stitch is a fundamental technique in knitting that offers versatility, texture, and the ability to create a wide range of stitch patterns. By mastering the purl stitch, you can take your knitting projects to the next level and add depth and interest to your creations.
Common Mistakes to Avoid when Purling
- Using the wrong tension: One common mistake beginners make when purling is applying too much or too little tension on the yarn. It is important to maintain a consistent tension throughout the stitch to ensure an even and uniform result.
- Slipping stitches off the needle: While purling, it’s important to keep the stitches secure on the needle. If you accidentally slip a stitch off the needle, it can lead to dropped stitches and unraveling of your work. Pay attention to how you hold the needle and yarn to prevent this mistake.
- Twisting the stitches: Purling involves inserting the needle through the front of the stitch. If you mistakenly insert the needle through the back of the stitch, it can twist the stitch and result in an incorrect purl stitch. Take care to insert the needle correctly to avoid this mistake.
- Mixing up knit and purl stitches: When following a pattern that includes both knit and purl stitches, it’s important to pay close attention to the instructions and differentiate between the two. Mixing up these stitches can result in an uneven texture and affect the overall appearance of your knitting.
- Not staying relaxed: Purling can sometimes be a bit challenging, especially for beginners. It’s important to try and stay relaxed while working on your purl stitches. Tension in your hands and fingers can affect the outcome of your stitches. Take breaks when needed and make sure to relax your hands to avoid unnecessary strain.
By being aware of these common mistakes and practicing your purling technique, you can improve your knitting skills and create beautiful and well-executed purl stitches.
Tips for Perfecting Your Purl Stitch
Mastering the purl stitch is an essential skill in knitting. While it may seem intimidating at first, with practice and these helpful tips, you’ll be purling like a pro in no time.
- Hold your yarn correctly: Make sure you hold your working yarn in front of your needles, as opposed to behind them like in the knit stitch. This will help create the purl stitch.
- Keep your tension even: Maintaining consistent tension is key to achieving neat and uniform purl stitches. Experiment with different ways of holding your yarn and find a method that feels comfortable for you.
- Watch your stitch orientation: When purling, the stitch should go from the right needle to the left needle in a backward motion. Pay attention to the direction of your stitches to ensure they are facing the correct way.
- Take your time: Purling can be slower than knitting, especially if you’re a beginner. Don’t rush through the stitches, as this can lead to mistakes and uneven tension. Practice at a relaxed pace until you become more confident.
- Avoid splitting your yarn: It’s easy for the needle to accidentally split the yarn when purling, resulting in loose or dropped stitches. Take care to insert your needle properly into the stitch without splitting the yarn.
- Use stitch markers: If you find it difficult to keep track of your purl stitches, try using stitch markers. Place a stitch marker before each purl stitch to help you easily identify where to make the next stitch.
- Count your stitches frequently: It’s important to count your stitches regularly to ensure you haven’t accidentally added or missed any. This will help prevent mistakes and maintain the correct stitch count in your pattern.
- Practice with different yarns: Different yarns can behave differently when purling, so it’s beneficial to practice with a variety of yarns. This will give you a better understanding of how the stitch works and how to adjust your tension accordingly.
- Don’t be afraid to unravel: If you make a mistake while purling, don’t be afraid to unravel a few stitches and fix it. It’s better to correct mistakes than to continue with a project that doesn’t meet your standards.
Remember, practice makes perfect. Keep practicing your purl stitch, and soon you’ll be able to create beautiful and intricate knitwear using this versatile stitch.
Advanced Techniques with Purl Stitch
The purl stitch is one of the basic knitting stitches that creates a raised bump texture on the right side of the fabric. Once you have mastered the purl stitch, you can explore various advanced techniques to create unique and beautiful patterns in your knitting projects. Here are some advanced techniques that involve the purl stitch:
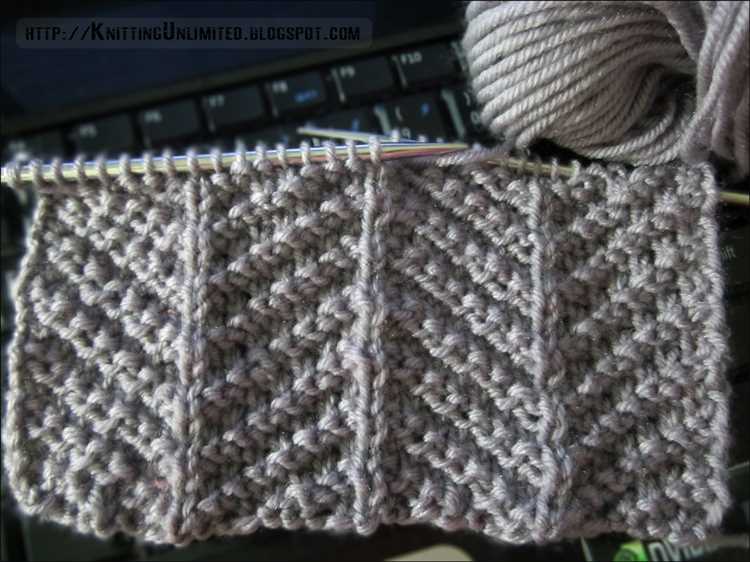
- Seed Stitch: The seed stitch is a combination of knit and purl stitches that creates a textured fabric with a bumpy surface. This stitch pattern is achieved by alternating knit and purl stitches within the same row and across different rows.
- Ribbing: Ribbing is a commonly used technique for creating stretchy and flexible fabric, typically used for cuffs, collars, and hems. It is achieved by alternating knit and purl stitches in a specific pattern, such as a 1×1 rib (one knit stitch, one purl stitch) or a 2×2 rib (two knit stitches, two purl stitches).
- Moss Stitch: The moss stitch, also known as the double seed stitch, is similar to the seed stitch but with larger bumpy texture. It is created by alternating knit and purl stitches within the same row and across different rows, but with a different starting point in each row.
- Brioche Stitch: Brioche stitch is an advanced knitting technique that creates a reversible, textured fabric with a rich and squishy texture. It involves working with two yarns at the same time and incorporating yarn overs and purl stitches to create a ribbed effect.
In addition to these advanced techniques, the purl stitch can also be used in combination with other stitches, such as cables, lace, and colorwork, to create intricate and unique designs. With practice and experimentation, you can create a wide range of patterns and textures using the purl stitch and add an extra dimension to your knitting projects.
Advanced Projects Featuring Purl Stitch
The purl stitch is a versatile knitting technique that can be used to create a wide range of advanced projects. By combining purl stitches with other knitting stitches, you can create intricate patterns and textures that add depth and interest to your knitting projects. Here are some advanced project ideas that feature the purl stitch:
- Ribbed Scarf: Create a classic and elegant ribbed scarf by alternating rows of knit and purl stitches. The ribbed texture adds warmth and stretch to the scarf, making it a cozy and stylish accessory.
- Cabled Sweater: Incorporate purl stitches into a cabled sweater pattern to add depth and definition to the cables. The purl stitches can be used to create borders around the cables or as part of the cable design itself, creating a visually stunning garment.
- Lace Shawl: Combine purl stitches with lace knitting techniques to create a delicate and intricate lace shawl. The purl stitches can be used to create eyelet patterns or to add texture and definition to the lace motifs.
- Colorwork Hat: Use purl stitches along with colorwork techniques to create a vibrant and unique hat. The purl stitches can be used to create contrasting patterns or to add texture and dimension to the colorwork design.
These advanced projects require a good understanding of the purl stitch and other knitting techniques. It’s important to practice and master the basics before attempting these projects. With practice, you’ll be able to create beautiful and intricate knitted items using the purl stitch as a key element of your designs.
FAQ:
What is a purl stitch?
A purl stitch is a basic knitting stitch that is used to create a textured pattern in a knitted fabric. It is the opposite of a knit stitch, creating a raised bump on the fabric’s surface.
How do I do a purl stitch?
To do a purl stitch, insert the right-hand needle from back to front into the first stitch on the left-hand needle. Wrap the working yarn counterclockwise around the right-hand needle, and then pull the new loop through the stitch, dropping the old stitch off the left-hand needle.
When should I use a purl stitch?
A purl stitch is commonly used to create ribbing, which gives a knitted piece elasticity. It can also be used to create textured patterns, such as seed stitch or garter stitch, or to create a smooth stockinette stitch on the wrong side of a piece.
Can I use a purl stitch to create a whole project?
Yes, you can use a purl stitch as the main stitch in a project. There are many patterns available that use only purl stitches, such as the purl slip stitch or the purl drop stitch. However, most projects will use a combination of purl and knit stitches to create different patterns and textures.


