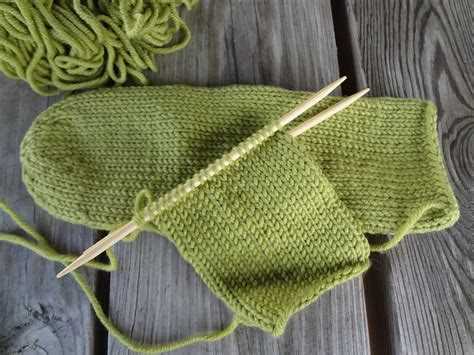
Knitting is a popular craft that allows you to create beautiful and functional items with just a pair of needles and some yarn. While most knitting projects can be completed using just two needles, there are some techniques that require additional needles. One such technique is knitting with double-pointed needles (dpn).
Dpn are shorter needles that come in sets of four or five. They have points on both ends, allowing you to work stitches from either end. Dpn are often used for knitting smaller projects in the round, such as socks, hats, mittens, or sleeves. They are also useful for creating seamless projects or adding details to larger projects.
Using dpn may seem daunting at first, but with practice, it can become a valuable tool in your knitting arsenal. In this essential guide for beginners, we will cover everything you need to know about dpn: from choosing the right needles for your project, to casting on, knitting in the round, decreasing, and casting off. Whether you’re a beginner knitter or have some experience, this guide will help you master the art of knitting with dpn.
So, if you’re ready to take your knitting to the next level and expand your skills, let’s dive in and learn all about dpn and how to use them effectively in your projects!
Understanding dpn in knitting
DPN or Double Pointed Needles are essential tools for advanced knitting techniques and projects like knitting in the round, socks, mittens, gloves, and other small projects. They consist of a set of long, thin needles with points at both ends.
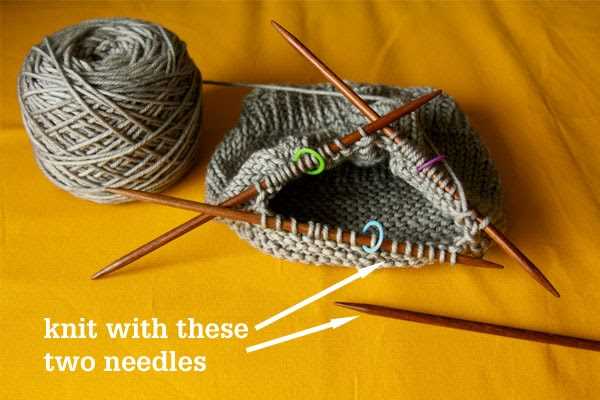
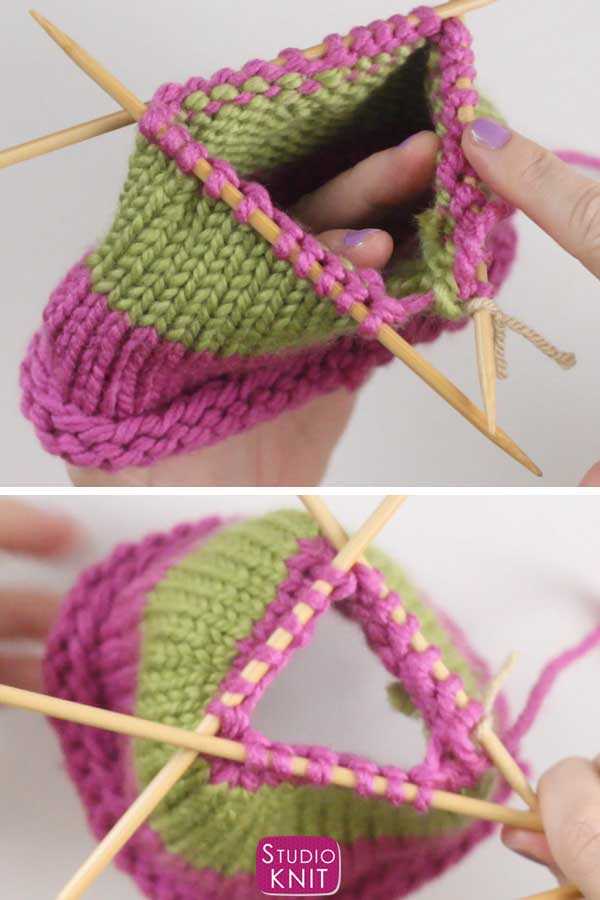
DPNs are typically used in sets of four or five, with stitches distributed evenly among them. The extra needles not in use are held out of the way, allowing the knitter to work on a small section at a time.
Advantages of using DPNs:
- Allows you to knit small tubes or objects with a small circumference that cannot be easily knit on a regular circular needle.
- Provides better control and accuracy when working on intricate stitches or patterns.
- Enables you to easily shape the project as you go, allowing for more versatility in your knitting.
How to use DPNs:
- Start by casting on the required number of stitches onto one of the DPNs.
- Distribute the stitches equally among the needles, making sure to avoid any gaps or loose stitches.
- Hold the needles with the working needle in your right hand and the rest in your left hand. The working needle should always be on top.
- Knit using the working needle as you would with regular knitting needles, working the stitches onto the right-hand needle.
- Continue working the stitches onto the right-hand needle until all the stitches have been worked.
- Move on to the next set of stitches, working in the same manner.
- Repeat the process until you have completed your project.
When using DPNs, it is common for beginners to experience some difficulty and confusion at first. However, with practice and patience, you will become more comfortable working with them and be able to tackle more complex knitting projects.
| Pros | Cons |
|---|---|
| Allows for knitting in the round | Can be tricky for beginners |
| Suitable for small circumference projects | Can be more time-consuming |
| Offers better control and accuracy | Requires keeping track of multiple needles |
Why use dpn in knitting
Double-pointed needles (DPNs) are commonly used in knitting for certain projects or techniques that require working in the round. They have several advantages that make them a popular choice among knitters:
- Seamless creation: When working on small projects like socks, gloves, or hats, DPNs allow you to knit in a continuous circle without the need for seams. This creates a seamless and professional-looking finished product.
- Flexibility: DPNs come in a variety of sizes, lengths, and materials, making them suitable for different project requirements. They can accommodate different yarn weights and stitch patterns, giving you more flexibility in your knitting.
- Portability: DPNs are compact and lightweight, making them easy to carry around. They are an excellent choice for knitting on the go or taking your projects with you while traveling.
- Ability to work with small circumference: DPNs are ideal for knitting projects with a small circumference, such as sleeves or the tops of hats. They allow you to easily divide your stitches onto multiple needles, making it easier to manipulate the knitting and work with smaller areas.
Using DPNs may require some practice, as it involves managing multiple needles simultaneously. However, once you become comfortable with using them, DPNs can greatly expand your knitting possibilities and open up new project options.
Choosing the right dpn for your project
When it comes to knitting with double-pointed needles (dpns), choosing the right ones for your project is important. Here are some factors to consider when selecting dpns:
- Size: Dpns come in various sizes, ranging from very thin for delicate projects to thicker ones for bulkier knits. The size you choose should correspond to the recommended needle size in your pattern.
- Material: Dpns are available in different materials, such as wood, metal, and plastic. Each material has its own advantages and disadvantages. Wood dpns provide a warm feel and grip, while metal ones are more slippery. Plastic dpns are lightweight and affordable.
- Gauge: Consider the gauge of your project. If you tend to knit tightly, you may want to use dpns with a sharper tip to help with stitch manipulation. If you knit loosely, dpns with a blunter tip may be better to avoid dropping stitches.
- Length: Dpns come in different lengths, usually ranging from 4 to 8 inches. The length you choose should be based on the circumference of your project. Longer dpns can accommodate more stitches, while shorter ones are better for smaller projects or when working on a narrow section of a larger project.
- Quantity: Most dpn sets come with a set of four or five needles. Consider the number of stitches and how many needles you will need to comfortably distribute the stitches. Additionally, having a spare needle can be useful in case you lose one.
Ultimately, the right dpns for your project will depend on your personal preferences and the requirements of your knitting pattern. Experiment with different types of dpns until you find the ones that work best for you.
How to use dpn in knitting
Using double-pointed needles (dpn) in knitting can be intimidating for beginners. However, with a bit of practice and patience, you’ll soon find that dpns are a versatile tool that can expand your knitting skills and allow you to create projects with small circumferences, such as socks, hats, and sleeves.
Here’s a step-by-step guide on how to use dpn in knitting:
- Choose the right size dpns: The size of your dpns should match the size of your yarn and project. You can find the recommended needle size on the yarn label or refer to the pattern you’re working on.
- Cast on stitches: Start by casting on the required number of stitches onto one dpn. Make sure not to cast too tightly, as it will be difficult to work with the needles.
- Distribute stitches: Once you’ve cast on the stitches, evenly distribute them onto three or four dpns. For example, if you have 24 stitches, you could distribute them onto three dpns with eight stitches each.
- Join in the round: Make sure all the stitches are facing the same direction and not twisted. Hold the needle with the first cast-on stitch in your left hand and the empty needle in your right hand. Use the working yarn to knit the first stitch, connecting the two needles and forming a circle.
- Working with dpns: As you knit, hold the dpns not in use with your right hand and work with the empty dpn in your left hand. With each round, move to the next dpn, maintaining the same stitch order.
- Avoid ladders: Ladders are loose strands of yarn that may appear between the dpns. To prevent ladders, pull the first stitch on each needle tightly and give an extra tug when transitioning between dpns.
- Completing the project: Continue working in the round, following your pattern instructions, until you’ve completed your project. When you’ve finished, you can bind off the stitches or use a technique called “grafting” to seamlessly close the top of your project.
Remember, practice makes perfect when it comes to knitting with dpns. Don’t be discouraged if it feels awkward or challenging at first. As you gain experience, you’ll become more comfortable and confident with this useful knitting technique.
Tips and tricks for knitting with dpn
Knitting with double-pointed needles (dpn) can be a bit tricky, especially for beginners. However, with the right techniques and some practice, you can master the art of using dpns. Here are some tips and tricks to help you knit with dpns more easily:
1. Start with fewer stitches
When you’re just starting out with dpns, it can be overwhelming to have a large number of stitches on multiple needles. To make it easier, start with a smaller project or fewer stitches, such as knitting a hat or a small pouch. This will help you become more comfortable with dpns before moving on to larger projects.
2. Use stitch markers
Stitch markers are essential when working with dpns. They can help you keep track of your stitches and make it easier to see where your round begins and ends. Place a stitch marker at the beginning of the round to mark the start, and another one at the halfway point to make it easier to count your stitches.
3. Divide your stitches evenly
When working with dpns, it’s important to divide your stitches evenly among the needles to ensure an even tension. For example, if you have 40 stitches and are using four dpns, you should have 10 stitches on each needle. Use stitch markers to help you divide your stitches evenly.
4. Keep your tension even
One of the challenges of knitting with dpns is maintaining an even tension. To achieve this, make sure to hold the needles snuggly, but not too tightly. By keeping your tension even, you will create a more uniform and professional-looking fabric.
5. Avoid ladders
Ladders are small gaps that can sometimes appear between the needles when working with dpns. To avoid ladders, make sure to give an extra tug on the first stitch of each needle. This will help to tighten the stitches and close any gaps.
6. Use a needle holder
If you find it difficult to manage multiple dpns, consider using a needle holder. A needle holder is a small device that can hold your dpns in place, making it easier to control your knitting. It can be especially helpful for beginners or when working with a large number of stitches.
7. Practice, practice, practice
As with any new skill, practice is key when learning to knit with dpns. Don’t get discouraged if your first few projects don’t turn out perfectly. Keep practicing, and with time, you will become more comfortable and confident in using dpns.
Common mistakes to avoid when using dpn
When using double pointed needles (dpn) in knitting, it’s common for beginners to make mistakes. Here are some common mistakes to avoid:
- Twisted stitches: One common mistake is accidentally twisting stitches when switching needles. It’s important to ensure that the stitches are not twisted before starting the next needle.
- Laddering: Laddering occurs when the tension between two needles is different, resulting in loose stitches. To avoid laddering, make sure to tighten the first few stitches on each needle.
- Dropping stitches: Dropping stitches can be a frustrating mistake. Always double-check that you have not dropped any stitches when working with dpns. Use stitch markers to help keep track of your stitches.
- Untangling yarn: With multiple needles and yarn, it’s easy for the yarn to become tangled. Take care to untangle the yarn regularly to avoid any complications.
- Not using the right number of dpns: Double pointed needles usually come in sets of four or five. Using the wrong number of dpns can make your knitting difficult or even impossible. Make sure to use the correct number of needles for your project.
Avoiding these common mistakes and practicing with dpns will help improve your knitting skills and make your projects look more professional.
FAQ:
What is dpn in knitting?
DPN stands for Double-Pointed Needles. These needles have points on both ends, allowing knitters to work in the round on smaller projects such as socks, gloves, and hats.
How do you use dpn in knitting?
To use double-pointed needles in knitting, you will typically have four or five needles. You cast on the required number of stitches onto three of the needles and use the fourth needle to work the stitches. As you knit, you will rotate the project, alternating needles, to continue working in a circle.
What sizes do dpn come in?
DPNs come in various sizes, ranging from US 0 (2mm) to US 11 (8mm) or even larger. The size you choose depends on the yarn weight and the desired gauge for your project. The needle size is usually indicated on the packaging or can be found in a needle size conversion chart.
Can you knit a flat project with dpn?
Yes, you can use double-pointed needles to knit a flat project. To do this, you will need a set of double-pointed needles and cast on the required number of stitches. Instead of joining in the round, you will simply work back and forth in rows, just like you would with straight needles.
What are the benefits of using dpn in knitting?
Using double-pointed needles in knitting allows you to work on small, circular projects without needing a circular needle. They are great for knitting items like socks, mittens, and small toys. DPNs also provide flexibility and can be used for both flat and circular knitting.
Are dpn suitable for beginners?
While double-pointed needles can be a bit challenging for beginners, they are definitely worth trying. Once you get the hang of using DPNs, they offer a lot of versatility and open up a whole new range of project possibilities. Starting with small projects like socks or hats can help beginners become more comfortable with using DPNs.
How do you prevent laddering when using dpn?
Laddering, or loose stitches between DPNs, can be prevented by ensuring that you tighten your stitches as you work and by using the “magic loop” technique. Additionally, you can try distributing your stitches evenly across the needles and giving an extra tug on the first stitch of each needle to minimize laddering.


