Knitting has long been regarded as a valuable skill that allows individuals to create unique and personal items with just a few strands of yarn and a pair of needles. While the basic knit stitch is widely known and used, there is another technique that adds depth and texture to knitted pieces – the purl stitch. Purl knitting is a versatile technique that opens up a whole new world of possibilities for knitters, allowing them to create intricate patterns, add ribbing, and incorporate a wide range of textures into their projects.
What is the purl stitch?
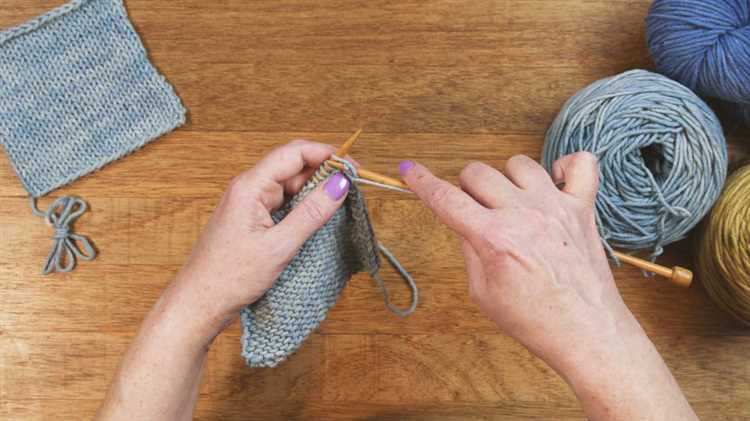
The purl stitch is essentially the reverse of the knit stitch. It is created by inserting the right-hand needle into the front of the stitch, from right to left, and then looping the yarn around the needle and pulling it through the stitch. This creates a new stitch on the right-hand needle, while the original stitch is transferred to the left-hand needle. The purl stitch creates a bumpy texture on the front side of the fabric and a smooth texture on the back, making it perfect for creating ribbing, borders, and intricate patterns.
Tips and techniques for purl knitting
Purl knitting can be slightly more challenging than the basic knit stitch, especially for beginners. However, with a few key tips and techniques, anyone can master this versatile stitch. One tip is to make sure the tension of the yarn is consistent while purling, as this can affect the overall look and feel of the fabric. Another technique is to practice different stitch combinations, such as purling two stitches together or purling through the back loop, to create unique textures and patterns.
Inspiration for purl knitting projects
If you’re looking for inspiration for your next knitting project, purl knitting offers endless possibilities. From cozy sweaters and scarves to intricate lace patterns and cabled designs, the purl stitch can be used to create a wide range of stunning pieces. Whether you’re a beginner or an experienced knitter, purl knitting allows you to express your creativity and create one-of-a-kind pieces that are as unique as you are.
Understanding the Basics of Purl Stitch
The purl stitch is one of the two fundamental stitches in knitting, alongside the knit stitch. It creates a textured pattern on the fabric and is typically used for ribbing, garter stitch, and various stitch patterns. Understanding how to work the purl stitch is essential for expanding your knitting skills and creating a wide range of designs.
To work the purl stitch:
- Hold the knitting needles with the stitches on your left needle.
- Insert the right needle into the front of the first stitch on the left needle, from right to left.
- Wrap the yarn counter-clockwise around the right needle, moving it to the back of the work.
- With the right needle still inserted into the stitch, use it to push the new loop through the old loop, transferring the stitch from the left needle to the right needle.
Here are some key points to remember when working the purl stitch:
- Keep your tension consistent throughout the stitch to create an even fabric.
- Make sure to wrap the yarn firmly around the needle, but not too tight to prevent difficulty in knitting subsequent stitches.
- Practice maintaining a comfortable grip on the needle to improve speed and efficiency.
- Remember to keep your yarn in back of the work when knitting subsequent stitches to maintain the purl stitch pattern.
Once you have mastered the basic purl stitch, you can explore various techniques and stitch patterns that incorporate purl stitches. This includes working purl stitches in combination with knit stitches, creating interesting textures, and designing intricate patterns in your knitting projects.
With time and practice, you will become more comfortable with the purl stitch and discover the versatility it offers in creating beautiful knitted pieces. So grab your needles, pick up some yarn, and start purling your way to stunning knitting creations!
Exploring Advanced Purl Knitting Techniques
Once you’ve mastered the basics of purl knitting, you can delve into more advanced techniques to expand your knitting skills. These techniques can add texture, depth, and complexity to your knitted projects. Here are some advanced purl knitting techniques to explore:
1. Purl Stitch Combinations
Combine purl stitches with other types of stitches to create intricate patterns. Some popular combinations include:
- Purling stitches together to create decreases.
- Alternating purl stitches with knit stitches to create ribbing.
- Using purl stitches in lace patterns to add texture.
2. Slip Stitch Purling
Slip stitch purling involves passing a stitch from one needle to the other without knitting or purling it. This technique can create interesting textures and patterns, especially when combined with other stitches.
3. Purling in the Round
While purling is often associated with working back-and-forth in rows, you can also purl when knitting in the round. This is commonly used in techniques like ribbing or creating intricate stitch patterns for hats, socks, and other circular projects.
4. Combination Knitting
Combination knitting is a technique that involves combining Eastern and Western knitting styles. This technique can affect the way purl stitches are formed and create a different tension in the fabric. It may be worth exploring if you’re looking for alternative ways to purl.
5. Shadow Wraps
Shadow wraps are a technique used in short-row knitting to prevent gaps and create smooth transitions. When working short rows in purl knitting, using shadow wraps can help maintain the integrity of the fabric and produce cleaner results.
6. Purling with Different Yarns
Experiment with different types of yarns to achieve different effects in your purl knitting. Using a chunky yarn can create a more textured and substantial fabric, while using a laceweight yarn can create a delicate and airy texture.
Remember, practice and patience are key when exploring advanced purl knitting techniques. Take the time to experiment, try different techniques, and most importantly, enjoy the process of discovering new possibilities with your purl knitting skills.
Essential Tools and Materials for Purl Knitting
Purl knitting requires a few essential tools and materials to ensure a smooth and enjoyable knitting experience. Whether you are a beginner or an experienced knitter, having the right tools can make a significant difference in your projects.
1. Knitting Needles
Choose knitting needles that are suitable for purl knitting. Most knitters prefer using straight or circular needles made of high-quality materials like bamboo, wood, or metal. The size of the needles depends on the yarn weight and the desired gauge for your knitting project.
2. Yarn
Choose yarn suitable for purl knitting based on the pattern you are following or the project you want to create. Consider the fiber content, weight, and color of the yarn. Different yarns create different textures and effects, so it’s essential to select the right yarn for your desired outcome.
3. Stitch Markers
Stitch markers are useful tools for marking specific stitches or sections in your knitting project. They come in various shapes and sizes and can help you keep track of your progress and pattern repeats. Using stitch markers can make complex purl patterns much easier to follow.
4. Tapestry Needles
Tapestry needles are essential for weaving in loose ends and seaming your finished purl knitted projects. Choose a tapestry needle with a large eye and a blunt tip to easily thread through the yarn and smoothly finish off your project.
5. Scissors
A good pair of scissors is necessary for cutting yarn and trimming any excess. Choose scissors that are sharp and comfortable to hold. Having a dedicated pair of scissors for your knitting projects can help ensure that they’re always handy when you need them.
6. Knitting Gauge
A knitting gauge is a ruler-like tool with small holes that allow you to measure your stitches and rows per inch accurately. It is particularly useful when you want to achieve the correct gauge for a pattern. Using a knitting gauge can help you avoid sizing issues and ensure that your finished project turns out as desired.
7. Pattern Resources
Having access to knitting pattern resources, such as books, magazines, or online tutorials, is crucial for purl knitting. These resources provide you with inspiration and guidance for various purl knitting techniques, stitch patterns, and projects. They can help you learn new skills and expand your knitting repertoire.
8. Project Bag
A project bag is a convenient storage solution for all your knitting tools, materials, and ongoing projects. Look for a bag that is spacious, durable, and has multiple compartments to keep your items organized and easily accessible. A project bag makes it easy to take your knitting with you wherever you go.
With these essential tools and materials at hand, you’ll be well-equipped to embark on your purl knitting journey and create beautiful and intricate projects.
Troubleshooting Common Purl Knitting Mistakes
Knitting requires both practice and patience, and even the most experienced knitters can run into difficulties. If you’re encountering problems with your purl stitches, here are some common mistakes and how to troubleshoot them:
| Mistake | Troubleshooting |
|---|---|
| Loose Purl Stitches |
|
| Twisted Stitches |
|
| Inconsistent Tension |
|
| Dropped Stitches |
|
| Uneven Stitches |
|
Remember, knitting is a skill that improves with practice, so don’t get discouraged if you encounter these common purl knitting mistakes. By troubleshooting and making adjustments, you’ll become more confident and skilled in your knitting journey.
Incorporating Purl Stitch into Patterns and Designs
The purl stitch is an essential technique in knitting, and it can add texture and dimension to your patterns and designs. Here are several ways you can incorporate the purl stitch into your knitting projects:
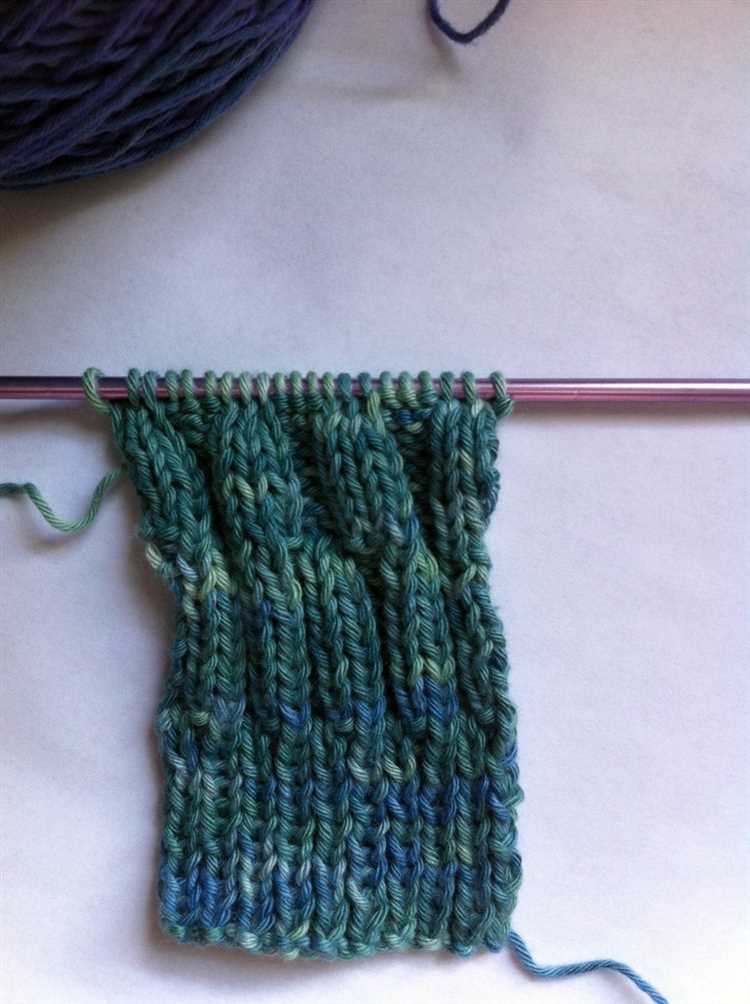
- Ribbing: The most common way to include the purl stitch is by creating ribbing. Ribbing is created by alternating knit and purl stitches in a pattern, typically using a 1×1 or 2×2 rib. This technique is commonly used for cuffs, collars, and hems.
- Seed Stitch: The seed stitch is created by alternating knit and purl stitches in a pattern, typically by knitting one stitch and purling the next. This creates a textured fabric with a bumpy appearance. Seed stitch is often used for scarves, hats, and blankets.
- Moss Stitch: Moss stitch is similar to seed stitch but has a different stitch pattern. It is created by alternating knit and purl stitches across rows, with the pattern shifted every other row. This creates a textured fabric with a moss-like appearance. Moss stitch is commonly used for sweaters, cardigans, and afghans.
- Garter Stitch: Although garter stitch is primarily made with knit stitches, you can also incorporate purl stitches to create a unique texture. By alternating knit and purl rows, you can add depth and interest to a garter stitch fabric.
- Lace Knitting: Lace knitting often incorporates many yarn overs and decreases to create intricate patterns. By combining purl stitches with yarn overs and decreases, you can create stunning lace designs with a mix of openwork and texture.
- Colorwork: Purl stitches can also be used in colorwork patterns, where different colors of yarn are used to create a design. By incorporating purl stitches in colorwork motifs, you can add depth and detail to your project.
Experimenting with the purl stitch and incorporating it into your patterns and designs can open up endless possibilities for creativity in your knitting projects. Whether you’re creating simple ribbing or intricate lace designs, the purl stitch is a versatile technique that can enhance the beauty and texture of your knitted items.
Tips for Perfecting Your Purl Knitting Skills
To become a master at purl knitting, it’s important to practice regularly and follow these tips:
- Relax your hands: Keep your hands loose and relaxed while purling. Tension in your hands can affect the evenness of your stitches.
- Use the correct needle: Make sure you are using the correct size needle for your yarn. Using the wrong size can result in uneven stitches and frustration.
- Keep an even tension: Pay attention to the tension of your yarn as you purl. Try to maintain a consistent tension throughout your project to ensure even stitches.
- Learn proper hand movement: Practice the correct hand movements for purling. Keeping your movements controlled and efficient will help you create neat and uniform stitches.
- Use stitch markers: Place stitch markers between pattern repeats or in complex sections to help you keep track of your progress and prevent mistakes.
- Count your stitches: Counting your stitches regularly will help you catch any mistakes early on and avoid having to rip out entire rows of purling.
- Experiment with different purl stitch patterns: Once you have mastered the basic purl stitch, try experimenting with different purl stitch patterns to add variety and texture to your knitting.
- Practice on different projects: Don’t limit yourself to just purling scarves. Practice your purling skills on a variety of projects, such as hats, sweaters, or even socks.
- Join a knitting community: Joining a knitting community or taking a knitting class can provide you with support, inspiration, and helpful tips from experienced knitters.
Remember, perfecting your purl knitting skills takes time and practice. Be patient with yourself and enjoy the process of learning and creating beautiful knitted items.
Finding Inspiration in Purl Knitting Projects
When it comes to purl knitting, the possibilities are truly endless. With just two basic stitches, the knit and purl, you can create a wide variety of beautiful and intricate designs. Whether you’re a beginner or an experienced knitter, there are plenty of projects to inspire and challenge you in your purl knitting journey.
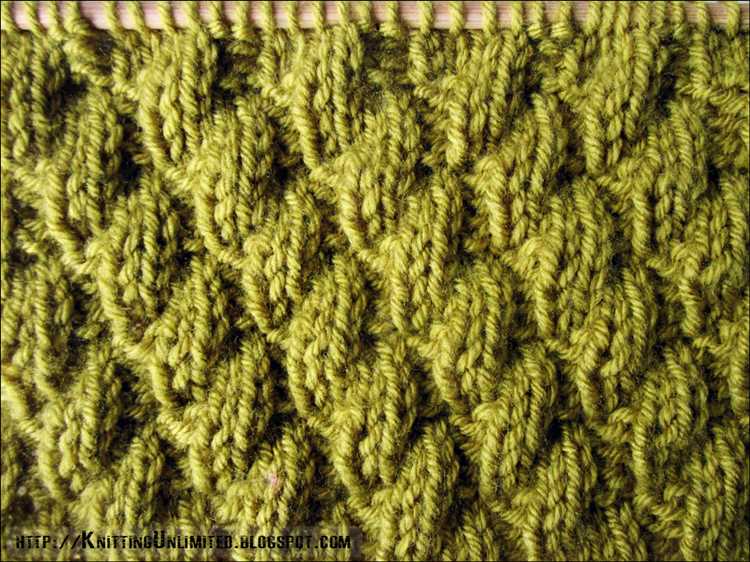
One of the great things about purl knitting is that it can be used to create a wide range of textures and patterns. From simple ribbing to complex cables and lace, there is a purl knitting project out there for everyone. You can experiment with different stitch combinations and techniques to create unique and personalized pieces.
If you’re just starting out with purl knitting, a great project to begin with is a simple scarf or hat. These projects often use basic stitch patterns and are a great way to practice your purling skills. Once you have mastered the basics, you can move on to more intricate projects like sweaters, shawls, and even blankets.
Purl knitting also lends itself well to colorwork. By combining different colors of yarn, you can create stunning patterns and designs. Fair Isle and intarsia are popular techniques that can be used to create intricate colorwork projects. Whether you prefer bold and vibrant colors or more subtle and muted tones, there is a colorwork project out there to suit your taste.
There are also many resources available to help inspire your purl knitting projects. Knitting magazines, books, and websites are filled with patterns and ideas to get you started. You can also join knitting groups or forums to connect with other knitters and share project ideas and tips. Don’t be afraid to experiment and try new things – you never know what beautiful creations you might come up with.
Remember, purl knitting is all about creativity and self-expression. Whether you’re following a pattern or designing your own project, let your imagination run wild and have fun with it. The more you practice and explore different techniques, the more skilled and confident you will become.
| Benefits of Finding Inspiration in Purl Knitting Projects |
|---|
|
FAQ:
What is purl knitting?
Purl knitting is a technique in knitting where you create a stitch that appears like a raised bump or loop on the fabric. It is the opposite of the basic knit stitch and is often used to create texture in knitting projects.
How do I purl knit?
To purl knit, insert the right-hand needle into the front of the first stitch on the left-hand needle from right to left. Then wrap the yarn counterclockwise around the right-hand needle and pull it through the stitch, leaving the new stitch on the right-hand needle. Repeat this process for each stitch on the left-hand needle.
Can I use purl knitting to create different patterns?
Yes, purl knitting can be used to create a variety of patterns and textures. You can use purl stitches along with knit stitches to create ribbing, seed stitch, moss stitch, and many other patterns. By combining purl stitches with different techniques and stitch patterns, you can create unique and beautiful projects.


