Knitting is a versatile and rewarding craft that allows you to create beautiful garments and accessories. If you’re just starting out, learning the basics of knitting is essential. One of the essential skills to master is casting off, also known as binding off.
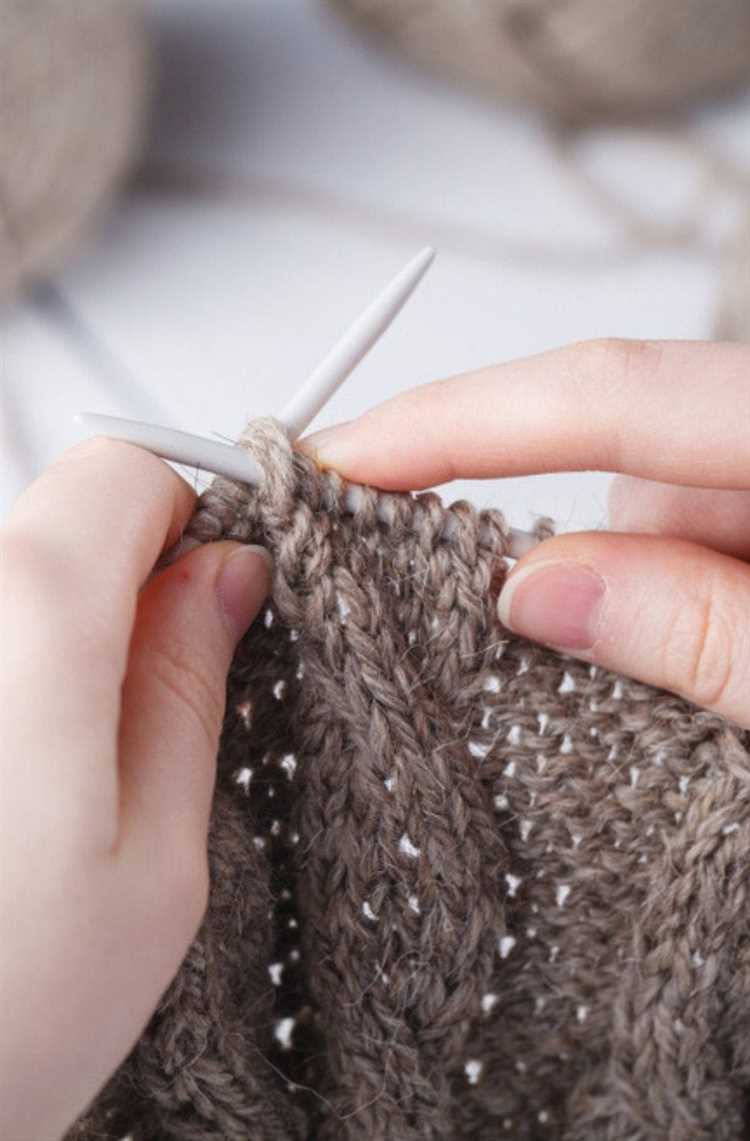
When you cast off, you are creating a finished edge on your knitting project. This technique is used to secure the stitches and prevent them from unraveling. Casting off is often done at the end of a project or when shaping the edges of a garment.
To cast off, follow these step-by-step instructions:
- Start by knitting two stitches.
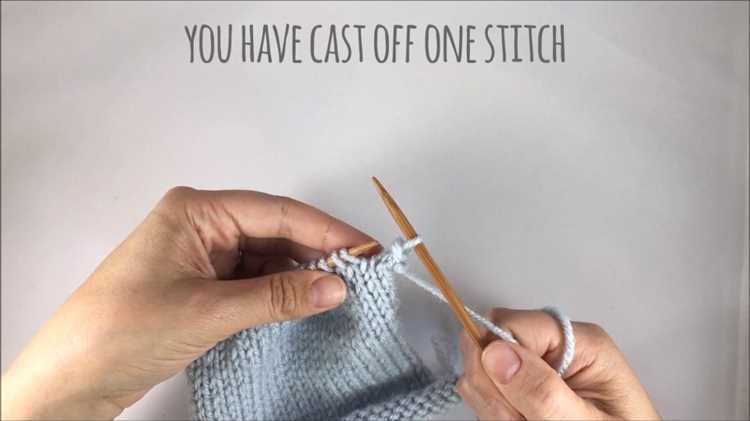
- Using your left-hand needle, lift the first stitch over the second stitch and off the right-hand needle.
- Knit another stitch, then lift the second stitch over the third stitch and off the needle.
- Continue in this manner, knitting one stitch and lifting the previous stitch over and off the needle until you have only one stitch left.
- Once you have one stitch remaining, cut your yarn, leaving a long tail. Thread the tail through the last stitch and pull tight.
Casting off is a simple but important technique in knitting. It gives your projects a polished and finished look. So whether you’re knitting a scarf, a sweater, or a hat, mastering the cast off will help you complete your projects with confidence.
Section 2: Supplies Needed for Knitting
In order to begin knitting, you will need to gather a few essential supplies. These items can be found at your local craft store or online. Here’s a list of what you’ll need:
- Yarn: Choose a type of yarn that suits the project you have in mind. Yarns come in different weights, textures, and colors.
- Knitting Needles: You will need a pair of knitting needles. The size of the needles will depend on the yarn you are using and the desired tension of your project.
- Scissors: A pair of scissors will come in handy for cutting yarn and trimming loose ends.
- Tapestry Needle: This type of needle has a large eye and a blunt end, which is perfect for weaving in yarn ends and sewing pieces together.
- Stitch Markers: Stitch markers are helpful for marking specific stitches or sections of your work.
- Measuring Tape: A measuring tape or ruler is essential for ensuring your project is the correct size.
- Row Counter: A row counter is a handy tool for keeping track of your progress, especially in more complex patterns.
Having these supplies on hand will ensure that you have everything you need to get started on your knitting journey. It’s always a good idea to keep your supplies organized and easily accessible, so consider investing in a knitting bag or organizer to store everything in one place.
Section 3: Understanding the Basic Knitting Techniques
Once you have learned how to cast on, it’s time to move on to the basic knitting techniques. These techniques will form the foundation of your knitting skills and enable you to start creating different patterns and designs. Here are the essential techniques you need to know:
Knit Stitch
The knit stitch is the most basic stitch in knitting. To knit, insert the right-hand needle into the first stitch on the left-hand needle from left to right. Wrap the yarn around the right-hand needle counterclockwise and pull it through the stitch, sliding the old stitch off the left-hand needle.
Purl Stitch
The purl stitch is another fundamental knitting stitch. It creates a different texture than the knit stitch. To purl, insert the right-hand needle into the first stitch on the left-hand needle from right to left. Wrap the yarn counterclockwise around the right-hand needle and pull it through the stitch, sliding the old stitch off the left-hand needle.
Knitting in the Round
Knitting in the round is a technique used to create seamless projects such as hats, socks, and cowls. Instead of working in rows, you continuously knit in a spiral. This is typically done using circular needles or double-pointed needles, depending on the circumference of your project.
Decreases and Increases
Decreases and increases are techniques used to shape your knitting. Decreases help you create a tapered effect or shape the garment, while increases add stitches to create a wider or fuller piece. The most common decrease is the knit two stitches together (k2tog), and the most common increase is the yarn over (yo).
Binding Off
Binding off, also known as casting off, is how you finish your knitting project. It creates a neat edge and secures the stitches in place. To bind off, knit two stitches, then use the left needle to lift the first stitch over the second stitch and off the right needle. Repeat this process until only one stitch remains, then cut the yarn and pull it through the last stitch.
Reading Knitting Patterns
As you progress in your knitting journey, you’ll come across knitting patterns that provide instructions on how to create specific designs. Understanding how to read these patterns will open up a world of possibilities. Knitting patterns typically include information on the stitches and techniques used, the materials required, and instructions on how to create the desired design.
By mastering these basic knitting techniques, you’ll be well-equipped to take on a wide range of knitting projects. Practice these techniques and explore different patterns to further develop your skills and unleash your creativity.
Section 4: Choosing the Right Yarn and Needles
When it comes to knitting, choosing the right yarn and needles can make all the difference in your finished project. Here are some tips to help you make the best choices:
1. Consider your project:
Think about the type of project you’re planning to knit. Will it be a lightweight scarf or a warm sweater? Different projects require different yarn thicknesses and fiber contents. You’ll also need to consider the size and length of the needles needed for your project.
2. Yarn weight:
Yarn comes in different weights, ranging from lace weight to super bulky. The weight of the yarn determines how thick or thin it is. Look for the yarn weight symbol on the label, which is usually represented by a number from 0 to 7. Choose a yarn weight that is appropriate for your project.
3. Fiber content:
Consider the fiber content of the yarn. Common options include wool, acrylic, cotton, and blends. Each type of fiber will have different properties, such as warmth, softness, and durability. Choose a fiber that suits your project and your personal preferences.
4. Needle size:
Needles are available in various sizes, and the size you choose will depend on the thickness of your yarn and the desired tension or gauge. The label on the yarn will typically specify a recommended needle size range. It’s important to use the correct needle size to achieve the intended stitch size.
5. Consider your skill level:
If you’re a beginner knitter, it’s generally recommended to start with medium or bulky weight yarn and larger needles. Thicker yarns are easier to work with and allow you to see your stitches more clearly. As you gain experience, you can experiment with different yarn weights and needle sizes.
6. Take your budget into account:
Yarn can vary in price depending on the fiber content and brand. Set a budget for your project and choose yarn and needles that fit within that budget. Remember, there are many affordable options available that still offer great quality.
7. Swatch and test:
Before starting your project, make a small swatch using your chosen yarn and needles. This will help you determine if you like how the fabric or pattern looks and feels. It will also give you an opportunity to check your gauge and make any necessary adjustments before committing to your project.
| Yarn Weight | Symbol | Recommended Needle Size | Recommended Gauge |
|---|---|---|---|
| Lace | 0 | US 000-1 (1.5-2.25mm) | More than 32 stitches per 4 inches |
| Fingering | 1 | US 1-3 (2.25-3.25mm) | 27-32 stitches per 4 inches |
| Sport | 2 | US 3-5 (3.25-3.75mm) | 23-26 stitches per 4 inches |
| DK | 3 | US 5-7 (3.75-4.5mm) | 21-24 stitches per 4 inches |
| Worsted | 4 | US 7-9 (4.5-5.5mm) | 16-20 stitches per 4 inches |
| Bulky | 5 | US 9-11 (5.5-8mm) | 12-15 stitches per 4 inches |
| Super Bulky | 6 | US 11 and above (8mm and above) | Less than 11 stitches per 4 inches |
| Jumbo | 7 | US 17 and above (12.75mm and above) | Less than 9 stitches per 4 inches |
Section 5: Casting On – Getting Started with Knitting
Before you can start knitting, you need to cast on, which is the process of creating the first row of stitches on your knitting needle. This is an essential step to get your project started.
Casting On Methods:
- Long Tail Cast On: This is the most commonly used method for casting on. It creates a neat and stretchy edge.
- Knitted Cast On: This method is similar to the long tail cast on, but it uses a different technique to create the stitches.
- Cable Cast On: This method creates a dense edge and is often used for projects that require a tighter cast on.
- Backward Loop Cast On: This method is quick and easy, but it can create loose stitches and is not ideal for large projects.
Step-by-Step Casting On:
- Hold the knitting needle in your dominant hand. Make a slip knot by forming a loop with the yarn and pulling the end through, leaving a tail.
- Slide the slip knot onto the knitting needle, making sure it is not too tight or too loose.
- Choose your desired casting on method and follow the specific instructions for that method.
- Continue casting on until you have the required number of stitches for your project.
- Once you have cast on all the stitches, you are ready to start knitting!
Tips for Casting On:
- Keep the tension of your yarn consistent to ensure even stitches.
- Practice your chosen casting on method before starting your project to become comfortable with the technique.
- Count your stitches as you go to make sure you have the correct number for your project.
- Use stitch markers to mark the beginning and end of your row if needed.
Now that you have learned the basics of casting on, you are ready to dive into the world of knitting! Remember to have patience and practice, and soon you will be creating beautiful knitted projects.
Section 6: Knitting the First Row – Beginner’s Guide
Once you have cast off your stitches, you are ready to start knitting the first row. This step is essential in creating the foundation for your knitting project. Follow these simple steps to start knitting:
- Hold the knitting needles in both hands. Make sure the needle with the cast-on stitches is in your right hand and the empty needle is in your left hand.
- With your right hand, insert the tip of the empty needle into the first stitch on the right needle, from left to right.
- Hold the yarn in your right hand and bring it under and then over the right needle. This creates a loop around the right needle.
- Using the right needle, pull the loop through the stitch, bringing the stitch onto the right needle. The loop created by the yarn will now be on the right needle, and the stitch will move from the left needle to the right needle.
- Repeat steps 2 to 4 until all the stitches have been worked. As you go, remember to keep the tension even and avoid pulling the yarn too tightly.
Remember to take your time and practice your knitting technique. It may feel a bit awkward at first, but with practice, it will become more natural. Once you have completed the first row, you can continue knitting by repeating the steps for each subsequent row.
Continue practicing your knitting skills and explore different patterns and techniques to expand your knitting repertoire. Happy knitting!
Section 7: Continuing the Knitting Project
Once you have successfully cast off your knitting project, you can now continue with the next row of stitches. Here are the steps to continue knitting:
- Hold your knitting needle with the finished row of stitches in your left hand.
- Insert the empty needle into the first stitch of the finished row.
- Using your right hand, bring the working yarn up and over the right needle, forming a loop.
- With your right hand, insert the right needle through the loop on the left needle.
- Pull the right needle through the loop, creating a new stitch.
- Slide the original stitch off the left needle, transferring it to the right needle.
- Repeat steps 2 to 6 for each stitch on the row.
- Continue knitting the desired number of rows, following your knitting pattern.
Remember to always hold your knitting needles with the stitches in your left hand and the empty needle in your right hand. This will allow you to create new stitches and transfer them from one needle to another smoothly.
As you continue knitting, keep an eye on your tension and make sure all your stitches are the same size. Consistent tension will ensure an even and professional-looking finished project.
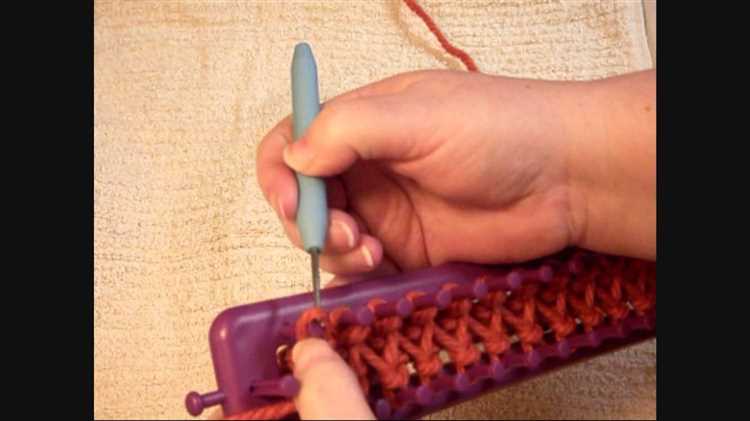
If you make a mistake or need to undo a few stitches, you can use a crochet hook to carefully unravel the stitches and start again from the row where the mistake occurred.
Take breaks when needed and enjoy the process of knitting. With practice, you’ll become more comfortable and confident in your knitting skills.
Section 8: How to Cast Off – Completing Your Knitting
After completing your last row of knitting, it’s time to cast off and finish your project. Casting off creates a neat edge and prevents your stitches from unraveling. Follow these steps to cast off your knitting:
- Start by knitting the first two stitches of the row as normal.
- Using your left-hand needle, lift the first stitch you knitted over the second stitch and off the right-hand needle. This leaves one stitch on your right-hand needle.
- Knit one more stitch onto your right-hand needle.
- Once again, lift the first stitch you knitted over the second stitch and off the right-hand needle.
- Continue this process of knitting one stitch and lifting the previous stitch over until you only have one stitch left on your right-hand needle.
- To finish, cut the yarn, leaving a tail that is a few inches long.
- Take the remaining stitch off the needle and thread the yarn through it.
- Pull the yarn tight to secure the end of the knitting.
Now your knitting is securely cast off and complete. You can weave in any remaining loose ends with a tapestry needle to tidy up your work.
FAQ:
What is casting off in knitting?
Casting off, also known as binding off, is the final step in knitting where you remove the stitches from the knitting needle and secure them to prevent unravelling.
Why is it important to know how to cast off in knitting?
Knowing how to cast off is important because it allows you to finish your knitting projects neatly and securely. Without casting off, the stitches would be left open and the knitting would unravel.
How do I cast off in knitting?
To cast off in knitting, you start by knitting two stitches, then using the left needle to lift the first stitch above the second stitch and off the right needle. You continue this process until you have one stitch left, then you cut the yarn and thread it through the last stitch to secure it.
Is casting off the same as binding off in knitting?
Yes, casting off and binding off are the same term used interchangeably in knitting. They both refer to the process of removing the stitches from the needle and securing them.
Are there different methods of casting off in knitting?
Yes, there are different methods of casting off in knitting. The most common method is the basic bind off, but there are also stretchy bind offs, picot bind offs, and many more. The method you choose depends on the desired finish and the type of project you are working on.
What can I do if I make a mistake while casting off?
If you make a mistake while casting off, you can simply undo the last stitch or stitches and start again. It’s important to take your time and pay attention to the steps to avoid mistakes, but if they happen, they can be easily fixed.


