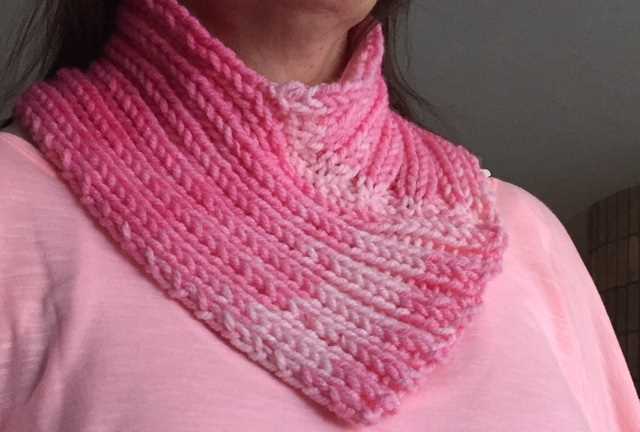
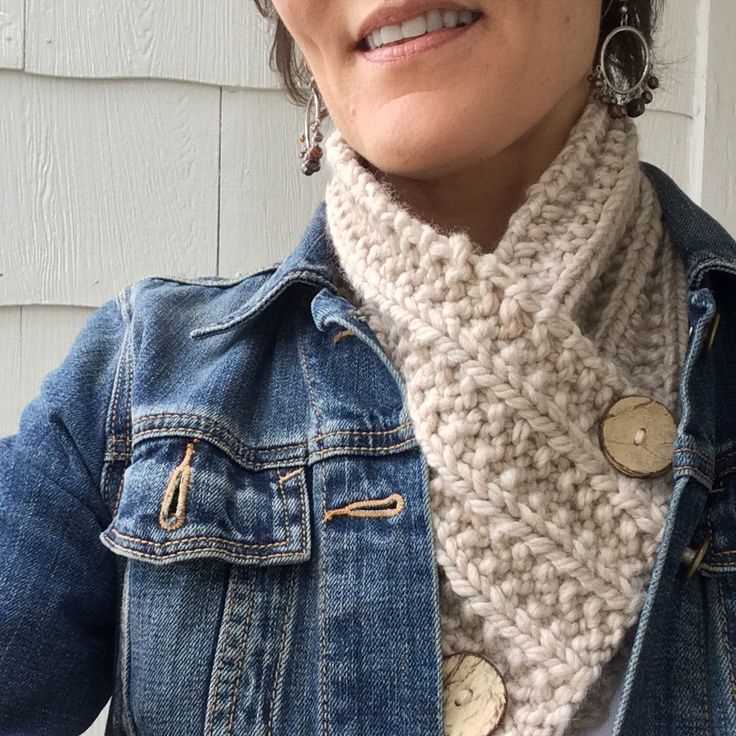
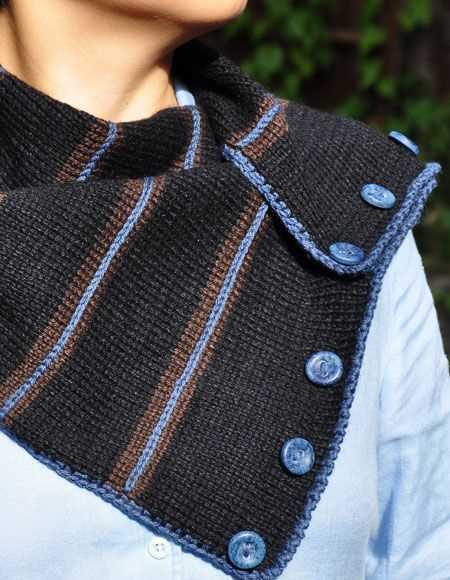
Are you ready to embark on a knitting adventure? In this step-by-step knitting guide, we will show you how to create a cozy and stylish neck warmer to keep you warm during the chilly winter months. Whether you are an experienced knitter or just starting out, this project is perfect for all skill levels.
Knitting is a timeless craft that allows you to create custom pieces that are both functional and fashionable. With just a few simple techniques, you can transform a ball of yarn into a beautiful accessory that will impress your friends and family. This neck warmer is not only practical but also a versatile addition to your winter wardrobe.
Throughout this knitting guide, we will walk you through each step of the process, from choosing the right yarn and needles to mastering various stitches. You will learn essential techniques like casting on, knitting, purling, and binding off. We will also share helpful tips and tricks to ensure your knitting journey is a success.
So, grab your knitting needles and join us on this creative adventure. By the end of this guide, you will have a cozy neck warmer that you can proudly wear or give as a thoughtful gift. Let’s get started!
What is a Neck Warmer?
A neck warmer is a type of winter accessory that is designed to keep your neck cozy and warm in cold weather. It is typically made of soft and insulating materials such as wool, acrylic, or fleece. Unlike scarves, neck warmers are usually shorter in length and do not have loose ends that need to be wrapped or tied.
Neck warmers are also known as neck gaiters or neck tubes, and they are commonly used by outdoor enthusiasts during activities such as skiing, snowboarding, hiking, and biking. They provide protection from the wind and cold, while still allowing for easy movement of the head and neck.
One of the main advantages of a neck warmer is that it provides warmth without the bulkiness of a traditional scarf. It fits snugly around the neck, sealing out cold air and preventing heat from escaping. This makes it a practical and efficient choice for those who want to stay warm without sacrificing mobility.
In addition to its functional benefits, a neck warmer can also be a stylish accessory. It comes in a variety of colors, patterns, and designs, allowing you to express your personal style while staying warm. Some neck warmers even have added features such as adjustable closures, built-in hoods, or pockets for storing small items.
Overall, a neck warmer is a versatile and practical accessory for keeping your neck cozy and protected from the elements. Whether you’re going for a winter hike or simply running errands on a cold day, a neck warmer can be a valuable addition to your winter wardrobe.
Step 1: Gathering Supplies
Before you begin knitting your cozy neck warmer, it’s important to gather all the necessary supplies. Here is a list of what you will need:
- Yarn: Choose a soft, bulky weight yarn in your desired color. You will need approximately 200-250 yards.
- Knitting Needles: Use size 10 ½ or 11 knitting needles, depending on your tension and desired gauge.
- Tapestry Needle: You will need a large-eyed needle for seaming and weaving in the loose ends.
- Scissors: Have a pair of scissors handy for cutting the yarn.
- Measuring Tape: A measuring tape or ruler will be useful for checking your gauge and measuring your progress.
- Stitch Markers: Optional, but can be helpful for marking important sections or stitches in your project.
Once you have gathered all these supplies, you will be ready to move on to the next step: choosing your pattern and casting on. Having everything prepared beforehand will make the knitting process smoother and more enjoyable.
Choosing the Right Yarn
When it comes to knitting a cozy neck warmer, choosing the right yarn is essential to achieve the desired results. The yarn you choose will not only determine the look and feel of your finished project but also affect its warmth and durability. Here are some factors to consider when selecting the yarn for your neck warmer:
- Fiber Content: Yarns come in a variety of fiber types, including wool, acrylic, cotton, and blends. Each fiber has its own unique characteristics, so think about what qualities you want in your neck warmer. If you’re looking for warmth, opt for wool or wool-blend yarns. For a lightweight and breathable neck warmer, cotton or acrylic may be more suitable.
- Yarn Weight: Yarns are categorized into different weights, from lace and fingering weight to bulky and super bulky. The weight of the yarn will determine the thickness and heaviness of your neck warmer. Consider the climate and the level of warmth you desire when selecting a yarn weight. As a general guideline, thicker yarns provide more insulation, while thinner yarns create a lighter and less bulky fabric.
- Color and Texture: Different yarns come in a multitude of colors and textures. Think about the overall look you want for your neck warmer. Do you prefer a solid color or a variegated yarn? Would you like a smooth texture or a yarn with a bit of fuzziness? Consider these preferences when choosing your yarn.
- Budget: Yarn prices can vary greatly, so it’s important to consider your budget. Some specialty yarns can be quite expensive, while basic acrylic or wool yarns are more affordable. Determine how much you’re willing to spend on your project and choose a yarn that fits within your budget.
Once you’ve taken these factors into account, you’ll be ready to make an informed decision about which yarn to use. Remember to consider your own personal preferences and the intended use of your neck warmer. With the right yarn, you’ll be on your way to creating a cozy and stylish accessory!
Selecting the Appropriate Needles
Choosing the right knitting needles is crucial for the success of your neck warmer project. Here are a few factors to consider when selecting the appropriate needles:
- Needle material: Knitting needles can be made from different materials such as metal, wood, or plastic. Each material has its advantages and disadvantages. Metal needles are durable and smooth, allowing stitches to slide easily. Wood needles provide a warmer touch and have a natural grip. Plastic needles are lightweight and often less expensive.
- Gauge: Gauge refers to the number of stitches and rows per inch of knitted fabric. It is important to match the gauge specified in the pattern to ensure the correct size and fit of the neck warmer. You can determine the gauge by knitting a small swatch with the chosen needles and yarn.
- Needle length: The length of the knitting needles determines the width of your project. For a neck warmer, you may prefer shorter needles, such as 16 or 24 inches, as they are easier to handle and keep the stitches more compact.
- Needle size: Needle size is measured in terms of diameter. The size you choose depends on the yarn weight you are using and the desired stitch density. Thinner yarns typically require smaller needle sizes, while thicker yarns need larger needle sizes. The pattern you are following will provide recommendations for the needle size.
Once you have considered these factors, you can select the appropriate knitting needles for your neck warmer project. It is always a good idea to check your gauge and make adjustments as needed before starting the project.
Step 2: Casting On
Once you have gathered your materials and familiarized yourself with the knitting needles and yarn, it’s time to start casting on. Casting on is the process of creating the first row of stitches on your knitting needle.
To cast on, follow these steps:
- Hold the knitting needle with your dominant hand and leave a tail of yarn hanging down.
- With your other hand, take the end of the yarn and create a slipknot by making a loop.
- Insert the knitting needle through the loop and tighten the slipknot gently, leaving enough space for the needle to move freely.
- Now, hold the knitting needle with both hands, placing your thumb and index finger around it.
- Using your dominant hand, bring the yarn over the needle, creating a loop.
- Slide the loop onto the needle, keeping it loose and not too tight.
- Repeat steps 5 and 6 until you have the desired number of stitches on your needle.
Remember to keep your stitches even and not too tight or too loose. Casting on sets the foundation for your project, so take your time to ensure you are comfortable with each step.
Once you have finished casting on, you are ready to start knitting your cozy neck warmer. Stay tuned for Step 3: Knitting the First Row.
Using the Long-Tail Cast-On Method
The long-tail cast-on method is a versatile and widely-used technique for starting knitting projects. It creates a neat and elastic edge that is perfect for the beginning of a cozy neck warmer. Here’s how to do it:
- Measure the tail: Start by determining how much yarn you’ll need for your cast-on. To do this, measure out a length of yarn that is approximately three times the width of the finished piece.
- Make a slip knot: Make a slip knot at the end of the tail. This will create a loop that you will use to start your cast-on.
- Hold the needle: Hold your knitting needle in your right hand, with the slip knot loop positioned on the needle. Grasp the needle with your thumb and index finger towards the tip, leaving enough space for the stitches.
- Create the first stitch: With your left hand, bring the working yarn (the yarn attached to the ball) over the needle, leaving a tail that is approximately equal to the width of your finished piece.
- Make the second stitch: Insert your right-hand needle into the slip knot loop from right to left, going under the working yarn. Then, bring the working yarn over the right-hand needle and pull it through the slip knot loop.
- Continue casting on: Repeat steps 4 and 5 until you have cast on the desired number of stitches. Remember to keep the tension even, neither too loose nor too tight.
- Secure the last stitch: After casting on all the stitches, pull the working yarn to tighten the last stitch. This will help ensure that your cast-on edge is even and secure.
Now you’re ready to start knitting your cozy neck warmer using the long-tail cast-on method. Happy knitting!
Step 3: Knitting the First Row
Now that you have cast on your stitches, it’s time to start knitting the first row of your cozy neck warmer. Follow these steps:
- Hold the knitting needle with the cast on stitches in your right hand and the working yarn in your left hand.
- Take the working yarn and wrap it around your left index finger, creating a loop.
- Insert the right needle into the first stitch from front to back.
- With your right hand, use the needle to grab the working yarn and bring it through the stitch, creating a loop on the right needle.
- Slip the stitch off the left needle, transferring it to the right needle.
- Repeat steps 3-5 to knit each stitch across the row until you reach the end.
Make sure to keep your tension consistent throughout the row, as this will ensure an even and neat-looking fabric. You can hold the knitting needle and yarn in whatever way feels comfortable for you.
Once you have knitted the entire first row, you can continue on to the next step to begin knitting subsequent rows. Congratulations on completing your first row!
Creating the Stitch Pattern
Once you have cast on the desired number of stitches for your neck warmer, you are ready to start creating the stitch pattern. There are several stitch patterns you can choose from, but for this project, we will be using a simple rib stitch pattern.
To create the rib stitch pattern, you will alternate between knitting and purling stitches. This creates a stretchy and textured fabric that is perfect for a cozy neck warmer.
- Begin by knitting the first stitch. Insert the right-hand needle into the first stitch on the left-hand needle from left to right, bringing the needle over and behind the left-hand needle. Use the right-hand needle to wrap the working yarn around the right-hand needle in a counterclockwise motion. Pull the right-hand needle through the stitch, bringing it to the front of the work.
- Purl the next stitch. Insert the right-hand needle from right to left into the next stitch on the left-hand needle. Use the right-hand needle to wrap the working yarn around the right-hand needle in a clockwise motion. Pull the right-hand needle through the stitch, creating a loop on the right-hand needle.
- Continue alternating between knitting and purling stitches until you reach the end of the row. Remember to keep track of your stitches and maintain the pattern.
After completing the first row, continue repeating the knit and purl stitches in the same pattern for the desired length of your neck warmer. This will create the rib stitch pattern throughout the entire project.
Once you have reached the desired length, you can bind off to finish the neck warmer. The bind off method will depend on the stitch pattern you chose and the desired edge you want for your neck warmer.
Now that you know how to create the stitch pattern for your cozy neck warmer, you can customize it by adding different colors or stitch patterns. Get creative and make a one-of-a-kind accessory to keep you warm and stylish during the colder months!
Step 4: Continuing the Pattern
After completing the ribbed section, it’s time to continue with the pattern for the main body of the neck warmer. This pattern will create a textured design that adds warmth and visual interest to the finished piece.
To continue the pattern, you will need to repeat a series of rows. Here’s how to do it:
- Row 1: Knit across all stitches.
- Row 2: Purl across all stitches.
- Row 3: Knit 2 stitches, purl 2 stitches, repeat this pattern across the row.
- Row 4: Purl 2 stitches, knit 2 stitches, repeat this pattern across the row.
- Repeat Rows 1-4: Continue repeating rows 1-4 until the desired length of the neck warmer is reached. The number of repeats will depend on your gauge and personal preference.
As you work through the pattern, you’ll start to see the textured design forming. The alternating knit and purl stitches create a ribbed effect that adds stretch and structure to the neck warmer.
Continue repeating the rows until you’re happy with the length of the neck warmer, keeping in mind that it will slightly stretch when worn.
Once you’ve reached the desired length, you’re ready to move on to the next step: finishing the neck warmer by binding off and weaving in any loose ends.
Repeating the Stitch Sequence
Once you have completed the first row of stitches, you will need to repeat the stitch sequence for the remaining rows of your neck warmer. This will create the desired pattern and shape of the garment.
- Start each row with the same stitch as the previous row.
- Continue knitting or purling each stitch according to the stitch pattern you have chosen.
- Work through each row in the same manner, following the pattern until you reach the desired length for your neck warmer.
Remember to count your stitches regularly to ensure that you are maintaining the correct number and pattern. This will help you avoid any mistakes or inconsistencies in your knitting.
If you are using a more complex stitch pattern, such as cables or lace, you may need to refer to a detailed pattern or chart for specific instructions on each row. Take your time and follow the instructions carefully to achieve the desired result.
Once you have completed all the rows according to your pattern, you will be ready to finish the edge of your neck warmer and bind off the stitches. This will give your neck warmer a clean and finished look.
With these steps and a little practice, you will soon be able to create a cozy and stylish neck warmer to keep you warm during the colder months.
FAQ:
What materials do I need to knit a neck warmer?
To knit a neck warmer, you will need yarn, knitting needles, a tapestry needle, and scissors.
Can I use any type of yarn for knitting a neck warmer?
Yes, you can use any type of yarn for knitting a neck warmer. However, it is recommended to use a soft and cozy yarn that will feel comfortable against your skin.
How long will it take to knit a neck warmer?
The time it takes to knit a neck warmer will vary depending on your knitting speed and the complexity of the pattern. On average, it can take anywhere from a few hours to a few days to complete.
Are there any knitting techniques I should know before attempting to knit a neck warmer?
Before knitting a neck warmer, it is recommended to be familiar with basic knitting techniques such as casting on, knitting, purling, and binding off. You should also know how to read a knitting pattern and understand common knitting abbreviations.


