Knitting is a popular pastime that allows people to create beautiful, cozy items such as scarves, hats, and sweaters. The intricate textures of knitted fabric can be challenging to replicate in a drawing, but with the right techniques, you can learn to capture the essence of knit patterns.
To begin, it’s important to understand the basic structure of knitted fabric. Knitting consists of interlaced loops, formed with knitting needles and yarn. These loops create various patterns and textures, including the classic stockinette stitch, ribbing, and cables.
In this step-by-step tutorial, we will explore different techniques for drawing knit textures, starting with the simple stockinette stitch.
The stockinette stitch is one of the most common and easily recognizable knit textures. It consists of rows of knit stitches on the front side and rows of purl stitches on the backside. Drawing this pattern requires understanding how to depict the smooth, V-shaped knit stitches and the bumpy, horizontal purl stitches.
“With a few simple techniques and some practice, you can master the art of drawing knit textures and bring your illustrations to life.”
Learn How to Draw Knit Textures
Drawing knit textures can add depth and realism to your artwork, whether you’re working on a fashion illustration or a still life composition. Follow these step-by-step instructions to master the art of drawing knit textures:
- Start with a basic sketch: Begin by lightly sketching the outline of the object you want to draw, whether it’s a sweater, a scarf, or a hat. This will serve as a guide for adding the knit texture later on.
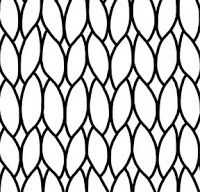
- Draw the knit pattern: Use short, curved lines to create the appearance of knit stitches. These lines should follow the contours of the object and overlap slightly to mimic the intertwined nature of knit fabric. Pay attention to the direction of the stitches, as it can add realism to your drawing.
- Add shading: To give your drawing depth and dimension, add shading to the areas where light doesn’t directly hit the fabric. Use a darker pencil or shading tool to create shadows between the knit stitches and on the folds of the fabric.
- Highlight the stitches: Use an eraser or a white pencil to add highlights to select stitches. This will create the illusion of light hitting the fabric and enhance the texture of the knit.
- Create a sense of movement: To make the knit texture look more realistic, vary the size, length, and direction of the stitches. This will add a sense of movement and randomness to the texture, just like real knit fabric.
- Experiment with different knit patterns: Don’t be afraid to try different knit patterns and textures. Explore different types of stitches, such as cables, ribbing, or seed stitch, to add variety and interest to your drawings.
Remember, practice is key when it comes to drawing knit textures. The more you practice, the better you’ll become at capturing the intricate details of different knitted fabrics. So grab your pencils, start sketching, and have fun exploring the world of knit textures!
Step 1: Choose the Right Tools
Before you begin drawing knit textures, it’s important to gather the right tools. Having the proper materials will make the process easier and improve the quality of your artwork. Here are some essential tools to consider:
- Drawing Paper: Start with a smooth and high-quality drawing paper. Look for a paper that has a good weight and texture that can withstand the pressure of your drawing tools.
- Pencils: Invest in a variety of pencils with different hardness levels (e.g., HB, 2B, 4B, etc.). This will allow you to create different levels of shading and texture in your drawings.
- Erasers: Have both a kneaded eraser and a vinyl eraser on hand. The kneaded eraser is great for lifting graphite, while the vinyl eraser is ideal for larger areas or removing stubborn marks.
- Blending Stumps: Blending stumps, also known as tortillons, are useful for creating smooth gradients and blending different areas of your drawing.
- Reference Material: Collect reference material such as photos or real-life knit fabrics to study their patterns and textures. This will help you accurately depict the different stitches and weaves in your drawings.
Make sure to have a clean and organized workspace for your drawing process. This will help you stay focused and ensure that your tools are easily accessible.
Step 2: Understanding the Basic Stitches
Before we start drawing knit textures, it is important to understand the basic stitches used in knitting. These stitches create the foundation of any knitted fabric and are essential for creating realistic knit textures in your drawings.
Here are the main basic stitches you need to know:
-
Knit Stitch: The knit stitch is the most common stitch used in knitting. It creates a smooth, V-shaped stitch on the right side of the fabric. In drawings, it is represented by a diagonal line that slants to the right.
-
Purl Stitch: The purl stitch is another basic stitch used in knitting. It creates a bumpy, horizontal line on the right side of the fabric. In drawings, it is represented by a diagonal line that slants to the left.
-
Stockinette Stitch: The stockinette stitch is created by alternating rows of knit and purl stitches. It produces a smooth, flat fabric on the right side and a bumpy texture on the wrong side. In drawings, it is represented by alternating diagonal lines that slant in opposite directions.
-
Garter Stitch: The garter stitch is created by knitting every row. It produces a textured fabric with ridges on both sides. In drawings, it is represented by horizontal lines.
These basic stitches can be combined and manipulated in various ways to create different knit textures, such as cables, lace, and ribbing. By understanding how these stitches work together, you will be able to create more realistic and detailed drawings of knit textures.
Next, we will learn how to draw these basic stitches and start creating our knit textures.
Step 3: Starting Your Knit Drawing
Now that you have your reference image and materials ready, it’s time to start your knit drawing. Follow these steps to begin:
- Choose your drawing style: Before you start, decide on the style you want to approach your knit drawing with. You can go for a realistic look or opt for a more whimsical style. This will help you determine the level of detail and shading you want to incorporate into your drawing.
- Start with a rough outline: Begin by sketching a rough outline of the knit texture you want to draw. Use light pencil strokes to create the basic shape of the knit pattern. Don’t worry about getting it perfect at this stage, as you can refine the details later.
- Identify the stitch pattern: Look closely at your reference image and identify the specific stitch pattern you want to recreate. Note any unique characteristics, such as cables, ribs, or bobbles. These details will add depth and realism to your drawing.
- Break down the stitch pattern: Break down the stitch pattern into smaller sections. Focus on one section at a time and draw the individual stitches using light strokes. Pay attention to the spacing, size, and shape of each stitch to accurately depict the knit texture.
- Add shading and highlights: To create dimension in your knit drawing, incorporate shading and highlights. Use darker tones to shade the areas of the knit that appear darker in your reference image. Add highlights using lighter tones to emphasize the raised portions of the knit texture.
- Refine and add details: Once you have established the basic knit texture, go back and refine the details. Use an eraser to clean up any stray lines or mistakes. Add additional texture and details as needed to enhance the realism of your drawing.
Remember, practice makes perfect! The more you experiment with different knit textures and techniques, the more skilled you’ll become at drawing them. Stay patient, take your time, and enjoy the process of bringing knit textures to life on paper.
Step 4: Adding Texture with Different Stitches
Once you have mastered the basic knit stitches, you can start experimenting with different stitches to add texture to your knitting.
Here are some popular stitches that you can try:
- Seed Stitch: This stitch alternates between knit and purl stitches in a single row, and then switches the stitches in the following row. This creates a bumpy texture and is great for adding interest to plain knit fabrics.
- Ribbing: Ribbing is created by alternating knit and purl stitches in a specific pattern. Common ribbing patterns include 1×1 (alternating knit and purl stitches), 2×2 (two knit stitches followed by two purl stitches), and so on. Ribbing is commonly used for cuffs, collars, and hems to add stretch and texture.
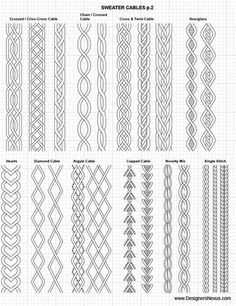
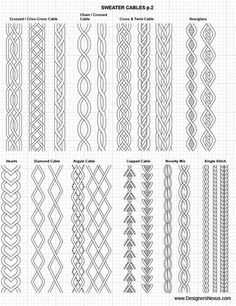
- Cable Stitch: Cable stitches create a twisted effect by crossing stitches over each other. This stitch requires the use of a cable needle or a double-pointed needle to hold the stitches while you work on the crossed stitches. Cable stitches can be simple or complex, depending on the number of stitches involved and the direction of the crossing.
- Moss Stitch: Moss stitch is similar to seed stitch, but instead of alternating knit and purl stitches in a single row, it alternates them in two rows. This creates a more pronounced texture, with raised bumps on a flat background.
Once you are comfortable with these stitches, you can combine them in various ways to create unique patterns and textures in your knitting. Don’t be afraid to experiment and try new stitches – knitting is an art form that allows for creativity and personal expression!
Refer to knitting patterns and stitch dictionaries for more ideas on different stitches and how to work them. With practice and patience, you will be able to master the art of creating beautiful and textured knit fabrics.
Step 5: Creating Shading and Highlights
Adding shading and highlights to your knitted textures can help create dimension and depth in your drawing. Here are a few techniques to help you achieve realistic shading and highlights:
- Start by identifying where the light source is coming from in your drawing. This will determine the placement of your shading and highlights.
- Use a darker shade of the base color to add shading to areas that are further away from the light source. Apply this shade with light, feathery strokes to create a subtle effect.
- For more dramatic shading, use a darker shade of the base color and apply it with slightly heavier pressure. Focus on areas that would naturally have more shadows, such as folds and creases in the fabric.
- To create highlights, use a lighter shade of the base color or even a white pencil. Apply this color sparingly to areas that would catch the most light, such as the tops of raised stitches or areas that are directly facing the light source.
- Blend the shading and highlights together using a blending stump or a tortillon. This will create a smoother transition between the different shades and give your knitted texture a more realistic appearance.
- Continue to layer and blend your shading and highlights until you achieve the desired effect. Take breaks and step back from your drawing to assess the overall look and make adjustments as needed.
Remember, practice makes perfect! The more you experiment with shading and highlights, the better you will become at creating realistic knitted textures in your drawings.
Step 6: Adding Details and Patterns
Once you have mastered the basic knit texture, you can begin to add more details and patterns to your drawing. This will give your artwork a more realistic and intricate look. Here are some tips and techniques to help you add details and patterns to your knit textures:
1. Stitches and Rows: Pay attention to the arrangement of stitches and rows in your knit texture. Use different lengths and shapes to create a variety of stitches, such as V-shaped or U-shaped stitches.
2. Cables and Ribbing: To add dimension to your knit texture, incorporate cables and ribbing into your drawing. Cables are created by crossing stitches over each other, while ribbing is made by alternating knits and purls in a specific pattern.
3. Stitch Variations: Experiment with different stitch variations to create unique patterns in your knit texture. Some examples include seed stitch, basketweave stitch, and diamond stitch.
4. Color Changes: Use different colors of thread or yarn to create color changes in your knit texture. This can be done by using different shades of the same color or by introducing contrasting colors for a bold effect.
5. Texture Effects: Play around with the thickness and weight of your lines to create texture in your knit texture. Using thicker lines for cables or adding shading to create depth can make your drawing more visually interesting.
6. Reference Materials: Look at real-life knit textures or knitting patterns for inspiration and reference. Pay attention to the details, patterns, and colors used in these references and try to replicate them in your artwork.
7. Practice and Experiment: The more you practice, the better you will get at adding details and patterns to your knit textures. Experiment with different techniques, stitches, and patterns to find your own unique style.
By incorporating these tips and techniques into your drawing, you can create intricate and realistic knit textures that will impress your audience.
Step 7: Final Touches and Finishing
Once you have completed the main steps of drawing the knit textures, it’s time to add those final touches that will make your drawing look even more realistic.
Here are some final touches and finishing techniques to consider:
- Highlighting: Use a white pencil or an eraser to add some highlights to the knit textures. This will give them a three-dimensional look and make them appear more shiny and realistic.
- Shading: Use a darker pencil or shading technique to add shadows to the knit textures. This will create depth and dimension, making them look more realistic.
- Texture details: Pay attention to small details in the knit textures, such as the stitches or patterns. Add these details using thin lines or dots, depending on the type of stitch you want to represent.
- Coloring: If you want to add color to your drawing, choose colors that are commonly found in knitted fabrics, such as various shades of browns, grays, or blues. Use colored pencils or other coloring tools to add color to your knit textures.
- Clean up: Erase any stray lines or smudges that may have occurred during the drawing process. Clean up the edges of your drawing to make it look polished and professional.
Once you are satisfied with the final touches and finishing of your knit textures, step back and take a look at your drawing as a whole. Make any necessary adjustments or additions to ensure that the textures blend well into the overall composition.
Congratulations! You have successfully mastered the art of drawing knit textures. With practice and patience, you can continue to refine your skills and create even more intricate and realistic knitting drawings.
FAQ:
What materials do I need to draw knit textures?
To draw knit textures, you will need a pencil, eraser, drawing paper, and shading tools such as graphite pencils or charcoal.
Can I use colored pencils to draw knit textures?
Yes, you can use colored pencils to add color to your knit textures. However, it’s recommended to start with a base sketch using graphite pencils or charcoal to establish the textures and shading before adding color.
How do I create the illusion of knitted stitches in my drawing?
To create the illusion of knitted stitches, you can use a variety of techniques such as cross-hatching, stippling, or shading with parallel lines. Start by lightly sketching the overall shape of the knitted fabric, then add the details of the stitches using the chosen technique.
Are there any specific tips for drawing cable knit textures?
When drawing cable knit textures, it’s important to pay attention to the direction and flow of the cables. Start by sketching the main pathways of the cables, then add the twists and curves that create the cable pattern. Use shading and hatching techniques to give depth and dimension to the cables.


