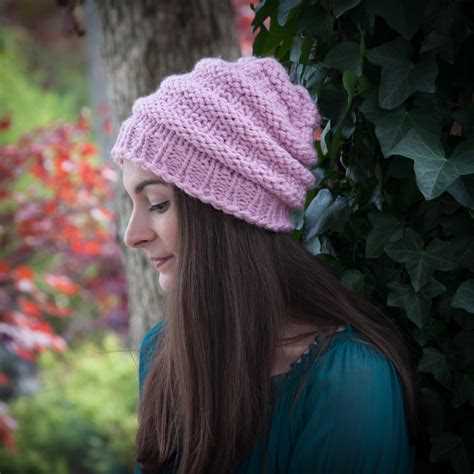
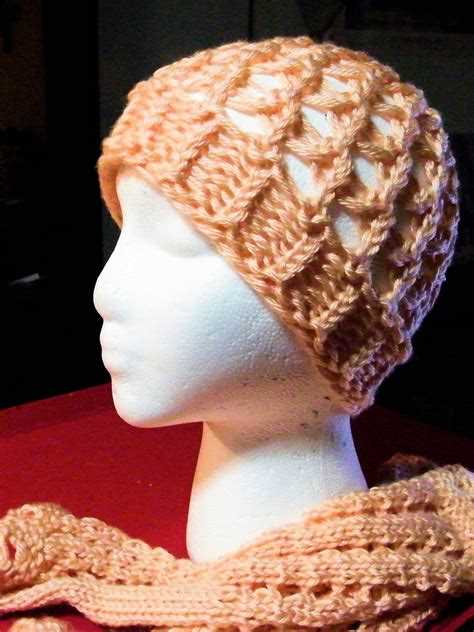
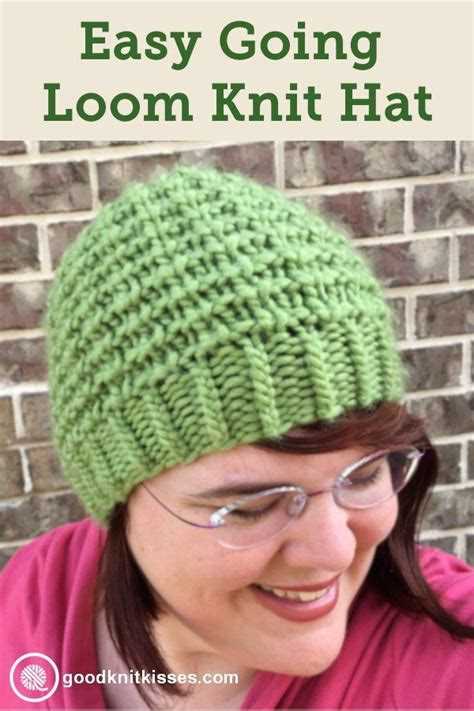
Do you want to learn how to knit a hat on a loom? Whether you are a complete beginner or have some knitting experience, this step-by-step tutorial will guide you through the process. Knitting on a loom is a great way to create beautiful and cozy hats without needing any knitting needles. With just a loom, some yarn, and a little patience, you can create a stylish hat that will keep you warm during the colder months.
First, gather your materials. You will need a knitting loom, which is a circular or rectangular frame with pegs around the edge. You can find knitting looms in various sizes, depending on the desired size of your hat. Additionally, choose a soft and chunky yarn that you like. The yarn’s thickness will determine the warmth of your hat, so choose accordingly. Lastly, you will need a yarn needle, a crochet hook, and a pair of scissors.
Once you have all your materials ready, it’s time to start knitting your hat. Begin by creating a slipknot and placing it on the first peg of the loom. Then, wrap the yarn around each peg in a clockwise direction, making sure not to wrap too tightly or too loosely. Continue wrapping the yarn around each peg until you have gone around the entire loom. This will create the first row of stitches.
Tip: If you’re having trouble wrapping the yarn around the pegs, try using a crochet hook to help guide the yarn.
After finishing the first row, use your loom’s hook or a crochet hook to lift the bottom loop over the top loop on each peg. This will create a second row of stitches. Repeat this process for each row until your hat reaches the desired length. For a slouchy hat, knit more rows, and for a snugger fit, knit fewer rows.
Materials and Tools Needed
To knit a hat on a loom, you will need the following materials and tools:
- Loom: You will need a round loom with pegs. The size of the loom will determine the size of your hat.
- Yarn: Choose a yarn of your choice in a color and thickness that you like. Make sure you have enough yarn to complete the hat.
- Loom Hook: This is a specialized tool used to knit stitches on the loom.
- Yarn Needle: You will need a yarn needle to weave in the loose ends of the yarn.
- Scissors: To cut the yarn.
- Measuring Tape: This will help you measure the size of the hat and determine how long to make it.
These are the basic materials and tools you will need to knit a hat on a loom. Once you have gathered all the necessary supplies, you are ready to begin the knitting process.
Choosing the Right Yarn
When it comes to knitting a hat on a loom, choosing the right yarn is important for the final outcome of your project. Here are a few things to consider when selecting the yarn:
- Weight: The weight of the yarn refers to its thickness. For a beginner’s hat, it is recommended to use a medium weight or worsted weight yarn. This type of yarn is easier to work with and creates a hat that is not too heavy or too light.
- Fiber Content: Yarn comes in various fiber contents, such as acrylic, wool, cotton, and blends. Each fiber has its own characteristics and affects the feel and durability of the hat. Acrylic yarn is budget-friendly and easy to care for, while wool is warm and natural. Consider the recipient’s preferences and the desired properties of the hat when choosing the fiber content.
- Color: The color of the yarn is a personal preference, but it’s important to choose a color that complements the recipient’s style and wardrobe. Additionally, some stitch patterns might look better with solid colors, while others might benefit from variegated or self-striping yarn.
- Quantity: The amount of yarn you will need depends on the size of the hat and the stitch pattern you choose. Most yarn labels provide information about the yardage and recommended project size. Ensure that you have enough yarn to complete the project without running out.
Keep in mind that these are general guidelines, and you can always experiment with different yarns to achieve the desired effect. Try to match the yarn to the pattern’s recommendations, as it can greatly affect the fit and appearance of the finished hat. Don’t be afraid to get creative and have fun with your yarn selection!
Setting up the Loom
Before you begin knitting your hat on a loom, it’s important to set up the loom properly.
- Assemble the loom: Start by connecting all the loom pieces together according to the manufacturer’s instructions. Make sure all the pegs are securely inserted into the loom, and that the loom is stable and won’t move around while you’re working.
- Adjust the peg spacing: Depending on the desired size of your hat, you may need to adjust the spacing between the pegs on your loom. Some looms have adjustable pegs, while others have fixed spacing. Consult the loom’s instructions to ensure that the pegs are set to the correct spacing for your project.
- Prepare the yarn: Attach your yarn to the anchor peg on one side of the loom. Leave a long tail of yarn, as this will be used later to close the top of the hat. Wind the yarn around each peg in a clockwise direction, making sure it is not too tight or too loose. Repeat this process for each peg on the loom.
- Create a slip knot: To start knitting, you’ll need to create a slip knot and place it on the first peg. Start by making a loop with the yarn, leaving a tail. Pull the end of the yarn through the loop to create a knot. Place the knot on the first peg, making sure it is not too tight or too loose.
Once you have completed these steps, your loom is now set up and ready for you to start knitting your hat. The next section will guide you through the knitting process step-by-step.
Casting On
Before you can begin knitting a hat on a loom, you need to cast on. Casting on is the process of creating the foundation row of stitches on the loom. Follow these steps to cast on:
- Hold the loom in your left hand with the pegs facing upward and the anchor peg on the right side.
- Take the working yarn and make a slip knot. Place it on the anchor peg.
- Move counterclockwise around the loom, skipping the next peg and wrapping the working yarn around the following peg in a clockwise direction.
- Continue wrapping the yarn around each peg until you reach the last peg. The last peg should be skipped.
- Move back around the loom in a clockwise direction, pushing each wrapped loop down to the base of the peg.
- Repeat steps 3-5 until you have wrapped all the desired pegs. The number of pegs you use will depend on the size of the hat you want to make.
Once you have finished casting on, you are ready to start knitting your hat on the loom! Make sure all the loops are securely wrapped around the pegs and there are no gaps or loose stitches.
Knitting the Brim
The brim of the hat is the part that fits snugly around your head and keeps the hat in place. It is typically knit with a ribbing or a folded brim to provide extra stretch and structure.
To knit the brim of your hat on a loom, follow these steps:
- Casting on: Start by casting on the desired number of stitches, following the instructions in your loom knitting pattern. This will determine the size and stretchiness of the brim.
- Ribbing: Begin knitting the brim using the ribbing stitch of your choice. Some common ribbing stitches include 1×1 ribbing (alternating knit and purl stitches) or 2×2 ribbing (alternating two knit stitches and two purl stitches). The ribbing stitch creates a stretchy fabric that will hug your head comfortably.
- Repeat the ribbing: Continue knitting the ribbing stitch for the desired length of the brim. This may vary depending on your personal preference or the pattern instructions.
- Bind off: Once you have reached the desired length, it’s time to bind off. Cut the working yarn, leaving a long tail. Thread the tail through a darning needle, and then insert the needle through the loops remaining on the loom, removing them from the pegs as you go. When all the loops have been removed from the loom, pull the tail tight to secure the stitches.
With the brim of your hat complete, you can now move on to knitting the body of the hat. The brim provides a solid foundation for the rest of the hat and ensures a comfortable fit.
Increasing for the Crown
Once you have completed the ribbed brim of your hat, it’s time to start increasing the stitches to shape the crown. The crown is the top part of the hat that fits snugly on your head.
To increase stitches on a loom, you will be using a technique called “e-wrap” or “yarn over.” This technique creates an extra loop around the peg, effectively adding a new stitch.
Follow these step-by-step instructions to increase stitches for the crown of your hat:
- Start by moving the working yarn to the inside of your loom, leaving a long tail.
- Take the working yarn and wrap it around the first peg in a clockwise direction, creating a loop.
- Wrap the working yarn around the second peg in a counterclockwise direction, creating another loop.
- Continue wrapping the yarn in a figure-eight pattern around each peg until you have added an extra loop to every peg on the loom.
- After completing one round of e-wrap, go back to the first peg and repeat the process for a second round of increasing stitches.
- Repeat these two rounds of increasing stitches for the desired number of times, depending on the pattern or style of your hat. This will determine how many stitches you will have at the crown.
Remember to always keep your tension even when increasing stitches to maintain an even shape for your hat.
Once you have finished increasing stitches for the crown, you can continue knitting your hat in your chosen stitch pattern until it reaches the desired length. Then, you will be ready to close the crown and finish off your hat.
Decreasing for the Top
Once you’ve reached the desired length for your hat, it’s time to start decreasing so that the top of the hat narrows. Decreasing will create a tapered shape and provide a better fit for the head. Follow these steps to decrease for the top:
- Move the loops over on the loom so that you have two loops on each peg. This will create the double stitch needed for decreasing.
- Start at one end of the loom and use the hook to lift the bottom loop over the top loop and off the peg. This decreases one stitch.
- Repeat this process for each peg, moving from one end of the loom to the other. Make sure to be gentle and not pull too tightly, as this may cause the yarn to break or stretch.
- After completing the first round of decreasing, you should now have one loop on each peg.
- Continue knitting the next round without decreasing, following the same stitch pattern as before. This will maintain the tapered shape and create a smooth transition.
- Repeat steps 2-5 until you have only a few pegs remaining with loops. At this point, you may need to switch to a smaller loom or use a crochet hook to finish the last few stitches.
- Once you have decreased to a single loop on each peg, cut the yarn, leaving a long tail. Thread the tail through the loops and use a yarn needle to weave it in, securing the top of the hat.
- Finally, gently remove the hat from the loom, being careful not to unravel the stitches. Give the hat a gentle stretch to remove any remaining slack and adjust the shape if necessary.
Congratulations! You have successfully finished knitting a hat on a loom, complete with decreasing for the top. Now you can enjoy wearing or gifting your handmade hat!
Finishing the Hat
Once you have completed knitting your hat on the loom, it’s time to finish it off and add any desired embellishments. Follow these steps to finish your hat:
- Cast off: Start by cutting the yarn, leaving a long tail. Thread the tail through a yarn needle, and then insert the needle through the loop on your final peg. Continue threading the needle through each loop on the loom until all loops have been removed.
- Cinch the top: Gently pull the yarn to cinch the top of the hat closed. Make sure to tighten it securely, but not too tightly to allow for comfort.
- Weave in ends: Take the loose tail and weave it into the stitches on the wrong side of the hat. This ensures a neater finish and prevents the yarn from unraveling.
- Embellish: If desired, you can add embellishments to personalize your hat. Consider adding a pom-pom, a bow, or any other decorative element that suits your style.
- Block the hat: To give your hat a more polished look, you can block it. Wet the hat with water, squeeze out the excess, and gently stretch it to the desired shape. Let it dry completely before wearing.
Congratulations! You have successfully finished knitting your hat on a loom. Now it’s time to show off your creation and keep warm in style!
FAQ:
What materials do I need to knit a hat on a loom?
To knit a hat on a loom, you will need a loom, yarn, a loom hook, a yarn needle, and a pair of scissors.
Where can I buy a loom and yarn?
You can buy a loom and yarn at craft stores like Michaels or Jo-Ann Fabric, or online on websites like Amazon or Etsy.
Is it difficult to knit a hat on a loom?
No, knitting a hat on a loom is a beginner-friendly project. With the step-by-step instructions provided in the tutorial, you can easily learn and create your own knitted hat.
How long does it take to knit a hat on a loom?
The time it takes to knit a hat on a loom depends on factors such as your knitting speed and the complexity of the pattern. On average, it can take a few hours to complete a basic hat.
Can I customize the design of the hat?
Yes, you can customize the design of the hat by choosing different yarn colors and adding embellishments such as pom-poms or buttons. The tutorial provides instructions on how to make basic hats, but you can get creative and make your hat unique.


