Knitting is a wonderful and rewarding craft that allows you to create beautiful and unique pieces of clothing or home decor. However, mistakes can happen, and sometimes you may find yourself needing to undo a row in your knitting. Whether you made a mistake in your stitch pattern, dropped a stitch, or simply need to fix an issue in your project, undoing a row can be a daunting task. But fear not! With this step-by-step guide, you’ll learn how to undo a row in knitting like a pro.
Step 1: Assess the Situation
Before you start unraveling your hard work, it’s important to take a moment to assess the situation. Determine whether you need to undo just a few stitches or an entire row. This will help you decide where to begin and give you a better idea of how much work will be involved in undoing the row.
Step 2: Identify the Last Correctly Knitted Stitch
Next, you’ll need to identify the last correctly knitted stitch in the row you want to undo. Look for a stitch that looks uniform and tidy, without any loose or twisted strands. This will serve as your starting point for unraveling the row.
Step 3: Begin Unraveling the Row
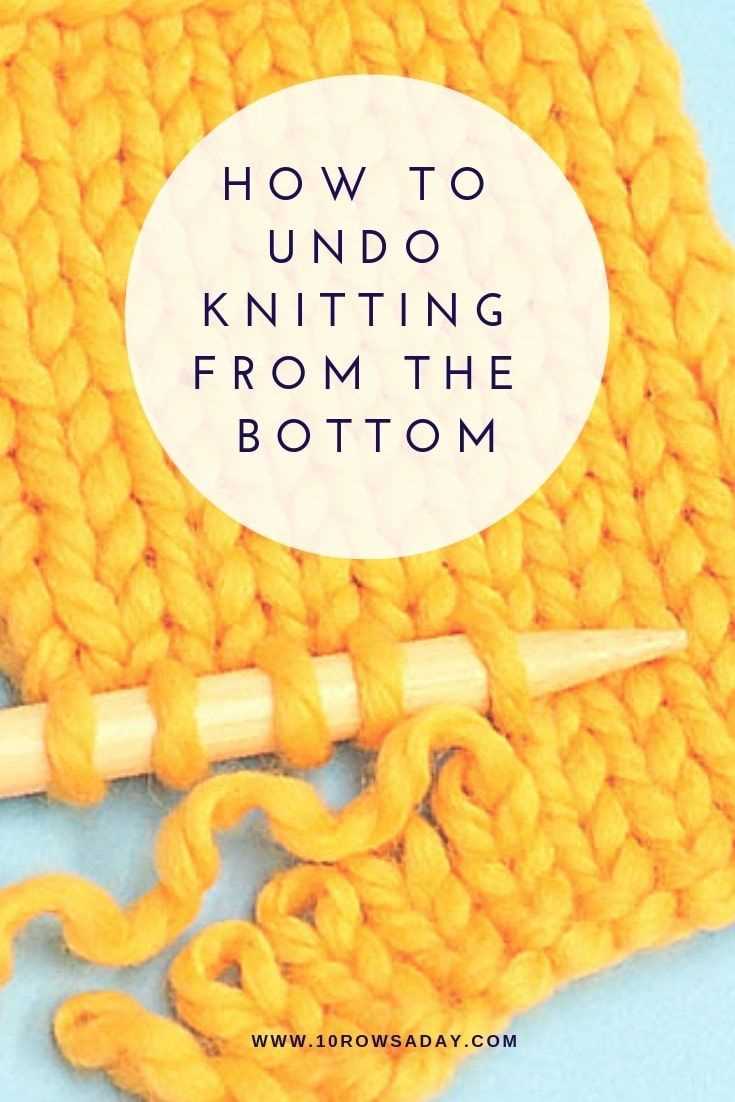
Once you’ve identified the last correctly knitted stitch, gently pull on the yarn to unravel the stitches below it. Take care to only unravel the stitches of the row you want to undo, being careful not to catch any stitches from the previous row or the row above. You can use a crochet hook or your knitting needles to help guide and separate the stitches as you go.
Step 4: Fix Any Mistakes
As you unravel the row, you may come across any mistakes or issues in your knitting. This is the perfect opportunity to fix them! If you dropped a stitch, use a crochet hook or your knitting needles to pick it up and secure it back onto your needles. If there are any other mistakes, such as twisted stitches or incorrect stitch patterns, now is the time to correct them.
Step 5: Re-knit the Undone Row
Once you’ve successfully undone the row and fixed any mistakes, it’s time to re-knit the undone row. Using your knitting needles, carefully insert them into the unraveled stitches and knit them back onto your needles. Pay attention to your stitch pattern and take your time to ensure that everything is knitted correctly.
Step 6: Continue Knitting
With the undone row now re-knitted, you can continue working on your project as usual. Take a moment to admire your handiwork and pat yourself on the back for successfully undoing a row in knitting!
Remember, undoing a row in knitting may seem intimidating at first, but with practice and patience, it becomes easier. The key is to take your time, pay attention to your stitches, and have confidence in your abilities. Before you know it, you’ll be able to fix any mistakes that come your way and continue on with your knitting projects.
Understanding the Need
Before learning how to undo a row in knitting, it is important to understand why it may be necessary. Whether you are a beginner or advanced knitter, mistakes can happen. It is not uncommon to make an error, drop a stitch, or simply change your mind about a pattern or design choice.
Undoing a row in knitting allows you to correct mistakes or make adjustments without having to start your project from scratch. By undoing a row, you can fix errors, pick up dropped stitches, or modify your knitting to achieve the desired result.
Knowing how to undo a row can save you time, effort, and frustration, making it an essential skill for any knitter.
Gathering the Required Tools
Before you can start undoing a row in knitting, it’s important to gather the necessary tools. Here are the items you will need:
- Knitting Needles: Make sure you have the appropriate size knitting needles for your project. The needles should match the size of the yarn you are using.
- Tapestry Needle: This needle will come in handy when you need to unravel stitches and fix any mistakes.
- Scissors: Keep a pair of small scissors nearby to cut any yarn that needs to be removed.
- Stitch Markers: If you have placed stitch markers in your knitting, it can help you keep track of your stitches as you undo a row.
- Row Counter: Although not necessary, having a row counter can be helpful to keep track of the number of rows you have undone.
- Pen and Paper: Keep a pen and paper handy to take notes or make any necessary calculations.
Having these tools readily available will make the process of undoing a row in knitting much easier. Make sure to keep them within arm’s reach before you begin!
Locating the Mistake
Undoing a row in knitting can be a bit challenging, especially if you are an inexperienced knitter. The first step in undoing a row is to locate the mistake. This may require some close inspection of your knitting project.
If you are following a pattern, carefully compare your work to the pattern instructions. Look for any inconsistencies or deviations from the pattern. If you notice any differences, it is likely that you have made a mistake in that particular section.
In addition to comparing your work with the pattern instructions, you should also examine the stitches themselves. Look for any stitches that appear different or out of place. Common mistakes include accidental increases or decreases, yarn overs, or dropped stitches. These mistakes are often easy to spot as they disrupt the overall uniformity of the fabric.
If you are having trouble locating the mistake, try gently tugging on the fabric to see if any loose stitches reveal themselves. You can also use a tapestry needle or a small crochet hook to carefully examine each stitch and identify any errors.
Once you have located the mistake, you can proceed to the next step of undoing the row and fixing the error. Remember to take your time and be patient, as undoing a row requires careful attention to detail.
Preparing to Undo the Row
Before you begin undoing a row in knitting, it’s important to gather all the necessary tools and materials. Here are the steps to prepare:
- Gather the knitting project: Place your knitting project on a flat surface, like a table or lap, ensuring it is secure and won’t unravel further.
- Identify the row to be undone: Take a moment to assess the row you want to undo. Count the rows from the edge or use a stitch marker to mark the start of the row.
- Arm yourself with patience: Undoing a row in knitting can be a time-consuming process, especially if there are intricate stitch patterns or multiple rows to undo. Stay calm and patient throughout the process.
- Use a stitch holder or extra needle: If your pattern requires you to put the stitches on hold while undoing a row, have a stitch holder or an extra needle ready to transfer the stitches onto.
- Have a crochet hook or tapestry needle: A crochet hook or tapestry needle can come in handy when picking up dropped stitches or fixing any mistakes that might occur during the unraveling process.
- Be prepared to readjust your pattern: Undoing a row might change the stitch count or disrupt any stitch patterns. Take note of any pattern adjustments you may need to make after undoing the row.
By following these steps and being prepared, you’ll be ready to confidently undo a row in your knitting project.
Unraveling the Stitches
When you make a mistake in your knitting, it can be frustrating, but fortunately, fixing it is usually as simple as unraveling the stitches back to the point where the mistake was made. Here is a step-by-step guide on how to undo a row in knitting:
- Identify the mistake: Carefully examine your work to pinpoint where the mistake occurred. Look for any missed or extra stitches, twisted stitches, or any other inconsistencies.
- Secure your work: Before unraveling the stitches, it’s a good idea to secure your work to prevent any further unraveling. You can use a stitch marker, safety pin, or a locking stitch holder to hold the last correct row in place.
- Start unraveling: Locate the working yarn that is connected to the last stitch of the row below the mistake. Gently pull the working yarn to unravel the stitches, being careful not to pull too tightly.
- Fixing mistakes in stockinette stitch: If you made a mistake in stockinette stitch, such as a purl stitch instead of a knit stitch, you can simply unravel the row and then re-knit the stitches correctly. Make sure to pay attention to whether you need to knit or purl each stitch as you rework the row.
- Fixing mistakes in other stitch patterns: If you made a mistake in a more complicated stitch pattern, such as cables or lace, it can be a bit trickier to fix. In these cases, you may need to carefully tink (knit backwards) the stitches to correct the mistake or even drop down multiple rows to fix the error.
- Re-knit the row: Once you have unraveled the row back to the mistake, it’s time to re-knit the row correctly. Take your time to make sure you are working the stitches correctly to avoid making the same mistake again.
- Continue knitting: After fixing the mistake, you can continue knitting as normal. Remember to remove any stitch markers or holders that were used to secure the work.
Undoing a row in knitting may seem intimidating at first, but with a bit of practice and patience, it becomes a simple process. Remember to take your time and be gentle when unraveling the stitches to avoid any further damage to your work. Happy knitting!
Fixing the Error
If you make a mistake while knitting a row, don’t worry! Undoing a row is a simple process.
- Identify the mistake: Carefully examine your work to determine where the error occurred.
- Find the corresponding row: Look for the row below the mistake to locate the one that needs to be undone.
- Undo the stitches: Starting from the end of the row, carefully unravel each stitch using either a knitting needle or your fingers. Gently pull the working yarn to undo each stitch, making sure to keep track of the loops.
- Secure the loops: Once you have undone the row, use a stitch holder or safety pin to secure the loops. This will prevent them from unraveling further while you fix the mistake.
- Re-knit the row: Now that you have undone the row, you can re-knit it correctly. Follow the pattern instructions or your own design to recreate the stitches.
- Continue knitting: Once the row has been re-knit, continue working on your project as normal. Ensure that the stitches are correct before moving on to the next row.
Remember, undoing a row may seem daunting at first, but with practice, it will become easier. Take your time and be patient with yourself as you learn this valuable skill.
Reknitting the Row
When you realize you’ve made a mistake in your knitting and need to undo a row, it can be frustrating. However, with a few simple steps, you can easily reknit the row and fix your mistake.
Here’s a step-by-step guide on how to reknit the row:
- Identify the mistake: Carefully examine your knitting to determine where the mistake occurred. Look for any stitches that stand out or don’t match the pattern.
- Tink or rip back: If the mistake is within a few stitches or rows, you can tink (unknit) or rip back to the mistake. To tink, carefully unravel the stitches one by one, putting them back on the left-hand needle. To rip back, insert the right-hand needle into the stitch below the mistake, drop the old stitch off the left-hand needle, and undo the row until you reach the mistake.
- Place the stitches back on the needle: Once you’ve undone the row, carefully place the live stitches back onto the left-hand needle, making sure they’re not twisted.
- Reknit the row: Using the correct yarn and needles, reknit the entire row, following the stitch pattern. Pay attention to the tension of your stitches to match the rest of your work.
- Check your work: After reknitting the row, take a moment to check your work. Make sure the stitches are correct, and the pattern looks consistent with the rest of your knitting.
Remember to take your time and be patient when reknitting a row. It’s important to fix the mistake properly to ensure your finished project looks its best.
FAQ:
Is it possible to undo a row in knitting?
Yes, it is possible to undo a row in knitting. It is called “tinking” or “frogging” in knitting terminology.
Why would I want to undo a row in knitting?
There are several reasons why you might want to undo a row in knitting. It could be because you made a mistake in your pattern, you dropped a stitch, or you want to change the color or type of yarn you are using.
What tools do I need to undo a row in knitting?
You will need a knitting needle or crochet hook to undo the stitches, and a pair of scissors to cut the yarn if necessary.
Can I undo multiple rows of knitting?
Yes, you can undo multiple rows of knitting by carefully unraveling the stitches. However, it can be a bit trickier and time-consuming compared to undoing just one row.


