When it comes to knitting, gauge is an essential element to consider if you want your project to fit properly. Knit gauge refers to the number of stitches and rows per inch in a knitted fabric. It determines the size and overall fit of your finished piece, whether it’s a sweater, hat, or scarf.
Measuring knit gauge may seem intimidating, but with the right tools and a few simple steps, you can easily ensure that your project is the perfect size. In this guide, we will walk you through the process of measuring knit gauge step by step, so you can confidently start your next knitting project.
Step 1: Choose the right yarn and needles
The first step in measuring knit gauge is selecting the appropriate yarn and needles for your project. The recommended yarn and needle size can usually be found on the knitting pattern or yarn label. Make sure to use the same yarn and needle size as specified to achieve accurate results.
Step 2: Create a gauge swatch
Next, you’ll need to create a gauge swatch, which is a small sample of your knitting that you’ll use to measure your gauge. Cast on a few more stitches than the suggested stitch count and knit a few rows.
Pro tip: Use the stitch pattern that you’ll be using in your project for the swatch to get the most accurate results.
Step 3: Measure the swatch
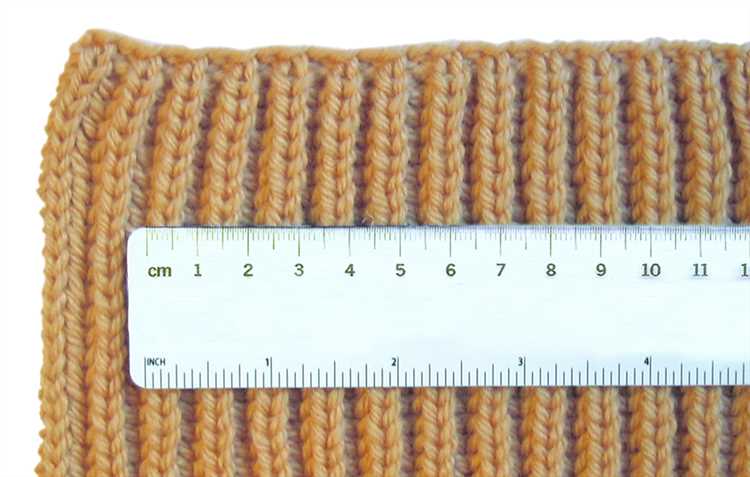
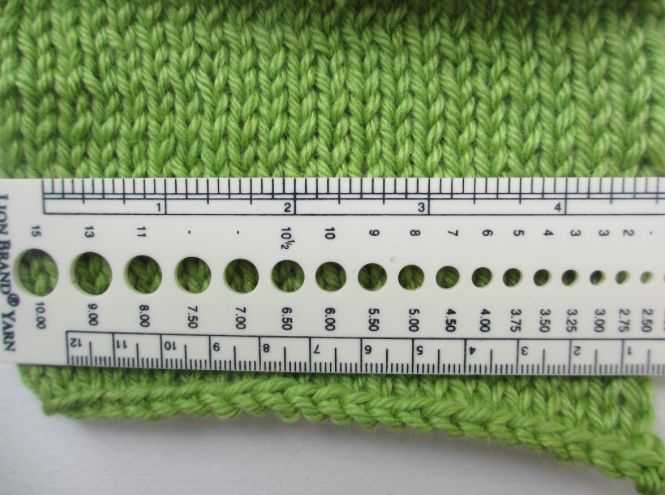
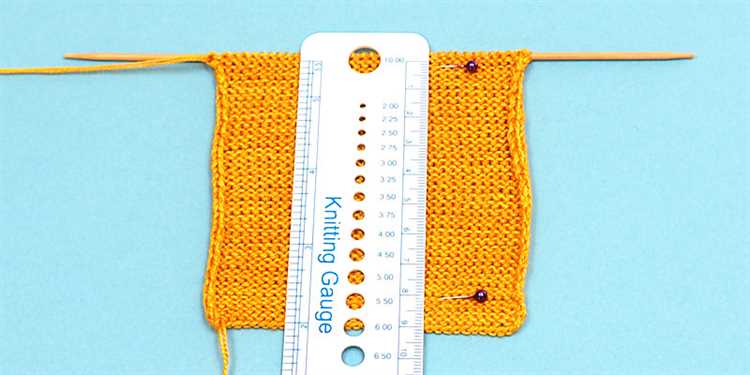
After you’ve finished knitting the swatch, lay it flat on a surface and measure its dimensions using a ruler or a knit gauge tool. Count the number of stitches and rows within a 4-inch section to determine your gauge.
Step 4: Adjust your needle size
If your gauge doesn’t match the pattern’s recommended gauge, you may need to adjust your needle size. If you have fewer stitches per inch than specified, switch to smaller needles. If you have more stitches per inch, switch to larger needles.
Step 5: Re-measure and make adjustments as needed
After making the necessary adjustments, knit another swatch using the new needle size. Repeat the measuring process and compare your new gauge to the pattern’s recommended gauge. Make any further adjustments if necessary.
By following these five simple steps, you can ensure that your knitting projects turn out the right size every time. Taking the time to measure your knit gauge will save you from disappointment and frustration down the line, and help you create beautiful, well-fitting garments and accessories that you’ll be proud to wear or gift to others.
What is a knit gauge?
A knit gauge, also known as a tension gauge or swatch, is a measurement tool used in knitting to determine the number of stitches and rows in a given area. It helps knitters achieve the correct sizing and fit for their knitted items, whether it’s a sweater, hat, or any other project. By comparing the knit gauge to the pattern’s recommended gauge, knitters can ensure that their finished project will have the intended size and proportions.
A knit gauge is typically created by knitting a swatch using the chosen yarn and needle size. The swatch is a small square or rectangular piece of knitting that is worked in the same stitch pattern as the project. It should be large enough to accurately measure the gauge and allow for any blocking or finishing techniques that will be used.
To measure the knit gauge, a ruler or measuring tape is used to count the number of stitches and rows within a set measurement, usually 4 inches (10 centimeters) square. The stitch gauge refers to the number of stitches per inch, while the row gauge indicates the number of rows per inch.
Once the knit gauge is determined, it can be compared to the pattern’s recommended gauge. If the knitter’s gauge matches the pattern, they can continue knitting with confidence. However, if the gauge is not the same, adjustments may need to be made by changing needle size or adjusting tension.
Using a knit gauge is especially important for garments that require precise sizing, such as fitted sweaters or items with specific measurements. It allows knitters to customize their projects to their desired dimensions and achieve the best possible fit.
Overall, a knit gauge is an essential tool for knitters to ensure accuracy and achieve the desired sizing and fit for their projects. By taking the time to measure and compare the gauge, knitters can confidently create beautiful and well-fitting knitted items.
Importance of measuring knit gauge
Measuring knit gauge is an essential step in knitting projects as it determines the size and fit of the finished garment. Whether you are knitting a sweater, a hat, or any other item, getting the gauge right is crucial to ensure that the final product matches the intended measurements.
Accurate sizing: Measuring the knit gauge allows you to determine the number of stitches and rows that fit within a specific measurement. This ensures that your finished piece will have the desired size and fit. Without measuring gauge, you run the risk of creating a garment that is too small or too large, resulting in disappointment and wasted time.
Pattern compatibility: Knitting patterns often provide a recommended gauge in order to achieve the same results as the designer. Measuring your knit gauge helps you determine whether your knitting tension matches the pattern’s requirements. If your gauge doesn’t match, you may need to adjust the needle size or choose a different yarn weight to achieve the desired outcome.
Yarn substitution: Measuring knit gauge is particularly important when substituting yarns. Different yarns have different thicknesses and properties, which can affect your gauge. By measuring the gauge, you can determine if the new yarn will result in the same size and fit as the original yarn recommended in the pattern.
Efficient use of yarn: Knitting is a creative art but it also requires a good amount of planning. Measuring gauge helps you calculate the amount of yarn needed for your project. If your gauge differs from the pattern’s gauge, you may require more or less yarn than anticipated. This knowledge helps you avoid running out of yarn or wasting excess yarn.
Improving skills: Measuring knit gauge is an important skill for any knitter to develop. It helps you understand your tension and knitting habits. By comparing your gauge to the recommended gauge, you can identify any inconsistencies and work on improving your knitting technique for more consistent results.
Professional finishing: Taking the time to measure the knit gauge ensures that your finished piece has a professional look. A garment with the accurate gauge will have even stitches and a balanced appearance. This attention to detail and precision can elevate your knitting projects to the next level.
In conclusion, measuring knit gauge is a crucial step in any knitting project. It ensures accurate sizing, compatibility with patterns, successful yarn substitution, efficient use of yarn, skill improvement, and professional finishing. By taking the time to measure your gauge, you increase the likelihood of achieving the perfect fit and the desired outcome for your knitted creations.
Tools needed for measuring knit gauge
To accurately measure your knit gauge, you will need a few simple tools. These tools will help ensure that you obtain accurate measurements and achieve the correct sizing for your knitted projects.
- Knitting needles: Select the knitting needles that you plan to use for your project. Make sure they are the correct size as indicated in your knitting pattern. Using the wrong size needles can affect your gauge.
- Yarn: Choose the yarn that you will be using for your project. Make sure it is the same yarn that is recommended in your knitting pattern. Different yarns can have different gauges, so using the same yarn will provide the most accurate results.
- Ruler or tape measure: You will need a ruler or tape measure to measure your gauge. Make sure it is long enough to measure the required number of stitches and rows.
- Stitch marker: A stitch marker can be helpful for keeping track of your stitches while measuring your gauge. This can be particularly useful if you are measuring a large number of stitches.
- Gauge swatch: Before you can measure your gauge, you will need to create a gauge swatch. This is a small sample piece that you knit using the chosen needles and yarn. The swatch should be large enough to measure at least 4 inches in both width and height.
Once you have gathered these tools, you will be ready to measure your knit gauge. Following the correct measuring techniques will ensure that your finished project fits properly and matches the sizing indicated in your knitting pattern.
Step 1: Choose the right yarn and needles
Before you can begin measuring your knit gauge, it’s important to choose the right yarn and needles for your project. These two factors can greatly affect the accuracy of your measurements and the final sizing of your knitted item.
1. Yarn: When selecting yarn, consider the recommended yarn weight for your pattern. The weight of the yarn will determine the size of the stitches and the overall drape of your project. Look for yarn labels that indicate the weight category, such as “worsted,” “chunky,” or “fingering.” If your pattern doesn’t specify a yarn weight, you can choose one that is similar in thickness to the yarn used in the original project.
2. Needles: The size of your needles will also impact your knit gauge. Different needle sizes can result in different stitch sizes and overall tension. Refer to your knitting pattern for the recommended needle size. If you are unsure, start with a needle size that is slightly smaller than what is recommended, as this can help create tighter stitches.
It’s important to note that every knitter has their own unique tension, so your gauge may vary even if you are using the same yarn and needles as specified in the pattern. This is why it’s crucial to measure your gauge before starting your project.
Step 2: Cast on stitches
Once you have chosen your knitting needles and yarn, it’s time to cast on stitches. Casting on is the process of creating the foundation row of stitches on your knitting needles.
To cast on stitches, follow these steps:
- Hold the yarn: Hold the end of the yarn in your right hand, with the ball of yarn on the opposite side of your work.
- Create a slipknot: With your right hand, make a loop with the yarn, bringing the end of the yarn over the top of the loop. Insert your needle through the loop, and pull the loose end of the yarn to tighten the loop onto the needle. This creates a slipknot.
- Hold the slipknot: Hold the slipknot with your left thumb and forefinger, allowing the needle to hang down. The working yarn should be attached to the ball of yarn, with the tail end of the yarn hanging down.
- Insert the needle: With your right hand, insert the needle from front to back through the loop of the slipknot, bringing it up and over the working yarn.
- Create the first stitch: With the working yarn in your right hand, wrap it around the needle in a counterclockwise direction. Use your right hand to pull the working yarn through the loop, creating a new stitch on the needle.
Repeat steps 4 and 5 until you have cast on the desired number of stitches for your project.
Casting on stitches may take some practice to get the tension and size of the stitches just right. Make sure the stitches are not too tight or too loose, as this can affect your gauge and the overall size of your finished project.
Once you have cast on the stitches, you can proceed to the next step, which is knitting a few rows to establish your gauge.
Step 3: Measure the gauge swatch
After you have finished knitting the gauge swatch, it’s time to measure it to determine your knitting gauge. Measuring the gauge swatch accurately is essential for achieving the correct sizing in your knitting project.
- Get a ruler or gauge tool: You will need a ruler or a gauge tool specifically designed for measuring knitting gauge. These tools usually have measurements in inches or centimeters and are marked with rows and stitches.
- Place the swatch on a flat surface: Lay your finished gauge swatch on a flat surface, making sure that it is not stretched or distorted.
- Align the ruler or gauge tool: Position the ruler or gauge tool on top of the swatch, aligning it with the rows and stitches.
- Count the stitches and rows: Use the marked measurements on the ruler or gauge tool to count the number of stitches and rows within a set measurement, such as one inch or ten centimeters. Count both horizontally and vertically.
- Calculate your gauge: Once you have counted the stitches and rows, you can calculate your gauge. Divide the number of stitches by the measured width, and divide the number of rows by the measured height. This will give you the number of stitches and rows per inch or centimeter.
It’s important to measure your gauge swatch accurately to ensure that your finished project will match the desired dimensions. Take your time and double-check your measurements to get an accurate gauge.
Step 4: Calculate the gauge
To determine the gauge of your knit project, you’ll need to measure the number of stitches and rows in a given measurement. With this information, you can calculate the gauge and ensure your project is the correct size.
- Using a ruler or tape measure, measure a 4-inch by 4-inch square on your knitted fabric.
- Count the number of stitches that fit horizontally within the square. This is your stitch gauge.
- Count the number of rows that fit vertically within the square. This is your row gauge.
For example, if you have 20 stitches across and 24 rows vertically within the 4-inch by 4-inch square, your gauge would be 20 stitches and 24 rows per 4 inches.
Keep in mind that the gauge may vary depending on the yarn, needle size, and tension you use. It’s essential to follow the pattern’s recommended gauge to achieve the desired size and fit.
If your gauge doesn’t match the pattern, you may need to adjust your needle size. If your gauge has fewer stitches and rows per inch than the pattern requires, use smaller needles. Conversely, use larger needles if your gauge has more stitches and rows per inch. Remember to make a new gauge swatch with the adjusted needle size to ensure accuracy.
Calculating and adjusting the gauge is crucial for achieving the perfect sizing of your knit project. Take the time to measure and adjust as needed to ensure your final piece fits just right.
Step 5: Adjust the needle size if necessary
After measuring your knit gauge, you may find that it does not match the recommended gauge specified in your knitting pattern. In this case, you will need to adjust the needle size to achieve the correct gauge.
If your gauge is too tight (meaning you have more stitches per inch than the recommended gauge), you will need to use larger needles. This will create larger stitches and ultimately result in a looser fabric. You can try going up a needle size or two and re-measure your gauge until you reach the desired stitch count per inch.
On the other hand, if your gauge is too loose (meaning you have fewer stitches per inch than the recommended gauge), you will need to use smaller needles. This will create smaller stitches and result in a tighter fabric. Try going down a needle size or two and re-measure your gauge until the stitch count per inch matches the recommended gauge.
Remember that the type of yarn you are using, your tension, and your knitting style can all affect your gauge. It is important to do a gauge swatch before starting your project and make any necessary adjustments to ensure the final garment or item has the correct measurements.
FAQ:
Why is it important to measure knit gauge?
It is important to measure knit gauge because it determines the size and fit of your knitted garment. If your gauge is off, your garment might end up too big or too small. Measuring gauge ensures that your project will turn out the way you want it to.
What materials do I need to measure knit gauge?
To measure knit gauge, you will need a measuring tape or ruler, a swatch of your knitted fabric, and your knitting needles. It may also be helpful to have a calculator handy, especially if you need to make any adjustments to the pattern based on your gauge.
How do I measure my knit gauge accurately?
To measure knit gauge accurately, start by knitting a swatch using the recommended yarn and needle size stated in your knitting pattern. Once your swatch is complete, lay it flat on a table and use a measuring tape or ruler to count the number of stitches and rows per inch. This will give you your gauge. Make sure to measure in a few different areas of the swatch to account for any variation.
What should I do if my gauge is off?
If your gauge is off, meaning you have more or fewer stitches and rows per inch than what is called for in the pattern, you will need to make adjustments. If your gauge is too loose, you can try using smaller needles. If your gauge is too tight, you can try using larger needles. You may also need to adjust your tension while knitting. It is important to knit another swatch with the adjusted needles and tension to see if it matches the pattern gauge.


