Are you interested in learning how to knit? The seed stitch is a great place to start! It’s a simple yet versatile stitch that creates a lovely textured pattern. Whether you’re a complete beginner or have some knitting experience, this guide will walk you through the steps of knitting the seed stitch.
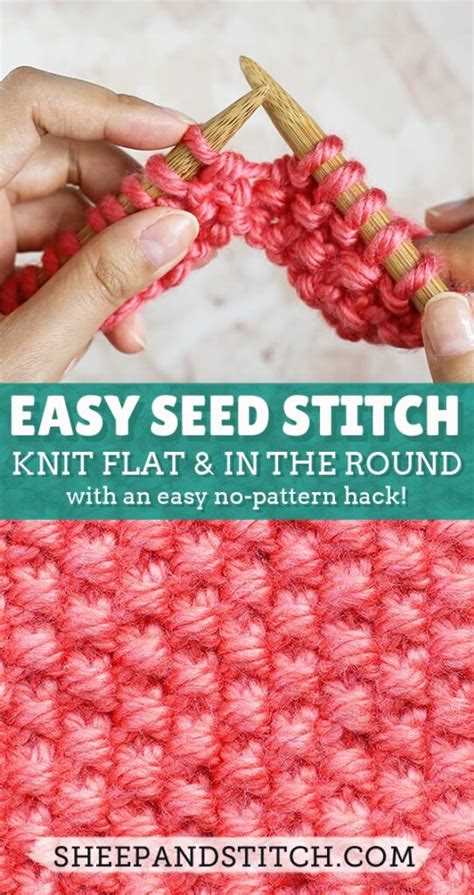
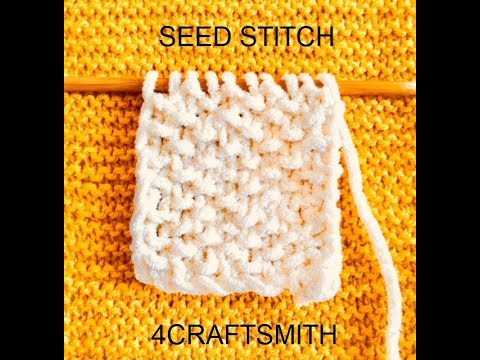
The seed stitch is a pattern that alternates between knit and purl stitches in a row. This creates a texture that resembles scattered seeds or little bumps on the fabric. The beauty of the seed stitch is that it looks complex, but it’s actually quite easy to knit. It’s a great way to practice the basic knitting stitches and get comfortable with them.
To knit the seed stitch, you’ll need some basic knitting supplies: knitting needles and yarn. Choose a pair of needles that are appropriate for the yarn you’re using. As for the yarn, a medium-weight yarn is a good choice for beginners. Make sure to check the yarn label for recommended needle size and gauge.
Once you have your supplies ready, you can begin knitting the seed stitch. Start by casting on an even number of stitches. Then, follow the pattern of knitting one stitch and purling one stitch in each row. Repeat these two stitches until you reach the desired length. Finish off your knitting by binding off the stitches, and you’ll have a beautiful seed stitch fabric!
With this beginner’s guide, you’ll be able to learn how to knit the seed stitch and create beautiful textured projects. You can use the seed stitch in various knitting projects, such as scarves, blankets, and hats. So grab your knitting needles and yarn, and start practicing this versatile stitch today!
The Basics of Seed Stitch: A Beginner’s Guide
Seed stitch is a basic knitting stitch that creates a dense, textured fabric. It is perfect for beginners who are just starting to learn how to knit because it only involves two stitches: the knit stitch and the purl stitch. In this guide, we will walk you through the steps of knitting seed stitch and provide some tips and tricks to help you along the way.
Materials Needed
- Knitting needles
- Yarn of your choice
- Tapestry needle
- Scissors
Step-by-Step Guide
- Cast on an even number of stitches on your knitting needles.
- Row 1: *Knit 1, purl 1.* Repeat from * to * across the entire row.
- Row 2: *Purl 1, knit 1.* Repeat from * to * across the entire row.
- Repeat rows 1 and 2 until your piece reaches the desired length.
- Bind off all stitches.
- Weave in any loose ends with a tapestry needle.
Seed stitch creates a fabric that looks like a field of scattered seed beads. The alternating knit and purl stitches create a bumpy texture that is both visually appealing and soft to the touch.
Here are a few tips and tricks to help you master seed stitch:
- Pay close attention to your stitch pattern. It can be easy to lose track of whether you should be knitting or purling, especially when you first start out.
- Try to keep your tension consistent. Too tight of a tension can make the fabric stiff and difficult to work with, while too loose of a tension can result in a loopy, loose fabric.
- Practice, practice, practice! Knitting seed stitch may feel a bit awkward at first, but with repetition, it will become second nature.
With this beginner’s guide, you are ready to start knitting seed stitch. Grab your knitting needles, choose your favorite yarn, and get started on your first seed stitch project today!
Why Should You Learn Seed Stitch?
The seed stitch is a fundamental knitting stitch that is easy to learn and versatile in its application. Whether you are a beginner or an experienced knitter, there are several reasons why you should learn the seed stitch:
- Simple and Easy: The seed stitch is one of the simplest knitting stitches to learn. It only requires basic knitting skills such as knit and purl stitches, making it accessible to beginners. Once you master the seed stitch, you can create a variety of beautiful patterns and textures.
- Textured Fabric: The seed stitch creates a textured fabric that is visually appealing and adds interest to your knitting projects. The alternating knit and purl stitches result in a bumpy surface that resembles scattered seeds, hence the name “seed stitch”. It is perfect for creating scarves, hats, and other accessories.
- Reversible: One of the unique features of the seed stitch is that it is reversible. Both sides of the fabric look almost identical, making it suitable for projects that require a finished look on both sides. This is especially useful for items like blankets, wraps, and cowls.
- Versatile: The seed stitch can be used in a wide range of knitting projects. You can incorporate it into garments, such as sweaters and cardigans, to add texture and visual interest. It is also commonly used for borders, cuffs, and hems to provide a contrasting texture. The possibilities are endless!
- Practice and Build Skills: Learning the seed stitch helps you practice and build essential knitting skills. It improves your ability to read knitting patterns, count stitches, and maintain tension. These skills will come in handy as you progress to more complex knitting techniques.
In conclusion, learning the seed stitch is a valuable skill for any knitter. It is easy to learn, versatile in its application, and allows you to create beautiful textured fabric. So grab your knitting needles and yarn, and start exploring the endless possibilities of the seed stitch!
Getting Started: Tools and Materials
Before you begin learning how to knit the seed stitch, it’s important to gather all the necessary tools and materials. Here’s a list of what you’ll need:
- Knitting Needles: You’ll need a pair of knitting needles in the appropriate size for your chosen yarn. Choose a size that will create a fabric with a comfortable drape.
- Yarn: Select a yarn that you’re comfortable working with and that is suitable for the project you have in mind. For the seed stitch, you can use any type of knitting yarn, but a medium-weight yarn is typically recommended for beginners.
- Tapestry Needle: A tapestry needle with a large eye will be used for weaving in ends and finishing your knitting project.
- Scissors: A pair of scissors will be needed to cut the yarn when you finish your project or need to change colors.
- Stitch Markers (optional): Stitch markers can be used to mark specific stitches or sections of your knitting, which can be particularly helpful if you’re working on a more complex pattern.
- Measuring Tape (optional): A measuring tape can come in handy when you need to check gauge or measure the dimensions of your finished project.
Once you have gathered all the necessary tools and materials, you’ll be ready to start learning how to knit the seed stitch. Remember to always choose good quality needles and yarn that you feel comfortable working with, as this can greatly affect your knitting experience.
Casting On: The First Step
Before you can start knitting, you need to cast on. Casting on is the process of creating the foundation row of stitches on your needle, and there are a few different methods you can use. In this guide, we’ll go over the long-tail cast-on method, which is commonly used for the seed stitch.
Here are the steps to cast on using the long-tail method:
- Step 1: Hold the end of your yarn in your right hand and make a slipknot by forming a loop. Leave a tail that is approximately 4 times the width of your knitting project.
- Step 2: Insert your knitting needle into the loop of the slipknot and tighten it securely.
- Step 3: Hold the needle with the slipknot in your right hand, and use your left hand to hold the yarn that is attached to the ball.
- Step 4: With your left thumb and index finger, reach over the yarn attached to the ball and grab the tail end of the yarn, forming a loop on your thumb and index finger.
- Step 5: Use your needle to go through the loop on your thumb from front to back, and then go over the yarn on your index finger.
- Step 6: Bring your thumb out of the loop and tighten the stitch on your needle.
- Step 7: Repeat steps 4-6 until you have cast on the desired number of stitches.
Once you have cast on all your stitches, you’re ready to start knitting the seed stitch. The seed stitch is a great stitch for beginners as it creates a textured fabric that lies flat and is reversible. It is made up of alternating knit and purl stitches, and we’ll cover how to do that in the next section.
Note: The number of stitches you cast on will depend on the width of your project. You can find the recommended number of stitches in your knitting pattern or consult a knitting reference book.
The Main Stitch Pattern: K1, P1
- The main stitch pattern used in seed stitch is called K1, P1.
- K1 stands for “knit 1” and P1 stands for “purl 1”.
- The K1, P1 pattern is repeated across the row or round to create the seed stitch texture.
- To start a row with K1, P1, begin by knitting the first stitch and purling the second stitch.
- Continue alternating between knitting and purling stitches for the entire row or round.
- When working on a flat knitting project, make sure to end the row with a purl stitch to maintain the pattern.
- If working in the round, simply continue the K1, P1 pattern without needing to switch between knit and purl stitches at the beginning or end of each round.
- The K1, P1 pattern creates a fabric that is reversible, making seed stitch a great choice for scarves, blankets, and other projects where both sides of the fabric will be visible.
Adding Some Variety: Seed Stitch Variations
If you’ve already mastered the basic seed stitch, you might be interested in trying out some variations to add some diversity to your knitting projects. Here are a few seed stitch variations that you can experiment with:
- Half Seed Stitch: This variation is created by working the seed stitch pattern over an even number of stitches, alternating between knitting and purling every other row. This creates a more textured fabric with a denser look.
- Moss Stitch: Also known as double seed stitch, this variation is created by alternating between knitting and purling every stitch. This results in a fabric that has a more pronounced texture and is often used for cozy scarves or blankets.
- Broken Seed Stitch: This variation is similar to the traditional seed stitch, but includes occasional rows of all knit stitches or all purl stitches. This creates a broken texture and can be used to add visual interest to your knitting.
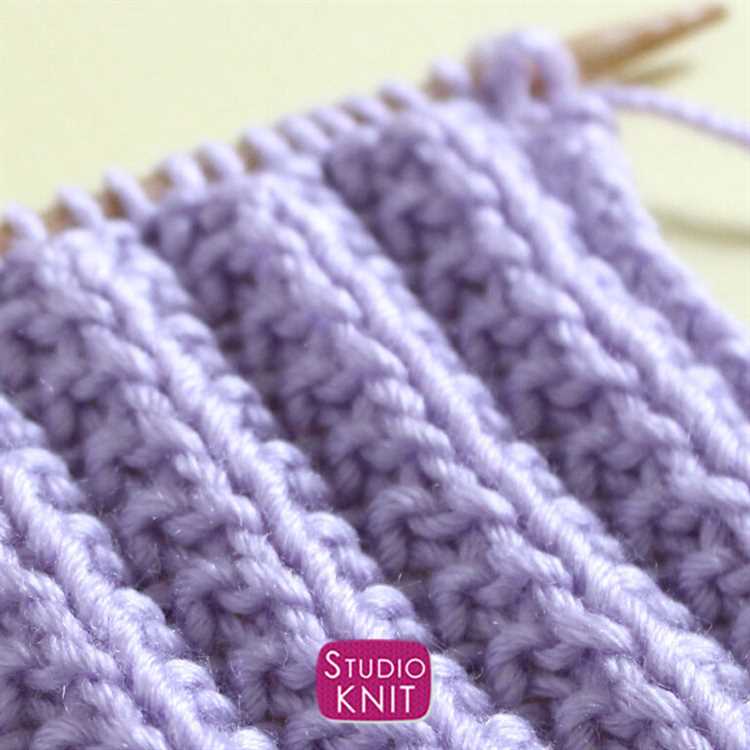
- Seed Rib Stitch: Combining the seed stitch with ribbing, this variation is created by working a set number of rows in seed stitch and then switching to a ribbing pattern such as knit 2, purl 2. This creates a fabric with both texture and stretch.
- Garter Seed Stitch: This variation combines the garter stitch and seed stitch to create a fabric with alternating rows of garter stitch and seed stitch. This creates a more pronounced texture and can be used for scarves, hats, or even sweaters.
Feel free to experiment with these seed stitch variations to create unique designs and textures in your knitting projects. Don’t be afraid to mix and match different stitch patterns to create even more variety. Happy knitting!
Troubleshooting: Common Mistakes to Avoid
When learning how to knit seed stitch, beginners often make some common mistakes. Here are some troubleshooting tips to help you avoid them:
1. Confusing Knit and Purl Stitches
One of the most common mistakes beginners make is confusing knit and purl stitches. Remember that in seed stitch, you alternate between knitting and purling stitches. Pay close attention to your pattern and double-check your work to make sure you’re using the correct stitch.
2. Forgetting to Change Stitches
In seed stitch, it’s important to alternate between knitting and purling stitches in every row. Some beginners forget to switch between stitches, resulting in an inconsistent pattern. Keep track of your stitches by placing stitch markers or simply paying close attention to your work.
3. Uneven Tension
Another common mistake is having uneven tension throughout your knitting. This can result in a lopsided or bumpy seed stitch pattern. Practice maintaining a consistent tension by knitting slowly and evenly. You may also want to experiment with different needle sizes to find the right fit for your knitting style.
4. Skipping the Slip Stitch
Seed stitch sometimes involves slipping stitches to create the pattern. Beginners may accidentally skip these slip stitches, disrupting the intended pattern. Make sure to carefully follow your pattern instructions and pay attention to any slip stitch indications.
5. Not Counting Stitches
Counting your stitches is crucial for maintaining the seed stitch pattern. Beginners may accidentally add or skip stitches, resulting in an uneven pattern. Use stitch markers or count your stitches after each row to ensure accuracy.
6. Ignoring Gauge
Gauge refers to the number of stitches and rows per inch, which can vary from person to person. Ignoring gauge can lead to a finished piece that is too tight or too loose. Take the time to check your gauge and make any necessary adjustments before starting your project.
7. Lack of Patience
As with any new skill, learning how to knit seed stitch takes time and practice. It’s essential to have patience and not get discouraged by mistakes. Take your time, learn from your errors, and keep practicing. With persistence, you’ll master the seed stitch technique.
By avoiding these common mistakes and staying patient, you’ll improve your seed stitch knitting skills and create beautiful patterns.
Finishing Your Seed Stitch Project
Once you have completed your seed stitch project, it’s time to finish it off with some final touches. Here are a few steps you can follow to give your project a polished and professional look:
- Weave in loose ends: Take a yarn needle and use it to weave in any loose ends of yarn that may be sticking out from your project. This will ensure that your project looks neat and tidy.
- Blocking: Depending on the type of yarn and size of your project, you may want to consider blocking your seed stitch project. This involves wetting your project and then carefully shaping and laying it flat to dry. Blocking can help even out any irregularities in your stitches and give your project a more finished look.
- Add any desired embellishments: If you want to add any decorative touches to your seed stitch project, now is the time to do so. You could add buttons, embroidery, or any other embellishments that you desire. Just be sure to carefully sew them on so they are secure.
- Care instructions: It’s always a good idea to include care instructions when giving or selling your seed stitch project. Make sure to include information on how to wash and care for the item to ensure its longevity.
Following these steps will help ensure that your seed stitch project is finished off beautifully. Take your time and enjoy the process of completing your knitting project!
FAQ:
What is seed stitch?
Seed stitch is a basic knitting stitch pattern that creates a textured fabric by alternating knit and purl stitches.
How do I knit seed stitch?
To knit seed stitch, you need to alternate between knitting and purling each stitch across the row. On the next row, you have to knit the stitches that look like purls and purl the stitches that look like knits.
Can seed stitch be used to create patterns?
Yes, seed stitch can be used to create various patterns. By combining seed stitch with other knitting stitches, you can create different textures and designs in your knitted projects.
Is seed stitch suitable for beginners?
Yes, seed stitch is great for beginners as it only involves basic knit and purl stitches. It is a simple stitch pattern that is easy to learn and creates a beautiful texture.


