Knitting is a beloved craft that has been passed down through generations. It allows people to create beautiful and functional items using just a pair of needles and some yarn. While the process of knitting itself can be relaxing and enjoyable, one of the least favorite tasks for many knitters is weaving in ends.
When knitting a project, there are often loose ends of yarn that need to be secured and hidden so that the finished piece looks neat and professional. Weaving in ends is a necessary step in completing any knitted item, but it can often be a tedious and time-consuming process if not done correctly.
Fortunately, there are several techniques and tips that can make weaving in ends easier and more efficient. In this article, we will explore the best practices for weaving in ends, including how to secure them securely, how to choose the right yarn for weaving, and how to hide the ends so seamlessly that they become invisible in the finished piece.
By learning and applying these techniques, knitters can make the process of weaving in ends faster and more enjoyable. No longer will they dread this task, but instead, they will be able to confidently finish their knitting projects and proudly show off their beautiful creations.
Why is it important to weave ends in knitting?
When it comes to knitting, weaving in ends refers to the process of securing loose yarn tails that are left after changing colors, joining a new ball of yarn, or finishing a project. While it may seem like a tedious and unnecessary step, weaving in ends is actually an important part of the knitting process. Here’s why:
- Prevents unraveling: Weaving in ends ensures that the yarn tails are securely fastened, preventing any unraveling or fraying of the stitches. This is especially crucial for garments and accessories that will undergo regular wear and tear.
- Improves aesthetics: Leaving loose ends hanging out can make even the most beautiful knitting projects look messy and unfinished. Weaving in ends helps achieve a polished and professional look, making your hard work shine.
- Enhances durability: By weaving in ends, you create a stronger bond between the yarn tails and the fabric. This adds stability and durability to your knitted piece, ensuring it withstands washing, stretching, and general use without falling apart.
- Prevents tangling: Loose ends can easily become tangled or caught in other stitches, leading to difficulty in working on or wearing the knitted item. Weaving in ends eliminates this risk and ensures a smoother knitting experience.
- Allows for modifications: Weaving in ends in a neat and organized manner makes it easier to make modifications or repairs to your knitting project in the future. It keeps the ends secure but also accessible, should they need to be unraveled and reworked.
Overall, weaving in ends is an essential step in any knitting project. It not only provides structural integrity and longevity but also contributes to the overall aesthetic appeal of the finished piece. So, take the time to weave in those ends and enjoy the satisfaction of a well-executed knitting project.
The best techniques for weaving ends in knitting
When you finish knitting a project, one of the final steps is weaving in the loose ends. This ensures that your work stays intact and prevents unravelling or snagging. There are several techniques you can use to weave in ends, and the best technique will depend on the type of yarn and project you are working on. Here are some tried and true methods:
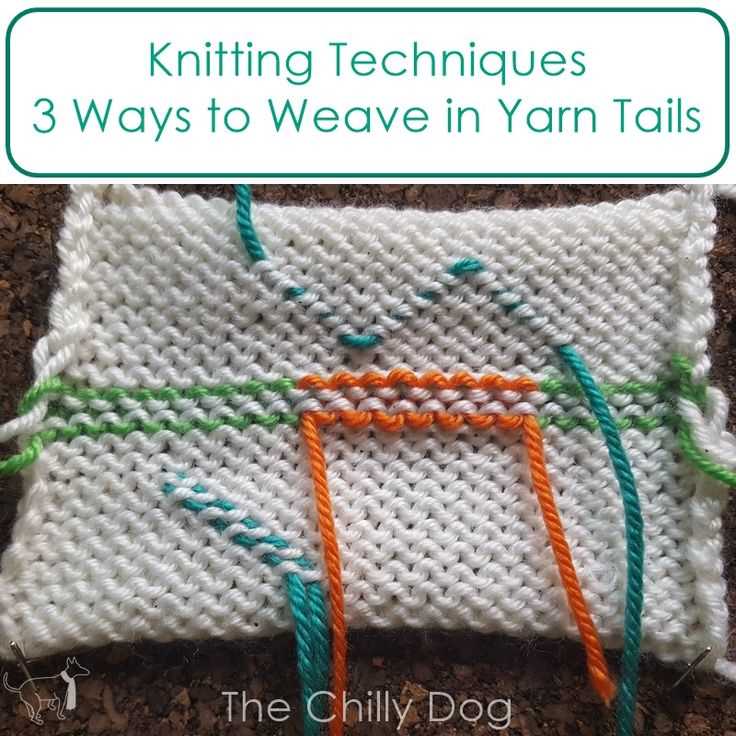
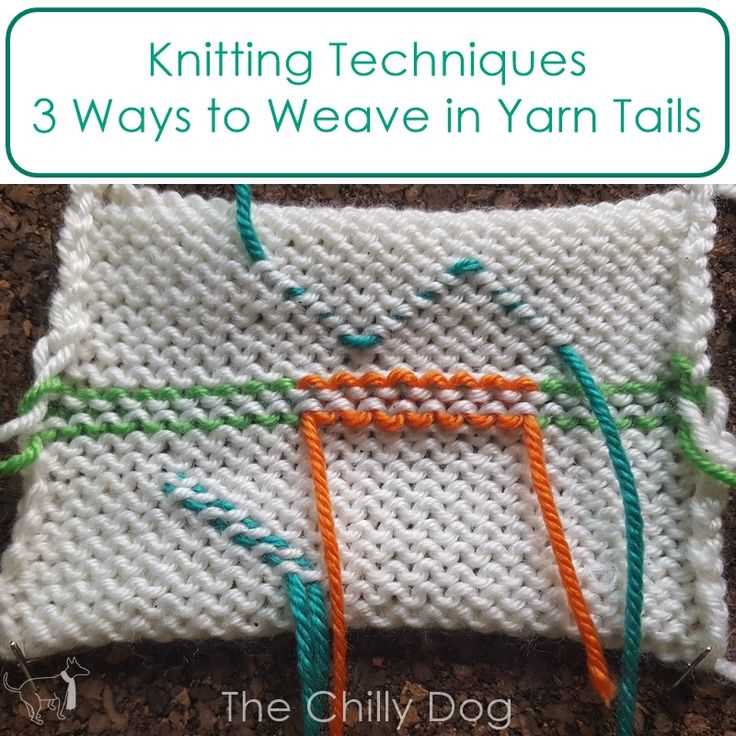
- The Duplicate Stitch Technique: This technique involves replicating the knit or purl stitches with a darning needle and yarn to secure the ends. It works well for colorwork projects or when you want the ends to blend seamlessly into the fabric.
- The Slip Stitch Technique: With this technique, you slip the darning needle through the stitches on the wrong side of the work, creating a secure and nearly invisible finish. This technique is great for slippery or delicate yarns.
- The Weaving Technique: This is a simple and effective method where you weave the loose ends through the stitches on the wrong side of the work. It works well for most yarn types and can be used on both ends of the project.
When weaving in ends, make sure to leave a tail of at least 6 inches (15 cm) to ensure a secure finish. Always weave the ends in the same direction as the stitch pattern to maintain the integrity of the fabric.
Another important consideration is where to weave the ends. Try to weave them in inconspicuous places, such as along the edge or in the same color sections of the project. Avoid weaving them in areas that will be subject to a lot of stress or tension, as this can increase the likelihood of the ends coming loose.
- Finishing Techniques for Specific Projects:
If you are working on a project that has additional finishing steps, such as seaming or blocking, it is best to weave in the ends after completing these steps. This will ensure that the ends are secured and hidden within the finished project.
| Project Type | Recommended Finishing Technique |
|---|---|
| Sweaters or garments | Weave in ends along the seams or in the same color sections |
| Scarves or shawls | Weave in ends along the edges or in the same color sections |
| Hats or mittens | Weave in ends near the ribbing or in inconspicuous places |
Remember, practice makes perfect when it comes to weaving in ends. Experiment with different techniques and find what works best for you and your projects. With a little bit of patience and attention to detail, you can achieve a professional finish and enjoy your knitted creations for years to come.
How to secure your ends when weaving them
When finishing a knitting project, one of the most important steps is weaving in the ends. This ensures that your project looks neat and professional, while also preventing your stitches from unraveling over time. Here are some techniques for securing your ends when weaving them:
- Knotting: One of the most common ways to secure your ends is by knotting them. Simply tie a knot at the base of your work, closest to the last stitch made. This will help to hold the end in place and prevent it from coming undone.
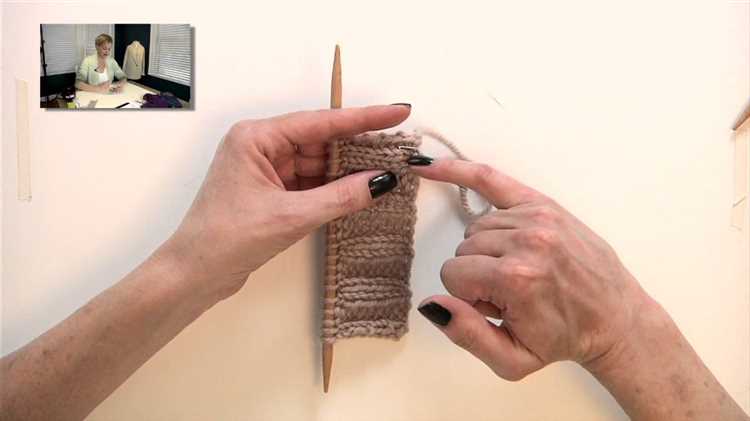
- Weaving through stitches: Another method is to weave the end through your stitches. Thread the end onto a tapestry needle and carefully weave it in and out of the stitches on the wrong side of your work. Make sure to vary the direction and path of the woven end to ensure it is secure.
- Weaving in the edge: If you have a garter stitch or ribbed edge, you can weave your end along the edge itself. This helps to hide the end and secure it in place. For garter stitch, weave the end horizontally through the bumps on the wrong side. For ribbing, weave the end in a zigzag pattern between the columns of stitches.
- Weaving in duplicate stitch: Duplicate stitch, also known as Swiss darning, can be used to secure your ends while adding a decorative touch. Thread the end onto a tapestry needle and use it to embroider over a few stitches, following the pattern of your work. This will secure the end and make it less noticeable.
Whichever method you choose, it is important to ensure that your ends are secure and will not come undone with use. Take your time and weave the end through multiple stitches to ensure a strong hold. Once you have finished weaving in your ends, carefully trim any excess yarn, leaving a small tail to prevent unraveling.
Understanding how different yarns behave when woven in
When weaving in ends in knitting, it’s important to consider the type of yarn you’re working with. Different yarns have different characteristics and will behave differently when woven in. Here are some factors to consider:
- Fiber composition: Yarns made from different fibers, such as wool, cotton, acrylic, or blends, have varying levels of elasticity and durability. This can affect how well the ends stay in place when woven in.
- Twist: Yarns with a higher twist tend to be more cohesive and less likely to unravel. They may require less reinforcement when weaving in the ends.
- Texture: Yarns with a smoother texture may slip more easily when woven in, while yarns with a more textured surface may provide better grip.
- Thickness: Thicker yarns may require more space when woven in, as they take up more bulk. You may need to leave longer tails to ensure they are secured properly.
- Color: Yarns of different colors may be more or less forgiving when it comes to visible ends. Darker yarns or those with complex patterns may help hide woven-in ends more effectively.
When working with different yarns, it’s a good idea to test the weaving technique on a swatch before using it on a larger project. This will allow you to see how the yarn behaves and adjust your techniques accordingly. Remember, practice and experimentation will help you find the best method for weaving in ends with each type of yarn.
Tips and tricks for achieving a seamless finish
When it comes to knitting, achieving a seamless finish can make all the difference in the final look of your project. Here are some tips and tricks to help you achieve a professional-looking finish:
-
Weave in ends as you go: One of the best ways to ensure a seamless finish is to weave in your ends as you go. This means that instead of leaving all the finishing work till the end, you weave in the ends of each color or yarn as you finish using them. This not only helps reduce the amount of work and prevents tangling, but it also creates a neater and seamless finish.
-
Use the duplicate stitch method: The duplicate stitch method involves using a yarn needle to essentially duplicate the existing stitches to weave in your ends. This method is ideal for achieving a seamless finish in colorwork projects, as the duplicate stitches blend in seamlessly with the surrounding stitches.
-
Split the plies: If you’re working with a plied yarn, splitting the plies can help create a more invisible and seamless finish. Simply separate the plies of the yarn and weave in each ply separately. This technique is particularly useful for achieving a seamless finish in areas with high contrast or when working with variegated yarns.
-
For added security, use a knot: While some knitters prefer to avoid knots in their knitting, using a knot can provide added security and prevent your ends from coming loose. When using a knot, make sure to keep it small and tight, and choose a spot where it will be hidden from view.
-
Leave a long tail: When starting a new ball of yarn or changing colors, leaving a long tail can make weaving in the ends easier and create a neater finish. Aim to leave a tail that’s at least 6 inches long, or longer if you’re working with thicker yarn. This will give you enough yarn to weave in the ends securely.
Remember, achieving a seamless finish takes a little extra time and effort, but the final result is well worth it. With these tips and tricks, you’ll be able to create projects that have a polished and professional look.
Common mistakes to avoid when weaving ends
When it comes to weaving in ends in knitting, there are several common mistakes that can easily be avoided. By being aware of these pitfalls and taking the time to weave in your ends correctly, you can ensure that your finished knitted projects look polished and professional.
- Not securing the tail properly: One of the most common mistakes is not securing the tail of the yarn properly when weaving in the ends. It’s important to make sure that the tail is securely woven into the stitches to prevent it from unraveling over time.
- Skipping the blocking step: Another common mistake is skipping the blocking step before weaving in the ends. Blocking helps to shape the knitted fabric and can make a big difference in the final appearance of the project. Make sure to block your project before weaving in the ends to ensure a professional finish.
- Weaving in ends too tightly: It’s important to weave in ends with just the right amount of tension. If you weave in the ends too tightly, it can cause the fabric to pucker or distort. On the other hand, if you weave in the ends too loosely, they may come undone over time. Practice finding the right balance between too tight and too loose.
- Not weaving in the ends securely: When weaving in the ends, make sure to weave the tail through several stitches in different directions to ensure that it is securely fastened. This will help to prevent the end from coming loose and unraveling later on.
- Weaving in ends too close to the edge: Avoid weaving in ends too close to the edge of your project, as this can cause the ends to poke out and become visible. Instead, weave in the ends towards the middle of the fabric where they will be better hidden.
- Not using a blunt needle: When weaving in ends, it’s important to use a blunt needle to avoid splitting the yarn or damaging the stitches. A blunt needle will make it easier to weave the ends through the fabric without causing any damage.
- Not cutting the tail to the right length: Finally, make sure to cut the tail of the yarn to the right length. If it’s too short, it may come undone. If it’s too long, it may be visible through the fabric. Aim to leave a tail that is long enough to be woven in securely, but not so long that it becomes a distraction.
By avoiding these common mistakes and taking the time to weave in your ends correctly, you can ensure that your knitted projects have a professional and polished finish.
FAQ:
What are the best techniques for weaving ends in knitting?
The best techniques for weaving ends in knitting include the duplicate stitch method, the Russian join method, the felted join method, and the invisible join method. Each method has its own advantages and is suitable for different types of knitted items.
How do I use the duplicate stitch method to weave ends in knitting?
To use the duplicate stitch method, thread a needle with the yarn end and bring it up through the fabric at the base of the stitch. Then, thread the needle under the horizontal strands of the stitch, creating a duplicate stitch. Repeat this process until the yarn end is secured and trim the excess.
What is the Russian join method for weaving ends in knitting?
The Russian join method involves tying a knot with the yarn end and the working yarn, then threading both ends onto a needle. Insert the needle into the middle of a stitch, pull it through, and trim the excess ends. This method creates a secure join without the need for weaving in ends.
How can I use the invisible join method to weave ends in knitting?
To use the invisible join method, weave the yarn end into the back of the work by duplicating the path of the stitches. Then, thread the yarn end through the center of the stitches and trim the excess. This method creates a seamless and invisible finish.


