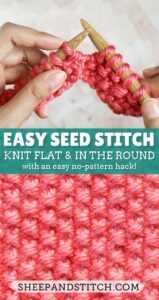
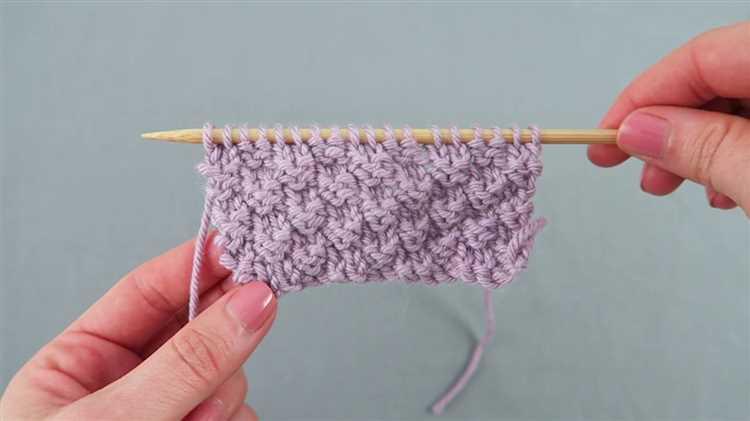
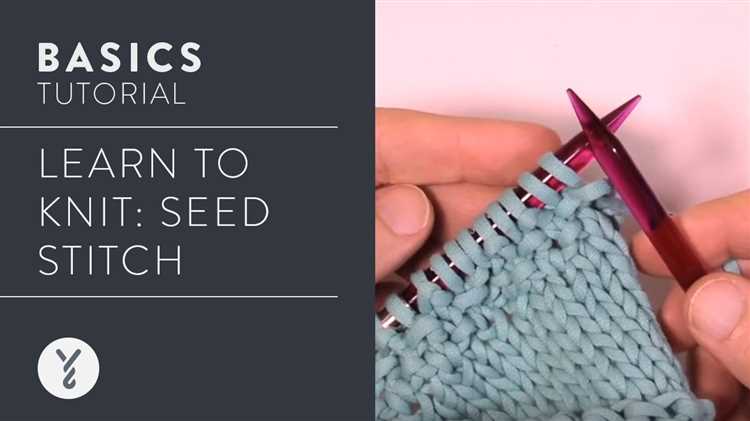
If you’re new to knitting or looking to expand your stitch repertoire, the seed stitch is a great option to consider. The seed stitch creates a textured fabric that is perfect for a variety of projects, from scarves and blankets to hats and mittens. In this step-by-step tutorial, we’ll show you how to knit the seed stitch and provide tips and tricks for achieving a polished finished result.
To begin, you’ll need a pair of knitting needles and some yarn in your desired color. The seed stitch is worked over an odd number of stitches, so you’ll want to cast on an odd number of stitches to get started. If you’re new to knitting, casting on refers to the process of getting your stitches onto your needles. There are several methods you can use to cast on, but for the seed stitch, the long-tail cast on method works well.
Once you have cast on your stitches, you’re ready to start knitting the seed stitch. The seed stitch is a combination of knit and purl stitches, and it’s important to keep track of which rows you’re working on. To create the seed stitch, you’ll alternate between knitting one stitch and purling one stitch across each row. This creates a pattern of raised bumps, similar to seeds, hence the name of the stitch.
Pro tip: To ensure a neat and tidy seed stitch, it can be helpful to use stitch markers to differentiate between your knit and purl stitches. You can place a stitch marker before a knit stitch and another one before a purl stitch to help you easily identify which stitch to work next.
What is the Seed Stitch?
The seed stitch is a simple knitting stitch pattern that creates a textured fabric with a raised, bumpy surface. It is achieved by alternating knit and purl stitches within the same row, and then repeating this pattern on subsequent rows. The resulting fabric has a reversible pattern and is often used for creating scarves, hats, and blankets.
The seed stitch is sometimes referred to as the moss stitch, as it resembles the appearance of moss or seeds on a plant. It is an ideal stitch pattern for beginners, as it only requires basic knitting techniques and is easy to memorize.
To create the seed stitch, you will need to know how to knit and purl. The stitch pattern is created by working a knit stitch, followed by a purl stitch, and then repeating this pattern across the row. On the next row, you will repeat the same pattern, but knit the purl stitches and purl the knit stitches.
Benefits of the Seed Stitch
The seed stitch not only creates an interesting texture, but it also has several benefits:
- Reversible fabric: The seed stitch pattern creates a fabric that looks the same on both sides, making it suitable for items like scarves and blankets that are seen from both sides.
- Minimal curling: The seed stitch has a tendency to lay flat, making it less likely to curl at the edges compared to other stitch patterns.
- Great for showcasing yarn: The seed stitch’s bumpy texture can really show off the characteristics of different yarns, such as variegated colors or unique textures.
- Easily adaptable: The seed stitch can be easily combined with other stitch patterns or used as a border for more complex designs.
Overall, the seed stitch is a versatile and beginner-friendly knitting stitch pattern that can add both texture and visual interest to your knitting projects.
Essential Knitting Supplies
Knitting is a popular craft that requires a few essential supplies to get started. Whether you’re a beginner or an experienced knitter, having the right tools can make all the difference in your knitting projects. Here are some essential knitting supplies that every knitter should have:
- Knitting Needles: Knitting needles come in various sizes and materials, such as metal, wood, or plastic. It is recommended to have a variety of needle sizes to accommodate different types of yarn and knitting patterns.
- Yarn: Yarn is the main material used in knitting. It comes in different weights and fiber compositions. Choose yarn that suits your project and personal preferences.
- Gauge Swatch: A gauge swatch allows you to measure your knitting tension and ensure that your project will turn out to be the correct size. It is recommended to make a gauge swatch before starting a new project.
- Scissors: Scissors are essential for cutting yarn and other materials. Choose a pair of sharp scissors that are dedicated to your knitting projects.
- Tapestry Needles: These needles have large eyes and blunt tips, making them ideal for sewing in loose ends and seaming pieces together.
- Stitch Markers: Stitch markers are used to mark specific stitches or sections in your knitting. They can help you keep track of your progress and make it easier to follow complex patterns.
- Row Counter: A row counter is a small tool that helps you keep track of the number of rows you’ve knitted. It is especially useful for large projects or patterns with multiple repeats.
- Measuring Tape: A measuring tape is essential for measuring your knitting projects and ensuring they are the correct size.
Having these essential knitting supplies on hand will make your knitting experience more enjoyable and successful. Remember to choose high-quality materials that are comfortable for you to work with. Happy knitting!
Step 1: Casting On
Before you can begin knitting the seed stitch, you first need to cast on your stitches. Casting on is the process of creating loops on your knitting needle, which will serve as the foundation for your project.
To cast on, follow these steps:
- Hold the knitting needle in your right hand and leave a long tail of yarn on the left side.
- With your left hand, make a slipknot by crossing the yarn over itself to form a loop.
- Insert the knitting needle through the loop, and pull the working yarn to tighten the loop around the needle.
- Hold the needle with the slipknot in your right hand.
- With your left hand, bring the yarn over the needle from back to front, creating a new loop.
- Insert the needle into the new loop and pull the yarn tight, creating another loop on the needle.
- Repeat steps 5 and 6 until you have cast on the desired number of stitches.
Make sure to keep your tension even as you cast on, so your stitches are not too tight or too loose. Once you have completed casting on, you are ready to move on to the next step of the seed stitch.
Step 2: First Row – Knit Stitch
The first row of the seed stitch pattern is worked entirely with the knit stitch. The knit stitch is the most basic stitch in knitting and is used to create the smooth, V-shaped fabric. To start the first row, follow these steps:
- Hold the knitting needles with the cast-on stitches in your left hand. The working yarn should be attached to the ball of yarn and held in your right hand.
- Insert the right needle into the first stitch on the left needle from left to right, going through the front loop of the stitch.
- With your right hand, bring the yarn over the right needle, wrapping it counterclockwise.
- Using the right needle, pull the wrapped yarn through the stitch, keeping the new stitch on the right needle.
- Slip the original stitch off the left needle, transferring it to the right needle.
- You have now completed one knit stitch. Repeat steps 2-5 for each stitch on the left needle until all stitches have been worked.
It’s important to keep a consistent tension while knitting the first row. Pulling the yarn too tightly can create a tight fabric, while leaving it too loose can result in loose and sloppy stitches.
Once you have finished knitting the first row, you are ready to move on to the next step of the seed stitch pattern: the purl stitch.
Step 3: Second Row – Purl Stitch
After completing the first row of seed stitch, you are ready to move on to the second row. This row will be worked with purl stitches, which will create the alternating texture of the seed stitch.
To work the purl stitch:
- Hold the knitting needles with the cast-on stitches in your left hand – the working needle in the back and the non-working needle in the front.
- With your right hand, bring the working yarn to the front of the work, between the two needles.
- Insert the working needle from right to left into the first stitch on the non-working needle.
- Wrap the working yarn counterclockwise around the working needle.
- With your right hand, pull the working needle and the yarn through the stitch, creating a new loop on the working needle.
- Gently remove the old stitch from the non-working needle.
- Repeat steps 3-6 for each stitch across the row, until you reach the end of the knitting.
Remember to keep a consistent tension and avoid pulling the yarn too tight or too loose. The purl stitch will create a bump or a “V” shape on the right side of your work, depending on how it’s used in your pattern.
Continue working alternate rows of the seed stitch pattern, alternating between the knit and purl stitches, until you reach the desired length or complete the pattern instructions.
With practice, you’ll become more comfortable with the motions and rhythm of knitting the seed stitch, and you’ll be able to create beautifully textured fabric for a variety of projects.
Step 4: Repeating the Seed Stitch Pattern
Now that you have learned how to knit the seed stitch, it’s time to practice and repeat the pattern to create a beautiful textured fabric.
To continue knitting the seed stitch, follow these steps:
- Start with a new row of stitches, either by turning your work or continuing in the same direction.
- Knit the first stitch.
- Purl the next stitch.
- Continue alternating between knitting and purling stitches until you reach the end of the row.
- Repeat these steps for each row, keeping in mind the seed stitch pattern: knit the purl stitches and purl the knit stitches.
Remember to always knit the purl stitches and purl the knit stitches to maintain the seed stitch pattern. This will create the alternating texture that makes the seed stitch so unique.
You can use the seed stitch pattern to create a variety of projects, such as scarves, blankets, and even sweaters. Experiment with different yarns and needle sizes to achieve different results.
Once you have mastered the seed stitch pattern, you can move on to more complex stitch patterns and designs. Knitting is a versatile craft that allows you to create beautiful and personalized items.
Enjoy the process of knitting the seed stitch and have fun exploring all the possibilities!
Step 5: Finishing Off
Once you have completed your desired length of seed stitch, it’s time to finish off your project. Follow these steps to properly finish off your work:
- Find the last stitch: Look for the last stitch on your knitting needle. It should be the stitch closest to the needle tips.
- Cut the yarn: Using a pair of scissors, cut the working yarn leaving a tail of about 6 inches.
- Pull the tail through: Take the tail of yarn and insert it through the last stitch on your knitting needle.
- Remove the stitches: Carefully slide the last stitch off the needle and pull the tail of yarn through, ensuring it is secure.
- Weave in the loose ends: Take the tail of yarn and using a yarn needle, weave it through the neighboring stitches to secure it and hide the loose end within your fabric.
Now that you have finished off your seed stitch, your project is complete! You can admire your beautiful work and show it off to your friends and family. Whether you made a scarf, hat, or any other item, the seed stitch adds a beautiful textured pattern that is sure to impress.
Tips and Troubleshooting
Knitting the seed stitch can be a fun and versatile way to add texture to your projects. However, like any knitting technique, it can sometimes pose challenges. Here are some tips and troubleshooting advice to help you navigate any issues you may encounter:
Tips:
- Use stitch markers: Placing stitch markers every few stitches can help you keep track of where to switch between knit and purl stitches.
- Count your stitches: It’s easy to lose track of your stitch count when working the seed stitch. Make sure to count your stitches regularly to ensure accuracy.
- Practice tension: Maintaining consistent tension is key to creating an even seed stitch pattern. Take your time to practice managing your tension for a polished finished product.
- Experiment with colors: The seed stitch is great for colorwork projects. Try using different colored yarns to create interesting patterns and designs.
Troubleshooting:
- Uneven seed stitch: If you notice that your seed stitch is coming out uneven or bumpy, check your tension. Make sure you’re consistently pulling your yarn tight enough when switching between knits and purls. Practice and patience will help you achieve a more uniform appearance.
- Dropped stitches: Dropping a stitch can be frustrating, but it’s not uncommon. If you drop a stitch in your seed stitch pattern, use a crochet hook or a knitting needle to pick up the dropped stitch and place it back on your needles in the correct orientation.
- Miscounted stitches: It’s easy to miscount stitches, especially with seed stitch where the pattern can be deceptive. If you find that your stitch count is off, carefully count each stitch and compare it to the number required by your pattern. You may need to frog (rip back) a few rows to correct any mistakes.
- Untangling yarn: If your yarn becomes tangled while working the seed stitch, take a moment to pause and carefully untangle it. Trying to knit with tangled yarn can lead to additional mistakes and frustration.
Remember, practice makes perfect! Don’t get discouraged if you encounter difficulties with the seed stitch. With time and patience, you’ll become more comfortable with the technique and be able to create beautiful seed stitch projects.
FAQ:
What is the seed stitch?
The seed stitch is a knitting stitch pattern that creates a textured fabric by alternating knit and purl stitches.
How do you knit the seed stitch?
To knit the seed stitch, you need to alternate between knit and purl stitches on every row. On the right side of the fabric, you knit the purl stitches and purl the knit stitches. On the wrong side, you purl the knit stitches and knit the purl stitches.
What are the advantages of knitting the seed stitch?
The seed stitch creates a fabric with a lovely texture and it is reversible, which means both sides of the fabric look the same. It is also great for hiding mistakes, as any errors blend into the texture of the stitch pattern.
Can the seed stitch be used for different knitting projects?
Yes, the seed stitch can be used for a variety of knitting projects, such as scarves, hats, sweaters, and blankets. It is a versatile stitch pattern that adds visual interest to any project.
Is the seed stitch suitable for beginners?
Yes, the seed stitch is a great stitch pattern for beginners to learn. It only requires basic knitting skills, such as knitting and purling, and it is easy to see and correct any mistakes. Plus, it creates a beautiful fabric that beginners can be proud of.
Can the seed stitch be knitted with different types of yarn?
Yes, the seed stitch can be knitted with a variety of yarns, from lightweight to bulky. Thinner yarn will create a daintier texture, while thicker yarn will create a more pronounced texture. It all depends on the desired look and feel of the finished project.


