Are you new to knitting and eager to expand your repertoire of stitches? Learning how to purl is an essential skill to have, as it opens up a whole new world of possibilities for creating intricate patterns and textures in your knitting projects. In this step-by-step guide, we’ll walk you through the basics of purling, from holding the yarn to creating neat and uniform stitches. With practice, you’ll soon be purling like a pro!
What is a purl stitch?
A purl stitch is one of the two fundamental stitches in knitting, along with the knit stitch. It is characterized by forming a loop with the working yarn behind the needle. Purl stitches are often used in combination with knit stitches to create various patterns, including ribbing, seed stitch, and garter stitch. While knit stitches are created by inserting the needle from front to back, purl stitches are made by inserting the needle from back to front.
Getting started
Before you begin practicing your purling technique, gather your knitting needles and a ball of yarn. Make sure you have a comfortable and quiet space to work in. It’s also a good idea to have a stitch marker on hand to help you keep track of your stitches.
Remember to take your time and be patient with yourself as you learn. Like any new skill, purling may feel awkward and challenging at first, but with practice, it will become second nature.
Learn how to purl in knitting
Knitting is a popular craft that allows you to create beautiful and functional pieces. The purl stitch is one of the fundamental stitches in knitting and is essential for creating texture and patterns in your projects. In this step-by-step guide, we will teach you how to purl in knitting.
Materials:
- Knitting needles
- Yarn
Step 1: Hold the knitting needles:
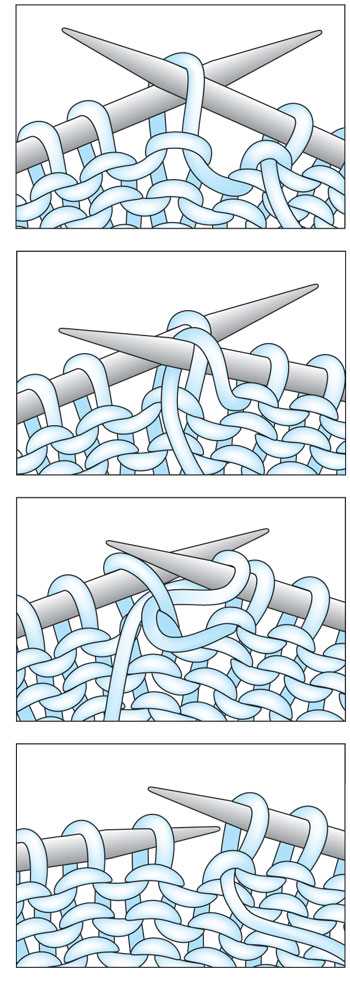
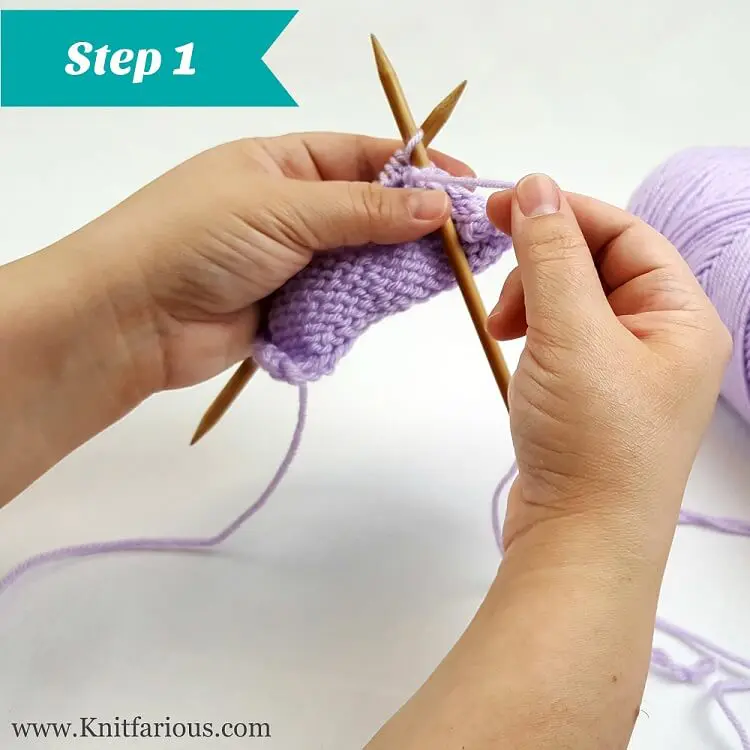
Hold the knitting needles in your right hand, with the point of the right needle resting on your left hand. The yarn should be at the back of your work.
Step 2: Insert the right needle:
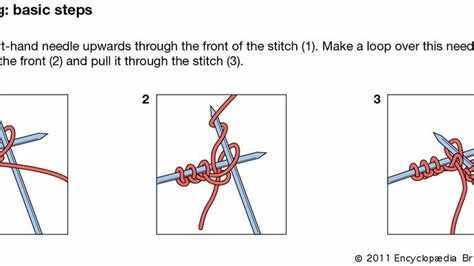
Insert the right needle from right to left into the first stitch on the left needle.
Step 3: Wrap the yarn:
Wrap the yarn around the right needle counterclockwise, bringing the yarn to the front of your work.
Step 4: Push the needle through:
Keeping the yarn in front of your work, push the right needle through the stitch from left to right.
Step 5: Slip the stitch off:
With the right needle, slip the stitch off the left needle, moving it to the right needle.
Step 6: Repeat:
Repeat steps 2-5 for each stitch on the left needle until you have purled all the stitches.
Step 7: Practice:
Practice purling by knitting a swatch of fabric. The more you practice, the more comfortable you will become with the purl stitch.
Tips:
- Make sure to keep the tension of your yarn consistent to create even and neat stitches.
- Take your time and practice regularly to improve your purling skills.
- Experiment with different yarns and needle sizes to achieve different textures and patterns.
Now that you have learned how to purl in knitting, you can start incorporating this stitch into your projects. Have fun and happy knitting!
Understand the basics of knitting
Knitting is a popular craft that involves the creation of fabric by interlocking loops of yarn. It can be a relaxing and creative hobby that allows you to create beautiful and functional items such as sweaters, scarves, and blankets.
Before diving into more complex knitting techniques, it’s important to understand the basics. Here are some key terms and concepts to familiarize yourself with:
- Yarn: The main material used in knitting. Yarn comes in various colors, weights, and textures, allowing you to achieve different effects in your projects.
- Needles: Two pointed sticks used to hold the loops of yarn. Knitting needles come in different sizes, which affect the size of the stitches and the overall fabric.
- Stitches: The individual loops of yarn that make up a knitted fabric. There are different types of stitches, each with its own method of creation.
- Cast on: The process of creating the first row of stitches on your needles. This is the foundation of your knitting project.
- Knit stitch: The basic stitch in knitting where the yarn is pulled through a loop from front to back. This creates a new stitch and moves the old stitch from the left needle to the right needle.
- Purl stitch: The reverse of the knit stitch. The yarn is pulled through a loop from back to front, creating a new stitch and moving the old stitch from the left needle to the right needle.
Once you have a good understanding of these basics, you can start exploring more advanced knitting techniques, such as increasing and decreasing stitches, creating patterns, and working with different stitch textures. There are numerous resources available, including books, online tutorials, and local knitting groups, to help you expand your knitting skills and tackle more challenging projects.
Remember, knitting is a skill that takes practice to master, so be patient with yourself and enjoy the process of creating something unique with your own hands.
Gather the necessary materials
Before you start learning how to purl in knitting, make sure you have all the necessary materials. Here is what you will need:
- Knitting needles: You will need a pair of knitting needles. The size and material will depend on your personal preference and the type of yarn you are using.
- Yarn: Choose a yarn that is suitable for the project you are working on. The weight, color, and fiber content are all important factors to consider.
- Tapestry needle: This needle is used for weaving in loose ends and finishing your knitting project.
- Scissors: You will need a pair of scissors to cut the yarn.
- Stitch markers: Stitch markers can be useful for marking specific stitches or sections of your knitting.
- Pattern or instructions: If you are following a specific pattern or instructions, make sure to have them handy.
Once you have gathered all the necessary materials, you will be ready to start learning how to purl in knitting. It is important to have everything you need within reach to ensure a smooth and enjoyable learning experience.
Prepare your knitting project
Before you start purling in knitting, it’s important to properly prepare your knitting project. This includes gathering the necessary materials and making sure your stitches are set up correctly.
- Materials: Gather all the materials you’ll need for your knitting project. This typically includes knitting needles, yarn, and any other accessories or tools specific to your project, such as stitch markers or a cable needle.
- Choose yarn and needles: Select the appropriate yarn and needles for your project. Consider the recommended yarn weight and needle size specified in your knitting pattern, or choose yarn and needles that create the fabric you desire. Make sure to also check the dye lot of your yarn if you’re using multiple skeins to ensure they have the same color.
- Make a gauge swatch: Knit a small sample swatch using the yarn and needles you’ve chosen. This will help you determine if the stitch and row gauge match the measurements specified in your pattern. Adjust your needle size if necessary to achieve the correct gauge.
- Cast on: Once you’re satisfied with your gauge swatch, cast on the required number of stitches for your project. There are various casting-on methods you can use, such as the long-tail cast on or the knitted cast on. Choose a method that you feel comfortable with and that suits the look you want for your project.
- Set up your stitches: Before you start purling, make sure your stitches are set up correctly on your needles. Ensure that all the stitches are facing the same direction and that the working yarn is properly positioned. You should have the working yarn coming from the last stitch on the right-hand needle.
By properly preparing your knitting project, you’ll set yourself up for success and have a smooth experience while purling and working on your knitting project.
Hold the knitting needles correctly
When learning how to purl in knitting, it’s important to hold the knitting needles correctly to ensure a smooth and comfortable knitting experience. Here are some tips on how to hold the knitting needles correctly:
- Hold the right knitting needle: Hold the right knitting needle in your dominant hand, allowing it to rest comfortably in your palm. Grip it firmly, but not too tightly, to maintain control while knitting.
- Hold the left knitting needle: Hold the left knitting needle in your non-dominant hand, positioning it between your palm and the base of your thumb. Rest it against your palm for stability.
- Hold the yarn: Use your right hand to hold the yarn. Keep a relaxed grip on the yarn, allowing it to flow naturally. Some knitters prefer to wrap the yarn around their pinky finger and then weave it through their other fingers for better control.
Properly holding the knitting needles and the yarn is essential for maintaining tension and achieving even stitches while purling. Practice holding the needles and yarn in a way that feels comfortable for you, making any necessary adjustments to ensure a smooth knitting process.
Insert the needle into the stitch
Once you have your knitting project set up and ready to go, it’s time to start purling. Purling is the opposite of knitting and creates a different texture on your project. To purl, you will need to insert the needle into the stitch in the following steps:
- Hold your knitting needle with the cast-on stitches in your left hand.
- Take the working yarn, which is connected to the ball of yarn, and bring it to the front of your work.
- Insert the right-hand needle into the first stitch on the left-hand needle from right to left, going through the front loop of the stitch.
- Bring the working yarn up and over the right-hand needle, from the right to the left, creating a loop around the right-hand needle.
- Slide the right-hand needle down and through the stitch, pulling the loop of yarn through with it.
- Remove the stitch from the left-hand needle, transferring it to the right-hand needle.
Now you have successfully inserted the needle into the stitch and completed the first purl stitch. Repeat these steps for each stitch until you have finished your desired number of purl stitches.
Wrap the yarn around the needle
After casting on the desired number of stitches onto your knitting needles, it’s time to start the purl stitch. The first step is to wrap the yarn around the needle.
Hold the knitting needle with the cast-on stitches in your right hand and the empty needle in your left hand. The working yarn should be hanging down from the last stitch on the right needle.
Take the working yarn in your left hand and bring it to the front of your work, crossing over the left needle from right to left.
Now, bring the yarn around the right needle from the front to the back, creating a loop around it. The working yarn should now be hanging down from the back of the right needle.
Make sure to keep the tension of the yarn loose but not too loose, as it should be able to slide easily through the stitches during the purling process.
Pull the needle through the stitch
After you have completed the setup for the purl stitch, it’s time to pull the needle through the stitch. Follow these steps to do so:
- Hold the knitting needle with the stitches in your left hand.
- Insert the right needle from right to left into the first stitch on the left needle.
- With the right needle behind the left needle, wrap the yarn counterclockwise around the right needle.
- Using the right needle, pull the yarn through the stitch, bringing it to the front of the work.
- Slide the old stitch off the left needle, transferring it to the right needle.
- Repeat steps 2-5 for each stitch until all the stitches have been purled.
Remember to maintain the correct tension while pulling the needle through the stitch. It’s important to keep a consistent tension throughout your knitting to ensure even stitches and a neat finished project.
Purling is an essential skill in knitting and can be used to create a variety of stitch patterns and designs. Practice this technique regularly to improve your knitting skills and expand your project options.
Repeat the process to purl the remaining stitches
Once you have successfully purled the first stitch, you will need to repeat the same process for the remaining stitches on your knitting needle.
To purl the next stitch, follow these steps:
- Insert the right-hand needle into the next stitch on the left-hand needle from right to left, going behind the left-hand needle.
- Bring the yarn to the front of your work, between the two needles.
- Wrap the yarn around the right-hand needle counterclockwise, just like when you purled the first stitch.
- Use the right-hand needle to pull the yarn through the stitch, creating a new loop on the right-hand needle.
- Slide the original stitch off the left-hand needle.
Continue these steps for each remaining stitch on the left-hand needle until you have purled all the stitches.
Remember to keep the tension of your yarn consistent and avoid pulling too tightly or too loosely. Consistent tension will help ensure that your knitted fabric has an even appearance.
Continue practicing purling until you feel comfortable with the technique. As with any new skill, practice and patience are key to becoming proficient.
FAQ:
What is purling in knitting?
Purling is a basic stitch in knitting that creates a textured pattern by forming small bumps on the right side of the fabric. It is the opposite of the knit stitch and is commonly used in various knitting patterns.
Can purling be done on any type of knitting project?
Yes, purling can be done on any type of knitting project. It is a fundamental stitch in knitting and is used in various patterns to create texture and design.
What is the difference between knitting and purling?
The main difference between knitting and purling is the position of the working yarn. In knitting, the yarn is held in the back of the work, while in purling, the yarn is held in the front. Knitting creates a smooth V-shaped stitch on the right side of the fabric, while purling creates small bumps.
Are there any alternative methods to purling in knitting?
Yes, there are alternative methods to purling in knitting. Some popular alternatives include the seed stitch, ribbing, and brioche stitch. Each technique creates a different texture and design, so feel free to explore and find the one that suits your project.


