Are you new to knitting and looking for a versatile and easy-to-learn cast-on method? The long tail cast on is a popular choice for both beginners and experienced knitters alike. This technique creates a neat and stretchy edge and is commonly used to start a variety of knitting projects, from scarves and hats to sweaters and blankets.
The long tail cast on is known for its simplicity and efficiency. Unlike other methods that require an estimation of yarn length, the long tail cast on uses both a working yarn and a tail. By utilizing both ends of the yarn, you can easily control the tension and adjust the size of your stitches.
In this step-by-step tutorial, we will guide you through the process of long tail cast on. Whether you are a visual learner or prefer written instructions, we have got you covered. With a few basic knitting tools and a little bit of practice, you’ll be casting on like a pro in no time!
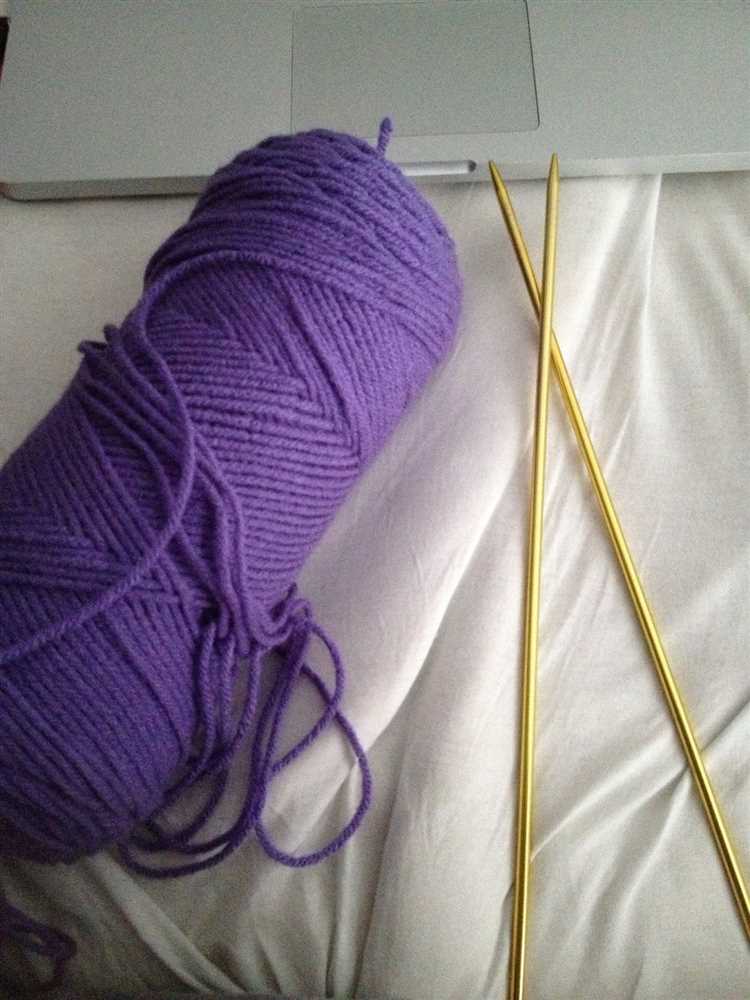
Note: Before starting, make sure you have a pair of knitting needles, a ball of yarn, and some scissors. It is recommended to use a smooth and medium-weight yarn for your first attempts.
Why Use the Long Tail Cast On Method
The long tail cast on method is one of the most popular ways to start a knitting project. It is often preferred over other cast on methods for several reasons:
- Sturdy Edge: The long tail cast on creates a firm and durable edge that is less likely to stretch out over time. This makes it ideal for starting projects that require a clean and stable foundation.
- Elasticity: Unlike some other cast on methods, the long tail cast on has a natural elasticity that allows the edge of the knitting to stretch and move with ease. This is particularly beneficial for projects such as hats, socks, and garments that need to fit snugly.
- Versatility: The long tail cast on can be used for a wide range of knitting projects, from simple scarves and blankets to intricate lace patterns and cables. It is a versatile technique that works well with different types of yarn and stitch patterns.
- Easy to Learn: Once you get the hang of it, the long tail cast on is relatively easy to learn and master. It only requires a single strand of yarn and a pair of knitting needles, making it a convenient method for beginners and experienced knitters alike.
- Neat Appearance: The long tail cast on creates a neat and uniform edge with smooth, even stitches. It gives the finished project a polished look and helps to prevent any gaps or loose stitches from forming.
Overall, the long tail cast on method is a reliable and versatile technique that provides a sturdy foundation for any knitting project. Whether you’re a beginner or a seasoned knitter, learning how to do the long tail cast on can greatly enhance your knitting skills and help you create beautiful, professional-looking pieces.
Advantages of Long Tail Cast On
The long tail cast on is one of the most popular methods for starting a knitting project. It has several advantages that make it a preferred choice for many knitters:
- Versatility: The long tail cast on can be used for a wide variety of knitting projects, from simple scarves to complex sweaters. It creates a strong and flexible edge that is suitable for different types of stitches and patterns.
- Elasticity: The long tail cast on creates a stretchy edge that is ideal for projects that require a bit of give, such as hats and socks. This elasticity helps the finished garment or accessory fit comfortably and snugly.
- Stability: The long tail cast on creates a stable edge that keeps the stitches in place and prevents them from becoming loose or unraveled. This is especially important for garments or projects that will undergo a lot of wear and tear.
- Easy to Learn: Once you understand the basic steps, the long tail cast on is relatively easy to learn and master. It involves wrapping the yarn around your fingers in a specific way and then working the stitches onto the needles. With a bit of practice, you’ll be able to cast on quickly and efficiently.
- No Extra Materials Needed: The long tail cast on requires only one ball of yarn and a pair of knitting needles. There is no need for additional tools or accessories, making it a convenient choice for on-the-go knitting.
In summary, the long tail cast on offers versatility, elasticity, stability, ease of learning, and requires minimal materials. It is a reliable and popular method that is worth mastering for any knitting project.
Understanding the Basics of Long Tail Cast On
The long tail cast on is a popular method for starting a knitting project. It creates a neat and flexible edge that is perfect for a variety of projects. Understanding the basics of the long tail cast on is essential for any knitter, whether they are just starting out or looking to expand their skills.
Materials:
- Yarn
- Knitting needles
- Scissors
Steps:
- Start by estimating the amount of yarn you will need for your cast on. A good rule of thumb is to measure out a length of yarn that is about four times the width of your project.
- Make a slip knot at the end of the yarn, leaving a long tail. This tail will be used to create the cast on stitches.
- Hold the slip knot in your non-dominant hand, with the yarn tail draped over your thumb and the working yarn (the end attached to the ball of yarn) draped over your index finger.
- Insert the knitting needle from front to back under the yarn tail and over the working yarn, creating a loop.
- Bring the needle back under the working yarn, creating another loop.
- Bring the needle towards you, under the yarn tail, and through the first loop on your thumb.
- Drop the first loop off your thumb, tightening the stitch on the needle.
- Repeat steps 4-7 until you have cast on the desired number of stitches.
Tips:
- Keep the tension of the yarn consistent throughout the cast on to ensure even stitches.
- Practice the long tail cast on technique until you feel comfortable with it. It may take a few tries to get the tension and motion right.
- Experiment with different yarns and needle sizes to see how they affect the appearance and flexibility of the cast on edge.
The long tail cast on is a versatile technique that every knitter should have in their repertoire. With practice, it will become second nature, and you’ll be able to confidently start any knitting project with a neat and professional-looking edge.
Step 1: Choosing the Right Yarn and Needles
Before learning how to long tail cast on in knitting, it’s important to choose the right yarn and needles for your project. The type of yarn and needles you use will affect the final outcome of your project, so it’s important to make the right choice.
Choosing the Right Yarn
When choosing yarn for your project, consider the following factors:
- Fiber Content: Different yarn fibers have different properties, such as elasticity, warmth, and drape. Consider the needs of your project and choose a yarn that will suit them.
- Gauge: Check the recommended gauge for your project and choose a yarn that will allow you to achieve it. Gauge refers to the number of stitches and rows per inch, and it ensures that your project will have the correct dimensions.
- Color and Texture: Consider the color and texture of the yarn and how it will complement your project. Yarn comes in a wide range of colors and textures, so you can get creative with your choices!
Choosing the Right Needles
When choosing needles, consider the following factors:
- Material: Needles can be made from various materials, such as metal, wood, or plastic. Each material has its own feel and properties, so choose one that you find comfortable to work with.
- Size: The size of the needles will determine the gauge of your project. Check the pattern or gauge recommendation and choose the appropriate needle size accordingly.
- Length: Needle length depends on the type of project you’re working on. Longer needles are better for projects with a large number of stitches, while shorter needles are better for small, tight projects.
By carefully choosing the right yarn and needles for your project, you can ensure that your final knitted piece turns out exactly as you envisioned. Now that you have chosen your materials, you’re ready to move on to the next step: learning how to do a long tail cast on in knitting.
Step 2: Making the Slip Knot
Once you have measured and left a long tail for your cast on, the next step is to make a slip knot. The slip knot will serve as the first stitch on your knitting needle.
To make a slip knot, follow these steps:
- Take the tail end of your yarn and cross it over the working yarn, leaving a small loop.
- Insert your hand through the loop from underneath, grabbing the working yarn.
- Pull the working yarn through the loop, creating a new loop.
- Place the new loop on your knitting needle, pulling it tight but not too tight.
The slip knot should be snug on the needle, but still able to slide back and forth easily.
After making the slip knot, you are ready to move on to the next step in the long tail cast on process.
Step 3: Positioning the Needles
Once you have cast on the desired number of stitches using the long tail cast on method, it’s time to position your needles for knitting.
1. Hold the needles: Take the needle with the stitches in your right hand and the empty needle in your left hand. The right needle should be positioned behind the left needle.
2. Insert the right needle: Insert the tip of the right needle into the first stitch on the left needle, going from left to right.
3. Position the working yarn: Ensure that the working yarn is coming from the back of the needle, between the two needles.
4. Hold the yarn: Use your right hand to hold the working yarn, with your fingers positioned comfortably around it.
5. Maintain tension: Gently pull the working yarn to create tension, ensuring that it is not too loose or too tight.
6. Get ready to knit: With the needles positioned correctly and the yarn held securely, you are now ready to start knitting the first row.
By following these steps and positioning your needles correctly, you will be able to knit smoothly and comfortably using the long tail cast on method.
Step 4: Wrapping the Yarn
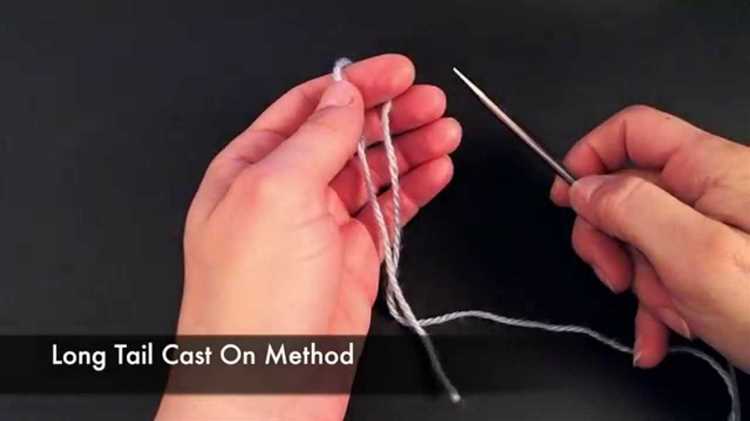
Now that you have your slipknot ready, it’s time to wrap the long tail around your fingers. This step will create the foundation for your long tail cast on.
- Hold the slipknot loop with your non-dominant hand, keeping it secure between your thumb and index finger.
- Extend your non-dominant hand, spreading your fingers slightly apart.
- With your dominant hand, bring the yarn over the palm side of your extended fingers, starting from the back of your hand and moving towards the tips of your fingers.
- Thread the yarn under your index finger, making sure it goes from the palm side to the backside of your hand.
- Continue wrapping the yarn around your extended fingers one more time, this time moving from the backside to the palm side of your hand.
At this point, you should have the long tail yarn wrapped around your fingers. Remember to keep the tension firm but not too tight. You want the stitches to be able to easily slide off your fingers when you start casting on.
| Tip: | If you find that the yarn keeps slipping off your fingers or feels too loose, you can adjust the tension by either tightening or loosening your grip. Experiment with different levels of tension until you find what works best for you. |
Step 5: Inserting the Needle
Once you have completed the previous steps and have the desired number of stitches on your needle, it’s time to insert the working needle into the loops you created on the thumb.
Here’s how to insert the needle:
- Hold the knitting needle with the loops in your right hand, and keep the tail end of the yarn securely wrapped around your left thumb.
- With your right hand, insert the working needle from left to right through the first loop on your thumb.
- Continue to insert the needle through each loop on your thumb, from left to right, until you have inserted it through all the loops.
Make sure to insert the needle through the loops in the same order you created them, to maintain the correct stitch orientation.
Note: If you are a left-handed knitter, you can follow the same steps, but hold the knitting needle and yarn in your left hand, and insert the working needle from right to left through the loops on your thumb.
Once you have inserted the needle through all the loops, you are ready to start working the first row of your long tail cast on! The loops will now be on the working needle, and you can begin knitting or following the pattern instructions for your project.
Step 6: Casting On the Stitches
Now that you have prepared the yarn and the needle, it’s time to start casting on the stitches. Follow these steps:
- Hold the needle with the slip knot in your right hand, and the yarn tail and working yarn in your left hand.
- With your right hand, insert the needle into the slip knot from left to right, making sure to catch the working yarn with the needle.
- With your left hand, bring the yarn tail under and then over the needle, creating a loop around it. The loop should be in front of the needle.
- With your right hand, pull the needle and the loop through the slip knot, making sure to keep the loop in front of the needle.
- You have now cast on one stitch. Repeat steps 2 to 4 for the desired number of stitches.
As you cast on more stitches, gently slide them down the needle towards the tips to make room for the new stitches. You can use your thumb to do this.
Continue casting on stitches until you have reached the desired number of stitches for your project.
Once you have finished casting on, you can remove the slip knot and continue with your knitting pattern.
FAQ:
What is long tail cast on in knitting?
Long tail cast on is a method of starting a knitting project where you create a foundation row by making loops with both the working yarn and tail yarn. It creates a stretchy and strong edge for your knitting.
Why is long tail cast on popular in knitting?
Long tail cast on is popular in knitting because it creates a neat and tidy edge that is both flexible and strong. It is also relatively easy to learn and versatile, making it a go-to method for many knitters.
How do you do the long tail cast on?
To do the long tail cast on, you start by leaving a long tail of yarn and making a slipknot. Then, you position the needle in your right hand between the working yarn and tail yarn, and use your thumb and index finger to hold them securely. Next, you create a loop by wrapping the needle around the working yarn and pulling it through the loop on your thumb. Repeat this process for each stitch desired.
Is the long tail cast on difficult to learn?
The long tail cast on is considered one of the basic knitting techniques and is relatively easy to learn. With a bit of practice, you’ll be able to do it smoothly and quickly.
What types of projects are ideal for long tail cast on?
Long tail cast on is ideal for a wide range of knitting projects, including scarves, hats, sweaters, and blankets. It creates a neat edge that is suitable for both stretchy and structured items.
Are there any alternatives to long tail cast on?
Yes, there are several alternatives to long tail cast on in knitting. Some popular alternatives include the knitted cast on, cable cast on, and backward loop cast on. Each method has its own unique characteristics and is best suited for certain projects or personal preferences.
Can I use long tail cast on for lace knitting?
Long tail cast on can be used for lace knitting, but it may not be the best choice depending on the specific lace pattern you’re working on. Lace knitting often requires a stretchy cast on to accommodate the yarnovers and decreases, so a more elastic cast on method like the knitted cast on or cable cast on may be recommended.


