Knitting is a popular craft that allows you to create beautiful and functional items with just a few simple tools. One basic stitch that every knitter should learn is the seed stitch. The seed stitch creates a textured fabric that is perfect for scarves, dishcloths, and other small projects. If you’re new to knitting or just want to expand your skills, this easy step-by-step guide will teach you how to seed stitch knit.
The seed stitch is a simple combination of knit and purl stitches. It creates a pattern of alternating knits and purls, resulting in a bumpy texture. This stitch is often used as a border or edging, but can also be used for the entire project. It’s a great stitch for beginners because it’s easy to learn and creates a reversible fabric, meaning it looks the same on both sides.
To begin seed stitch knitting, you will need a pair of knitting needles and some yarn. Choose a yarn that is appropriate for your project and a needle size that gives you the desired tension. It’s helpful to start with a light-colored yarn so you can easily see your stitches. Once you have your materials, you’re ready to get started!
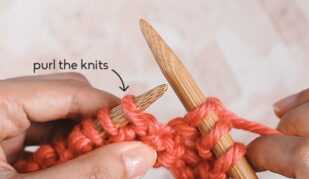
Follow these simple steps to master the seed stitch: First, cast on an even number of stitches. The seed stitch requires an even number of stitches to create the alternating pattern. Once you have cast on, knit the first stitch. Then, purl the next stitch. Repeat these two stitches – knit, purl, knit, purl – until you reach the end of the row. When you turn your work and start the next row, continue knitting the purl stitches and purling the knit stitches. This creates the seed stitch pattern.
Continue knitting in this seed stitch pattern until your project is the desired length. Remember to always knit the purl stitches and purl the knit stitches to maintain the pattern. When you’re ready to finish your project, bind off your stitches and weave in any loose ends. You’ll be left with a beautiful seed stitch fabric that is sure to impress!
What is Seed Stitch Knitting?
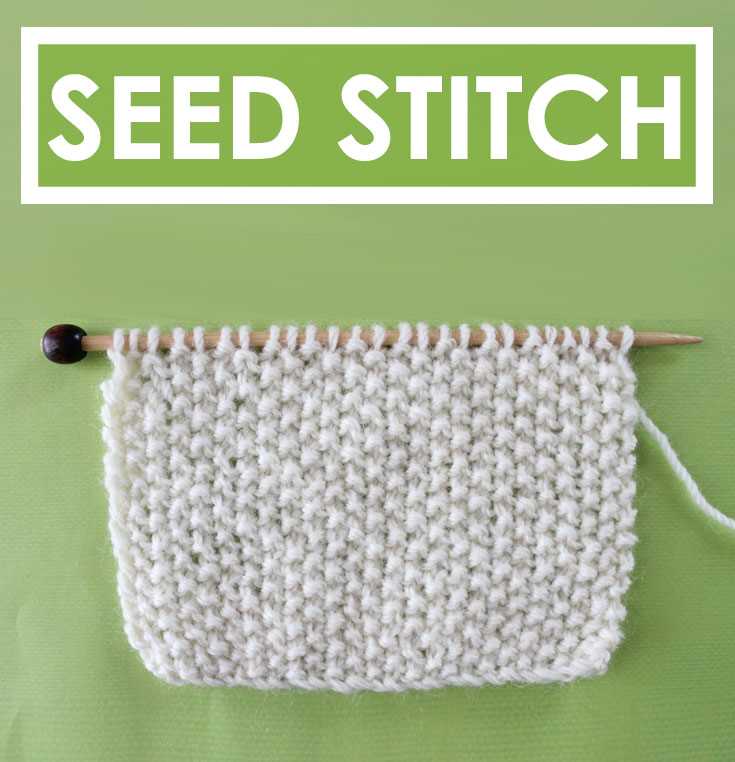
Seed stitch knitting is a popular stitch pattern in knitting that creates a texture resembling scattered seeds. Also known as moss stitch or dot stitch, it is a simple yet effective way to add visual interest to your knitting projects.
In seed stitch knitting, you alternate between knit and purl stitches in a specific pattern. This creates a textured fabric that is reversible, meaning it looks the same on both sides. It is often used for scarves, blankets, hats, and other accessories.
One of the advantages of seed stitch knitting is that it lies flat and does not curl, making it a great choice for edging or borders. It also adds extra warmth and thickness to the fabric, making it suitable for colder weather garments.
Seed stitch is a beginner-friendly knitting pattern that is easy to learn and memorize. It only requires basic knitting skills, such as knitting and purling, making it accessible to knitters of all levels.
To create seed stitch, you need an odd number of stitches. The pattern is as follows:
| Row 1: | K1, p1, repeat to the end of the row. |
| Row 2: | P1, k1, repeat to the end of the row. |
| Repeat rows 1 and 2 for the desired length. |
By following this simple pattern, you can create beautiful seed stitch fabric with just a few basic knitting techniques.
Seed stitch knitting is a versatile stitch pattern that can be used in a wide range of knitting projects. Whether you’re a beginner or an experienced knitter, mastering seed stitch opens up a world of possibilities for your knitting creations.
Materials Needed for Seed Stitch Knitting
Before you start learning how to seed stitch knit, make sure you have the following materials:
- Knitting needles: Choose a pair of knitting needles that are suitable for the yarn you will be using. The size of the needles will depend on the weight of the yarn.
- Yarn: Any type of yarn can be used for seed stitch knitting, but it is recommended to use a medium-weight yarn for beginners. Select a yarn color of your choice.
- Scissors: You will need scissors to cut the yarn at the end of your project.
- Tapestry needle: A tapestry needle is used for weaving in loose ends of yarn and finishing your project.
- Stitch markers (optional): Stitch markers can be used to mark specific stitches or sections in your knitting project, making it easier to keep track of your progress.
- Measuring tape or ruler: A measuring tape or ruler is useful for checking the gauge of your knitting and measuring the size of your finished project.
Once you have gathered all the necessary materials, you are ready to start learning how to seed stitch knit!
Step-by-Step Guide to Seed Stitch Knitting
Seed stitch is a simple and beautiful knitting stitch that creates a textured fabric. It is perfect for beginners and has a reversible pattern, making it ideal for scarves, blankets, and other projects. Follow these easy steps to learn how to seed stitch knit:
- Step 1: Gather Your Materials
- Knitting needles
- Yarn in your desired color
- A pair of scissors
- A yarn needle
- Step 2: Cast On
- Step 3: Row 1
- Step 4: Row 2
- Step 5: Repeat Rows 1 and 2
- Step 6: Bind Off
- Step 7: Finishing Touches
- Step 8: Enjoy Your Seed Stitch Knit
Before you start knitting, make sure you have the necessary materials. You will need:
To begin, you need to cast on an even number of stitches. You can choose any method of casting on that you prefer. Make sure you have enough stitches to achieve your desired width.
The first row of the seed stitch is simple. Knit one stitch, then purl one stitch. Repeat this pattern until you reach the end of the row.
For the second row, you need to start with a purl stitch. Purl one stitch, then knit one stitch. Repeat this pattern until you reach the end of the row.
Continue alternating between knitting one stitch and purling one stitch for row 1 and purling one stitch and knitting one stitch for row 2. Repeat these rows until your project reaches the desired length.
Once you have knitted your desired length, it’s time to bind off. Cut the yarn, leaving a long tail. Thread the tail onto a yarn needle and slip the needle through the first stitch on your knitting needle. Then, pass the needle through the second stitch, bringing it in front of the first stitch. Continue this process until you have bound off all stitches. Cut the yarn, leaving another long tail, and pull it through the last stitch to secure.
After binding off, weave in any loose ends using a yarn needle. Give your finished project a gentle blocking to even out the stitches and make it look more polished.
Your seed stitch knitting is now complete! Admire your beautiful textured fabric and use it to create a variety of cozy and stylish items.
Seed stitch knitting is a versatile technique that can be used in many different projects. Experiment with different yarn weights and colors to create unique and personalized creations.
Tips and Tricks for Seed Stitch Knitting
Seed stitch knitting is a versatile stitch pattern that creates a textured and reversible fabric. While it may seem simple, there are a few tips and tricks that can help you achieve the best results when knitting in seed stitch.
1. Tension is key: Maintaining consistent tension is important in seed stitch knitting to ensure that your fabric doesn’t end up too loose or too tight. Pay attention to your knitting tension and adjust if needed.
2. Use an odd number of stitches: Seed stitch pattern is worked over an odd number of stitches, usually multiples of 2 plus 1. This creates an alternating pattern of knit and purl stitches on every row.
3. Remember to alternate: To achieve the seed stitch pattern, you need to alternate between a knit stitch and a purl stitch on every row. Pay close attention to the pattern and make sure you alternate correctly.
4. Mark your rows: It can be helpful to use stitch markers or different colored yarn to mark your rows in seed stitch knitting. This way, you can easily see where each row begins and ends, making it easier to keep track of your progress.
5. Practice blocking: Seed stitch is known to curl at the edges, so blocking your finished project can help to flatten and even out the fabric. Wet blocking or steam blocking can be used to relax the stitches and achieve a more polished look.
6. Experiment with yarn and needle size: Seed stitch can look different depending on the type of yarn and needle size used. Try experimenting with different combinations to achieve the desired texture and drape for your project.
7. Check your gauge: As with any knitting project, it’s important to check your gauge before starting a larger piece. Make a swatch and measure your stitches and rows per inch to ensure that your finished project will turn out the right size.
8. Have fun with color: Seed stitch can be a great way to showcase different colors, especially in striped or color block projects. Play around with color combinations and see how they interact with the seed stitch pattern.
Remember, practice makes perfect! Don’t be discouraged if your first few attempts at seed stitch knitting don’t turn out exactly as you imagined. With time and practice, you’ll become more comfortable with the technique and be able to create beautiful seed stitch projects.
Common Mistakes to Avoid in Seed Stitch Knitting
Seed stitch knitting is a simple and versatile stitch pattern that creates a beautiful texture. However, like any knitting technique, it is easy to make mistakes, especially if you are new to knitting. Here are some common mistakes to avoid when knitting seed stitch:
- Mixing up knit and purl stitches: Seed stitch is made by alternating knit and purl stitches, so it is important to pay attention to the pattern. Mixing up the two stitches can result in an uneven texture.
- Forgetting to switch stitches: It’s important to switch between knit and purl stitches every row or round in order to create the seed stitch pattern. Forgetting to switch stitches can result in a different stitch pattern.
- Tension issues: Maintaining consistent tension is important in seed stitch knitting. If your tension is too loose, the stitches may look uneven and loose. If your tension is too tight, it can be difficult to insert the needle into the stitches.
- Counting stitches incorrectly: Seed stitch patterns often require a specific number of stitches to be cast on. Make sure to count your stitches carefully before starting your project to ensure that you have the correct number.
- Not using stitch markers: Stitch markers can be helpful in seed stitch knitting to keep track of where you need to switch between knit and purl stitches. Without stitch markers, it can be easy to lose track and make mistakes.
- Not checking gauge: Gauge is important in any knitting project, including seed stitch. Not checking your gauge before starting your project can result in a garment that doesn’t fit properly.
Avoiding these common mistakes will help you achieve a beautiful and even seed stitch pattern in your knitting projects. Remember to take your time, practice, and always double-check your work to ensure the best results.
Advantages of Seed Stitch Knitting
Seed stitch knitting is a versatile and popular stitch pattern that presents several advantages for knitters. Here are some of the main advantages of seed stitch knitting:
- Textured and reversible fabric: Seed stitch creates a fabric with a bumpy texture that adds visual interest to any project. The stitch pattern is reversible, meaning that both sides of the fabric look the same, making it suitable for scarves, blankets, and other items where both sides are visible.
- Simple and easy to memorize: Seed stitch is straightforward and easy to learn, making it a great option for beginners or those looking for a relaxing project. Once you understand the basic stitch pattern, it’s easy to memorize, allowing you to knit without constantly referring to a pattern.
- Good for gauge swatches: Seed stitch is ideal for creating gauge swatches. Its textured nature helps to accurately measure the gauge as it prevents the fabric from curling or distorting. This makes it easier to determine the correct needle size and stitch count for a particular project.
- Great for colorwork: Seed stitch works well in colorwork projects, as it creates a visually striking pattern when combined with multiple colors. The alternating knit and purl stitches help to break up the colors and add depth to the design.
- Excellent for edging and borders: Seed stitch makes a beautiful border or edging on garments or accessories. Its texture adds a decorative element and prevents the edges from rolling or curling. It can also be used to create contrasting cuffs, collars, or hems.
In conclusion, seed stitch knitting offers a range of benefits, from its textured and reversible fabric to its simplicity and versatility. Whether you’re a beginner or an experienced knitter, seed stitch is a stitch pattern worth exploring in your knitting projects.
FAQ:
What is seed stitch knitting?
Seed stitch knitting is a simple and versatile stitch pattern that creates a textured fabric with a distinct look. It is created by alternating knit and purl stitches within a row, and then alternating the order of those stitches in the next row.
How do I start seed stitch knitting?
To start seed stitch knitting, you will need to cast on an even number of stitches. Begin by knitting the first stitch, then purl the next stitch, and continue to alternate knit and purl stitches until you reach the end of the row. In the next row, reverse the pattern, purling the first stitch and knitting the next, and continue alternating the pattern for each row.
Can I use seed stitch knitting for a large project like a sweater?
Yes, seed stitch knitting can be used for large projects like sweaters. However, it’s important to note that seed stitch knitting tends to create a dense fabric, so it may not drape as well as other stitch patterns. If you decide to use seed stitch for a large project, be prepared for a longer knitting time and consider the texture and appearance of the finished piece.
Are there any variations to the seed stitch pattern?
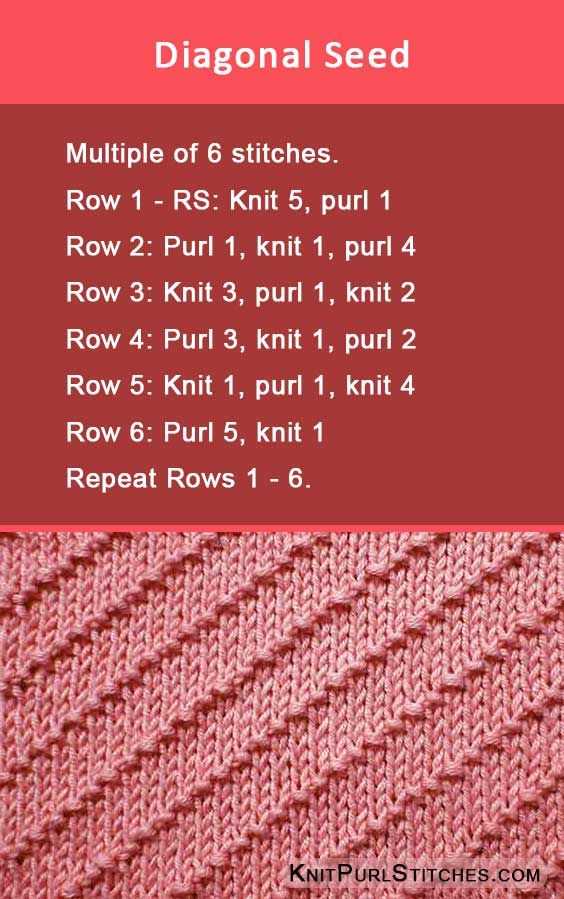
Yes, there are variations to the seed stitch pattern. One common variation is the moss stitch, which is similar to seed stitch but adds an extra purl stitch between each knit stitch. Another variation is the double seed stitch, where you alternate two rows of seed stitch to create a more pronounced texture. These variations can add even more visual interest to your knitting projects.
Can I use seed stitch knitting for a baby blanket?
Yes, seed stitch knitting is a great choice for a baby blanket. The textured fabric created by the alternating knit and purl stitches is not only visually appealing, but it also provides added warmth and coziness. Additionally, seed stitch knitting creates a reversible fabric, so the blanket will look great on both sides.
What type of yarn is best for seed stitch knitting?
The type of yarn you choose for seed stitch knitting depends on the project and the desired outcome. Generally, medium-weight yarns, such as worsted or aran weight, work well for seed stitch knitting. You can choose yarns made of different materials, such as cotton, wool, or acrylic, depending on the drape, warmth, and texture you want to achieve.
Can I use seed stitch knitting for scarves or hats?
Yes, seed stitch knitting is a great choice for scarves or hats. The textured fabric created by the alternating knit and purl stitches adds visual interest to these accessories. Seed stitch scarves and hats also tend to be more stretchy and have a better fit compared to other stitch patterns. Experiment with different yarns and colors to create unique and stylish accessories.


