If you’re a beginner knitter or looking to learn a new stitch, the seed stitch is a great option to try. This versatile stitch creates a beautiful texture with alternating knit and purl stitches. It’s perfect for adding detail to a variety of knitting projects, from scarves and hats to blankets and sweaters.
To get started with the seed stitch, you’ll need a pair of knitting needles and yarn in your desired color. Choose a medium weight yarn for best results. Once you have your materials ready, follow these simple steps to learn how to knit the seed stitch.
Step 1: Cast on an odd number of stitches
To begin the seed stitch, you’ll need to cast on an odd number of stitches. The exact number will depend on the size of your project, but as a general rule, you can start with around 25-30 stitches for a small sample or scarf. Use the cast-on method of your choice, such as the long-tail cast-on.
Step 2: Knit the first stitch
Once you have your stitches cast on, it’s time to start knitting. Begin by knitting the first stitch in your row. Hold the yarn in your right hand and insert the right needle into the first stitch on the left needle, from left to right. Wrap the yarn around the right needle and pull it through the stitch, sliding the stitch off the left needle. You have now completed your first knit stitch.
Step 3: Purl the next stitch
After knitting the first stitch, it’s time to purl the next stitch. To purl, hold the yarn in your right hand and insert the right needle into the next stitch on the left needle, from right to left. Wrap the yarn around the right needle and pull it through the stitch, sliding the stitch off the left needle. You have now completed your first purl stitch.
Continue knitting the next stitch and purling the following stitch until you reach the end of the row. Repeat these steps for every row to create the seed stitch pattern.
Pro tip: To make the seed stitch more distinct, remember to alternate between knitting and purling for every stitch, even when changing rows. This will ensure the texture stands out.
Once you’re comfortable with the seed stitch, you can use it to create a variety of knitting projects. Experiment with different yarn types and colors to create unique patterns and designs. Whether you’re knitting a cozy scarf or a beautiful blanket, the seed stitch adds a lovely touch that will impress everyone who sees your work.
Understanding the Seed Stitch: A Beginner’s Guide
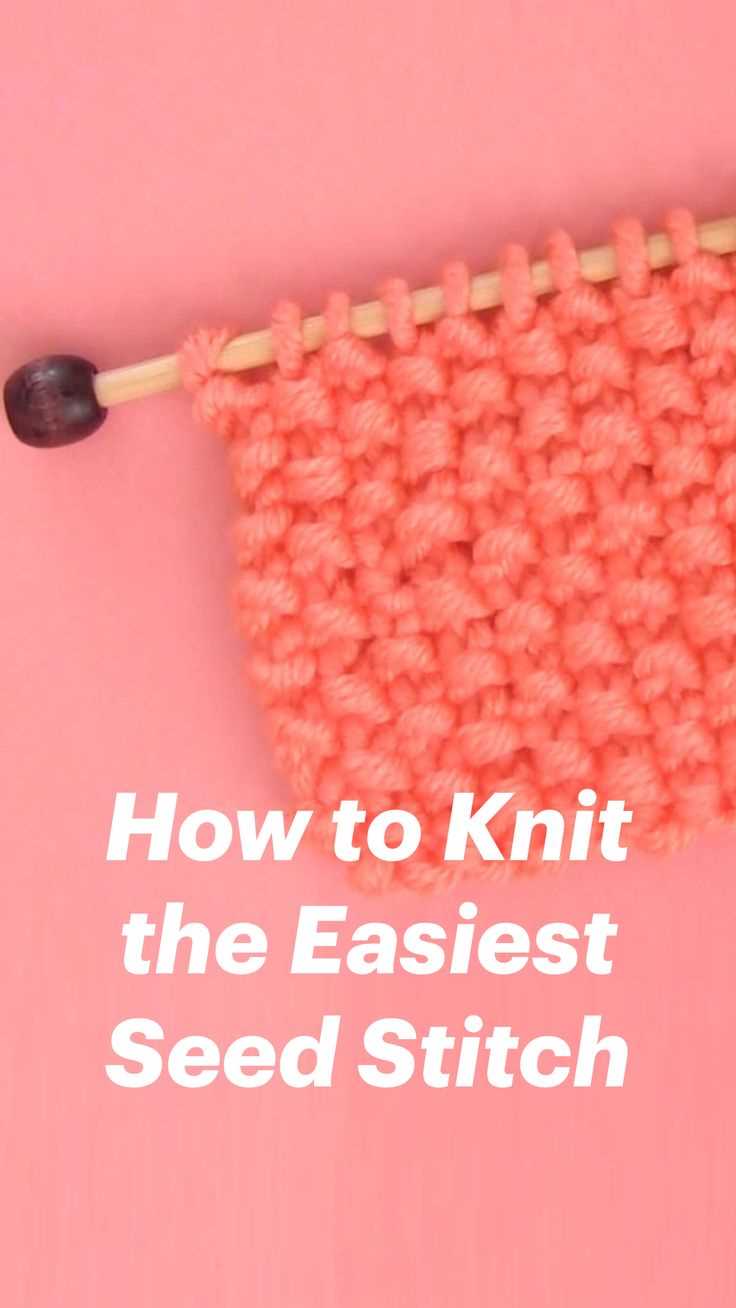
The seed stitch is a basic knitting pattern that creates a textured fabric with small bumps or seeds. It is an ideal stitch for beginners as it is simple to learn and creates a visually appealing pattern. In this guide, we will walk you through the step-by-step process of knitting the seed stitch.
Materials Needed
- Knitting needles
- Yarn of your choice
- Scissors
Step 1: Casting On
To begin knitting the seed stitch, you will need to cast on an even number of stitches onto your knitting needles. Make sure your cast-on stitches are not too tight or too loose.
Step 2: First Row
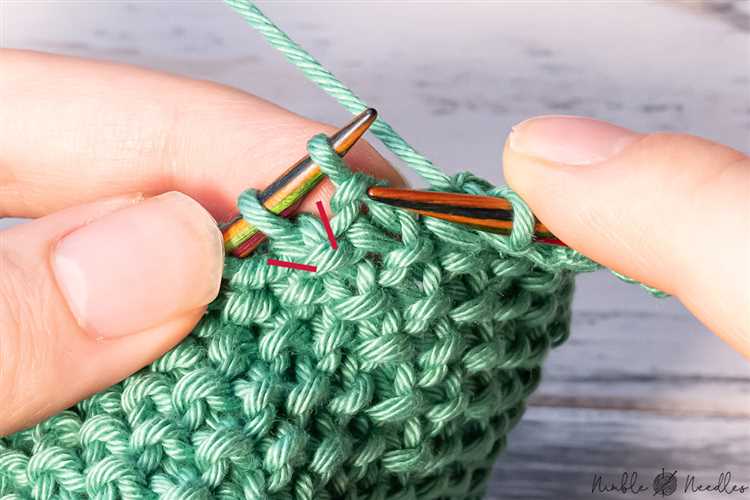
For the first row, knit one stitch, then purl one stitch. Repeat this pattern of knitting one stitch and purling one stitch until you reach the end of the row.
Step 3: Second Row
On the second row, start by purling one stitch, then knitting one stitch. Repeat this pattern of purling one stitch and knitting one stitch until you reach the end of the row.
Step 4: Repeat Steps 2 and 3
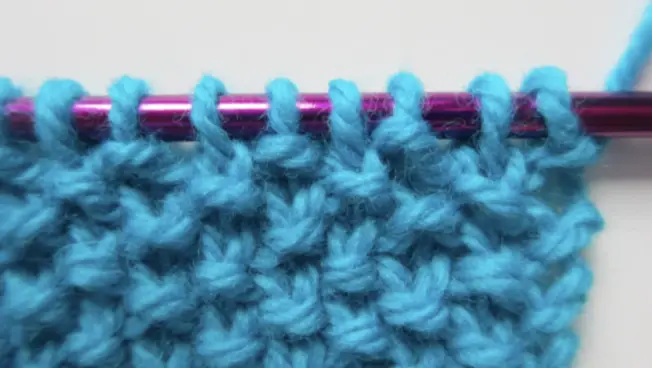
Continue alternating between knitting one stitch and purling one stitch for each row. This alternation creates the seed stitch pattern.
Step 5: Knitting the Last Row
When you have reached the desired length for your project, knit one row across using the seed stitch pattern. This will create a neat edge.
Step 6: Binding Off
To finish your seed stitch project, bind off your stitches. Cut the yarn, leaving a tail, and pull it through the last stitch to secure it.
Tips and Tricks
- When knitting the seed stitch, it’s important to pay attention to your stitches. Make sure to knit the purl stitches and purl the knit stitches to maintain the seed stitch pattern.
- If you want a wider border for your project, you can add an extra few rows of the seed stitch at the beginning and end.
- Experiment with different yarn colors and textures to create unique seed stitch projects.
Now that you understand the basics of the seed stitch, you can start creating your own knitted projects using this simple yet beautiful stitch pattern. Happy knitting!
Getting Started: Tools and Materials
Before you start knitting the seed stitch, there are a few tools and materials you will need to gather. Here is a list of what you will need:
- Knitting Needles: You will need a pair of knitting needles that are appropriate for the weight of yarn you will be using. The size of the needles can vary depending on your personal preference and the desired gauge of your project.
- Yarn: Choose a yarn that is suitable for the project you have in mind. The type of yarn you select will determine the final look and feel of your piece. Consider the weight, color, and fiber content of the yarn.
- Tapestry Needle: A tapestry needle, also known as a yarn needle, will be used for weaving in the ends of yarn once your project is complete. Make sure the needle has a large enough eye to accommodate the yarn you are using.
- Scissors: A pair of scissors will be needed for cutting the yarn when you are finished with a section or when you need to change colors.
- Stitch markers: Stitch markers are helpful for keeping track of specific stitches or sections in your knitting. You can use commercial stitch markers or make your own from scrap yarn or safety pins.
- Measuring Tape: A measuring tape will come in handy for checking your gauge, measuring your work, and determining the finished dimensions of your project.
- Pattern or Instructions: If you are following a specific pattern or set of instructions, be sure to have them on hand before you start knitting.
- Patience and Persistence: Learning a new knitting stitch takes time and practice. Be patient with yourself as you learn and don’t be afraid to make mistakes. With persistence, you will master the seed stitch in no time!
Once you have gathered all of these tools and materials, you will be ready to dive into the world of seed stitch knitting. Enjoy the process and explore the endless possibilities of this versatile stitch!
Step-by-step Instructions
To learn how to knit the seed stitch, follow these step-by-step instructions:
- Cast on stitches: Start by casting on an even number of stitches. This will determine the width of your project.
- Row 1: Knit the first stitch. Then, purl the next stitch. Repeat this knit-purl pattern across the row.
- Row 2: Purl the first stitch. Then, knit the next stitch. Repeat this purl-knit pattern across the row.
- Repeat rows 1 and 2: Continue alternating between rows 1 and 2 until your project reaches the desired length.
- Bind off: When you are ready to finish your project, bind off the stitches following your preferred method.
- Weave in ends: Use a tapestry needle to weave in any loose ends of yarn to give your project a polished look.
The seed stitch is a simple stitch pattern that creates a textured fabric with a bumpy appearance. It is achieved by alternating knit and purl stitches across rows. By following these step-by-step instructions, you will be able to create beautiful seed stitch projects.
Mastering the Basic Technique
Before you can start knitting the seed stitch, you will need to learn the basic knitting technique. Here’s a step-by-step guide to help you get started:
- Choose your yarn and needles: Select a yarn that is suitable for your project and find the appropriate size needles. Thicker yarn will require larger needles, while thinner yarn needs smaller needles.
- Make a slipknot: To start your knitting, make a slipknot by creating a loop with the yarn and pulling the end through. Place the slipknot onto one of your needles.
- Hold the needles: Hold one needle in your right hand (if you’re right-handed) and the other needle with the slipknot in your left hand. Make sure the working yarn is attached to the slipknot needle.
- Insert the right needle: Insert the right needle into the slipknot from left to right, going under the left needle.
- Wrap the yarn: With your right hand, wrap the working yarn (attached to the slipknot needle) around the right needle counterclockwise.
- Pull through: Use the right needle to pull the loop of yarn through the slipknot, creating a new loop on the right needle.
- Transfer stitches: Slip the new loop from the right needle onto the left needle, keeping the working yarn attached to the left needle.
- Repeat: Continue steps 4-7 until you have the desired number of stitches on your needle.
- Start the seed stitch: Now that you have mastered the basic knitting technique, you can begin the seed stitch. The seed stitch is created by alternating knit and purl stitches in a specific pattern.
With these steps, you are ready to start knitting the seed stitch. Remember to practice and be patient, as knitting requires some time and effort to master!
Exploring Variations and Patterns
Once you have mastered the basic seed stitch, you can start exploring variations and patterns to add more complexity to your knitting projects. Here are some ideas to get you started:
Stripes
Add stripes to your seed stitch by alternating colors. You can use two or more colors to create different effects. For example, you can create bold, contrasting stripes or subtle, gradient stripes. Experiment with different color combinations and stripe widths to achieve the desired look.
Color Blocking
Color blocking involves using different colors for different sections of your project. For example, you can knit the main body of a scarf in one color and use a contrasting color for the edges. This creates a visually interesting design and allows you to showcase different colors in your knitting.
Cable Patterns
Combine seed stitch with cable patterns to add texture and depth to your knitting. Cable patterns involve crossing stitches over each other to create intricate designs. You can incorporate cable patterns into your seed stitch by knitting some stitches in seed stitch and others in the cable pattern. This combination adds a touch of elegance and complexity to your knitting projects.
Lace Patterns
For a delicate and airy look, try incorporating lace patterns into your seed stitch. Lace patterns involve creating decorative holes in your knitting by strategically increasing and decreasing stitches. You can knit some sections in seed stitch and others in the lace pattern to create a beautiful contrast. Lace patterns are great for knitting shawls, scarves, and other lightweight accessories.
Fair Isle
Fair Isle knitting is a technique that involves knitting with multiple colors in the same row to create intricate patterns. You can incorporate Fair Isle techniques into your seed stitch by using multiple colors for your seeds. This adds a pop of color and complexity to your knitting projects.
Remember, knitting is all about creativity and experimenting. Don’t be afraid to try new patterns and techniques to make your seed stitch projects unique and exciting!
Troubleshooting: Common Mistakes to Avoid
Knitting seed stitch can be a fun and rewarding project, but it’s important to be aware of common mistakes and know how to troubleshoot them. Here are some common mistakes to avoid:
- Mistake 1: Forgetting to change stitches
- Mistake 2: Tension issues
- Mistake 3: Not counting stitches
- Mistake 4: Losing track of the pattern
- Mistake 5: Not fixing mistakes immediately
- Mistake 6: Not practicing tension techniques
One of the most common mistakes beginners make is forgetting to change stitches when knitting seed stitch. In seed stitch, you alternate between knit and purl stitches. Make sure to pay attention to the pattern and switch between the two stitches accordingly.
Tension is an important aspect of knitting, and maintaining consistent tension is crucial for achieving an even and neat seed stitch pattern. Avoid knitting too tightly or loosely, and try to keep your stitches at a consistent tension throughout your project.
Seed stitch often requires a specific number of stitches to create a balanced pattern. Neglecting to count your stitches can result in an uneven or distorted pattern. Take the time to count your stitches regularly to ensure accuracy.
Seed stitch involves repeating a pattern of knit and purl stitches. It’s easy to lose track of where you are in the pattern, especially if you’re interrupted or distracted. Consider using stitch markers or a notebook to help you keep track of your progress.
If you make a mistake in your seed stitch pattern, it’s crucial to fix it as soon as you notice it. Leaving mistakes uncorrected can result in a cascading effect, making it more difficult to fix later on. Take the time to fix any mistakes as you go, so your finished project looks polished and professional.
If you’re struggling with tension issues, it can be helpful to practice different tension techniques. Try knitting a small swatch before starting your project to experiment with different tension techniques and find what works best for you.
By avoiding these common mistakes and practicing proper technique, you’ll be well on your way to creating beautiful and flawless seed stitch projects.
Tips and Tricks for a Perfect Seed Stitch
- Choose the right yarn and needles: When working on a seed stitch, it’s important to choose a yarn and needles that create a fabric with good stitch definition. Opt for a medium-weight yarn and needles that are appropriate for the yarn’s thickness.
- Always start with an odd number of stitches: The seed stitch pattern requires an odd number of stitches to achieve the desired pattern. This ensures that each row starts and ends with the same stitch, creating a neat and uniform look.
- Pay attention to your tension: Maintaining consistent tension is crucial for a perfect seed stitch. Make sure your stitches are neither too tight nor too loose, as this can affect the overall appearance of the pattern. Practice maintaining an even tension to achieve the desired texture.
- Alternate stitches on each row: To create the seed stitch pattern, you need to alternate between knitting and purling stitches on each row. Pay close attention to the pattern instructions to ensure you switch between the two stitches correctly.
- Use stitch markers: If you find it challenging to keep track of your stitches in the seed stitch pattern, consider using stitch markers. Place a marker after every set of alternating stitches to help you stay organized and prevent any mistakes.
- Block your finished project: Once you have completed your seed stitch project, blocking can enhance the overall appearance of the pattern. Gently wash your knitted item and lay it flat to dry, reshaping it if needed. This will help even out the stitches and create a polished look.
- Practice swatches: If you’re new to knitting seed stitch, it’s a good idea to practice on a smaller swatch before starting a larger project. This will allow you to familiarize yourself with the pattern and ensure that you’re happy with your tension and stitch definition.
- Experiment with color: Seed stitch is a versatile pattern that looks great in a variety of colors. Consider using different-colored yarns to create interesting and eye-catching designs. You can even experiment with color changes within the pattern to add depth and texture to your project.
FAQ:
What is seed stitch?
Seed stitch is a basic knitting stitch pattern that creates a textured fabric with alternating knits and purls.
What materials do I need to knit seed stitch?
To knit seed stitch, you will need knitting needles, yarn, and a pair of scissors.
How do I cast on for seed stitch?
To cast on for seed stitch, you can use any method of casting on that you prefer, such as the long tail cast on or the cable cast on.
What are the basic steps to knit seed stitch?
The basic steps to knit seed stitch are: cast on an even number of stitches, knit 1 stitch, purl 1 stitch, repeat these two stitches across the row, and repeat the knit and purl stitches on each row until the desired length is reached.
Can I use seed stitch for different knitting projects?
Yes, seed stitch can be used for a variety of knitting projects, such as scarves, hats, blankets, and even sweaters. It creates a beautiful, textured fabric that adds interest to any project.


