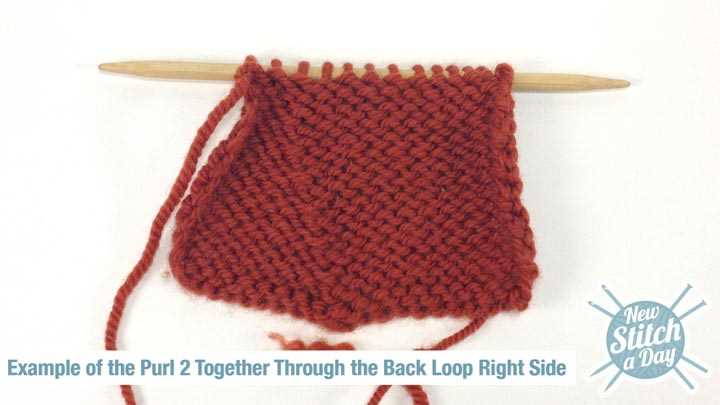
Are you a knitting enthusiast looking to expand your repertoire of knitting stitches and techniques? If so, learning how to knit p2tog tbl (purl two stitches together through the back loop) is a great skill to add to your knitting toolbox. This decrease stitch is commonly used in lace patterns and can create a beautiful, textured fabric.
Knitting p2tog tbl involves combining two purl stitches into one stitch, but instead of working through the front loops, you will be working through the back loops. This creates a twist in the stitch, resulting in a unique look. It may seem a bit tricky at first, but with practice, you’ll quickly get the hang of it.
In this step-by-step tutorial, we will guide you through the process of knitting p2tog tbl. We’ll cover everything from the materials you’ll need to the specific steps you’ll take to successfully execute this stitch. By the end of this tutorial, you’ll be able to confidently incorporate p2tog tbl into your knitting projects.
Note: This tutorial assumes you are familiar with basic knitting techniques, such as knitting, purling, and working with yarn and needles.
Materials needed for knitting p2tog tbl
- Yarn: Choose a yarn that you like and that is suitable for the project you are working on. Make sure it is a yarn with good stitch definition, so that it is easy to see the individual stitches when you are knitting p2tog tbl.
- Knitting Needles: You will need a pair of knitting needles of the appropriate size for your yarn. The size will depend on the pattern you are following or the gauge you want to achieve. Make sure the needles are comfortable to hold and work with.
- Tapestry Needle: A tapestry needle is useful for weaving in loose ends or finishing your project.
- Scissors: You will need a pair of scissors to cut the yarn when you finish your project or when you need to change colors.
- Stitch Marker: A stitch marker can be helpful to mark specific stitches or places in your knitting, especially if you are working on a complex pattern.
- Measuring Tape: A measuring tape is useful to check your gauge or measure your project as you go along.
- Pattern or Instructions: Make sure you have the pattern or instructions for the project you are working on, so that you know when and how to knit p2tog tbl.
Step 1: Casting on stitches for p2tog tbl
Casting on is the first step in any knitting project. Here’s how you can cast on stitches to prepare for p2tog tbl:
- Hold the knitting needle in your right hand and make a slipknot with the yarn. The slipknot will create your first stitch.
- Slide the slipknot onto the left-hand needle, holding both needles in your left hand now.
- Insert the right-hand needle into the slipknot from left to right and under the left-hand needle.
- Wrap the yarn around the right-hand needle counterclockwise.
- Gently pull the right-hand needle and the loop of yarn through the slipknot, creating a new stitch.
- Place the new stitch onto the left-hand needle, and your cast on stitch is complete.
- Repeat these steps until you have cast on the desired number of stitches for your p2tog tbl.
Remember to keep your tension even while casting on to ensure that all your stitches are the same size.
Step 2: Knitting the first stitch for p2tog tbl
Begin by inserting your right-hand needle into the first stitch on your left-hand needle as if to knit.
- Insert the tip of the right-hand needle into the front of the first stitch on the left-hand needle.
- Wrap the yarn around the right-hand needle counterclockwise.
- Bring the right-hand needle back through the first stitch, pulling the loop of yarn through.
- Slide the loop onto the right-hand needle, completing the knit stitch.
This completes the first step of knitting the first stitch for p2tog tbl. Repeat these steps to knit the next stitch on your left-hand needle.
Step 3: Slipping the next stitch onto the right needle for p2tog tbl
In this step, we will learn how to slip the next stitch from the left needle onto the right needle for performing the purl two together through the back loop (p2tog tbl) stitch.
Here’s how to do it:
- Hold the knitting needles with the project in your left hand and the empty needle in your right hand.
- Insert the right needle into the next stitch on the left needle from the back to the front, as if you were going to purl.
- With the right needle, slide the stitch off the left needle and onto the right needle.
Now you have successfully slipped the next stitch onto the right needle in preparation for the p2tog tbl stitch.
Remember to practice this step to get comfortable with the technique before moving on to the next step.
Step 4: Inserting the left needle into the back loop of the slipped stitch for p2tog tbl
In this step, we will insert the left needle into the back loop of the slipped stitch to prepare for the p2tog tbl (purl two stitches together through the back loop) stitch.
- Hold the working needle with the slipped stitch in your right hand, and take the left needle in your left hand.
- Insert the left needle from right to left into the back loop of the slipped stitch on the right needle.
- Make sure the left needle goes all the way through the stitch, and that you are inserting it into the loop that is farthest away from you.
- Once the left needle is inserted, you can now proceed to the next step to complete the p2tog tbl stitch.
Step 5: Knitting the two stitches together through the back loops for p2tog tbl
Once you have mastered the technique of purling two stitches together through the back loops (p2tog tbl), you can create unique and stunning knit patterns. This step-by-step tutorial will guide you through the process of p2tog tbl.
Before you start, make sure you have two stitches on your left-hand needle.
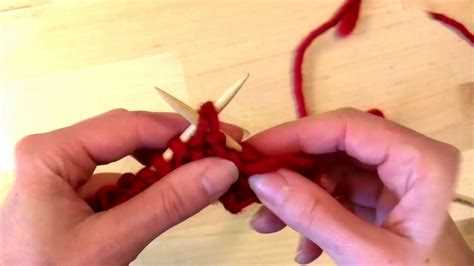
- Insert the right-hand needle into the back loop of the first stitch on the left-hand needle, from right to left. This will create a twist in the stitch.
- Now, insert the right-hand needle into the back loop of the second stitch on the left-hand needle, from right to left.
- With the right-hand needle, bring the yarn over the two stitches from back to front.
- Pull the yarn through both stitches to complete the p2tog tbl stitch.
- Slide the two stitches off the left-hand needle.
Tip: Make sure to keep a firm tension on your stitches while working p2tog tbl to avoid any loose stitches.
By mastering the p2tog tbl technique, you can create various patterns and designs in your knitting projects. Practice this technique and experiment with different patterns to enhance your knitting skills.
Step 6: Repeat steps 2-5 for p2tog tbl until desired number of stitches are decreased
Once you have successfully performed the p2tog tbl stitch and decreased one stitch, you can repeat the previous steps to decrease more stitches in your knitting project.
Here is a summary of the steps:
- Knit the next two stitches together through the back loops using the p2tog tbl technique.
- Pass the working yarn over the needle so that it is in position to knit the next stitch.
- Repeat steps 2 and 3 until you have decreased the desired number of stitches.
Keep in mind that when you decrease stitches, you are making your fabric narrower or shaping it in a specific way. Make sure to follow your pattern’s instructions for the number of stitches to decrease and the specific placement of the decreases.
Remember to practice this technique to become comfortable with it before using it in your knitting projects. With time and practice, you will be able to perform p2tog tbl decreases smoothly and confidently.
FAQ:
What does p2tog tbl mean in knitting?
P2tog tbl stands for “purl two stitches together through the back loop.” It is a decrease stitch that is used to create a decrease in the number of stitches and create a decorative effect in your knitting.
How do I p2tog tbl?
To p2tog tbl, follow these steps: 1. Insert your right-hand needle from right to left through the back loops of the next two stitches on your left-hand needle. 2. Wrap the working yarn counterclockwise around the right-hand needle. 3. Pull this loop of working yarn through the two stitched on your left-hand needle, bringing the loop through the back side of the stitches. 4. Slide the two stitched off your left-hand needle. You have now completed the p2tog tbl stitch.
What is the purpose of p2tog tbl in knitting?
The purpose of p2tog tbl is to decrease the number of stitches in a row and create a decorative effect. It is often used in lace knitting to create unique stitch patterns and decrease the width of the fabric.
Is p2tog tbl difficult to learn?
P2tog tbl may be a bit tricky for beginners, but with practice, it can become easier. It requires inserting the needle through the back loops of the stitches, which may take some getting used to. Following a step-by-step tutorial and practicing regularly will help improve your skill in p2tog tbl.
What other knitting stitches can I use to decrease the number of stitches?
There are several other knitting stitches you can use to decrease the number of stitches, such as k2tog (knit two stitches together), ssk (slip, slip, knit), and skp (slip, knit, pass). Each of these techniques creates a different effect in your knitting and may be used in different stitch patterns or designs.
Can I use p2tog tbl in any knitting project?
P2tog tbl can be used in many knitting projects, but it is most commonly used in lace knitting, where it helps create intricate stitch patterns and decreases the width of the fabric. It may also be used in other projects to create a decorative effect or decrease stitches. Consider the pattern and design of your project before deciding to use p2tog tbl.


