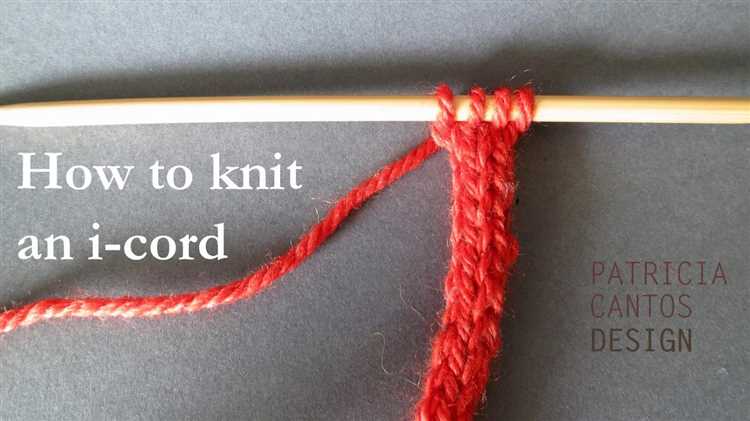
Knitting is a popular craft that allows you to create beautiful and functional items using just a pair of knitting needles and some yarn. If you’re looking to add a new stitch to your repertoire, you should definitely consider learning how to knit I-cord. I-cord is a simple yet versatile knitting technique that can be used to create handles, edgings, or even an entire project. In this step-by-step guide, we will walk you through the process of knitting I-cord from start to finish.
To begin, you will need a set of double-pointed knitting needles, and a ball of yarn in your desired color. The size of your needles and yarn will depend on your project, but generally, a medium weight yarn and corresponding needles will work well.
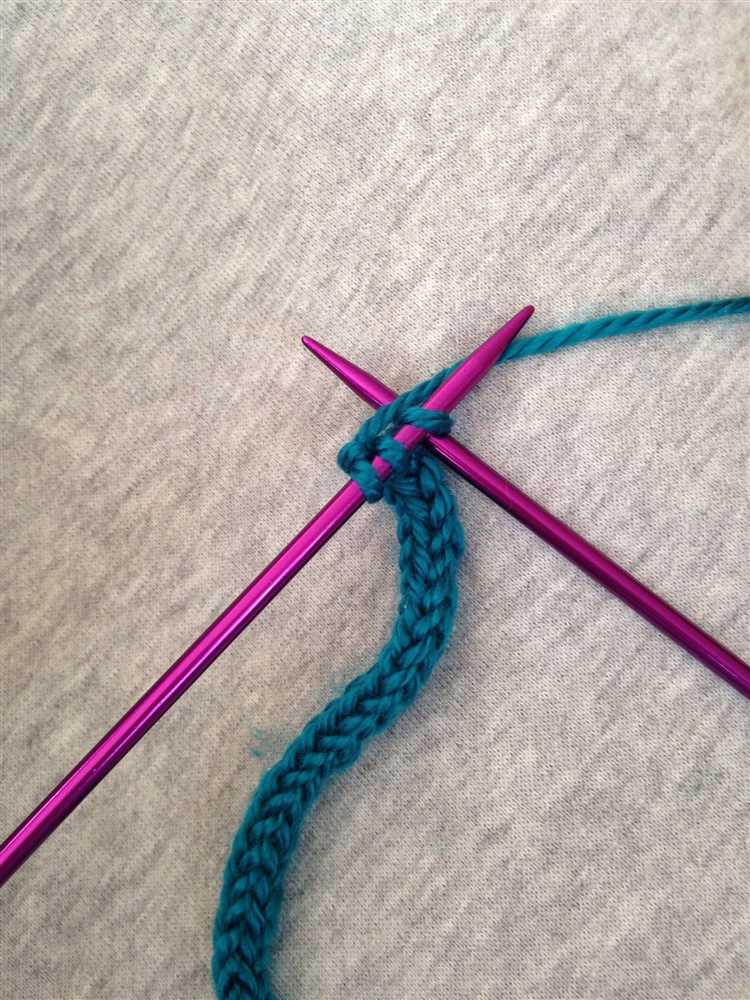
First, cast on the desired number of stitches onto one of your double-pointed needles. For I-cord, you will typically cast on between 3-5 stitches, depending on the thickness you want. Once you have cast on, slide the stitches to the other end of the needle.
Next, hold the needle with the cast on stitches in your left hand, and take the second needle in your right hand. Insert the right needle into the first stitch as if to knit. Wrap the yarn around the needle and pull it through the stitch, transferring it from the left needle to the right needle. Repeat this process for all of the stitches on the needle.
Continue knitting the I-cord by repeating this process until your cord reaches the desired length. Remember to keep the tension consistent as you knit, to create an even and smooth I-cord. Once you have reached the desired length, you can bind off the stitches and weave in any loose ends. Congratulations, you have successfully knit an I-cord!
I-cord can be used in a variety of ways, so feel free to experiment and get creative with your knitting projects. Whether you want to add a decorative edge to a garment or create a unique accessory, learning how to knit I-cord opens up a world of possibilities in your knitting journey.
Why Knit I-Cord?
The I-Cord knitting technique, also known as Idiot Cord, is a simple and versatile knitting technique that can be used for various purposes. Here are a few reasons why you may want to learn how to knit I-Cord:
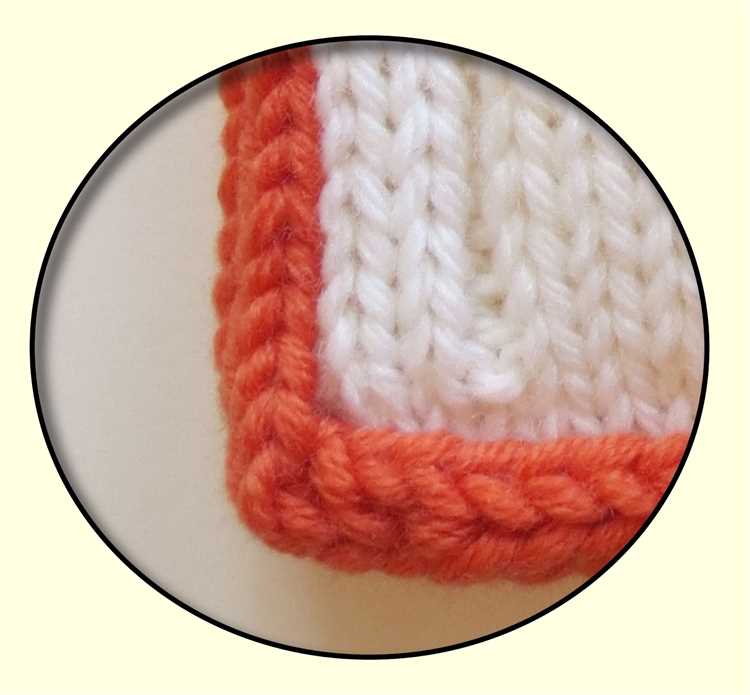
- Creating Edges: I-Cord is often used to create neat and professional-looking edges on knitted projects. It can be used to finish off blankets, scarves, shawls, and other accessories, giving them a clean and polished appearance.
- Adding Detail: I-Cord can be used to add decorative details to your knitting projects. It can be attached as an embellishment to hats, headbands, or even garments, adding a touch of style and uniqueness.
- Cords and Straps: As its name suggests, I-Cord can be used to create cords and straps for various purposes. It can be used to make drawstrings for bags, handles for purses, or even shoelaces. Its round shape and flexibility make it an ideal choice for such applications.
- Strengthening Weak Areas: When knitting garments or accessories that may have weak or stretchy areas, adding an I-Cord border can provide additional strength and stability. This can be especially useful in areas such as buttonholes, pockets, or cuffs that require extra reinforcement.
- Experimenting with Stitch Patterns: I-Cord can be a fun way to experiment with different stitch patterns and techniques. By using different yarns, colors, or stitch variations, you can create unique I-Cord designs that can be incorporated into your knitting projects.
Overall, whether you’re a beginner knitter or an experienced one, learning how to knit I-Cord can open up a world of possibilities for adding a professional touch, enhancing your knitting projects, and exploring new creative avenues.
Materials Needed for I-Cord
To knit I-Cord, you will need the following materials:
- Yarn: Choose a yarn that is compatible with the needle size you plan to use.
- Needles: Use double-pointed needles (DPNs) or a circular needle with a long cable, depending on your preference.
- Tapestry Needle: You will need a tapestry needle to weave in loose ends and finish the I-Cord project.
- Scissors: A pair of scissors will be handy for cutting the yarn.
- Stitch Markers (optional): Stitch markers can help you keep track of your stitches, especially if you are a beginner.
Once you have gathered these materials, you will be ready to start knitting I-Cord and create beautiful projects!
Step 1: Cast On Stitches
To start knitting I-Cord, you’ll need to cast on stitches. Casting on is the process of putting stitches onto your needles to create the foundation row of your project.
Here’s how you can cast on stitches for knitting I-Cord:
- Hold the knitting needles in your hands, with the working yarn placed behind the needles.
- Create a slipknot by making a loop with the yarn, crossing the tail end over the working yarn.
- Slide the slipknot onto the knitting needle, leaving a small loop on the tail end.
- Hold the needle with the slipknot in your right hand, and insert the left needle into the slipknot from left to right.
- Use the right needle to catch the working yarn and bring it through the slipknot.
- Slide the new loop onto the right needle, while keeping the previous loop on the left needle.
- Repeat steps 4-6 until you have cast on the desired number of stitches for your I-Cord.
Once you have finished casting on your stitches, you can continue with the next step in knitting I-Cord.
Step 2: Knit the I-Cord
Once you have cast on the desired number of stitches for your I-Cord, you can begin knitting it. Here are the steps to knit the I-Cord:
- Hold the knitting needles with the I-Cord stitches in your right hand, and leave the working yarn on the left side.
- Insert the right needle into the first stitch on the left needle as if you were going to knit.
- Wrap the working yarn around the right needle from back to front in a counterclockwise direction.
- Use the right needle to pull the yarn through the stitch, creating a new loop on the right needle.
- Carefully slide the stitch off the left needle, transferring it to the right needle.
- Repeat steps 2-5 for each stitch on the left needle until you have knit all the stitches in the I-Cord.
- Keep the tension of your stitches consistent as you knit, ensuring that they are not too tight or too loose.
- Continue knitting the I-Cord until it reaches the desired length, referring to your project instructions for guidance.
Remember to always knit the I-Cord using the same technique, whether it’s for the entire length of the I-Cord or just a few rows. Once you have finished knitting the I-Cord, you can use it in various ways, such as a decorative trim or a functional handle for a bag. Enjoy the process of knitting the I-Cord and experiment with different colors and yarns to create unique projects!
Step 3: Joining I-Cord to Project
Once you have completed your desired length of I-Cord, it’s time to join it to your project. Here are the steps to follow:
- Thread the I-Cord through a tapestry needle. This will make it easier to join the I-Cord to your project.
- Locate the point on your project where you want to attach the I-Cord. It could be an edge, a seam, or any other desired location.
- Insert the tapestry needle through the project at the attachment point. You can use a sewing or embroidery needle if you don’t have a tapestry needle.
- Pull the I-Cord through the attachment point. Make sure to leave a small tail of I-Cord on the wrong side of the project to secure it later.
- Move the needle to the front side of the project. Insert it through the same stitches as the I-Cord, but in the opposite direction.
- Pull the I-Cord tight to secure it to the project. Adjust the tension as needed.
- Repeat steps 3-6 to attach the I-Cord to other desired locations on your project.
- Once you have finished attaching the I-Cord, secure the tails on the wrong side of the project. You can use a tapestry needle to weave in the ends or tie them off and trim them close to the fabric.
By following these steps, you will be able to successfully join your I-Cord to your project and add a finished touch to your knitting project.
Step 4: Binding Off
Once you have reached the desired length for your I-cord, it’s time to bind off. The binding off process creates a finished edge that prevents the stitches from unraveling. Follow these steps to bind off your I-cord:
- Knit 2 stitches: Start by knitting the first two stitches of your I-cord, just like you would with a regular row.
- Insert left needle into first stitch: Insert your left needle into the first stitch on your right needle, just as if you were going to knit.
- Slip stitch over: Using your right needle, lift the first stitch on the left needle up and over the second stitch and completely off the left needle. You are essentially slipping the first stitch over the second stitch.
- Continue binding off: Repeat steps 2 and 3 until only one stitch remains on your right needle. You have successfully bound off one stitch.
- Knit last stitch: Knit the last stitch on your right needle, just like you would with a regular row.
After binding off all the stitches, cut the yarn, leaving a long tail for weaving in later. Congratulations! You have now successfully completed your I-cord project.
Applications of I-Cord
I-Cord, or Idiot Cord, may have a funny name, but it is a versatile knitting technique that can be used in various projects. Here are some popular applications of I-Cord:
- Edging: I-Cord can be used as a decorative trim for the edges of garments, such as sweaters, cardigans, or scarves. It adds a polished and finished look to the project.
- Drawstrings: I-Cord can be used to create drawstrings for bags, pouches, or hoodies. It provides a sturdy and flexible cord that can be easily adjusted.
- Decorative Accents: I-Cord can be used to create decorative elements, such as twisted cords or braids, which can be added to hats, headbands, or even as jewelry.
- Handles and Straps: I-Cord can be used to create handles or straps for bags, tote bags, or purses. It provides a comfortable and durable grip.
- Cord Wrapping: I-Cord can be used to wrap around the handles of kitchen utensils, such as wooden spoons or ladles, to provide a cushioned grip and prevent slippage.
- Embellishments: I-Cord can be used as an embellishment for various projects, such as adding loops to buttonholes or as a decorative element on blankets or pillows.
I-Cord is a simple technique that can be easily customized to fit your project needs. It can be knit in various lengths, widths, and colors, allowing you to experiment and get creative with your knitting projects.
| Pros | Cons |
|---|---|
|
|
Tips and Tricks for Knitting I-Cord
- Choose the right yarn: When knitting I-Cord, it’s important to choose a yarn that has good stitch definition and is not too slippery. A yarn with a bit of bounce and structure will work best for creating a sturdy I-Cord.
- Use double-pointed needles: I-Cord is typically knit on double-pointed needles, as they allow you to easily slide the stitches from one end to the other. Make sure to choose a needle size that is appropriate for your yarn weight to achieve the desired gauge.
- Keep your tension consistent: Consistent tension is key to creating a neat and even I-Cord. Avoid pulling too tightly or too loosely on the yarn as you knit. Take your time to ensure each stitch is worked with an even tension.
- Knit in the round: I-Cord is worked in a continuous tube, so it’s best to knit it in the round. This will eliminate the need to join separate pieces together later on. Use circular needles or double-pointed needles, depending on your preference.
- Practice a smooth rhythm: Knitting I-Cord can be repetitive, so finding a smooth knitting rhythm will make the process more enjoyable. Pay attention to your hand movements and find a comfortable way to knit I-Cord that works for you.
- Experiment with different widths and lengths: I-Cord can be knit in various widths and lengths, depending on your project. Play around with different stitch counts to achieve the desired thickness and experiment with different lengths to suit your needs.
- Add a twist for a decorative touch: To add a decorative twist to your I-Cord, simply hold the tube in one hand and twist it a few times before continuing to knit. This will create a spiral effect that can add visual interest to your finished project.
- Consider using I-Cord for embellishments: I-Cord is not only great for creating straps and handles, but it can also be used as an embellishment on other knitted or crocheted projects. Try adding I-Cord as an edging or as a decorative element to give your project a unique touch.
- Use I-Cord for quick and portable projects: I-Cord is a great option for small, portable projects as it only requires a few stitches and is worked in the round. Consider making keychains, bag charms, or even jewelry using I-Cord.
- Have fun with color: I-Cord can be a great way to showcase different colors in your knitting projects. Experiment with color changes and multi-colored yarns to create unique and eye-catching I-Cord designs.
FAQ:
What is I-Cord?
I-Cord is a narrow knitted tube that is commonly used for decorative trims, handles, and other embellishments in knitting projects.
What materials do I need to knit I-Cord?
To knit I-Cord, you will need knitting needles (preferably double-pointed needles), yarn, and a tapestry needle.
Can I use any yarn to knit I-Cord?
Yes, you can use any type of yarn to knit I-Cord. However, it is recommended to use a yarn that is similar in weight to the main yarn used in your project.
How do I cast on stitches for I-Cord?
To cast on stitches for I-Cord, you will need to use the cable cast-on method. This technique creates a neat and stretchy edge for your I-Cord.
How do I knit I-Cord?
To knit I-Cord, you will need to knit the first row of stitches, then slide the stitches to the other end of the needle and knit again. Repeat this process until your I-Cord reaches the desired length.
Can I add stripes to my I-Cord?
Yes, you can add stripes to your I-Cord by changing colors after completing a row. Simply cut the yarn of the current color, leaving a short tail, and attach the new color of yarn. Continue knitting in the new color.
How do I bind off stitches for I-Cord?
To bind off stitches for I-Cord, you will need to knit the first two stitches. Then, using the left needle, lift the first stitch over the second stitch and off the needle. Knit another stitch, and repeat the process until there is only one stitch left on the right needle. Cut the yarn, leaving a tail, and thread it through the last stitch to secure.


