Knitting is a beloved craft that allows you to create beautiful and functional items. If you are a beginner knitter or looking to expand your knitting skills, learning how to knit an icord is a great place to start. In this step-by-step tutorial, we will guide you through the process of knitting an icord, a simple and versatile knitting technique.
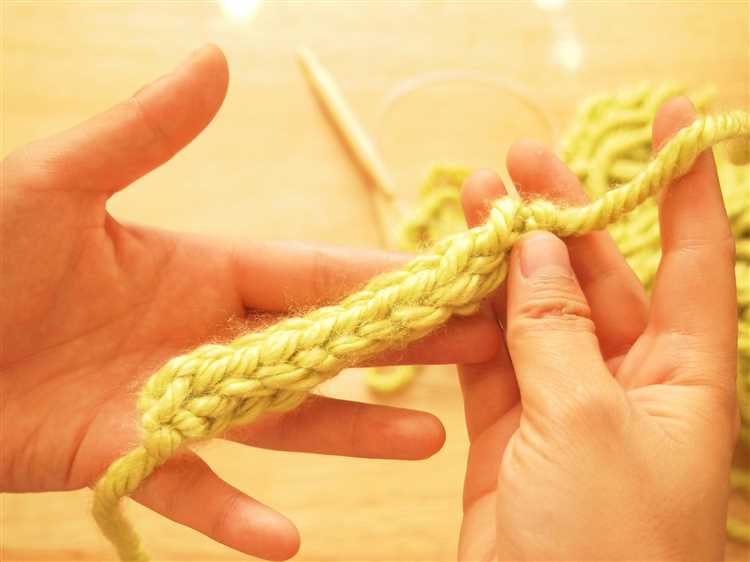
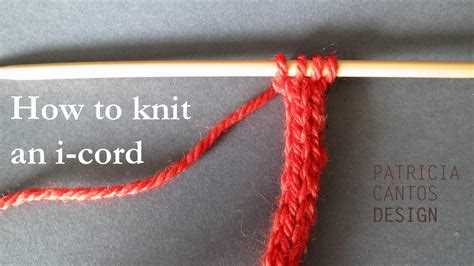
An icord, short for “idiot cord,” is a narrow tube of knitting that can be used for various purposes such as drawstrings, decorative trim, shoelaces, and more. It is created by repeatedly knitting a few stitches on double-pointed needles or a circular needle without turning the work.
To begin knitting an icord, you will need a set of double-pointed needles or a circular needle, yarn of your choice, and basic knitting skills. The icord is worked in a continuous spiral, so make sure you are comfortable with knitting in the round.
In this tutorial, we will cover the basics of casting on, knitting, and binding off an icord. We will also provide tips and tricks to help you achieve a neat and even result. So grab your knitting needles and let’s get started on this exciting knitting adventure!
Learn how to knit an icord – step by step tutorial
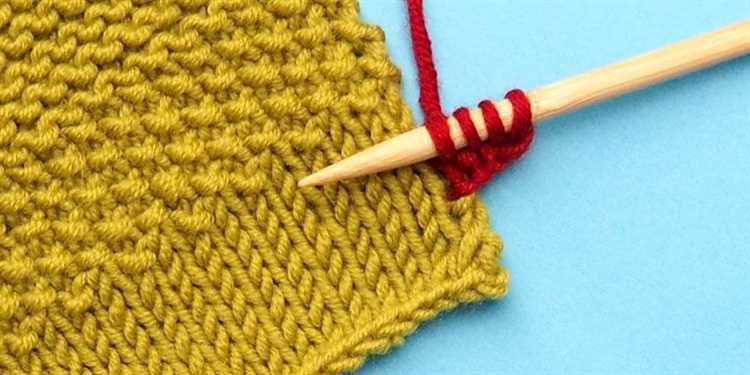
An icord is a knitted cord that is smooth and tubular, making it perfect for adding edging or straps to your knitted projects. It is also a great technique for creating decorative elements. Follow this step-by-step tutorial to learn how to knit an icord:
- Materials: To start knitting an icord, you will need a pair of knitting needles, a skein of yarn, and a tapestry needle.
- Casting on: Begin by making a slipknot and placing it on one of the knitting needles. Hold the needle with the slipknot in your right hand and the empty needle in your left hand.
- Knitting the icord: With the yarn at the back, insert the right needle into the slipknot from left to right and wrap the yarn around the right needle.
- Pulling the loop through: Use the right needle to pull the loop through the slipknot, creating a new stitch. This stitch should be snug but not too tight.
- Sliding the stitches: Push the new stitch to the right-hand needle. You now have two stitches on the right needle.
- Repeat steps 3-5: Continue steps 3-5 until your icord reaches the desired length. Remember to keep the tension consistent throughout.
- Binding off: To bind off the icord, knit the first two stitches as usual. Then insert the left needle into the first stitch on the right needle and lift it over the second stitch and off the needle.
- Finishing off: Continue binding off in this manner until you have one stitch left on the right needle. Cut the yarn, leaving a tail, and pull it through the last stitch to secure.
- Weaving in the ends: Thread the tapestry needle with the yarn tail and weave it through the back of the icord to hide the end.
Now you know how to knit an icord! Use this versatile technique to add beautiful finishing touches to your knitted creations.
Materials needed for knitting an icord
To knit an icord, you will need a few basic materials:
- Yarn: Choose a yarn in your preferred color and weight. A smooth yarn works best for creating a clean and polished icord.
- Knitting Needles: You will need a pair of knitting needles in the appropriate size for your yarn. For most icord projects, a set of double-pointed needles (DPNs) in size US 6 or 7 (4.0 – 4.5mm) will work well.
- Tapestry Needle: This needle will be used to weave in any loose ends or to sew the icord onto your project if desired.
- Scissors: A pair of scissors will be necessary for cutting the yarn.
Step 1: Casting on stitches
The first step in knitting an i-cord is to cast on the desired number of stitches onto your knitting needle. The i-cord is typically knit with a small number of stitches, usually 2 or 3, but you can adjust the number of stitches depending on the size and thickness of the cord you want to create.
There are different methods for casting on stitches, but one of the most common methods used for casting on stitches for an i-cord is the knitted cast on. Here’s how to do it:
- Hold the knitting needle in your right hand, with the yarn attached to the ball of yarn hanging down.
- Using your left hand, make a slipknot by creating a loop with the yarn.
- Insert the knitting needle into the slipknot from front to back, with the working yarn behind the needle.
- Slide the slipknot onto the needle, making sure it is not too tight or too loose.
- Hold the knitting needle with the slipknot in your right hand, and the working yarn in your left hand.
- With your left hand, insert the needle into the slipknot from back to front, and under the right-hand needle.
- Take the working yarn and wrap it counterclockwise around the right-hand needle, going over the left-hand needle.
- Using the tip of the right-hand needle, pull the loop of yarn through the slipknot, creating a new stitch on the right-hand needle.
- Repeat steps 6-8 until you have cast on the desired number of stitches.
Once you have cast on the stitches, you are ready to move on to the next step in knitting the i-cord.
Step 2: Knitting the icord
Once you have your knitting needles and yarn ready, follow these steps to create an icord:
- Hold your knitting needles with the cast-on stitches in your right hand.
- Slide the stitches to the right-hand side of the needle and hold the yarn behind the stitches.
- Insert the right-hand needle into the first stitch from left to right, just as you would for a normal knit stitch.
- Wrap the yarn around the right-hand needle from back to front.
- Pull the yarn through the stitch, creating a new stitch on the right-hand needle.
- Slip the old stitch off the left-hand needle, leaving the new stitch on the right-hand needle.
- Repeat these steps for each stitch in your cast-on row until you have knitted all of the stitches.
As you continue knitting the icord, make sure to keep the tension on the yarn consistent to create an even and uniform cord.
Remember to knit all of the stitches in the same manner as described above. The icord will start forming as you knit more rows.
You can vary the width of your icord depending on how many stitches you cast on in the beginning. The more stitches you have, the wider the icord will be.
Continue knitting until your icord reaches the desired length. To finish the icord, follow the next step in the tutorial.
Step 3: Creating the icord’s tube shape
Now that you have cast on the required number of stitches for your icord, it’s time to start creating its tube shape. Follow these steps:
- Hold the needle with the cast on stitches in your right hand and the empty needle in your left hand. Ensure that the working yarn is on the right side of the needle with the cast on stitches.
- Insert the empty needle into the first stitch on the right-hand needle as if to knit, but instead of knitting it, slip the stitch onto the empty needle. This means that you transfer the stitch from the right-hand needle to the left-hand needle without actually working or altering the stitch in any way.
- Repeat step 2 for each stitch on the right-hand needle. Remember to slip each stitch onto the empty needle without knitting or purling it.
- Once all the stitches have been moved to the left-hand needle, return the empty needle back to your right hand and continue sliding the stitches to the right end. This will allow you to continue working the next row without having to turn the work.
- Continue repeating steps 2-4 until your icord has reached the desired length. You will notice that the stitches begin to form a tube shape as you keep repeating these steps.
- When you’ve reached the desired length, cast off the stitches. To do this, knit the first two stitches together, then lift the first stitch on the right-hand needle over the second stitch and off the needle. Continue this process until only one stitch is left on the right-hand needle, and cut the working yarn, leaving a tail of a few inches. Finally, pull the tail through the last stitch to secure it.
Congratulations, you have now successfully created an icord with a tube shape! This versatile knitting technique can be used for various projects, such as handles for bags, decorative trim, or even as part of more complex knitting patterns.
Step 4: Binding off the icord
After you have completed knitting the desired length of your icord, it’s time to bind off and finish it off.
To bind off the icord, follow these steps:
- Knit the first two stitches as usual.
- Insert the left-hand needle tip into the first stitch on the right-hand needle.
- Lift the first stitch over the second stitch and off the right-hand needle, passing it over the second stitch and onto the left-hand needle.
- You now have one bound off stitch and one stitch on the right-hand needle.
- Knit the next stitch on the right-hand needle.
- Repeat steps 2-5 until you have only one stitch left on the right-hand needle.
- Cut the working yarn, leaving a tail of about 6 inches.
- Pull the tail through the last stitch to secure it.
Now your icord is bound off and finished! You can use it as a decorative trim, a handle for bags or garments, or incorporate it into your knitting projects in various ways.
Tips for knitting a perfect icord
Knitting an icord can be a fun and versatile technique to add a professional-looking finish to your knitting projects. Here are some tips to help you create a perfect icord:
- Use the right needles: For a smooth and even icord, it’s best to use double-pointed needles in a size suitable for your yarn. This will ensure that your stitches are evenly spaced and the tension is consistent throughout.
- Start with a slipknot: To begin your icord, create a slipknot and place it on one of the needles. This will help you get your first row of stitches started easily.
- Keep your tension consistent: Maintaining an even tension is crucial for creating a neat and uniform icord. Make sure not to pull your yarn too tightly or leave it too loose. Consistent tension will help your stitches appear uniform and tidy.
- Knit with patience: Knitting an icord requires knitting every row, so it may feel repetitive. However, take your time and knit each stitch carefully to ensure a professional-looking result. Rushing can lead to mistakes and uneven stitches.
- Avoid twisting your stitches: To achieve a clean icord, make sure your stitches are not twisted on the needles. Double-check each stitch as you knit to ensure they are all facing the same direction.
- Block your icord: Once you’ve finished knitting your icord, consider blocking it to enhance its appearance. Gently wash your icord, reshape it to the desired length and width, and lay it flat to dry. Blocking can help even out any irregularities and give your icord a polished finish.
- Experiment with different yarns and needle sizes: Icord can be knit with a variety of yarns and needle sizes, which can significantly alter its appearance. Don’t be afraid to experiment and try different combinations to achieve the desired effect. Thicker yarns can create a chunkier icord, while finer yarns can result in a more delicate cord.
By following these tips and practicing your knitting skills, you’ll be able to create beautiful icords that add a professional touch to your knitting projects. Have fun knitting!
FAQ:
What is an i-cord?
An i-cord is a knitted cord or tube that is typically used as a decorative element or as a drawstring in knitting projects.
How do I knit an i-cord?
To knit an i-cord, you will need double-pointed knitting needles and yarn. Cast on the desired number of stitches onto one of the needles, then slide the stitches to the other end of the needle. Knit across the stitches, then slide them to the other end again. Repeat this process until the i-cord reaches the desired length.
What can I use an i-cord for?
An i-cord can be used for various purposes in knitting projects. It can be used as a decorative element in garments, such as edging or trim. It can also be used as a drawstring in bags or as a strap for accessories like hats or headbands.
Can I use any type of yarn to knit an i-cord?
You can use any type of yarn to knit an i-cord, although it is generally recommended to use a yarn that is similar in weight to the project you are working on. Thicker yarns will result in a bulkier i-cord, while thinner yarns will create a more delicate cord.


