Knitting is a versatile and rewarding craft that allows you to create beautiful and functional pieces of clothing and accessories. If you’re a beginner knitter looking to expand your skills, learning how to knit a wrapped stitch can open up a whole new world of possibilities. In this step-by-step guide, we’ll walk you through the process of knitting a wrapped stitch, from start to finish.
A wrapped stitch adds texture and depth to your knitting projects, giving them a unique and eye-catching look. It’s a simple technique that involves wrapping the yarn around the needle before knitting the stitch. This creates a little loop of yarn around the stitch, which adds extra volume and visual interest.
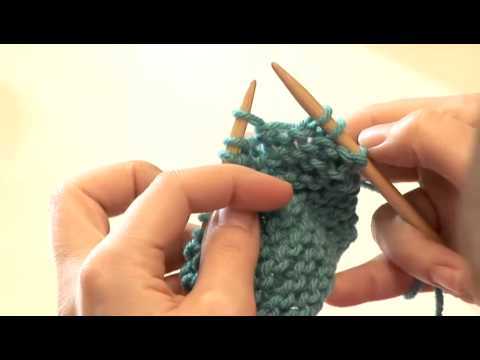
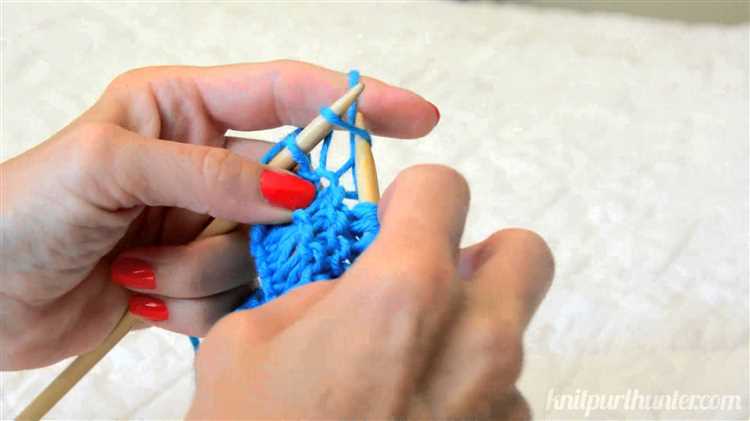
To knit a wrapped stitch, start by inserting your right needle into the next stitch as if to knit. Instead of simply knitting the stitch, bring the working yarn to the front of your work and wrap it around the right needle once in a clockwise direction. Then, bring the working yarn to the back of your work and complete the knit stitch as usual, pulling the yarn through the loop and slipping the old stitch off the left needle.
Once you’ve mastered the basic technique of knitting a wrapped stitch, you can get creative and experiment with different patterns and designs. For example, you can knit multiple wrapped stitches in a row to create a ribbed or bumpy texture. Or you can combine wrapped stitches with other stitch patterns, such as cables or lace, to create intricate and unique designs.
Choosing the Right Yarn and Needles
When it comes to knitting, choosing the right yarn and needles is essential for a successful project. Here are some tips to help you make the best choices:
- Consider the project: Before selecting your yarn and needles, think about what you want to knit. Different projects may require different types of yarn and needles.
- Yarn weight: Yarn comes in various weights, from super fine to super bulky. The weight of the yarn will determine the gauge and the final appearance of your project. Choose a yarn weight that matches the pattern’s requirements or the desired outcome.
- Fiber content: Yarns can be made from different fibers, such as wool, cotton, acrylic, or blends. Each fiber has its own characteristics and properties. Consider the desired drape, warmth, and care instructions when choosing the fiber content.
- Needle size: The size of your needles will also affect the gauge and the overall look of your knitting. Most patterns will recommend a specific needle size or a range to achieve the desired outcome. Be sure to check the pattern or consult a needle size chart for guidance.
- Consider your skill level: If you’re a beginner knitter, it’s best to start with medium or large-sized needles and a smooth, medium-weight yarn. This will make it easier to see your stitches and practice your technique.
- Personal preference: Ultimately, choose yarn and needles that you find comfortable and enjoyable to work with. Experiment with different combinations to find what works best for you and your knitting style.
By considering these factors and making informed choices, you’ll be well on your way to creating beautiful knitted projects. Remember, knitting is a creative and personal craft, so don’t be afraid to explore and try new materials and techniques!
Basic Knitting Techniques
Knitting is a versatile craft that offers a wide range of techniques to create beautiful and functional projects. Whether you are a beginner or an experienced knitter, mastering the basics is essential. Here are some fundamental knitting techniques to get you started:
Casting On
Casting on is the first step in starting a knitting project. It creates the foundation row of stitches that you will work with. There are several methods for casting on, including the long-tail cast-on and the knitted cast-on. Choose the method that works best for you and practice until you are comfortable with it.
Knit Stitch
The knit stitch is the most basic stitch in knitting. It creates a smooth fabric with a flat, v-shaped pattern on the right side. To knit, insert the right needle into the first stitch from left to right, wrap the yarn around the needle, and pull it through the stitch. Slide the stitch off the left needle and repeat.
Purl Stitch
The purl stitch is the reverse of the knit stitch and creates a bumpy texture on the right side of the fabric. To purl, insert the right needle into the first stitch from right to left, wrap the yarn around the needle, and pull it through the stitch. Slide the stitch off the left needle and repeat.
Knit 2 Together (K2tog)
The knit 2 together stitch is a decrease stitch that reduces the number of stitches on your needles. To do a knit 2 together, insert the right needle into the next two stitches from left to right, wrap the yarn around the needle, and pull it through both stitches at the same time. Slide the stitches off the left needle and repeat.
Yarn Over (YO)
The yarn over stitch is an increase stitch that adds a new stitch to your knitting. To do a yarn over, simply bring the yarn to the front of your work (if it’s not already there), then wrap it around the right needle from back to front. Continue knitting or purling the next stitch as usual.
Binding Off
Binding off is the final step in finishing a knitting project. It creates a secure edge and prevents the stitches from unraveling. To bind off, knit the first two stitches, then use the left needle to lift the first stitch over the second stitch and off the right needle. Continue knitting the next stitch and binding off the previous stitch until only one stitch remains. Cut the yarn, leaving a long tail, and pull it through the last stitch to secure it.
Blocking
Blocking is an important step in finishing your knitting projects. It helps to even out the stitches, relax the fabric, and shape the project to the desired dimensions. To block your knitting, wet it with water or a blocking solution, gently squeeze out the excess moisture, and lay it flat on a towel. Shape the project into the desired dimensions and let it dry completely.
These are just a few of the basic knitting techniques to help you get started. As you continue to explore knitting, you’ll discover new stitches, patterns, and techniques to expand your knitting skills and create beautiful projects.
Understanding the Wrapped Stitch
The wrapped stitch is a technique used in knitting to create a neat and decorative edge. It involves wrapping the yarn around the needle before knitting the next stitch, which creates a small loop. The wrapped stitch is commonly used in patterns that require a clean and polished finish, such as scarves, shawls, and blankets.
To create a wrapped stitch, follow these simple steps:
- Insert the right needle into the next stitch as if to knit.
- Instead of knitting the stitch normally, bring the yarn to the front of the work, between the needles.
- Wrap the yarn clockwise around the right needle, crossing over the front of the stitch.
- Bring the yarn back to the back of the work, between the needles.
- Continue knitting the stitch as usual, using the wrapped loop as one stitch.
The wrapped stitch creates a decorative edge by slightly elongating the stitch and adding a small loop. This loop can be left as is for a subtle design element or manipulated in various ways for a more intricate look.
There are several ways to manipulate the wrapped stitch, including:
- Slipping the wrap: Instead of knitting the wrap, simply slip it onto the right needle without knitting it. This creates a twisted loop and can be used to create a raised texture on the knitted fabric.
- Knitting the wrap: Instead of slipping the wrap, knit it along with the stitch. This creates a double-thick stitch and can be used to add extra warmth and thickness to the fabric.
- Unwrapping the stitch: After knitting the wrap, carefully undo the loop and separate it from the stitch. This creates a lacy effect and can be used to add an openwork pattern to the fabric.
By understanding and experimenting with the wrapped stitch, you can add texture, dimension, and visual interest to your knitting projects. Whether you choose to keep it simple or get creative, the wrapped stitch is a versatile technique that can elevate your knitting skills and create beautiful finished pieces.
Step 1: Casting On
Before you can begin knitting, you need to cast on your stitches. This is the first step in creating the foundation row of your project.
There are several methods for casting on, but the most common method for beginners is the long-tail cast on. This method creates a neat and stretchy edge that is perfect for many projects.
To begin, you will need a pair of knitting needles and your yarn. You will also need to leave a tail of yarn that is approximately three times the width of the project you are working on.
- Hold the knitting needle in your right hand and make a slipknot by creating a loop with the yarn.
- Place the slipknot on the knitting needle and pull the working yarn to tighten the loop.
- Hold the knitting needle with the slipknot in your right hand and the tail of yarn in your left hand.
- With your left hand, bring the yarn over the top of the needle so that it forms a cross.
- Insert the needle into the loop on your thumb and grab the yarn that is behind the loop.
- Pull the yarn through the loop to create a new stitch on the knitting needle.
- Repeat steps 4-6 until you have cast on the desired number of stitches.
Once you have cast on all of your stitches, you are ready to begin knitting the first row of your project. Casting on may take some practice to get the tension and evenness of the stitches right, so don’t be discouraged if your first attempts don’t look perfect.
Step 2: Knitting the Wrapped Stitch
Once you have completed the wrapping process, it is time to knit the wrapped stitch. Follow these steps:
- Insert your right-hand needle from left to right into the stitch that was wrapped.
- Insert your left-hand needle from left to right into the next stitch on the left-hand needle.
- Use the right-hand needle to lift the wrapped stitch up and over the stitch next to it and off the left-hand needle.
By completing these steps, you have now knit the wrapped stitch. Repeat this process for any other wrapped stitches in your knitting project.
It is important to note that when knitting a wrapped stitch, you may need to adjust your tension slightly. Pay attention to the tension of the yarn to ensure that the stitch is not too loose or too tight.
Continue following the next steps in the beginner’s guide to learn how to finish your knitting project and create beautiful wrapped stitch patterns.
Step 3: Finishing Your Project
Once you have completed knitting your wrapped stitch project, it’s time to finish it off to give it a polished look.
- Bind off: Start by binding off your stitches to secure them. To do this, knit the first two stitches as usual, and then using your left needle, lift the first stitch over the second stitch and off the right needle. Continue this process until you have only one stitch left on the right needle, then cut the yarn leaving a tail and pull it through the final stitch to secure it.
- Weave in ends: Take the tail of yarn you left after binding off and thread it onto a tapestry needle. Insert the needle into the knitted fabric, following the path of the stitches, and weave the tail in and out to hide it. Trim any excess yarn.
- Block your project: Blocking is the process of steaming or wetting your knitted piece to help it relax and shape it to its final dimensions. This step is optional, but it can help your project look more professional. Follow the instructions for blocking based on the specific type of yarn you used.
And there you have it! With just a few simple steps, you can finish your wrapped stitch project and proudly display or wear it.
Tips and Troubleshooting
Knitting a wrapped stitch may seem intimidating at first, but with a little practice, it can become a new technique in your knitting repertoire. Here are some tips and troubleshooting tips to help you along the way.
Tips
- Start with a simple pattern or practice swatch to get comfortable with the wrapped stitch technique. Once you feel confident, you can incorporate it into more complex projects.
- Use a contrasting color yarn for the wrap to make it easier to see and correct any mistakes.
- Take your time and go at a slower pace when knitting wrapped stitches, especially when you’re just starting out. This will help you avoid making errors and ensure a neater result.
- Consider using stitch markers to help you keep track of where to wrap or unwrap the stitch, especially if you’re working on a pattern with multiple wrapped stitches.
- Practice the wrapped stitch on different types of needles, such as straight or circular, to see which feels most comfortable for you.
Troubleshooting
If you run into any issues while knitting wrapped stitches, here are some common problems and how to fix them:
| Issue | Solution |
|---|---|
| The wrap is too tight or too loose. | Experiment with different tension levels when wrapping the stitch. If it’s too tight, try wrapping the yarn more loosely. If it’s too loose, wrap the yarn tighter. Adjust until you achieve the desired tension. |
| Unwrapping the stitch is difficult. | Make sure you’re working with the correct yarn strand. If you’re having trouble unraveling the wrap, try using a smaller needle size to loosen the tension. |
| You’re dropping or adding extra wraps accidentally. | Pay close attention to each step of the wrapped stitch process. Count the wraps as you go to make sure you’re not adding or dropping any accidentally. If you make a mistake, it’s okay to rip out and start again. |
| The wrapped stitches look messy or uneven. | Practice makes perfect! Keep practicing the wrapped stitch technique, and over time, your stitches will become more consistent and tidy. |
Remember, knitting is a skill that takes time and patience to master. Don’t get discouraged if it doesn’t come easily at first. With practice, you’ll be able to knit beautiful wrapped stitches with confidence and efficiency.
FAQ:
What is a wrapped stitch in knitting?
A wrapped stitch in knitting is a technique used to create a decorative element or add texture to a knitted piece. It involves wrapping the yarn around the needle in a specific way before making a stitch.
How do you execute a wrapped stitch?
To execute a wrapped stitch, you start by bringing the working yarn to the front of the work. Then, you slip the next stitch purlwise onto the right needle, bring the yarn to the back of the work, and slip the same stitch back onto the left needle. Finally, you knit the stitch as usual by inserting the right needle as if to knit and bringing the yarn through.
What is the purpose of a wrapped stitch?
The purpose of a wrapped stitch varies depending on the desired outcome. It can be used to create a decorative edge, add texture to a knitted piece, or even as a way to securely join two knitting pieces together.
Can a wrapped stitch be modified to fit different knitting projects?
Yes, a wrapped stitch can be modified to fit different knitting projects by adjusting the number of wraps or the size of the needle used. By experimenting with different variations, you can achieve different effects and tailor the wrapped stitch to suit your specific project.
Are there any common mistakes to avoid when knitting a wrapped stitch?
Yes, there are a few common mistakes to avoid when knitting a wrapped stitch. One is accidentally wrapping the yarn in the wrong direction, resulting in a twisted stitch. Another is not pulling the wrap tight enough, which can lead to loose or uneven stitches. It’s important to pay attention to the instructions and take your time to ensure you’re executing the wrapped stitch correctly.
Can a wrapped stitch be used in conjunction with other knitting techniques?
Yes, a wrapped stitch can be used in conjunction with other knitting techniques to create unique and intricate designs. For example, it can be combined with lace knitting to create delicate patterns, or incorporated into cable knitting to add texture and dimension.


