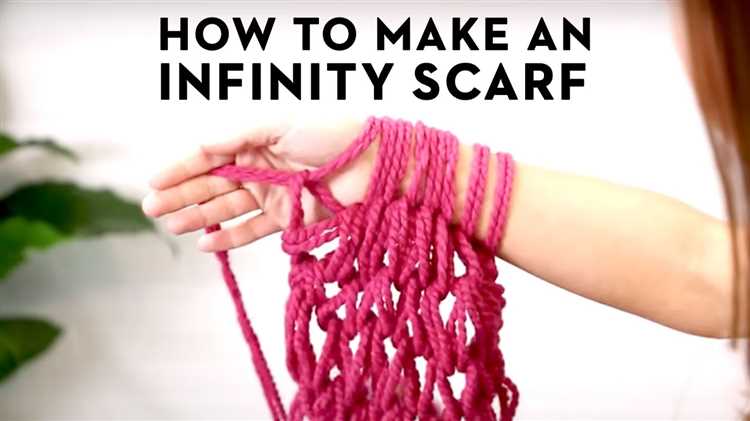
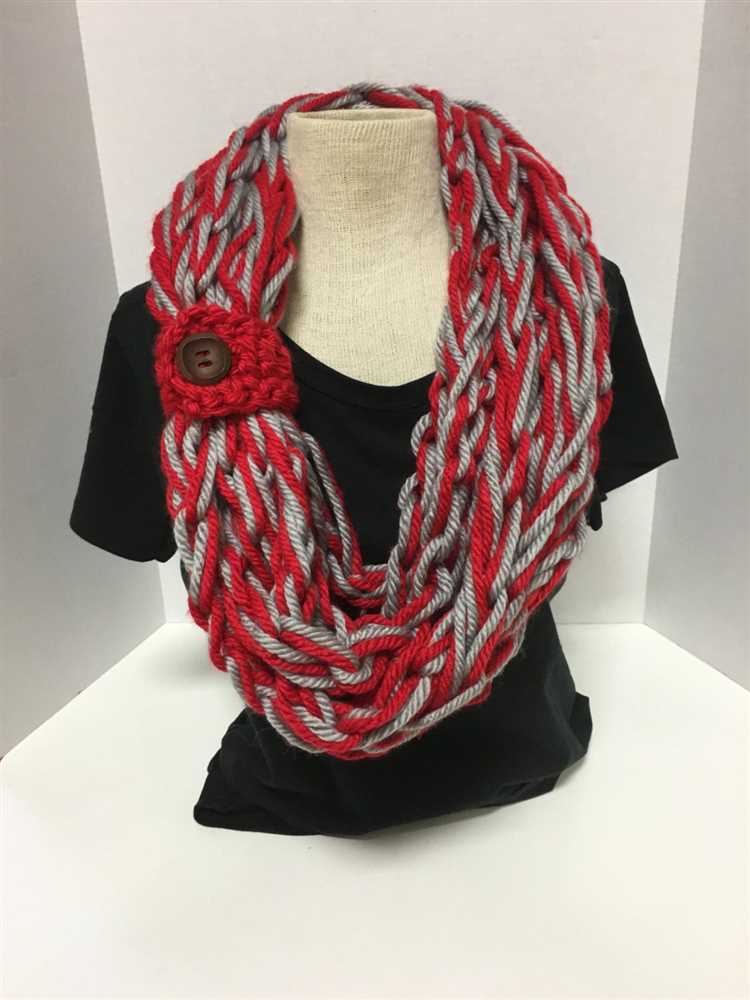
Are you looking for a fun and simple way to create your own cozy scarf? Look no further – knitting with your fingers is the perfect solution! This easy and beginner-friendly technique allows you to knit a scarf without the need for knitting needles or any complicated tools. All you need is some soft and chunky yarn, and your own two hands!
Knitting with your fingers is a fantastic way to relax and get creative. There’s something incredibly satisfying about transforming a ball of yarn into a beautiful and functional accessory. Plus, it’s a great way to keep your hands busy and productive while binge-watching your favorite TV show or traveling on long journeys.
In this step-by-step tutorial, we will guide you through the process of knitting a scarf with your fingers. We will start with the basics, teaching you how to cast on stitches and create a foundation for your scarf. Then, we will move on to the knitting technique itself, showing you how to create rows of beautiful and even stitches. Finally, we will explain how to finish off your scarf, so you can proudly wear your handmade creation and stay warm and stylish all winter long.
Whether you’re a complete knitting novice or have some experience with traditional knitting needles, knitting with your fingers is a fantastic technique to try. It’s quick, easy, and a lot of fun. So grab your favorite yarn and get ready to embark on a creative and fulfilling knitting journey!
What you will need
- Yarn: Choose a soft and chunky yarn in the color of your choice. The thickness of the yarn will determine the thickness of your scarf.
- Scissors: You will need a pair of sharp scissors to cut the yarn.
If you want to add some variations to your scarf, you can also consider using different colors of yarn or adding embellishments such as buttons, beads, or pom-poms.
Once you have gathered all the necessary materials, you are ready to start knitting your scarf with your fingers!
Step 1: Choose your yarn
Before you begin knitting a scarf with your fingers, you need to choose the right yarn for your project. The yarn you select will determine the look, feel, and warmth of your finished scarf.
Here are some factors to consider when choosing yarn:
- Weight: Yarn comes in various weights, ranging from super bulky to lace. For a finger-knitted scarf, a medium-weight or bulky yarn is recommended.
- Material: Yarn can be made from different materials, such as wool, acrylic, cotton, or blends. The material you choose will affect the scarf’s texture and warmth.
- Color: Consider the color or colors you want for your scarf. Do you prefer a solid color or a variegated yarn with multiple shades?
When selecting yarn, it’s also important to check the label for any special washing instructions or recommendations.
| Yarn Weight | Recommended Needle Size |
|---|---|
| Super Bulky | US 13 and above |
| Bulky | US 9-11 |
| Medium | US 6-8 |
| Lace | US 000-1 |
Now that you know what to consider when choosing yarn, you are ready to move on to the next step: gathering the necessary supplies.
Step 2: Cast on stitches
Now that you have chosen your yarn, it’s time to start casting on stitches. Casting on is the process of creating the foundation row of stitches on your fingers.
Follow these steps to cast on stitches:
- Hold the end of the yarn between your thumb and pointer finger, leaving a tail of about 6 inches.
- With your other hand, bring the tail of the yarn under your fingers, creating a loop.
- Insert your index finger through the loop from front to back.
- Bring the yarn over your index finger and behind your middle finger.
- Insert your middle finger through the loop from front to back.
- Bring the yarn over your middle finger and behind your ring finger.
- Insert your ring finger through the loop from front to back.
- Bring the yarn over your ring finger and behind your pinky finger.
- Insert your pinky finger through the loop from front to back.
- Finally, bring the yarn over your pinky finger and behind your pointer finger.
You should now have a loop of yarn around each finger and the tail of the yarn should be coming from behind your pointer finger.
If you are left-handed, you can follow the same steps, but begin by holding the yarn in your right hand and inserting your fingers from back to front through the loops.
Once you have successfully cast on stitches, you are ready to start knitting your scarf using the finger knitting technique!
Step 3: Knit the first row
Now that you have cast on the desired number of stitches, it’s time to start knitting your scarf using your fingers. Follow these steps to knit the first row:
- Insert your right hand index finger from bottom to top into the first loop on your left hand.
- Gently pull the loop over your right hand index finger and slide it off, creating a new loop on your right hand.
- Repeat this process for each loop on your left hand, transferring them to your right hand one at a time. You will now have one loop on your right hand for each stitch you casted on.
- Once you have finished transferring all the loops to your right hand, the first row is complete.
Continue to the next step to learn how to knit the second row.
Step 4: Continue knitting
After you have completed your first row, it’s time to continue knitting your scarf. Follow these steps to proceed:
- Bring your working yarn to the front of your hand, between your thumb and pointer finger.
- Slide your other hand (the one without the loops) into the loops on your working hand.
- Insert your thumb of your working hand into the first loop on your other hand, and pull it over the top of your thumb.
- Repeat step 3 for each loop on your other hand, until you have transferred all the loops back to your working hand.
- Move your working yarn to the back of your hand, between your thumb and pointer finger.
- Repeat steps 2 to 5 until your scarf reaches the desired length.
- Remember to maintain consistent tension while knitting, neither too tight nor too loose.
Congratulations! You are now well on your way to creating your very own finger-knitted scarf. Continue knitting using the same steps and enjoy the process of watching your scarf grow stitch by stitch.
Step 5: Finish knitting
Once you have reached your desired scarf length or run out of yarn, it’s time to finish knitting. Follow these steps to complete your finger-knitted scarf:
1. Cut the yarn: Use a pair of scissors to cut the yarn, leaving a long tail of about 6 inches.
2. Secure the stitches: Take the last loop of yarn on your fingers and carefully slide it off, keeping it secure with your other hand. Thread the long tail of yarn through this loop.
3. Pull tight: Gently pull the yarn tail to tighten the loop and secure the stitches. Make sure the loop is tightly closed without squeezing the stitches too tightly.
4. Weave in the ends: Thread the yarn tail onto a yarn needle or crochet hook. Carefully weave the yarn through the stitches of your scarf, going back and forth a few times to ensure it is securely fastened.
5. Trim the ends: Once the yarn tail is securely woven in, trim off any excess yarn to tidy up the ends of your scarf.
6. Block the scarf (optional): If desired, you can block your finished scarf to give it a neater appearance. Wet the scarf with water, gently squeeze out the excess, and lay it flat to dry, shaping it into the desired dimensions.
7. Enjoy your handmade scarf: Your finger-knitted scarf is now complete! Wrap it around your neck to stay cozy and stylish during the colder months.
Congratulations on successfully knitting a scarf with your fingers! With practice, you can experiment with different yarn colors, patterns, and textures to create unique scarves for yourself or as gifts for friends and family.
FAQ:
What materials will I need to knit a scarf with my fingers?
You will need a bulky weight yarn and your fingers. That’s all!
Is it difficult to knit a scarf with your fingers?
No, it is actually quite easy! This tutorial provides step-by-step instructions to guide you through the process.
How long does it take to knit a scarf with your fingers?
The time required to knit a scarf with your fingers depends on your knitting speed and the length of the scarf. On average, it could take a few hours to a day.
Can I use any type of yarn for finger knitting?
Yes, you can use any type of yarn for finger knitting. However, a bulky weight yarn works best for beginners as it is easier to handle.
Can I make a scarf with different colors using finger knitting?
Yes, you can create a scarf with different colors using finger knitting. Simply change the yarn color at the desired point in the process.
Is finger knitting suitable for beginners?
Yes, finger knitting is perfect for beginners as it does not require any knitting needles and is relatively easy to learn.

