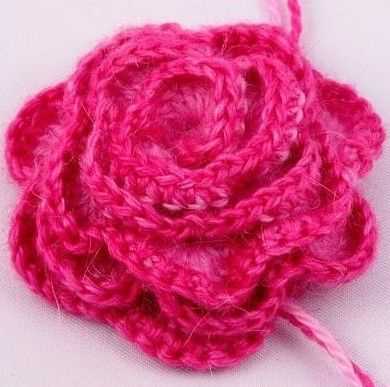
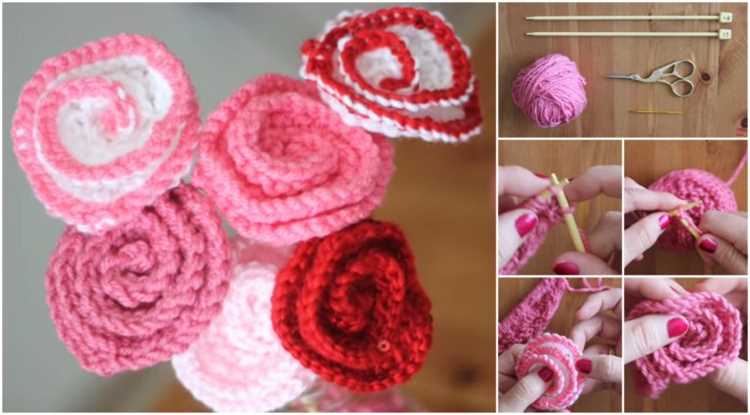
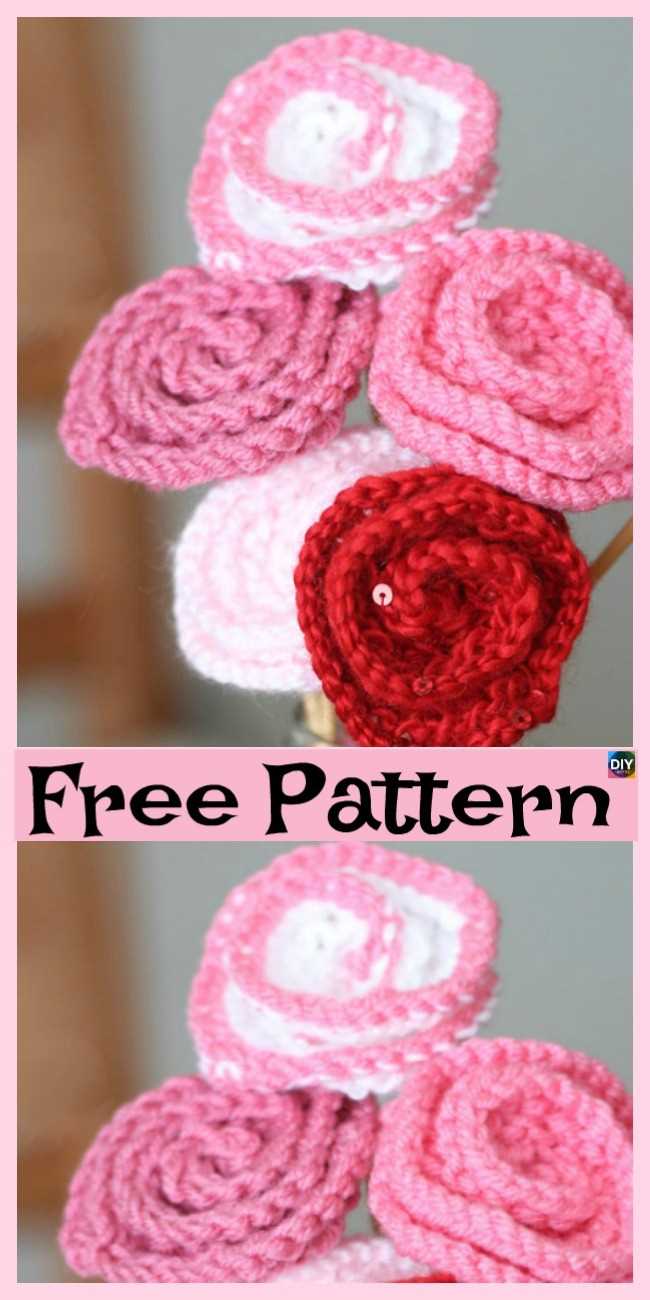
Knitting is a versatile craft that allows you to create beautiful and unique items. One such item is a knitted rose, which can be used as a decorative accessory or a heartfelt gift. In this tutorial, we will take you through the step-by-step process of knitting a beautiful and elegant rose.
To begin, you will need a pair of knitting needles and yarn in your desired color. It is recommended to use a medium weight yarn for this project, as it will help the rose to hold its shape. You will also need a yarn needle to weave in the ends.
Start by casting on eight stitches onto one of the needles. Then, bring the working yarn forward and purl all eight stitches. Repeat this row until you have a total of six rows. This will create the base of your rose.
Next, you will create the petals of the rose. Using the working yarn, knit the first stitch. Then, bring the yarn forward and slip the next stitch onto the right-hand needle. Repeat this process until you reach the end of the row. This will create a series of loops on the right-hand needle.
To shape the petals, you will need to turn the work. With the right side facing, begin knitting the first loop on the right-hand needle. Then, bring the yarn forward, slip the next loop onto the right-hand needle, and repeat until you reach the end of the row. Continue this process until you have a total of six rows. This will create six petals.
Finally, bind off all the stitches and weave in the ends with a yarn needle. Your knitted rose is now complete and ready to be used as a stunning accessory or a heartfelt gift.
Tip: Experiment with different colors and yarn textures to create a variety of roses. You can also combine multiple roses to create a bouquet or adorn other knitted items with these beautiful roses.
Getting Started: Gathering Materials and Tools
To begin knitting a beautiful and elegant rose, you will need to gather a few materials and tools. Here is a list of what you will need:
- Yarn: Choose a yarn in your preferred color. A medium weight yarn is typically used for knitting roses.
- Knitting Needles: Select knitting needles appropriate for your yarn weight. The needle size will depend on the type of yarn you have chosen.
- Tapestry Needle: You will need a tapestry needle with a large eye to weave in loose ends and sew the rose petals together.
- Scissors: Keep a pair of sharp scissors handy to cut your yarn as needed.
- Stitch Marker: A stitch marker can be helpful to mark the beginning of your rounds or any specific sections of your pattern.
- Stuffing: You will need stuffing to give your knitted rose shape and fullness. You can use polyester fiberfill or any other suitable stuffing material.
Gather these materials and tools before you begin knitting, as having everything ready will make the process smoother.
Step 1: Casting On Stitches
Before you start knitting your beautiful and elegant rose, you need to cast on stitches onto your knitting needle. This is the foundation row that will form the base of your rose.
To cast on stitches, you can use any method you are comfortable with. Here are a few common methods:
- Long-Tail Cast On: This is a versatile method that creates a neat and elastic edge. To do this, make a slipknot on the needle, leaving a long tail. Then, hold the needle with the slipknot in your right hand and the long tail in your left. With your left hand, make a loop with the working yarn, passing it over the thumb and behind the tail. Insert the needle through the loop, and tighten the stitch by pulling the tail.
- Knitted Cast On: This method is easy and creates a tight and firm edge. Start by making a slipknot on the needle. Then, insert the right-hand needle into the slipknot from front to back. Wrap the working yarn around the needle counterclockwise and pull it through the slipknot, creating a new stitch. Slip the new stitch onto the left-hand needle, and repeat this process until you have cast on the desired number of stitches.
- Cable Cast On: This method creates a decorative and sturdy edge. Begin by making a slipknot on the needle. Then, insert the right-hand needle into the slipknot from front to back, and knit a stitch. Instead of slipping the new stitch onto the left-hand needle, place it onto the right-hand needle. Repeat this process until you have cast on the desired number of stitches.
Choose the casting on method that suits your knitting style and preferences. Make sure to cast on the number of stitches required for the pattern you are following or the size of the rose you want to create.
Once you have cast on the stitches, you are ready to move on to the next step of knitting your beautiful and elegant rose.
Step 2: Knitting the Rose Petals
In this step, we will learn how to knit the rose petals. Follow these instructions to create beautiful and elegant petals for your rose.
- Casting on: Begin by casting on 10 stitches using your preferred casting on method. This will form the base of the rose petal.
- Row 1: Knit all stitches on the needle.
- Row 2: Purl all stitches on the needle.
- Row 3: Knit the first 2 stitches together. This decreases the number of stitches on the needle.
- Row 4: Purl the next stitch.
- Row 5: Knit the next stitch.
- Row 6: Slip the first stitch knitwise, knit the next stitch, and pass the slipped stitch over the knitted stitch.
- Row 7: Purl all stitches on the needle.
- Row 8: Slip the first stitch knitwise, knit the next stitch, and pass the slipped stitch over the knitted stitch.
- Rows 9-14: Repeat rows 7 and 8 four more times.
Repeat these rows until you have reached your desired number of petals. You can create as many petals as you like to achieve the desired fullness for your rose.
Remember to always end with a wrong-side row to maintain consistency.
Once you have completed all the petals, you can move on to the next step of the process: assembling the rose.
Step 3: Shaping the Rose
Once you have finished knitting all the petals, it’s time to shape the rose and give it a realistic look. Follow these steps to shape your knitted rose:
- Pin the petals: Start by gently pinning each petal to a foam pad or any soft surface. Make sure the petals are evenly spaced and slightly overlapping each other to create a realistic rose shape.
- Use steam: After pinning, use a steamer or iron with a steam setting to gently steam the petals. Hold the steamer a few inches away from the petals and allow the steam to penetrate the fibers. Be careful not to touch the petals with the steamer directly, as it may cause damage.
- Let it dry: Once you have steamed the petals, allow them to dry completely. This will help set the shape and remove any wrinkles or creases from the knitting process.
- Remove the pins: After the petals have dried, carefully remove the pins from each petal. Be gentle to avoid undoing the shape you have created.
- Finishing touches: If desired, you can add a small stem to your knitted rose. Cut a piece of floral wire, about 6 inches long, and insert it into the bottom of the rose. Secure it in place by wrapping green floral tape around the base of the rose.
Following these steps will help you shape your knitted rose into a beautiful and elegant flower. It may take some practice to get the shape just right, so don’t be discouraged if it doesn’t look perfect on your first try. With time and patience, you’ll be able to create stunning knitted roses.
Step 4: Finishing Touches
Once you have completed knitting the rose petals and the stem, it’s time to add the finishing touches to your beautiful creation.
1. Secure the petals: Take a needle and thread, and carefully stitch the base of each petal to the stem. This will ensure that the petals stay in place and don’t shift around.
2. Add leaves: Knit a few small leaves using green yarn. You can use a basic leaf pattern or create your own. Attach the leaves to the stem using the same sewing technique as you did with the petals.
3. Shape the petals: To give your rose a more realistic look, gently shape the petals with your fingers. You can gently curl them inward or outward, depending on the desired effect. Be careful not to pull too hard and risk damaging the yarn.
4. Trim any excess yarn: If there are any loose ends or excess yarn sticking out, carefully trim them with scissors. Be sure not to cut any of the main strands of yarn or any stitches.
5. Show off your creation: Once you are satisfied with the finished look of your knitted rose, display it proudly! You can place it in a vase, use it as a decorative element on a garment, or give it as a homemade gift to someone special.
Remember, practice makes perfect, and each rose you knit will become more beautiful as you refine your technique. Have fun knitting and enjoy the process of creating your own elegant roses!
Additional Tips and Variations
Once you have mastered the basic technique of knitting a rose, there are many ways you can customize and enhance your creations. Here are some additional tips and variations to try:
- Use different yarn: Experiment with different types of yarn to create roses with unique textures and looks. Try using bulky yarn for a more chunky and dramatic rose, or opt for a lightweight yarn for a delicate and airy appearance.
- Add embellishments: Take your rose to the next level by adding some embellishments. You can sew on beads or sequins to the center of the rose to add a touch of sparkle, or use contrasting yarn to create decorative accents around the edges of the petals.
- Change the size: Adjust the size of your rose by changing the number of stitches and rows you knit. Decrease the number of stitches for a smaller rose or increase them for a larger one. Keep in mind that the size of your needles and yarn weight will also affect the final size of your rose.
- Experiment with colors: Don’t be afraid to play with different colors to create unique and eye-catching roses. You can knit each petal in a different color for a vibrant and colorful look, or stick to a gradient of shades for a more subtle ombre effect.
- Combine roses: Knit multiple roses and combine them to create a bouquet or a decorative arrangement. You can create roses of different sizes and colors to add variety and dimension to your project.
Remember, the key to mastering the art of knitting roses is practice and experimentation. Have fun and let your creativity guide you as you create beautiful and elegant roses that will impress everyone!
FAQ:
What materials do I need to knit a rose?
To knit a rose, you will need knitting needles (preferably size 8), yarn (preferably in red or pink), a yarn needle, scissors, and a foam or cardboard base to attach the rose.
What knitting stitches are used to make the rose?
The rose is made using basic knitting stitches such as knit and purl. You will also need to know how to increase and decrease stitches. It’s helpful to be familiar with knitting in the round as well.
Can I use any type of yarn to knit the rose?
Yes, you can use any type of yarn to knit the rose. However, thinner yarns may result in a smaller and more delicate-looking rose, while thicker yarns will create a larger and more robust rose.
How long does it take to knit a rose?
The time it takes to knit a rose depends on your knitting speed and skill level. On average, it may take a few hours to complete a rose from start to finish.
Can I knit the rose using a different color?
Yes, you can knit the rose using any color you prefer. While red and pink are commonly used for roses, you can experiment with other colors to create unique and personalized roses.
What can I do with the knitted rose?
The knitted rose can be used in various ways. You can attach it to a headband or hair clip for a beautiful accessory, sew it onto a sweater or scarf as an embellishment, or use it as a decoration for home decor items like pillows or blankets.


