If you’re new to knitting, learning different stitches is an essential part of building your skills. One of the most fundamental stitches you’ll need to know is the purl stitch. While it may seem intimidating at first, mastering this stitch will open up a world of possibilities for your knitting projects.
The purl stitch creates a bumpy texture and is often used in combination with the knit stitch to create interesting patterns and designs. It is the reverse of the knit stitch and is commonly used for ribbing, edging, and creating visual interest in a piece of fabric.
This step-by-step guide will walk you through the process of purling, from holding your knitting needles correctly to executing the stitch with precision. Whether you’re knitting a simple scarf or a complex sweater, learning the purl stitch will give you the foundation you need to take your knitting to the next level.
Before you begin, make sure you have the necessary supplies: knitting needles, yarn, and a basic understanding of the knit stitch. With these tools in hand, let’s dive into the world of purling and discover the endless possibilities it can bring to your knitting projects.
Understanding the Basics of the Purl Stitch
When learning to knit, it’s important to understand the different stitches that make up a knitting pattern. One of the fundamental stitches is the purl stitch. In contrast to the knit stitch, which creates a smooth fabric with V-shaped stitches, the purl stitch creates a bumpy texture with horizontal rows.
To purl, you will need a working yarn, a pair of knitting needles, and basic knitting knowledge. Follow these steps to master the purl stitch:
- Hold the knitting needle with the cast-on stitches in your left hand, and the empty needle in your right hand.
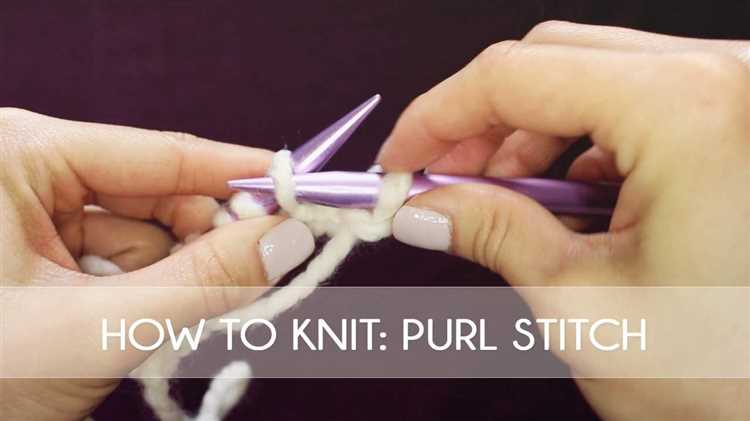
- Insert the right needle into the first stitch from left to right, as if you were going to knit.
- With your right hand, wrap the working yarn counterclockwise around the right needle.
- Using the right needle, bring the wrapped yarn through the stitch from right to left, also known as “purling through”.
- Slide the original stitch off the left needle, transferring it to the right needle.
- Repeat steps 2-5 for each stitch in the row.
- Continue purling rows until you achieve the desired length or complete the pattern.
The purl stitch is often used in combination with the knit stitch to create various knitting patterns and textures. By mastering the purl stitch, you will have the foundational skills required to knit a wide range of projects.
Here are some tips to keep in mind when purling:
- Make sure the tension of your stitches is consistent by keeping the working yarn neither too tight nor too loose.
- Pay attention to the orientation of the stitches to ensure you’re purling through the correct loops.
- Practice regularly to improve your speed and accuracy.
| Abbreviation | Description |
|---|---|
| p | Purl |
| k | Knit |
| p2tog | Purl two stitches together |
| p3tog | Purl three stitches together |
| purlwise | Insert the needle as if to purl |
With practice, the purl stitch will become second nature, and you’ll be ready to tackle more intricate knitting patterns.
What Supplies You’ll Need
Before you start learning the purl stitch, you’ll need to gather a few essential supplies. Here’s a list of what you’ll need:
- Yarn: Choose a yarn that is suitable for beginners, such as a medium weight yarn. Avoid yarns that are too fuzzy or slippery, as they can make it more difficult to work with.
- Knitting Needles: Start with a pair of straight knitting needles in a size recommended for your chosen yarn.
- Tape Measure: This will come in handy for measuring your gauge and double-checking your finished work’s dimensions.
- Scissors: You’ll need a sharp pair of scissors for cutting the yarn.
- Tapestry Needle: This type of needle is used for weaving in loose ends and sewing pieces together.
- Stitch Markers: Stitch markers are small rings or clips that can be placed on your knitting needles to mark specific points in your pattern.
- Row Counter: A row counter is helpful for keeping track of your rows, especially when working on more complex patterns.
- Pattern or Guide: Have a pattern or guide handy to follow along with as you learn the purl stitch.
Having these supplies on hand will ensure that you have everything you need to get started and make your knitting experience more enjoyable. Now that you have your supplies ready, let’s dive into learning the purl stitch!
How to Hold the Knitting Needles
Learning how to hold the knitting needles properly is an important skill for beginners to master. The way you hold your knitting needles can impact your comfort and efficiency while working on your knitting projects. Follow these steps to learn how to hold your knitting needles correctly:
- Choose the right knitting needles: Select knitting needles that feel comfortable in your hands. Needles made from different materials, such as wood or metal, have different weights and textures, so try a few different types to find what works best for you.
- Hold the first knitting needle: Hold one knitting needle in your dominant hand, much like you would hold a pencil or a chopstick. Grip the needle firmly but not too tightly, allowing space for movement.
- Hold the second knitting needle: Take the second knitting needle in your non-dominant hand, using a loose grip. This needle will be used to work the stitches on the first needle.
- Position your hands: Rest your hands comfortably on your lap or on a flat surface. Keep your wrists relaxed and avoid bending them at an extreme angle. Adjust the position of your hands as needed to find what feels most comfortable for you.
- Find a comfortable tension: Experiment with different tensions by holding the yarn in various ways. Some knitters prefer to wrap the yarn around their fingers, while others hold it loosely in their palm. Find a method that allows you to move the yarn smoothly but without it becoming too tight or too loose.
- Practice: Practice holding the knitting needles and yarn until you find a grip and tension that feels most natural and comfortable for you. As with any new skill, it may take some time and practice to find your preferred method.
Remember, there is no right or wrong way to hold knitting needles as long as you feel comfortable and are able to knit smoothly. Experiment with different techniques and find what works best for you. Happy knitting!
Step 1: Casting On
Before you can start knitting, you need to cast on. Casting on is the process of creating the first row of stitches on your knitting needle. There are different methods for casting on, but the most common method for beginners is the long tail cast on.
- Hold the knitting needle in your right hand and the ball of yarn in your left hand.
- Make a slipknot by creating a loop with the yarn and pulling the end through the loop. Leave a long tail of yarn so you can easily cast on stitches.
- Place the slipknot on the needle and tighten it by pulling on the yarn tail.
- Hold the needle with the slipknot in your right hand and the yarn in your left hand.
- Using your left thumb and forefinger, make a V-shape with the yarn, with the tail end over your thumb and the working yarn over your forefinger.
- Insert the needle from left to right through the V-shaped loop on your thumb.
- With your right hand, bring the needle under the tail end of yarn and over the working yarn.
- Slide the loop off your thumb and onto the needle.
- Tighten the stitch by pulling on the working yarn.
- Repeat steps 5 to 9 until you have cast on the desired number of stitches.
Once you have cast on all the stitches, you are ready to move on to the next step in knitting – the knit stitch.
Step 2: Inserting the Right Needle
Once you have the yarn in front of your work, it’s time to insert the right needle into the first stitch. Here’s how:
- Hold the right needle in your right hand and the left needle in your left hand.
- Insert the tip of the right needle from left to right into the first stitch on the left needle.
- Make sure the right needle goes under the left needle, with the right needle tip pointing towards the left needle.
- Hold the needles together with your left hand to keep them steady.
Note: It’s important to insert the right needle smoothly and accurately to ensure a neat and even stitch.
Tip: If you’re struggling to insert the right needle, you can use your left index finger to hold the stitch on the left needle while guiding the right needle through.
Once you have inserted the right needle into the first stitch, you’re ready to move on to the next step: working the purl stitch.
Step 3: Wrapping the Yarn
Now that you have the first stitch on the right-hand needle, it’s time to wrap the yarn around the needle to create the purl stitch.
Here’s how to do it:
- Hold the working yarn in your right hand, behind the needles.
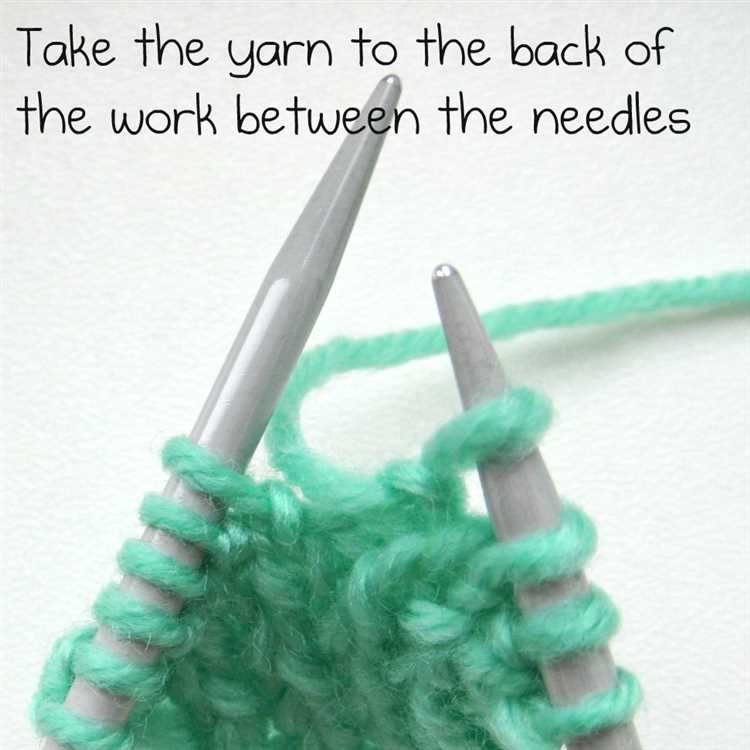
- Bring the yarn to the front of the right-hand needle, between the two needles.
- With your right-hand needle, insert it from right to left into the first stitch on the left-hand needle.
- Bring the yarn over the top of the right-hand needle, from right to left, and towards the back.
Remember to keep a firm tension on the yarn as you wrap it around the needle, but not too tight that it becomes difficult to insert the needle.
Once you’ve wrapped the yarn around the needle, you can proceed to the next step: completing the purl stitch.
Step 4: Pulling Through the Loop
Now that you have created the purl stitch by inserting your right needle into the front of the loop and wrapping the yarn counterclockwise around it, it’s time to pull through the loop and complete the stitch.
1. With your right needle still inserted into the loop from the front, use your left hand to hold the yarn taut.
2. Keeping the tension on the yarn, use your right hand to gently pull the right needle towards you, pulling the loop through the stitch.
3. As you pull the loop through, the stitch should slide off the left needle and onto the right needle.
Note: It’s important to maintain consistent tension on the yarn as you pull through the loop. If you pull too tightly, the stitch may become too tight and difficult to work with. If you pull too loosely, the stitch may be loose and uneven.
Repeat these steps for each purl stitch in your knitting project. Remember to always hold the yarn taut with your left hand and to pull the loop through with your right hand.
Tip: Practice makes perfect! If you’re new to knitting, it’s normal to feel a bit awkward at first, but with practice, you’ll become more comfortable and the motions will become second nature.
Once you’ve mastered the purl stitch, you’ll be ready to move on to more advanced knitting techniques and patterns. Stay tuned for our next tutorial on knitting!
Step 5: Finishing the Stitch
After you have completed the purl stitch, there are a few final steps to finish off the stitch and prepare for the next one.
1. Slide the right needle out: To complete the purl stitch, slide the right needle out of the loop on the left needle.
2. Tighten the loop: To ensure that the stitch is secure, gently pull on the working yarn to tighten the loop on the left needle. Make sure not to pull too tightly, as this can distort the stitch.
3. Move on to the next stitch: With the completed purl stitch now on the left needle, you are ready to move on to the next stitch in your pattern. Repeat the steps to continue purling across the row.
Tips:
- Take your time and practice the purl stitch until you feel comfortable with the technique.
- Pay attention to the tension of your stitches to ensure that they are consistent.
- If you make a mistake, don’t worry! You can always undo the stitches and try again.
Now that you know how to purl, you are ready to tackle a variety of knitting patterns that incorporate purling. Experiment with different combinations of knit and purl stitches to create various textures and designs in your knitting projects.
FAQ:
What is the purl stitch?
The purl stitch is a basic knitting stitch that creates a raised horizontal ridge on the knitted fabric. It is the reverse of the knit stitch and is commonly used to create different textures in knitting projects.
How do I perform the purl stitch?
To perform the purl stitch, insert the right needle from right to left into the first stitch on the left needle. Then, move the yarn to the front of the work and wrap it around the right needle. Finally, pull the right needle through the stitch, slipping the stitch off the left needle.
Can I use the purl stitch to create patterns in my knitting?
Yes, the purl stitch can be used to create various patterns in knitting. By combining knit and purl stitches in different ways, you can create textures, ribbing, cables, and other interesting design elements in your knitting projects.
Is the purl stitch more difficult than the knit stitch?
The purl stitch is not necessarily more difficult than the knit stitch, but it might feel slightly different for beginners. The main difference is the way the yarn is positioned and wrapped around the needle. With practice, you will become comfortable with both stitches.
Are there any tips for ensuring consistent tension while purling?
A tip for ensuring consistent tension while purling is to pay attention to the way you hold the yarn. Make sure the yarn is not too loose or too tight when wrapping it around the needle. Also, practice maintaining a consistent hand and finger movement while working the purl stitch.
How can I fix a mistake in the purl stitch?
If you make a mistake in the purl stitch, you can simply undo the stitch by carefully unraveling it and then reworking it correctly. If the mistake is further down in your knitting, you can use a crochet hook to fix the specific stitch or stitches that need correction.
Are there any knitting projects that primarily use the purl stitch?
Yes, there are various knitting projects that primarily use the purl stitch to create different textures and designs. For example, seed stitch, ribbing, and moss stitch are patterns that heavily rely on the purl stitch. These patterns are commonly used for scarves, hats, and other accessories.


