Knitting is a popular hobby that allows you to create beautiful and useful items with just a few simple tools. One item that is perfect for practicing your knitting skills is a potholder. Not only is it a great project for beginners, but it also makes for a practical addition to any kitchen. In this step-by-step guide, we will walk you through the process of knitting a potholder from start to finish.
Before you begin, gather your materials. You will need a pair of knitting needles, a crochet hook, and some cotton yarn. Cotton yarn is ideal for this project as it is heat resistant and durable. Once you have your materials, you can start by casting on stitches. A potholder typically measures about 6 inches by 6 inches, so cast on enough stitches to achieve this size.
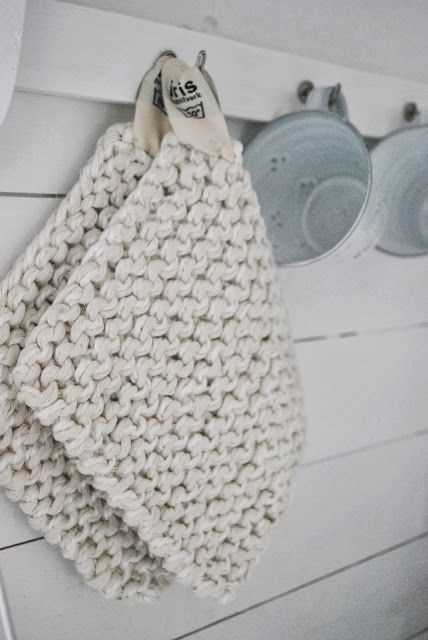
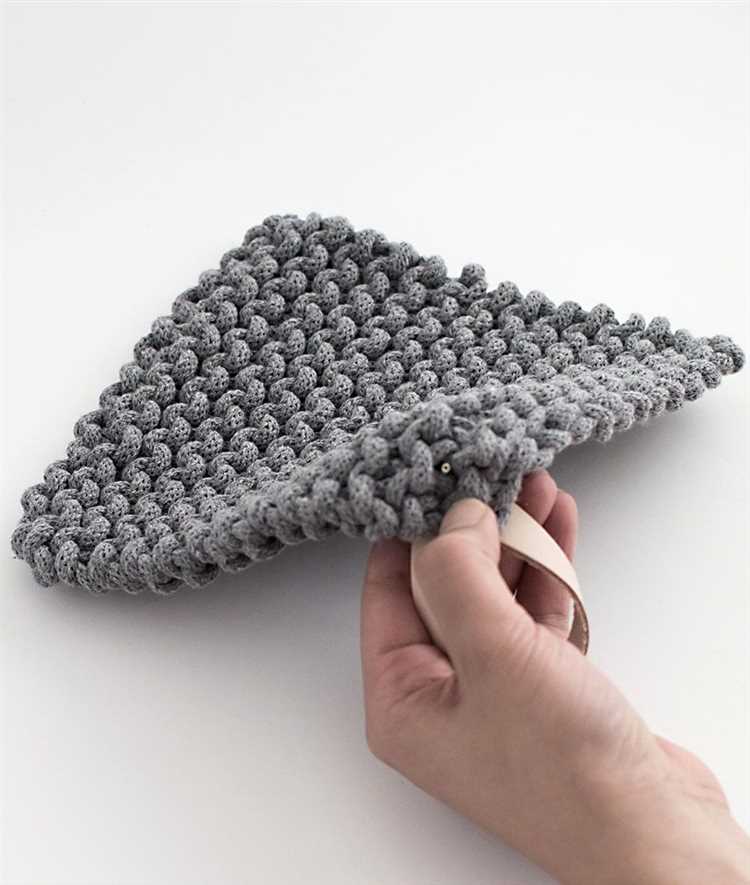
Once you have cast on your stitches, you can begin knitting. The stitch pattern we will be using for this potholder is called the garter stitch. To create this stitch, simply knit every row. Knitting the garter stitch creates a fabric that is both stretchy and textured, making it perfect for a potholder.
Continue knitting in the garter stitch until your potholder is the desired size. Remember to periodically check the size of your potholder by measuring it. Once you are happy with the size, it’s time to bind off your stitches. To do this, knit the first two stitches, then use your crochet hook to pull the first stitch over the second stitch and off the needle. Repeat this process until you have one stitch left on your needle, then cut your yarn and pull it through the last stitch to secure it.
Finally, trim any excess yarn and weave in the ends to finish your potholder. And there you have it, a beautifully knitted potholder that is ready to be used in your kitchen. Knitting a potholder is a simple and enjoyable project that allows you to practice your knitting skills while creating a useful item. So grab your needles, yarn, and crochet hook, and get started on knitting your very own potholder today!
Choosing the Right Yarn
When it comes to knitting a potholder, selecting the right yarn is important for both the appearance and functionality of the finished product. Here are some factors to consider when choosing your yarn:
Fiber Content: Different fiber types have different characteristics, so consider the desired properties of your potholder. Cotton is a popular choice as it is both durable and absorbent, making it ideal for handling hot pots and pans. Acrylic yarn is another option that is often chosen for its affordable price and easy care.
Weight: Yarn comes in different weights, indicated by numbers from 0 to 7. For potholders, it’s best to use a medium weight yarn (usually indicated as a “4” on the label), as it provides a good balance between thickness and heat resistance.
Color: Consider the color you want your potholder to be and choose a yarn color that complements your kitchen decor or personal taste. Remember that lighter colors can show stains more easily than darker colors.
Texture: Think about the texture you want your potholder to have. Smooth yarns will provide a sleek finish, while textured yarns can add visual interest and enhance grip.
Availability: Check the availability of the yarn you choose. It’s always a good idea to have a backup option in case the yarn you initially select is not available at your local store or online.
To help you make a decision, consult the yarn label for specific information about fiber content, weight, suggested needle size, and care instructions. Consider these factors and choose a yarn that meets your needs and preferences for your knitted potholder project.
Selecting the Appropriate Knitting Needles
Choosing the right knitting needles is an important step when starting a knitting project. The right needles can make a big difference in how your finished product looks and feels. Here are a few factors to consider when selecting knitting needles:
- Material: Knitting needles come in a variety of materials, including metal, wood, and plastic. Each material has its own unique feel and advantages. Metal needles are smooth and slippery, making them ideal for faster knitting. Wood needles have a warmer, natural feel and are often preferred by those with arthritis or joint pain. Plastic needles are lightweight and flexible, making them a good choice for beginners.
- Size: Knitting needles come in different sizes, indicated by the thickness of the needle shaft. The size of the needles you choose will depend on the yarn weight and the desired density of your knitted fabric. Thicker needles are used with thicker yarn for a looser stitch, while thinner needles are used with finer yarn for a tighter, more compact stitch.
- Length: The length of knitting needles can vary, typically ranging from 9 inches to 14 inches. The length you choose will depend on the size of your knitting project. Shorter needles are ideal for small projects like potholders, while longer needles are better suited for larger projects like scarves or blankets.
- Type: There are two main types of knitting needles: straight needles and circular needles. Straight needles are used for flat knitting and are typically sold in pairs. Circular needles have a flexible cable connecting the two needle tips and can be used for both flat knitting and in-the-round knitting. The type of needles you choose will depend on your knitting technique and the type of project you are working on.
By considering these factors, you can choose the appropriate knitting needles that will help you achieve the desired result for your potholder project. Once you have selected the right needles, you can move on to the next step of your knitting journey.
Casting On Stitches
Before you start knitting your potholder, you will need to cast on stitches to create the foundation of your project. Casting on is the process of creating loops on your knitting needle that will later be worked into your fabric.
To cast on stitches, follow these steps:
- Hold the knitting needle in your right hand and the yarn in your left hand.
- Make a slipknot by making a loop with the yarn and pulling the tail end through the loop. Tighten the loop onto the needle.
- Hold the needle with the slipknot in your right hand, and insert it into the loop of the slipknot.
- With your left hand, bring the yarn over the top of the needle and hold it securely with your thumb and middle finger.
- Using your right hand, bring the needle under the yarn, between your thumb and middle finger, and then over the top of the yarn.
- Pull the loop of yarn through the loop on your needle, creating a new stitch.
- Repeat steps 3-6 until you have cast on the desired number of stitches. Keep an even tension on the yarn to ensure consistent stitch sizes.
Once you have cast on the desired number of stitches, you are ready to start knitting the first row of your potholder. This usually involves knitting or purling the stitches in a specific pattern, as specified in your pattern instructions.
Knitting the Base of the Potholder
In order to knit the base of the potholder, you will need to start with a cast-on row. Choose an appropriate yarn and knitting needles for your project.
The cast-on row is the foundation of your knitting project. To begin, make a slipknot with your yarn and place it on one of the knitting needles. Insert the second knitting needle into the slipknot and tighten the yarn around both needles.
Next, you will need to cast on the desired number of stitches. Hold the knitting needles with the slipknot in your right hand, and wrap the yarn around your left hand. Slide the tip of the right knitting needle under the yarn on your left hand and bring it through the loop on the left knitting needle. This creates a new stitch.
Repeat this process until you have cast on the required number of stitches for your potholder. Remember to keep your tension consistent, neither too loose nor too tight.
Once you have cast on all the necessary stitches, you will begin knitting the base of the potholder. Hold the knitting needles with the cast-on stitches in your right hand, and wrap the yarn around your left hand.
Insert the right knitting needle into the first stitch on the left needle from left to right. Wrap the yarn around the right needle counterclockwise, and slide the right needle through the first stitch, bringing it behind the left needle.
Now, slide the left needle out of the first stitch, bringing the stitch onto the right needle. This completes one knit stitch. Repeat this process for each stitch on the left needle until all stitches have been transferred to the right needle.
Continue knitting each row in the same manner until you have reached the desired length for your potholder. Remember to switch the knitting needles in your hand after completing each row so that the needle with the stitches becomes the right needle and the empty needle becomes the left needle.
Knit stitches create a smooth, v-shaped pattern on the right side of the work and a bumpy, purl pattern on the wrong side. Keep this in mind as you knit the base of your potholder.
Once you have finished knitting the base, you can move on to the next step in creating your potholder.
Adding Color and Patterns
Once you have mastered the basic knitting technique for creating a potholder, you can start to add some color and patterns to make your potholder more decorative and personalized.
Here are some ways to add color and patterns to your potholder:
1. Stripes
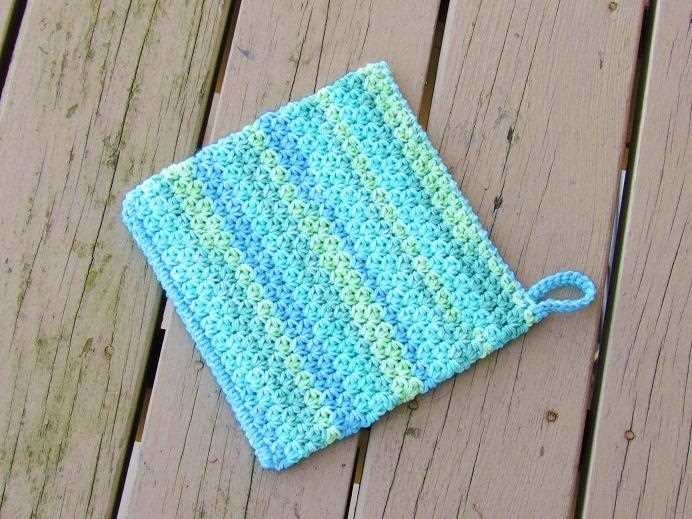
You can create stripes by using different colored yarns. Simply switch to a new color yarn at the beginning of a row and carry the old yarn along the edge of your work. This will create vertical stripes on your potholder.
2. Color Block
If you prefer a more bold and graphic look, you can create color blocks by knitting a section of your potholder with one color, then switch to another color for the next section. This creates a checkerboard effect.
3. Fair Isle
Fair Isle knitting involves using two or more colors in the same row to create intricate patterns. You can use this technique to create beautiful motifs and designs on your potholder. To do fair isle knitting, simply carry the unused color along the back of your work and switch colors as needed.
4. Intarsia
Intarsia knitting is another technique that allows you to create colorful designs on your potholder. With intarsia, you use separate balls of yarn for each color block and twist the yarns at the color change to prevent holes. This technique is great for creating images or lettering on your potholder.
5. Embroidery
If knitting different color patterns is not your thing, you can always add some color and patterns with embroidery. Use a contrasting color yarn and a tapestry needle to add stitches on top of your finished potholder. You can create simple or intricate designs, depending on your skill level.
Experimenting with different colors and patterns will allow you to create unique and personalized potholders that are not only functional but also visually appealing. Have fun and let your creativity shine through!
Creating the Potholder Border
Once you have finished knitting the main body of your potholder, it’s time to create the border. This will help give your potholder a finished look and also add some extra thickness to the edges, making it easier to grip hot items.
Here are the steps to create the border:
- Start with a new color: To make the border stand out, it’s a good idea to use a different color yarn than the one used for the main body. Choose a color that complements the potholder.
- Join the new color: Attach the new yarn to one corner of the potholder using a slip stitch. Make sure to leave a long enough tail so you can weave it in later.
- Work single crochet stitches: Single crochet stitches will be used to create the border. Start by chaining one and then working single crochet stitches evenly around the edges of the potholder.
- Pay attention to the corners: When you reach a corner, work three single crochet stitches into the same stitch to create a smooth corner. This will help prevent the border from puckering.
- Continue around the potholder: Work single crochet stitches evenly along the remaining edges of the potholder. Remember to work three single crochet stitches in each corner.
- Join the border: When you reach the starting point, join the border with a slip stitch to the first single crochet stitch you made.
After completing the border, you can weave in any loose ends and trim off excess yarn. Your potholder is now ready to be used!
Remember, practice makes perfect, so don’t be discouraged if your first potholder doesn’t turn out exactly as you envisioned. With time and experience, you’ll be able to create beautiful and functional potholders for yourself or as gifts for others.
Binding Off Stitches
Once you have finished knitting all the stitches on your row or when you have reached the desired length for your potholder, it’s time to bind off the stitches. Binding off is the process of securing the stitches so that they don’t unravel.
Follow these steps to bind off your stitches:
- Knit the first two stitches. You can either knit them as usual or use the “knit two together” technique, which decreases the number of stitches by one.
- Insert the left needle into the first stitch on the right needle.
- Using the left needle, lift the first stitch over the second stitch and off the right needle.
- Knit the next stitch, then lift the previous stitch over the newly knitted stitch and off the right needle.
- Continue steps 3 and 4 until you have only one stitch left on the right needle.
- Cut the yarn, leaving a long tail. Thread the tail through the last stitch and pull tight to secure.
Once you have bound off all the stitches, you can weave in any loose ends using a yarn needle to ensure that your potholder looks neat and tidy. Trim any excess yarn.
Binding off is an essential step in knitting as it finishes your project and prevents the stitches from unraveling. With practice, you’ll become more comfortable with binding off and be able to apply this technique to other knitting projects.
Finishing Touches and Care Instructions
Once you have finished knitting your potholder, there are a few final touches you can add to make it even more special.
- Blocking: To ensure your potholder maintains its shape, you may want to block it. Gently wet the potholder, then lay it flat on a towel. Use pins to shape it into the desired dimensions, and allow it to dry completely.
- Edging: If you want to add a decorative border to your potholder, you can pick up stitches along the edges and knit a few rows in a contrasting color or stitch pattern. This can give your potholder a polished and finished look.
- Labeling: Consider attaching a personalized label or tag to your potholder. This can serve as a reminder of your hard work and also make it a thoughtful gift for someone special.
- Care Instructions: To keep your potholder in good condition, it’s important to follow proper care instructions. Hand wash the potholder in cold water with mild detergent, then gently squeeze out the excess water. Lay it flat to dry, avoiding direct sunlight. Avoid using bleach or harsh chemicals as they may damage the fibers.
By adding these finishing touches and following the care instructions, your knitted potholder will not only be functional but also a beautiful and lasting addition to your kitchen or a thoughtful gift for someone else.
FAQ:
What materials do I need to knit a potholder?
To knit a potholder, you will need a pair of knitting needles, medium weight yarn, and a darning needle.
Can I use a different type of yarn for this project?
Yes, you can use different types of yarn depending on your preference. However, medium weight yarn is commonly used for potholders as it provides the right level of thickness and durability.
Do I need to know how to knit to make a potholder?
Yes, basic knitting knowledge is required to make a potholder. You should be familiar with basic knitting stitches such as the knit stitch and purl stitch.
Are there any additional tips for knitting a potholder?
One tip is to always use a tight tension while knitting a potholder to ensure a thick and sturdy fabric. Additionally, you can experiment with different stitch patterns to add some texture to your potholder.


