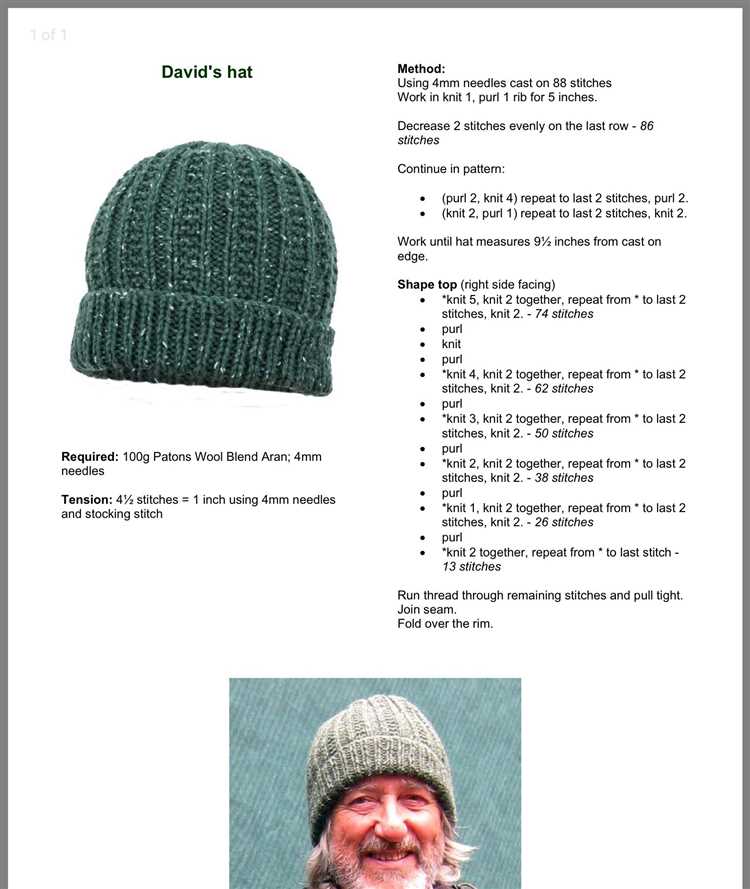
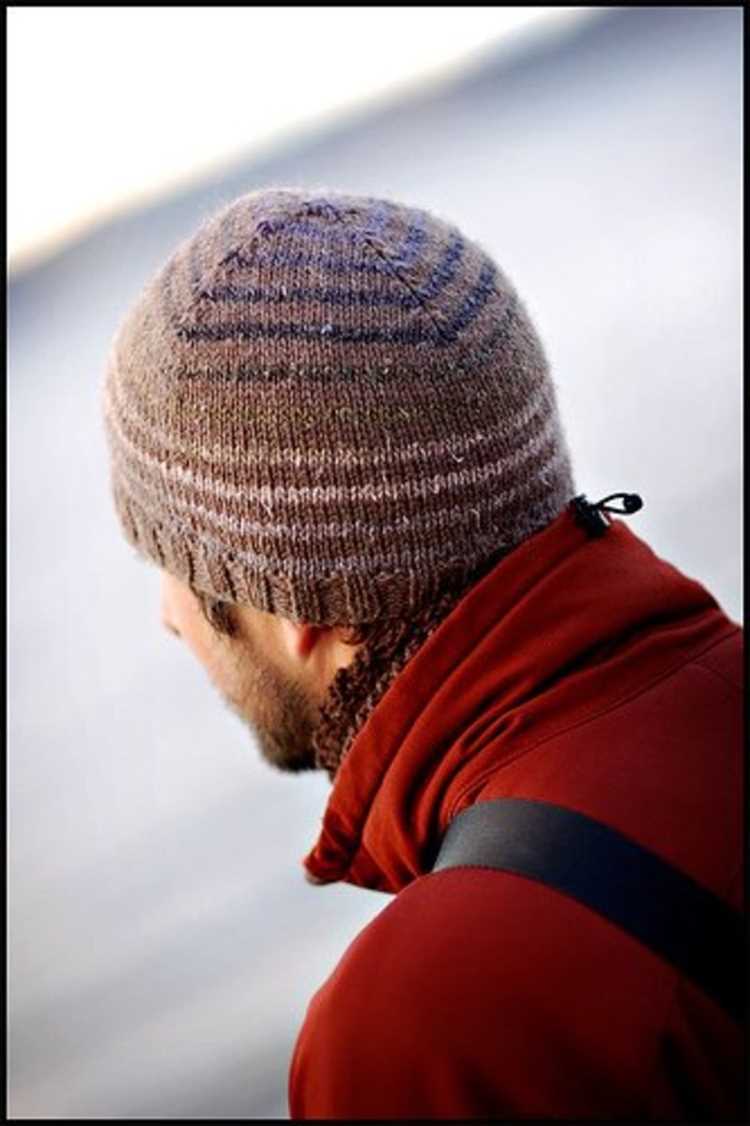
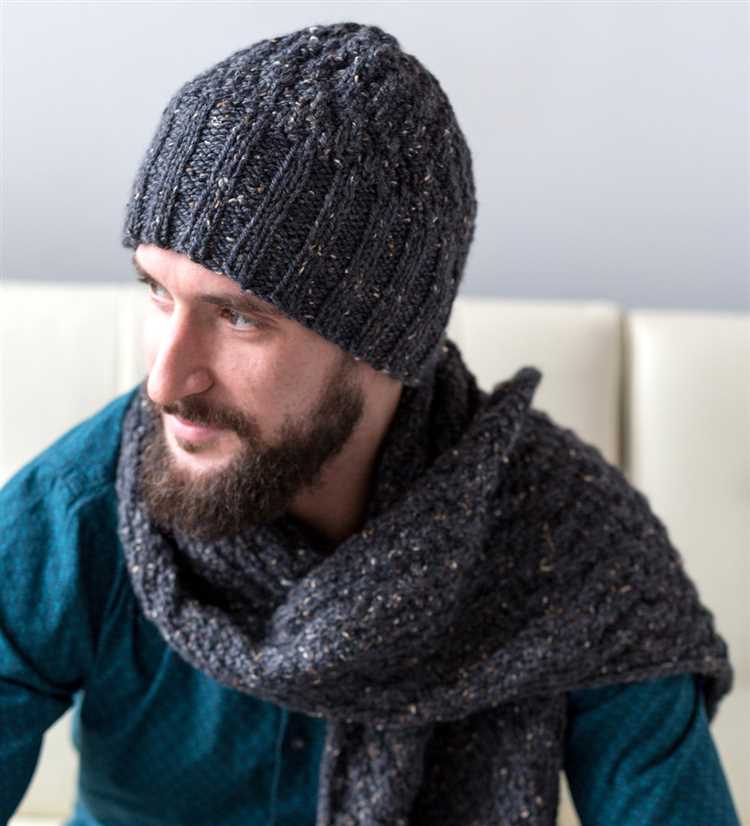
Knitting can be a fascinating and rewarding hobby, and one of the most popular things to make is a hat. Knitting a hat for a man is a great project, whether it’s for your husband, brother, or friend. In this beginner’s guide, we’ll take you through the step-by-step process of knitting a men’s hat.
First, you’ll need to gather your materials. You’ll need knitting needles, yarn (preferably a medium weight yarn), and a pattern. Consider choosing a yarn color that the man you are knitting for will like. Once you have all your materials ready, it’s time to start knitting!
Begin by casting on the stitches. This is done by making loops on one needle with the yarn. The number of stitches will depend on the size of the hat you want to make. If you’re not sure, a typical adult size hat will require around 80 stitches.
Once you have cast on your stitches, you’ll begin the main knitting process. Using the knit stitch, continue knitting in rounds until the hat reaches the desired length. It’s helpful to use a circular needle or double-pointed needles for this step. Remember to keep your tension even throughout the knitting process to ensure a smooth and consistent hat.
Finally, you’ll finish off the hat by binding off the stitches. This is done by knitting two stitches, then lifting the first stitch over the second stitch and off the needle. Repeat this process until there is only one stitch left, then cut the yarn and thread it through the last stitch to secure it.
With just a few simple steps, you can create a warm and stylish hat for the man in your life. So grab your knitting needles and yarn, follow this beginner’s guide, and get ready to impress with your knitting skills!
Understanding the Supplies You’ll Need for Knitting
In order to knit a men’s hat, you will need to gather the necessary supplies. Having the right tools and materials will ensure that you can successfully complete your knitting project. Here are the essential supplies you’ll need:
- Yarn: Choose a yarn that is suitable for a men’s hat. Consider the fiber content, weight, and color of the yarn. Worsted weight yarn is a popular choice for hats.
- Knitting Needles: You will need a set of knitting needles in the appropriate size for the yarn you have chosen. Circular needles or double-pointed needles are commonly used for knitting hats.
- Tapestry Needle: A tapestry needle is used for weaving in loose ends and sewing the hat together if necessary.
- Stitch Markers: Stitch markers can be used to mark specific stitches or sections in your knitting. They can come in handy when following a pattern or keeping track of your progress.
- Scissors: A pair of scissors is necessary for cutting the yarn at various stages of your knitting project.
- Measuring Tape: A measuring tape is helpful for checking your gauge and measuring the circumference of the hat.
These supplies can typically be found at your local craft store or online. It’s important to choose high-quality materials that are comfortable to work with and will result in a durable and stylish hat. Now that you have a better understanding of the supplies you’ll need, you can start gathering the necessary materials and get ready to knit your men’s hat.
Choosing the Right Yarn and Needles for Your Men’s Hat
When making a men’s hat, it’s important to choose the right yarn and needles to ensure that the final product is both comfortable and visually appealing. Here are some factors to consider when choosing your materials:
Yarn Weight
The weight of the yarn refers to its thickness. For a men’s hat, you’ll generally want to use a medium-weight or worsted-weight yarn. This weight provides a good balance between warmth and breathability.
Fiber Content
The fiber content of the yarn will determine the hat’s texture and characteristics. For a men’s hat, you might consider using a yarn that contains wool for its warmth and durability. Alternatively, you could use acrylic yarn for a more affordable and easy-to-care-for option.
Needle Size
The needle size you choose will depend on the yarn weight and your desired gauge. Usually, a set of 16-inch circular needles with a US size 7 or 8 will work well for a men’s hat. However, you may need to adjust the needle size to achieve the correct tension and fit.
Gauge
Gauge refers to the number of stitches and rows per inch in a knitted fabric. It’s important to check your gauge before starting your men’s hat to ensure that it will fit properly. You can swatch a small section of your pattern using the chosen yarn and needles and measure the gauge to compare it with the pattern’s recommended gauge.
Color
Consider the color of the yarn you choose for your men’s hat. Neutral colors like black, gray, or navy are classic options that will match with a variety of outfits. However, you can also choose bold or vibrant colors to add a pop of personality to your hat.
By considering these factors when choosing your yarn and needles, you’ll be able to create a men’s hat that is both functional and stylish.
Casting on: Starting Your Knitting Project
Casting on is the first step in starting your knitting project. It creates the first row of stitches on your knitting needle, providing a foundation for your work. Here are some methods you can use to cast on:
1. Long Tail Cast On
The long tail cast on is a versatile and commonly used method. It creates a neat and elastic edge. To do the long tail cast on:
- Make a slipknot by creating a loop and passing the working yarn through it.
- Hold the slipknot in your left hand and the knitting needle in your right hand.
- Insert the knitting needle into the slipknot from front to back, making sure the working yarn is behind the needle.
- Use your thumb and index finger to create a “V” shape with the working yarn.
- With the needle, scoop the working yarn from the back to the front through the “V”.
- Drop the slipknot from your left hand and tighten the stitch on the needle.
- Repeat steps 4-6 until you have cast on the desired number of stitches.
2. Knitted Cast On
The knitted cast on is another simple and easy method to create a foundation row. It produces a firm edge and is great for projects that require a sturdy start. To do the knitted cast on:
- Make a slipknot and place it on the needle.
- Insert the right needle into the slipknot as if to knit.
- Wrap the working yarn around the needle from back to front.
- Pull the wrapped yarn through the slipknot, creating a new stitch.
- Place the new stitch onto the left needle.
- Repeat steps 2-5 until you have cast on the desired number of stitches.
3. Cable Cast On
The cable cast on is a method that produces a firm and decorative edge. It is great for projects that require a sturdy start and a bit of texture. To do the cable cast on:
- Make a slipknot and place it on the needle.
- Insert the right needle into the slipknot as if to knit.
- Wrap the working yarn around the needle from back to front.
- Pull the wrapped yarn through the slipknot, creating a new stitch.
- Place the new stitch onto the left needle.
- Repeat steps 2-5 until you have cast on the desired number of stitches.
Now that you know a few different methods for casting on, you can choose the one that best suits your project and get started on your knitting journey!
The Basic Stitches: Learning the Knit Stitch and the Purl Stitch
When it comes to knitting, there are two basic stitches that you need to learn: the knit stitch and the purl stitch. These stitches form the foundation of most knitting projects and can create a variety of textures and designs.
The Knit Stitch
The knit stitch is the most basic and widely used stitch in knitting. It’s often abbreviated as ‘k’ or ‘K’ in knitting patterns. To knit a stitch, follow these steps:
- Hold the knitting needles with the working yarn in your right hand (if you’re right-handed) and the empty needle in your left hand. The working yarn should be behind your needles.
- Insert the right-hand needle into the first stitch on the left-hand needle, from left to right.
- Wrap the working yarn around the right-hand needle, moving from back to front.
- With the right-hand needle, pull the wrapped yarn through the stitch on the left-hand needle, creating a new stitch on the right-hand needle.
- Slide the original stitch off the left-hand needle, leaving the new stitch on the right-hand needle.
- Repeat these steps for each stitch until you’ve knitted all the stitches on the left-hand needle.
The Purl Stitch
The purl stitch is the reverse of the knit stitch and is often used to create a different texture or design in knitting. It’s often abbreviated as ‘p’ or ‘P’ in knitting patterns. To purl a stitch, follow these steps:
- Hold the knitting needles with the working yarn in your right hand (if you’re right-handed) and the empty needle in your left hand. The working yarn should be in front of your needles.
- Insert the right-hand needle into the first stitch on the left-hand needle, from right to left.
- Wrap the working yarn around the right-hand needle, moving from front to back.
- With the right-hand needle, pull the wrapped yarn through the stitch on the left-hand needle, creating a new stitch on the right-hand needle.
- Slide the original stitch off the left-hand needle, leaving the new stitch on the right-hand needle.
- Repeat these steps for each stitch until you’ve purled all the stitches on the left-hand needle.
By mastering the knit and purl stitches, you’ll be able to create a wide range of knitting projects. Practice these stitches until you feel comfortable with them, and then you can start experimenting with different patterns and designs!
Knitting in the Round: Creating the Body of Your Men’s Hat
Once you have completed the ribbing of your men’s hat, it’s time to start knitting the body of the hat in the round. Knitting in the round creates a seamless and continuous tube, making it the perfect technique for creating hats.
Here’s how you can create the body of your men’s hat:
- Start by joining your working yarn to the first stitch of the ribbing. You can either use a circular needle or double-pointed needles, depending on your preference.
- Knit every stitch in the first round. This will set the foundation for the body of your hat.
- Continue knitting every stitch in each subsequent round until the hat reaches the desired length. You can measure the length by trying the hat on periodically to check the fit.
- As you knit, you can add design elements such as stripes, cables, or colorwork to customize your men’s hat.
- Remember to periodically check your gauge to ensure that your knitting is consistent and the hat is turning out as desired.
- If you want a slouchy hat, you can increase the length of the body beyond the desired fit. For a beanie-style hat, you can stop knitting when the body reaches the desired length.
Tips:
- Use stitch markers to mark the beginning of each round. This will help you keep track of your progress and prevent mistakes.
- When working in the round, be sure to knit each stitch as usual, without purling or turning your work.
- Check your tension regularly to ensure that your knitting is not too tight or too loose.
- Experiment with different stitch patterns and techniques to add texture and interest to your men’s hat.
Once you have finished knitting the body of your men’s hat, you can move on to the next step: shaping the crown. Stay tuned for the next section of this guide!
Shaping the Crown: Decreasing Stitches to Finish Your Hat
Once you’ve reached the desired length for your men’s hat, it’s time to shape the crown by decreasing stitches. Decreasing stitches gradually narrows the opening at the top of the hat, creating a rounded shape. Here’s how you can do it step by step:
- Divide your stitches evenly across double-pointed needles or use a circular needle if you prefer the magic loop method.
- Start with the first two stitches on your needle.
- Knit these two stitches together to decrease one stitch.
- Continue knitting two stitches together until you’ve reached the end of the round.
- Repeat these steps for each round until you have a small number of stitches left on your needle.
- Cut the yarn, leaving a long tail.
- Thread the tail through a yarn needle.
- Slip the yarn needle through the remaining stitches and remove them from the needles.
- Gently pull the yarn tail to cinch the top of the hat closed.
- Weave in any loose ends to secure the crown.
Once you’ve finished shaping the crown, you can try on the hat to make sure it fits well. If not, you can always adjust the tension by blocking or adding extra rounds before decreasing stitches. Remember to always follow the pattern or your own desired measurements to achieve the perfect fit for your men’s hat.
Finishing Touches: Binding Off and Seamlessly Closing the Hat
Once you have completed knitting the body of the men’s hat, it’s time to finish off the project by binding off and seamlessly closing the hat. Follow these steps to achieve a neat and professional finish:
- Binding Off: Start by knitting two stitches. Then, using the left-hand needle, lift the first stitch over the second stitch and drop it off the needle. Knit another stitch and repeat the process of lifting the previous stitch over the new stitch until you have one stitch left on the right-hand needle. Cut the yarn, leaving a long tail, and pull it through the remaining stitch to secure it.
- Seamlessly Closing the Hat: Thread the long tail of yarn onto a yarn needle. Hold the hat with wrong side facing out and fold it in half, aligning the cast-on and bind-off edges. Insert the needle through the first stitch of the bind-off edge from inside to outside, then insert it through the corresponding stitch on the cast-on edge, going from outside to inside. Continue to sew the two edges together in this way, using a whipstitch or mattress stitch, until you reach the end.
- Weaving in Ends: To ensure that the hat is secure and all loose ends are hidden, weave in the loose ends of yarn using a yarn needle. Insert the needle through several stitches on the inside of the hat, following the path of the yarn, and pull it through. Trim any excess yarn.
Congratulations! You have successfully finished knitting a men’s hat. Now you can give it a gentle wash and let it dry flat to ensure the stitches relax and the hat retains its shape. Once dry, your hat is ready to be worn or gifted to a lucky recipient.
FAQ:
What materials do I need to knit a men’s hat?
To knit a men’s hat, you will need a set of knitting needles, a skein of yarn (preferably a wool blend), a tapestry needle, a pair of scissors, and a measuring tape.
How long does it take to knit a men’s hat?
The time it takes to knit a men’s hat will vary depending on your skill level and the complexity of the pattern. On average, it can take anywhere from a few hours to a few days to complete a hat.
Can I customize the size of the men’s hat?
Yes, you can customize the size of the men’s hat by adjusting the number of stitches and/or using larger or smaller knitting needles. You can also try different yarn weights to achieve the desired size.


