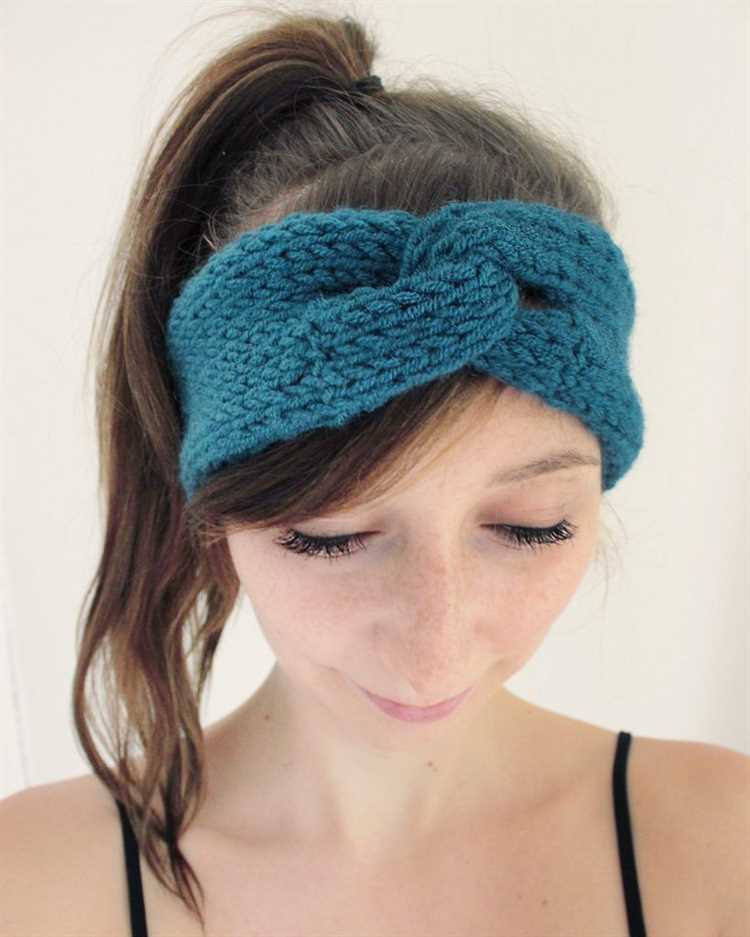
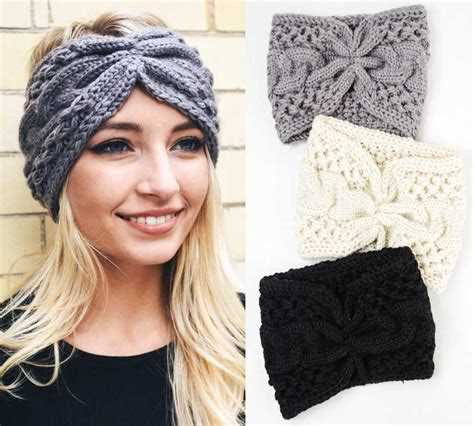
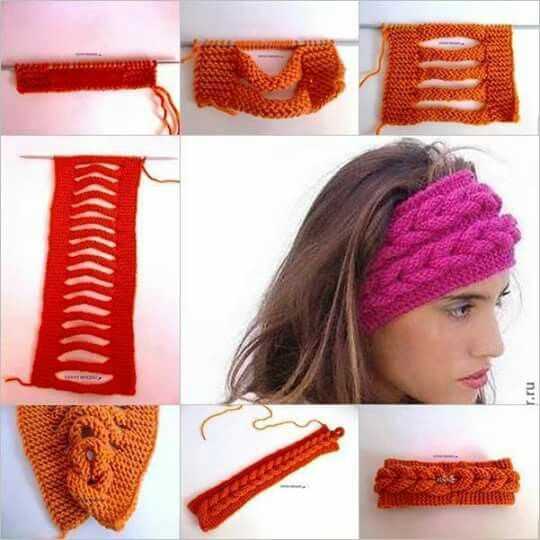
If you’re interested in knitting and want to create a fashionable accessory, look no further! In this article, we’ll guide you through the process of knitting a stylish headband from start to finish. Whether you’re a beginner or an experienced knitter, our easy step-by-step instructions will help you create a beautiful headband that you’ll be proud to wear.
Knitting a headband is a fantastic way to showcase your creativity and add a personal touch to your wardrobe. With just a few basic knitting techniques, you can create a trendy accessory that will keep you warm and stylish during colder months. Plus, knitting is a calming and therapeutic hobby that allows you to express yourself and relax.
In this tutorial, we’ll cover everything you need to know to knit a headband, including choosing the right yarn, selecting the perfect knitting needles, and understanding essential knitting stitches. We’ll also provide detailed step-by-step instructions, accompanied by helpful tips and tricks, to ensure your knitting project is a success. By the end of this article, you’ll have a beautiful headband that you can wear with pride or gift to a loved one.
What you will need
To knit a stylish headband, you will need the following supplies:
- Yarn: Choose a soft, medium-weight yarn in your desired color. Acrylic or wool blends work well for headbands.
- Knitting Needles: Select a pair of knitting needles that are suitable for your chosen yarn. Size 8 or 9 needles are commonly used for medium-weight yarns.
- Tapestry Needle: This will be used for weaving in the loose ends of yarn.
- Scissors: A pair of scissors will be necessary for cutting the yarn.
Optional supplies:
- Stitch Markers: These can be used to mark specific stitches or sections of the pattern.
- Buttons, Ribbons, or other Embellishments: If desired, you can add buttons, ribbons, or other embellishments to personalize your headband.
Once you have gathered all of these supplies, you will be ready to start knitting your stylish headband!
Choosing the right yarn and needles
When it comes to knitting a stylish headband, choosing the right yarn and needles is essential for achieving the desired result. Here are some tips to help you make the right choices:
- Yarn weight: Consider the weight of the yarn you want to use. A thicker yarn will create a chunkier, warmer headband, while a thinner yarn will result in a more delicate, lightweight headband.
- Fiber content: Think about the fiber content of the yarn. Different fibers have different properties, such as warmth, durability, and comfort. Some popular yarn fibers include wool, cotton, acrylic, and silk.
- Needle size: The needle size you choose will depend on the yarn weight and the desired tension. Thicker yarns generally require larger needles, while thinner yarns work well with smaller needles. Check the yarn label for recommended needle sizes.
- Straight vs. circular needles: Decide whether you want to knit with straight needles or circular needles. Straight needles are used for knitting flat pieces, while circular needles are versatile and can be used for both flat and circular knitting.
Once you have chosen the right yarn and needles, you are ready to start knitting your stylish headband. Remember to follow the instructions carefully and enjoy the process of creating a beautiful and cozy accessory!
Casting on
The first step in knitting a headband is to cast on. Casting on is the process of creating the initial stitches on the knitting needle. Here’s how to do it:
- Hold the yarn: Hold the yarn in your right hand (for right-handed knitters) or left hand (for left-handed knitters). The end of the yarn should be between your thumb and index finger.
- Make a slip knot: With your other hand, make a loop with the yarn. Insert your thumb and index finger through the center of the loop to grab the yarn.
- Insert the needle: Insert the knitting needle through the loop from front to back, with the yarn tail over the needle.
- Tighten the loop: Pull the yarn tail gently to tighten the loop around the needle. Make sure it is snug, but not too tight.
- Continue casting on: Repeat steps 2-4 until you have cast on the desired number of stitches. The number of stitches may vary depending on the width of the headband you want to create.
Once you have cast on the desired number of stitches, you are ready to start knitting the headband. The casting on process forms the foundation of your project and sets the stage for the rest of the knitting process. Happy knitting!
Knitting the headband
Now that you have gathered all the necessary materials and learned the basic knitting stitches, it’s time to start knitting your stylish headband. Follow these step-by-step instructions to create a beautiful accessory:
- Start by casting on the required number of stitches using the long-tail cast-on method. Make sure the number of stitches is appropriate for the desired width of your headband.
- Once you have cast on the stitches, begin the first row by knitting across all the stitches. This will create the foundation row for your headband.
- Continue knitting row after row using the knit stitch until you reach the desired length for your headband. Remember to keep your tension even throughout the project to ensure a neat and consistent appearance.
- Once you have reached the desired length, it’s time to bind off the stitches. To do this, knit the first two stitches as usual, then use the left-hand needle to lift the first stitch over the second stitch and off the right-hand needle. Continue this process until you have only one stitch left on the right-hand needle.
- Cut the working yarn, leaving about a 6-inch tail. Thread the tail through the last stitch, pull tight to secure, and weave in the loose ends using a tapestry needle.
That’s it! You have successfully knitted your very own stylish headband. Try experimenting with different yarn colors and stitch patterns to create unique variations of this headband design. It’s also a great project to give as a gift to friends and family.
Adding a Decorative Pattern
To add a decorative pattern to your headband, you can use various knitting techniques. Here are a few ideas:
- Fair Isle: This technique involves knitting with two different colors, creating a pattern with small repeating motifs. You can incorporate Fair Isle knitting by alternating between your main color yarn and a contrasting color yarn.
- Cables: Cables are created by crossing stitches over each other, creating a twisted effect. You can add cables to your headband by following a cable stitch pattern. This will give your headband a textured and stylish look.
- Lace: Lace patterns involve creating openwork designs by combining yarn overs and decreases. You can choose a lace stitch pattern and incorporate it into your headband to give it an elegant and feminine touch.
To incorporate these decorative patterns, you will need to follow the specific instructions for each technique. You may also need to adjust the stitch count or repeat sections of the pattern to ensure it fits within the width of your headband.
Remember to practice these patterns on small swatches before incorporating them into your headband to ensure you understand the instructions and achieve the desired effect. Once you feel confident, you can then start incorporating these patterns into your headband design.
| Row | Stitch Instructions |
|---|---|
| 1 | Knit 2, purl 2 |
| 2 | Purl 2, knit 2 |
| 3 | Knit all stitches |
| 4 | Purl all stitches |
This is just a simple example of a stitch pattern. Feel free to experiment with different stitch combinations and patterns to create a unique design for your headband.
Finishing touches
Once you have completed knitting the headband, you’re ready to add some finishing touches to make it even more stylish and unique.
Here are a few ideas to help you customize your headband:
- Embroidery: You can add decorative embroidery stitches to your headband using a contrasting color of yarn. This will give it a personalized touch and make it stand out.
- Buttons: Sewing buttons onto your headband can add a touch of elegance and character. You can choose buttons that match your yarn color or go for bold contrasting ones.
- Flower embellishments: Crochet or knit small flowers and sew them onto your headband. They can be made using the same yarn as your headband or with a different color for added contrast.
- Bow: Attach a pretty bow to your headband by knitting or crocheting it separately and sewing it on. This will add a feminine touch to your accessory.
Remember, these are just suggestions to help you get started. Feel free to get creative and experiment with different embellishments and techniques to create a headband that reflects your personal style.
Once you’ve added your finishing touches, your stylish headband is ready to wear! Enjoy the satisfaction of completing a handmade accessory and the warmth and style it brings to your outfit.
FAQ:
What materials do I need to make the headband?
To make the headband, you will need knitting needles, yarn (preferably in a medium weight), a tapestry needle for sewing, and scissors.
What are the basic knitting techniques I need to know for this project?
For this project, you will need to know how to cast on stitches, how to knit and purl stitch, and how to cast off stitches.
Are there any specific knitting patterns that I need to follow?
Yes, the article provides step-by-step instructions and a knitting pattern for the headband. It includes information on the gauge, stitch pattern, and measurements to ensure the headband comes out the right size.
Is this headband suitable for beginners?
Yes, this headband project is perfect for beginners. The instructions are easy to follow, and the basic knitting techniques required are explained in detail. It’s a great project for learning and practicing knitting skills.
Can I customize the size of the headband?
Yes, the article provides instructions on how to adjust the size of the headband to fit your head. It suggests measuring your head circumference and adding or subtracting stitches to achieve the desired size.


