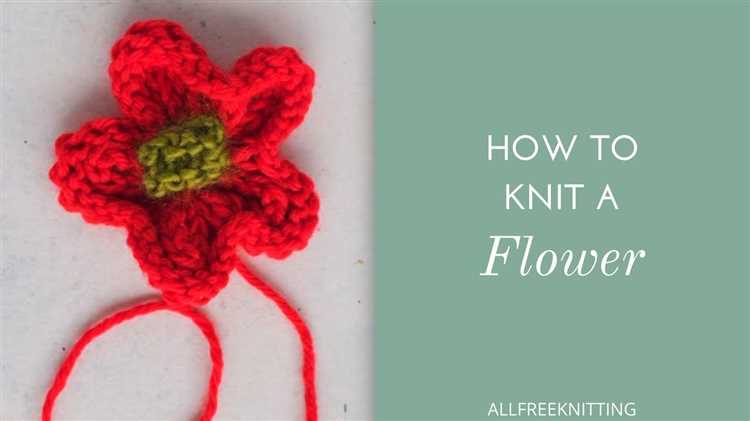
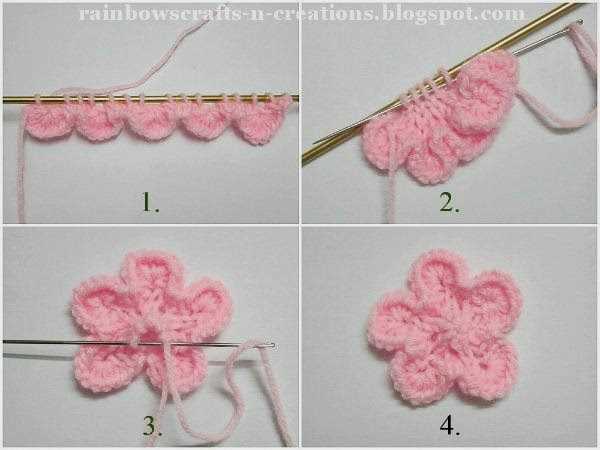
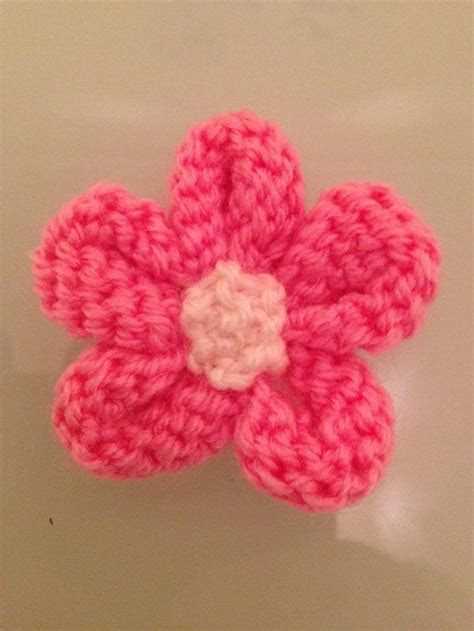
Knitting is a wonderful craft that allows you to create beautiful and unique items. One of the most popular knitting projects for beginners is knitting flowers. Knitted flowers can be used to decorate hats, scarves, bags, and more. They also make great gifts for birthdays, Mother’s Day, or just to brighten someone’s day. In this beginner’s guide, we will show you step-by-step how to knit a flower.
Before we begin, you will need a few basic knitting supplies. These include knitting needles, yarn, a tapestry needle, and scissors. If you are new to knitting, it is recommended to start with a medium-weight yarn and larger knitting needles to make it easier to see your stitches.
To start knitting your flower, you will first need to cast on stitches. This is the process of creating a foundation row of stitches on your knitting needle. The number of stitches you cast on will depend on the size of flower you want to create. Once you have cast on your stitches, you will then start knitting rows of stitches using the knit stitch.
As you knit your flower, you can add different colors of yarn to create a multicolored effect or use variegated yarn for a unique look. You can also experiment with different stitch patterns to create different textures and designs. Once you have finished knitting your flower, you will then need to bind off your stitches to secure your work. Finally, you can use your tapestry needle to weave in any loose ends and shape your flower into the desired shape.
Remember, knitting is a skill that takes practice. Don’t be discouraged if your first flower doesn’t turn out exactly as you envisioned. With time and practice, you will become more confident in your knitting abilities and be able to create beautiful flowers to cherish or share with others. So grab your knitting needles and yarn, and let’s get started on this knitting adventure!
What You’ll Need
To get started with knitting a flower, you’ll need a few basic supplies:
- Yarn: Choose a yarn in your desired color for the flower.
- Knitting Needles: Select a pair of knitting needles in the appropriate size for your yarn. The recommended needle size is usually mentioned on the yarn label.
- Tapestry Needle: A tapestry needle with a large eye will be necessary for weaving in ends and completing finishing touches.
- Scissors: Keep a pair of sharp scissors nearby for cutting the yarn.
- Stitch Markers: Optional, but helpful for keeping track of your stitches and marking important points in the pattern.
- Pattern: Find a pattern or tutorial for the flower you want to knit. There are many resources available online or in books.
Once you have gathered all of these supplies, you’ll be ready to start knitting your flower!
Knitting Needles
For knitting flowers, you will need a pair of knitting needles. The size of the needles depends on the type of yarn you are using and the desired tension for your project. Here are some things to consider when choosing your knitting needles:
- Material: Knitting needles can be made from various materials, including metal, plastic, and wood. Each material has its own advantages. Metal needles are smooth and durable, plastic needles are lightweight, and wooden needles provide a warm and comfortable grip.
- Size: Knitting needles come in different sizes, which are indicated by numbers ranging from 0 to 50 (US) or 2mm to 25mm (metric). The size of the needles affects the gauge or tension of your knitting. Thicker needles create looser stitches, while thinner needles create tighter stitches. The size of the needles you need will depend on your pattern and the thickness of your yarn.
- Length: Knitting needles are available in different lengths, such as 10 inches, 14 inches, and 16 inches. The length of the needles determines the width of your knitting. Longer needles are ideal for larger projects, such as blankets or shawls, while shorter needles are suitable for smaller projects, like flowers.
Before you start knitting your flower, make sure you have the right needles for your project. Experiment with different needle sizes and materials to find what works best for you and your yarn.
Yarn
Yarn is an essential material for knitting. It is made of fibers that are spun together to create a long, continuous strand. There are various types of yarn available, each with its own unique characteristics and qualities.
Fiber Content: Yarn can be made from natural materials such as wool, cotton, silk, and bamboo, or synthetic materials such as acrylic and polyester. The fiber content of the yarn determines its texture, warmth, and durability.
- Wool: Wool yarn is warm, soft, and elastic. It is a popular choice for knitting as it provides excellent insulation.
- Cotton: Cotton yarn is cool, breathable, and ideal for knitting lightweight garments, especially in warm climates.
- Silk: Silk yarn is luxurious, smooth, and has a beautiful sheen. It is often blended with other fibers to enhance their qualities.
- Bamboo: Bamboo yarn is eco-friendly, durable, and hypoallergenic. It is a great choice for those with sensitive skin.
- Synthetic: Synthetic yarns like acrylic and polyester are affordable, easy to care for, and come in a wide range of colors. They are great for beginners.
Weight: Yarn is also categorized by its weight, which refers to the thickness of the strand. The weight of the yarn determines the size of the knitting needles or crochet hook that should be used. Common yarn weights include lace, fingering, sport, DK, worsted, and bulky.
Color: Yarn comes in a wide array of colors, from solid hues to variegated and self-striping options. The color of the yarn can greatly affect the appearance and visual impact of the knitted item.
Texture: Yarn can have different textures, such as smooth, fluffy, or textured. The texture of the yarn adds dimension and interest to the knitted fabric.
Twist: Yarn can be twisted either clockwise (S-twist) or counterclockwise (Z-twist). The twist affects the way the yarn behaves when knitted or crocheted.
When choosing a yarn for knitting a flower, consider the desired characteristics and qualities of the finished flower and select a yarn accordingly. Experimenting with different types of yarn can also add variety and creativity to your knitting projects.
Scissors
When it comes to knitting, having a good pair of scissors is essential. Scissors are used to cut yarn and trim any excess ends or loose threads. Here are a few things to consider when choosing scissors for your knitting projects:
- Sharpness: Look for scissors with sharp blades to ensure clean and precise cuts.
- Size: Choose scissors that are comfortable to hold and maneuver. Depending on your preference, you can opt for small embroidery scissors or larger sewing shears.
- Material: Scissors come in various materials, such as stainless steel, titanium, or plastic. Consider the durability and weight of the scissors.
It’s important to keep your scissors clean and sharp to avoid any damage to your knitting project. Regularly wipe the blades with a soft cloth or tissue and store them in a safe place, away from children or pets.
Casting On
Casting on is the first step in starting your knitting project. It’s the process of creating the first row of stitches on your knitting needle.
Here are a few different methods you can use to cast on:
- Long Tail Cast On:
- Knitted Cast On:
- Cable Cast On:
This is a popular method for casting on because it creates a neat and flexible edge. To do the long tail cast on, you’ll need to estimate the amount of yarn you’ll need for your cast on stitches. Make a slipknot at the end of your yarn and place it on the needle. Hold the working yarn and the tail in different hands and begin casting on by wrapping the working yarn around the needle clockwise and then under the tail yarn. Insert the needle into the loop created and slip the loop onto the needle. Repeat this process until you have cast on the desired number of stitches.
This method is easy and quick. Start by making a slipknot and placing it on the needle. Insert the needle into the slipknot and knit a stitch. Instead of slipping the stitch off the left needle, keep it on the left needle and knit another stitch through the first stitch. Repeat this process until you have cast on the desired number of stitches.
The cable cast on method creates a sturdy edge that is good for projects that require a little more structure. Start by making a slipknot and placing it on the needle. Insert the needle into the slipknot knitwise and knit a stitch. Instead of slipping the stitch off the left needle, transfer the new stitch to the left needle by inserting the right needle between the first and second stitches on the left needle and knit another stitch through the first stitch. Repeat this process until you have cast on the desired number of stitches.
Choose a casting on method that you feel comfortable with and start practicing. Once you’ve mastered casting on, you’ll be ready to move on to the next steps in your knitting project.
Make a Slipknot
To begin knitting a flower, you first need to make a slipknot. The slipknot is used to secure the initial loop of yarn onto your knitting needle. Follow the steps below to make a slipknot:
- Step 1: Start by holding the working end of the yarn in your right hand, leaving a short tail.
- Step 2: Cross the working end of the yarn over the tail end, creating a loop.
- Step 3: Pass the working end of the yarn through the loop, creating a larger loop.
- Step 4: Insert your knitting needle through the larger loop from front to back.
- Step 5: Pull the working end of the yarn to tighten the loop around the knitting needle.
Once you have made the slipknot, you are ready to start knitting your flower. Make sure the slipknot is snug on the knitting needle, but not too tight that it prevents movement. The slipknot will serve as the first stitch of your project.
Place the slipknot on the needle
Before you begin knitting, you’ll first need to place the slipknot onto the needle.
To make a slipknot, start with a loop of yarn. Insert the needle through the loop, and pull the yarn to tighten the knot around the needle.
Make sure the loop is loose enough to easily slide along the needle, but not too loose that it falls off.
Once the slipknot is on the needle, you’re ready to start knitting your flower!
Hold the needle with the slipknot in your right hand
Before you start knitting, make sure you have the slipknot securely attached to one of the knitting needles. Hold the needle with the slipknot in your right hand, with the pointed end facing towards the left. Grip the needle firmly but not too tightly.
This grip will allow you to manipulate the yarn and control the knitting needles more easily as you work on your flower project.
Knitting the Flower
Once you have gathered all of your materials and familiarized yourself with the basic knitting stitches, it’s time to start knitting your flower. Follow these steps to create a beautiful knitted flower:
- Cast on the required number of stitches onto your knitting needles. This will depend on the size of the flower you want to create and the pattern you are following.
- Row 1: Knit across all stitches.
- Row 2: Purl across all stitches.
- Repeat rows 1 and 2 until your flower reaches the desired length. This will depend on the number of rows specified in your pattern.
- Once your flower has reached the desired length, it’s time to bind off your stitches. To do this, knit the first two stitches and then use your left needle to lift the first stitch over the second stitch and off the right needle. Repeat this process until all stitches have been bound off.
- Cut the yarn, leaving a tail of about 6 inches. Pull the tail through the last stitch to secure it.
- Now it’s time to shape your flower. Using your hands, gently roll up the knitted strip into a spiral shape, starting from one end. Make sure the right side of the knitting is on the outside.
- While holding the flower in its spiral shape, use a yarn needle to stitch the layers together. Insert the needle through the center of the flower and through each layer, creating a secure base.
- Continue stitching until all layers are secure and the flower holds its shape.
And there you have it! You have successfully knitted your very own flower. Experiment with different yarn colors and patterns to create a variety of beautiful knitted flowers for your projects.
Knit the first row
To begin knitting the flower, follow these steps:
- Start by holding the knitting needles in your hands, with the yarn attached to the right needle.
- Make sure the working yarn is positioned behind the needles.
- Insert the right needle into the first stitch on the left needle.
- Take the yarn with your right hand and bring it from back to front between the needles, creating a loop.
- With the right needle, bring the loop through the stitch, transferring the stitch from the left needle to the right needle.
- Repeat steps 3-5 until all stitches on the left needle have been transferred to the right needle.
- Once all the stitches have been transferred, the first row is complete.
Remember to keep your tension even and avoid pulling the yarn too tightly.
Now that you have completed the first row, you can continue with the next steps to knit the rest of the flower.
FAQ:
What materials do I need to knit a flower?
To knit a flower, you will need yarn, knitting needles (size depends on the thickness of the yarn), a darning needle, and scissors.
Do I need any prior knitting experience to knit a flower?
No, you don’t need any prior knitting experience to knit a flower. This beginner’s guide will walk you through all the steps.
What is the easiest flower pattern for beginners?
The easiest flower pattern for beginners is the simple garter stitch flower. It only requires basic knitting skills and is great for practicing the knit stitch.
Can I use different colors of yarn to make a multi-colored flower?
Yes, you can definitely use different colors of yarn to make a multi-colored flower. It can add a nice touch to your knitted flower and make it more visually interesting.
How long does it take to knit a flower?
The time it takes to knit a flower will depend on various factors such as your knitting speed, the complexity of the pattern, and the size of the flower. Generally, a simple knitted flower can be completed in a couple of hours.
Are there any alternative knitting techniques that can be used to make a knitted flower?
Yes, there are alternative knitting techniques that can be used to make a knitted flower. Some popular techniques include lace knitting, cables, and bobbles. These techniques can create more intricate and textured flowers.


