Have you ever wanted to try your hand at knitting but didn’t know where to start? Look no further! In this step-by-step guide, we will teach you how to knit a cozy chunky blanket using needles.
Knitting is a wonderful hobby that allows you to create beautiful and functional items with your own two hands. With just a few simple techniques, you can create a warm and stylish blanket that will be the envy of all your friends.
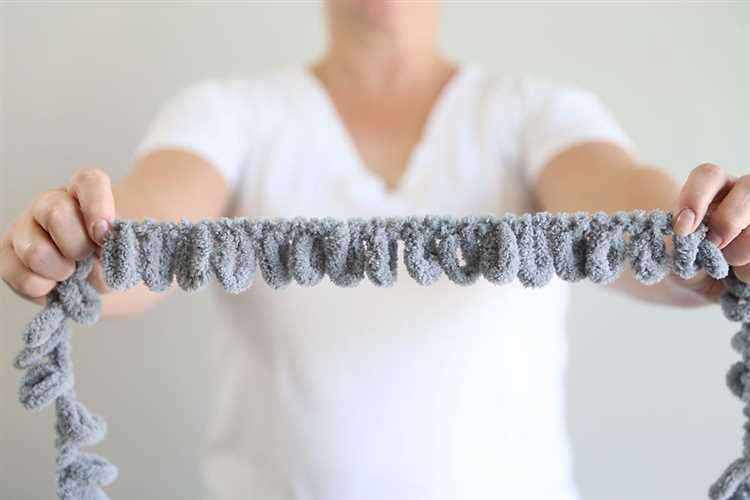
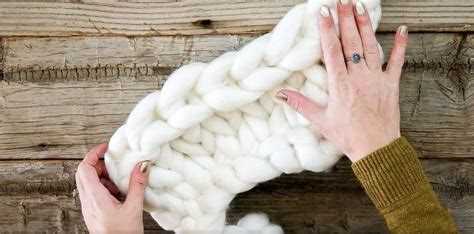
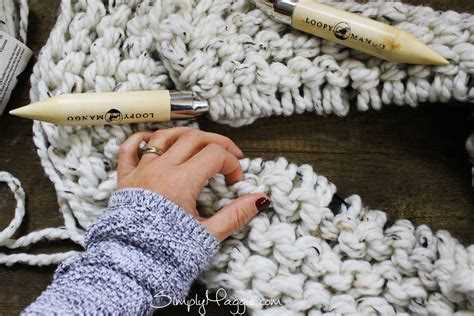
First, you’ll need to gather your materials. For this project, you’ll need a pair of chunky knitting needles and super bulky yarn. The chunky needles will help you create a loose and airy stitch, while the super bulky yarn will give your blanket a cozy and warm feel.
Once you have your materials, it’s time to get started! We’ll begin by casting on, which is the process of creating the first row of stitches on your needle. This will set the foundation for your blanket. Follow along with our step-by-step instructions and soon you’ll be well on your way to knitting your very own chunky blanket!
So grab your needles and yarn, and let’s get started on this knitting adventure! By the end of this guide, you’ll have a beautiful and cozy chunky blanket to snuggle up with on those chilly nights.
Choose Quality Yarn for Your Chunky Blanket
When it comes to knitting a chunky blanket, one of the most important factors to consider is the yarn you choose. The right yarn can make a significant difference in the final result and overall durability of your blanket. Here are some tips to help you choose quality yarn for your chunky blanket:
- Consider the fiber content: Different fibers have different properties, so it’s essential to understand the characteristics of each type of yarn. Wool is known for its warmth and durability, while acrylic yarn is typically more affordable and easy to care for. Alpaca yarn is luxurious and soft, perfect for a cozy blanket. Consider your preferences and needs when selecting the fiber content.
- Look for chunky weight: Since you’re knitting a chunky blanket, opt for yarn that is specifically labeled as chunky or super bulky. These yarns are thicker and will produce the desired chunky texture.
- Check the yardage: Pay attention to the yardage per skein or ball of yarn. Depending on the size of the blanket you want to make, you’ll need a specific amount of yarn. Make sure you have enough to complete your project to avoid running out before you finish.
- Consider the color: The color of your yarn can significantly impact the overall appearance of your blanket. Consider the style and decor of the room where the blanket will be used and choose a color that complements it. Additionally, keep in mind that light-colored yarns may show dirt and stains more easily.
- Feel the yarn: If possible, visit a local yarn shop and feel the yarn in person. Soft and squishy yarn will create a cozy blanket, while a stiffer yarn might result in a more structured and textured blanket. Pick the yarn that feels right for you.
By considering these factors and investing in quality yarn, you’ll be well on your way to creating a beautiful and long-lasting chunky blanket. Take your time to choose the perfect yarn for your project, and enjoy the knitting process!
Select the Right Size of Knitting Needles
Choosing the right size of knitting needles is essential for creating the perfect chunky blanket. The size of the needles will determine the gauge of your knitting project, which directly affects the overall size and texture of the finished blanket. Here are some key considerations to help you select the right size of knitting needles:
- Yarn weight: The weight of the yarn you choose will dictate the appropriate needle size. For a chunky or super bulky yarn, you will need larger knitting needles to accommodate the thickness and create an open and loose texture. Typically, knitting needles between US size 13 and 19 (9-15 mm) are recommended for chunky blankets.
- Gauge: It’s important to check the gauge of your preferred knitting pattern or project. The gauge refers to the number of stitches and rows per inch. Using the recommended needle size ensures that your stitch count matches the intended pattern. This will result in a blanket that turns out the right size and has the desired texture.
- Comfort: Consider your personal comfort and knitting style when choosing the size of your needles. Larger needles can be more challenging for some knitters to handle, especially if you’re new to knitting or have dexterity issues. Test a few different sizes to find a needle that feels comfortable and allows you to knit smoothly.
- Project size: Determine the dimensions of the blanket you want to knit. If you desire a smaller throw blanket, you can use smaller needles. However, if you’re aiming for a large and cozy blanket, opt for larger needles to achieve a looser and bulkier fabric.
Remember that knitting is a personal process, and the size of needles you choose can greatly impact the outcome of your project. Take the time to experiment with different needle sizes to find the one that works best for you and your desired chunky blanket design.
Learn the Basic Knitting Stitches
To make a chunky blanket with needles, you will need to learn a few basic knitting stitches. These stitches will form the foundation of your blanket and allow you to create the cozy texture you desire.
Garter Stitch
The garter stitch is the first stitch you should learn as a beginner. It is created by knitting every row, resulting in a bumpy texture. To knit the garter stitch, simply knit every stitch in each row until you have reached the desired length of your blanket.
Stockinette Stitch
The stockinette stitch creates a smooth and flat fabric with a “v” pattern on one side and a purl bump pattern on the other side. To create the stockinette stitch, alternate knitting one row and purling the next row. Repeat these two rows until you have reached the desired length of your blanket.
Rib Stitch
The rib stitch is commonly used for creating borders or decorative elements in a blanket. It has a stretchy and textured pattern that is achieved by alternating knit and purl stitches within a row. To create the rib stitch, start by knitting one stitch and then purling one stitch. Repeat this pattern until you have reached the desired length.
Seed Stitch
The seed stitch is a simple and textured stitch that is great for creating a visually interesting pattern. It is created by alternating knit and purl stitches, but in a specific pattern. To create the seed stitch, start by knitting one stitch and then purling one stitch in the next row. Repeat this pattern but start with purling in the next row. Continue alternating the knit and purl stitches until you have reached the desired length.
Cable Stitch
The cable stitch is a more advanced knitting technique that creates a twisted pattern resembling cables. It adds depth and dimension to your blanket. To create the cable stitch, you will need a cable needle. Move a set of stitches to the cable needle, hold it in the front or back of your work, and then knit the next set of stitches. Repeat this pattern to create the cable effect.
By learning these basic knitting stitches, you will have the skills needed to create a beautiful chunky blanket with needles. Experiment with different stitch patterns and textures to make your blanket unique and cozy.
Cast on Stitches for Your Chunky Blanket
Before you can start knitting your chunky blanket, you need to cast on the stitches. Casting on is the process of creating the foundation row of stitches on your knitting needles. For a chunky blanket, you’ll want to use a strong and durable cast on method that will hold up well with the weight of the yarn.
Here are a few options for casting on stitches for your chunky blanket:
- Long tail cast on: This is a popular and versatile cast on method that creates a neat and elastic edge. To do the long tail cast on, you’ll need to estimate the length of yarn needed to cast on the desired number of stitches. Make a slipknot and place it on one of the knitting needles, then using the long tail of yarn, create the remaining stitches by making loops with the needle.
- Cable cast on: This cast on method is also strong and durable, making it suitable for a chunky blanket. It creates an edge that is less stretchy than the long tail cast on. To do the cable cast on, make a slipknot and place it on the needle. Then, insert the needle into the slipknot from the bottom up, yarn over, and pull a loop through. Repeat this process for the desired number of stitches.
- Knitted cast on: This is a simple and easy cast on method that is great for beginners. It creates a dense and sturdy edge. To do the knitted cast on, make a slipknot and place it on the needle. Then, insert the right-hand needle into the slipknot, knitwise, and knit a stitch. Keep repeating this process, knitting into each previous stitch, until you have cast on the desired number of stitches.
Once you have cast on the desired number of stitches for your chunky blanket, you’re ready to start knitting! Make sure to use a pair of large knitting needles that are suitable for chunky yarn. Happy knitting!
Knit Rows to Create the Base of Your Blanket
Once you have gathered all your materials and cast on the desired number of stitches, you are ready to start knitting rows to create the base of your chunky blanket.
Here are the steps to follow:
- Hold the knitting needles in your hands, with the cast-on stitches on your left needle and the empty needle on your right hand.
- Insert the right-hand needle into the first stitch on the left-hand needle, going from left to right.
- Bring the working yarn over and behind the right-hand needle, forming a loop.
- Use the right-hand needle to pull the loop of yarn through the stitch, creating a new stitch on the right-hand needle.
- Slide the stitch from the left-hand needle to the right-hand needle, making sure to keep a firm tension on the yarn.
- Repeat steps 2-5 until you have knitted all the stitches from the left-hand needle and reached the end of the row.
- Turn your work around so that the side with the knitting stitches is now facing you, and the empty needle is in your right hand.
- Repeat steps 2-7 to knit the next row.
Continue knitting rows in this manner until your blanket reaches the desired length.
Remember to keep a consistent tension on the yarn and check your work regularly to ensure there are no mistakes.
Once you are finished knitting the base of your blanket, you can move on to adding any desired patterns or textures, or simply continue knitting in the same manner to create a simple, yet cozy knit blanket!
Continue Knitting Until Desired Length
Once you have cast on your desired number of stitches and completed your first row, it’s time to continue knitting until you reach your desired blanket length. Here’s how to do it:
- Row 2: After completing the first row, turn your work and start knitting the second row. Repeat the same knitting stitch pattern you used in the first row.
- Repeat: Continue knitting each row in the same stitch pattern until the blanket reaches your desired length. You can use a measuring tape or simply estimate the length by holding the blanket up to your body.
- Checking Size: If you’d like to periodically check the size of your blanket as you knit, you can gently lay it flat on a table or another surface and measure the width and length. This will help ensure that you’re on track to achieve your desired dimensions.
- Changing Yarn: If you run out of yarn while knitting and need to add a new ball or skein, simply tie a knot at the end of one yarn and attach the new yarn by making a small loop through the last stitch with the new yarn. Leave a short tail at the end to weave in later.
- Finishing: Once you have reached your desired length, finish the blanket by knitting one final row and binding off all stitches. Cut the yarn, leaving a long tail for weaving in the loose ends.
Remember to take breaks and enjoy the process as you knit your chunky blanket. Knitting can be a relaxing and rewarding hobby, and creating your own cozy blanket is a wonderful accomplishment. Happy knitting!
Bind Off Stitches to Finish Your Chunky Blanket
After completing all the rows of your chunky blanket, it’s time to bind off your stitches to finish the project. Binding off is the process of securing the stitches so they don’t unravel and create a clean edge.
Here are the steps to bind off your stitches:
- Start by knitting the first two stitches.
- Insert the left needle into the first stitch on the right needle.
- Lift the first stitch over the second stitch and off the needle, leaving one stitch remaining on the right needle.
- Knit one more stitch and repeat steps 2 and 3 until you have only one stitch remaining on the right needle.
Once you have one stitch remaining, cut the yarn, leaving a tail of about 6 inches. Pull the tail through the last stitch to secure it. You can use a tapestry needle to weave in any remaining loose ends.
Your chunky blanket is now complete and ready to use! Enjoy the warmth and coziness it will bring to your home.
Wash and Care for Your Finished Chunky Blanket
After completing your chunky blanket, it’s important to properly wash and care for it to maintain its softness and appearance. Follow these steps to keep your blanket looking its best:
- Read the care instructions: Check the label on your yarn for any specific washing instructions. Some yarns may require hand washing or dry cleaning, while others can be machine washed.
- Pre-treat any stains: If your blanket has any stains, pre-treat them before washing. Use a gentle stain remover or spot clean with mild soap and water.
- Use a large, front-loading washing machine: If your blanket is machine washable, it’s best to use a front-loading washing machine, as they tend to be gentler on bulky items. Avoid using a top-loading agitator machine, as it can cause excessive agitation and damage the fibers.
- Use a gentle cycle: Set your washing machine to a gentle or delicate cycle with cold water. This will help prevent shrinkage and protect the fibers.
- Use a mild detergent: Choose a mild, liquid detergent specifically designed for delicate items or wool. Avoid using bleach or harsh chemicals, as they can damage the fibers.
- Avoid fabric softeners: Fabric softeners can coat the fibers and make them less soft and fluffy. Instead, add a small amount of vinegar to the rinse cycle to help soften the blanket.
- Gently dry your blanket: After washing, remove your blanket from the washing machine and gently squeeze out excess water. Avoid wringing or twisting the fabric, as this can cause stretching or damage. Lay the blanket flat on a clean, dry towel and roll it up to remove more moisture. Then, reshape the blanket and lay it flat to air dry.
- Store your blanket properly: When not in use, store your chunky blanket in a cool, dry place away from direct sunlight. Avoid hanging it, as this can cause stretching. Instead, fold it neatly and store it in a breathable bag or container to protect it from dust and pests.
By following these care instructions, you can keep your chunky blanket looking beautiful and cozy for years to come.
FAQ:
What materials do I need to knit a chunky blanket?
To knit a chunky blanket, you will need chunky weight yarn, knitting needles (size 19 or larger), scissors, and a tapestry needle.
Do I need any prior knitting experience to make a chunky blanket?
No, you do not need any prior knitting experience to make a chunky blanket. This project is great for beginners.
How long does it take to knit a chunky blanket?
The time it takes to knit a chunky blanket will vary depending on the size of the blanket and your knitting speed. On average, it can take anywhere from a few days to a week or more to complete.
What are some tips for knitting a chunky blanket?
Here are some tips for knitting a chunky blanket: choose a soft and cozy yarn, use large needles to create a looser stitch, be patient and take breaks as needed, and block your finished blanket to give it a polished look.


