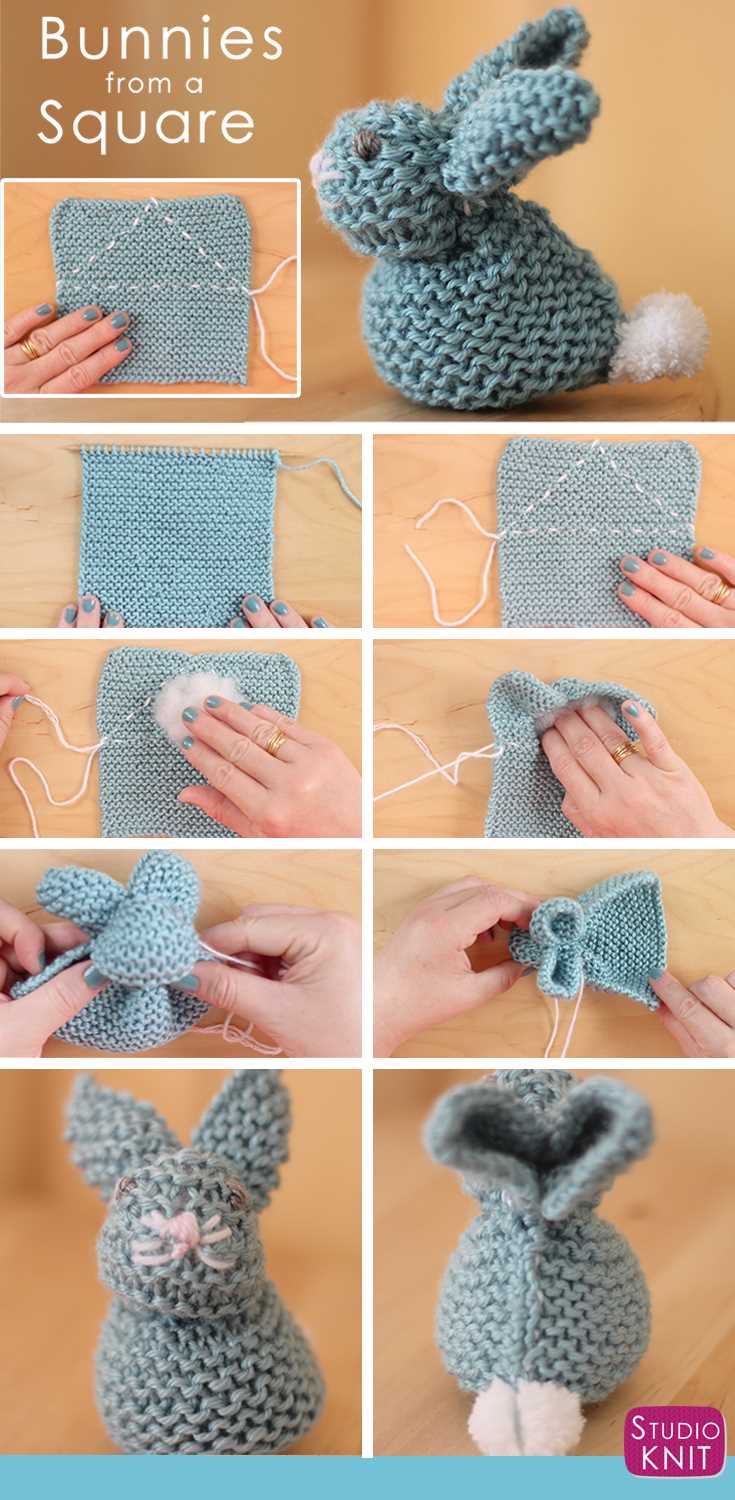
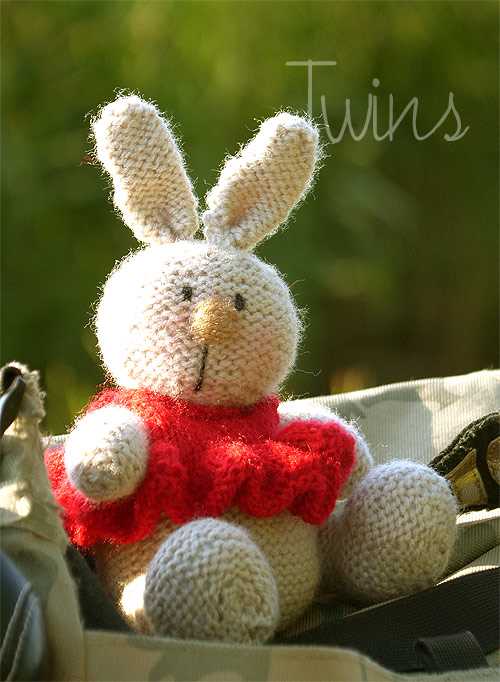
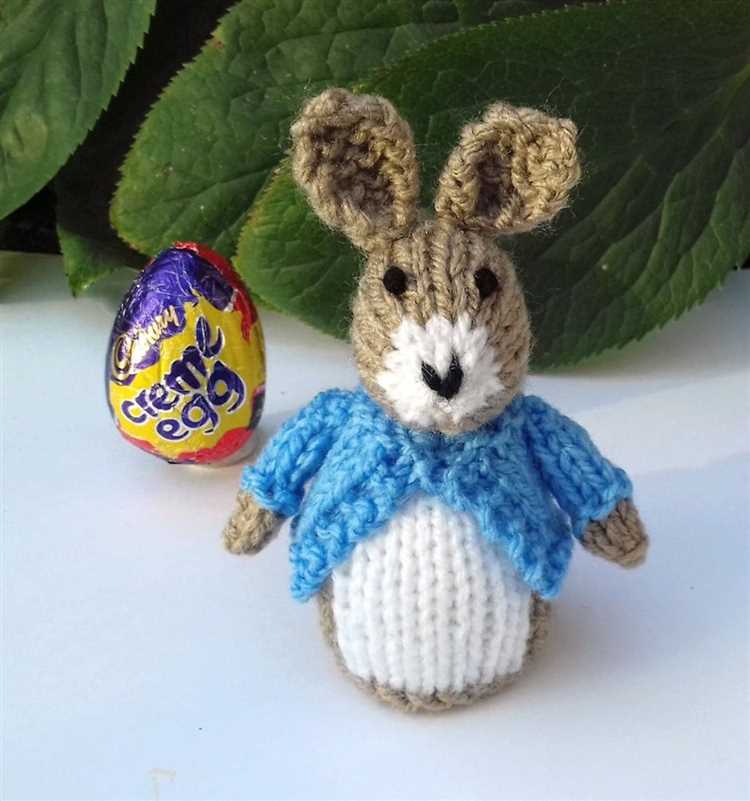
Looking for a fun and rewarding project to try your hand at knitting? Why not learn how to knit a bunny! Knitting toys can be a delightful way to create a handmade gift or decoration that is sure to bring a smile to your face or the face of a loved one.
In this step-by-step guide, we will walk you through the process of knitting a bunny from start to finish. Whether you are a beginner or an experienced knitter, this project is perfect for all skill levels. So grab your knitting needles and some soft, colorful yarn, and let’s get started!
First, we will cover the materials you will need for this project. You will want to have a set of knitting needles in a size appropriate for your yarn, which can be found on the yarn label. Additionally, you will need stuffing for the bunny, such as polyester fiberfill or cotton batting. Finally, you will want to choose yarn in your desired bunny colors. Opt for soft, washable yarn to ensure a cuddly and durable finished product.
Once you have gathered your materials, we can move on to casting on and starting our bunny. Don’t worry if you are unfamiliar with these terms – we will explain everything in detail as we go. By the end of this guide, you will have your very own adorable knitted bunny to cherish or gift to someone special. So let’s dive in and discover the joy of knitting!
Learn How to Knit a Bunny: Step-by-Step Guide
Introduction:
Knitting is a creative and relaxing hobby that allows you to make wonderful items. One of the cutest and popular knitting projects is making a knitted bunny. In this step-by-step guide, we will walk you through the process of knitting your own adorable bunny.
Materials:
- Knitting needles (size 5mm)
- Yarn (medium weight)
- Scissors
- Yarn needle
- Fiberfill stuffing
- Embroidery thread or yarn for eyes and nose
- Optional: Ribbon or bow for decoration
Step 1: Cast On
- Start by casting on 30 stitches using the long-tail cast on method.
- Divide the stitches onto three needles, with 10 stitches on each needle.
Step 2: Knit the Body
- Join the round and knit in the round for about 5 inches, or until the body is the desired length.
- Continue knitting in the round, decreasing 6 stitches evenly spaced across each round until you have 6 stitches remaining.
- Cut the yarn, leaving a long tail.
Step 3: Knit the Ears
- With a new piece of yarn, pick up and knit 4 stitches along the top edge of the body.
- Knit in garter stitch (knit every row) for about 2 inches, or until the ears are the desired length.
- Bind off the stitches.
Step 4: Sew the Body
- Fold the body in half, with the wrong sides together.
- Using the long tail from the body, sew the two sides together, leaving the bottom open for stuffing.
Step 5: Stuff the Bunny
- Take small amounts of fiberfill stuffing and fill the body of the bunny, making sure to shape it as you go.
- Add more stuffing until the bunny is firm but still squeezable.
- Make sure to stuff the ears as well.
Step 6: Finish the Bunny
- Sew the bottom of the bunny closed using the yarn needle.
- Embroider eyes and a nose using embroidery thread or yarn.
- Add any additional decorations, such as a ribbon or bow.
Conclusion:
Congratulations! You have successfully learned how to knit a bunny. This cute and cuddly bunny can be a great gift or a lovely decoration for your home. Enjoy your knitting journey and take pride in your handmade creation!
Gather the Necessary Materials
Before you begin knitting a bunny, make sure you have all the necessary materials. Here’s what you’ll need:
- Yarn: Choose a soft and durable yarn in your desired color. Pastel colors are commonly used for knitting bunnies.
- Knitting Needles: Select a pair of knitting needles that are appropriate for the weight of your yarn. Typically, a size 7 or 8 needle works well for medium weight yarn.
- Yarn Needle: You’ll need a yarn needle with a large eye to weave in loose ends and sew the bunny parts together.
- Scissors: A pair of sharp scissors will be handy for cutting the yarn.
- Stuffing: Choose a soft, non-allergenic stuffing material, such as polyester fiberfill, to fill the bunny.
- Toy Safety Eyes: If you want your bunny to have eyes, you can use plastic safety eyes or embroider them with yarn.
- Optional Accessories: Depending on your preference, you may want to gather additional materials like a small ribbon for a bowtie, a bell for the bunny’s collar, or a tiny pom-pom for the bunny’s tail.
Once you have gathered all these materials, you’ll be ready to start knitting your adorable bunny!
Start with the Bunny’s Body
Step 1: To begin knitting the bunny’s body, you will need to cast on a certain number of stitches. The exact number will depend on the size of the bunny you want to create. You can refer to the pattern for the specific number of stitches required.
Step 2: Once you have cast on the required number of stitches, you can start knitting the body in stockinette stitch. This means you will knit one row and purl the next row until you reach the desired length of the bunny’s body. The stockinette stitch creates a smooth, flat surface on one side and a bumpy texture on the other side.
Step 3: As you knit the body, you may want to add any desired details such as stripes or color changes. You can incorporate these by changing the yarn color or knitting additional rows in a different stitch pattern.
Step 4: Continue knitting until the body reaches the desired length. You can use a tape measure or ruler to measure the length as you go.
Step 5: Once the body is the desired length, you will need to bind off the stitches. This creates a finished edge and prevents the stitches from unraveling.
Step 6: Congratulations! You have completed the basic knitting for the bunny’s body. Now you can move on to knitting the other components such as the head, ears, and tail.
- Note: Remember to refer to the pattern for any specific instructions or variations for creating the bunny’s body.
Shape the Head and Ears
Once you have completed knitting the body and legs of the bunny, it’s time to shape the head and ears. Follow these steps to create the adorable bunny head:
- First, stuff the head firmly with polyester fiberfill. This will give the head a nice plump shape.
- Take a tapestry needle and some yarn in a contrasting color. Use this yarn to embroider the facial features on the head. You can make small stitches for the eyes, nose, and mouth.
- Next, shape the ears. Fold the knitted ear in half lengthwise, with the right sides facing each other. Use a tapestry needle and yarn to sew the folded edge of the ear together. Repeat for the second ear.
- Attach the ears to the top of the bunny’s head. Position them slightly towards the back of the head and sew them in place using a tapestry needle and yarn.
- Finally, shape the head by gently pulling the stuffing towards the back of the head. This will create a round shape for the bunny’s face.
With the head and ears shaped, your knitted bunny is almost complete! The next step is to attach the head to the body and finish off any remaining details.
Add the Eyes, Nose, and Mouth
Once you have finished knitting the body of the bunny, it’s time to add the eyes, nose, and mouth to give it a face.
Materials Needed:
- Two small black buttons for the eyes
- A small pink button for the nose
- Embroidery floss in black for the mouth
- A sewing needle
Instructions:
- Start by positioning the buttons for the eyes on the head of the bunny. Place them slightly above the middle of the head and make sure they are evenly spaced.
- Thread the sewing needle with a piece of black embroidery floss. Take the needle through one of the buttonholes and then through the corresponding hole on the head of the bunny. Repeat this step for the second eye.
- Next, position the pink button for the nose just below the eyes. Thread the sewing needle with a piece of embroidery floss and stitch the button to the head of the bunny.
- Using the black embroidery floss, create the mouth by stitching a small curved line below the nose. You can make a simple smile or get creative with other expressions like a frown or a smirk.
- Once you have finished stitching the eyes, nose, and mouth, tie off the embroidery floss on the inside of the head to secure everything in place.
Adding the eyes, nose, and mouth will bring your knitted bunny to life. These small details make a big difference in giving the bunny a cute and expressive face.
Knit the Arms and Legs
To complete your knitted bunny, you will need to knit the arms and legs. Follow these step-by-step instructions to create the limbs:
- Arms:
- Using your chosen yarn and knitting needles, cast on 8 stitches.
- Knit all stitches in every row until the arm measures 4 inches in length.
- Bind off all stitches and cut the yarn, leaving a long tail for sewing.
- Repeat these steps to knit the second arm.
- Legs:
- Using the same yarn and knitting needles, cast on 12 stitches.
- Knit all stitches in every row until the leg measures 6 inches in length.
- Bind off all stitches and cut the yarn, leaving a long tail for sewing.
- Repeat these steps to knit the second leg.
Once you have completed knitting the arms and legs, you are ready to move on to the next step in assembling your knitted bunny.
Attach the Arms and Legs to the Body
Once you have completed knitting the body and arms and legs separately, it’s time to attach them together.
Here’s how you can attach the arms and legs to the body:
- Take one arm and place it at the desired position on the body. Make sure the arm is evenly aligned with the body.
- Thread the yarn tail of the arm through a tapestry needle.
- Insert the tapestry needle under a stitch on the body where the arm is placed.
- Pull the yarn tail through the stitch and remove the tapestry needle. Make sure to leave a small tail of yarn on the outside of the body.
- Repeat steps 1-4 for the other arm and both legs.
Here are a few tips to keep in mind:
- Take your time when attaching the arms and legs to ensure they are securely attached.
- Make sure the arms and legs are evenly spaced and aligned with each other.
- Use a tapestry needle with a large eye to make threading the yarn easier.
- Double-check that you are attaching the correct arm and leg to the right side of the body.
Once you have securely attached the arms and legs to the body, your knitted bunny will start to take shape. The next step will be to add the bunny’s face and ears.
Finish with the Tail and Embellishments
Once you have finished knitting the body and head of your bunny, it is time to add the final touches. This includes adding the tail and embellishments to give your bunny a charming and personalized look.
To create the tail, you can use a fluffy yarn or a pom-pom maker. Choose a yarn color that complements the bunny’s body. Attach the tail near the bottom of the body, ensuring it is secure. You can use a yarn needle to sew it in place or tie it with a knot.
Embellishments are a great way to add character to your knitted bunny. You can use small buttons or beads for the eyes, a small piece of fabric for a bowtie, or even embroidery to create facial features. Be creative and have fun personalizing your bunny!
Here are some ideas for embellishments:
- Use buttons or beads for the eyes. Sew them securely in place, making sure they are evenly spaced.
- Create a bowtie by cutting a small piece of fabric and tying it around the bunny’s neck. Use a hot glue gun or sewing needle and thread to attach it.
- Add embroidery to create facial features such as a nose or mouth. You can use different colored yarn or embroidery floss to make the features stand out.
- For an extra touch, you can also sew on small accessories like a miniature hat or scarf.
Remember to use child-safe materials if you are making the bunny for a young child or baby.
Once you have added the tail and embellishments, your knitted bunny is complete! Admire your handiwork and consider making more to give as gifts or decorate your home. Happy knitting!
Website Name
Welcome to “Website Name”! Our goal is to provide you with step-by-step guides on various topics, including knitting. Whether you’re a beginner or an experienced knitter, our tutorials are designed to help you learn new techniques and create unique projects.
At “Website Name”, we understand the joy of creating something from scratch and the satisfaction of seeing your finished project. That’s why we’re excited to share our passion for knitting with you.
On our website, you’ll find a wide range of knitting tutorials, including how to knit a bunny. If you’re new to knitting or just want a refresher, our step-by-step guide will walk you through the process. From choosing the right materials to finishing touches, we’ll cover everything you need to know.
Our guide includes detailed instructions, helpful tips, and clear illustrations to ensure your knitting journey is enjoyable and successful. Along the way, you’ll learn various essential techniques such as casting on, knitting stitches, decreasing, and adding embellishments.
We believe that knitting is more than just a hobby; it’s a form of self-expression and creativity. Whether you want to knit a bunny for a loved one or explore other projects, our tutorials will inspire you to unleash your imagination and create something beautiful.
Check out our other knitting tutorials as well, such as knitting a hat, scarf, or even a sweater. With our step-by-step guides, you’ll be able to expand your knitting skills and tackle more challenging projects.
Join our knitting community and share your progress and finished projects with fellow knitters. Feel free to ask questions, seek advice, or simply engage in discussions about your favorite craft.
So, grab your knitting needles, choose your yarn, and get ready to create something magical with “Website Name”! We’re here to support you every step of the way on your knitting journey.
FAQ:
What materials do I need to knit a bunny?
To knit a bunny, you will need knitting needles, yarn in two different colors, stuffing material, and a pair of scissors.
Is knitting a bunny difficult?
Knitting a bunny can be challenging, especially for beginners. However, with practice and following the step-by-step guide, it becomes easier.
How long does it take to knit a bunny?
The time it takes to knit a bunny depends on your knitting skills and the amount of time you can dedicate to the project. It can take anywhere from a few hours to a few days.
Can I use different colors for my bunny?
Yes, you can use any colors you like for your bunny. Feel free to get creative and customize it to your preferences.
Can I wash my knitted bunny?
Yes, you can wash your knitted bunny. However, make sure to follow the care instructions for the yarn you used, as different yarns may have different washing requirements.


