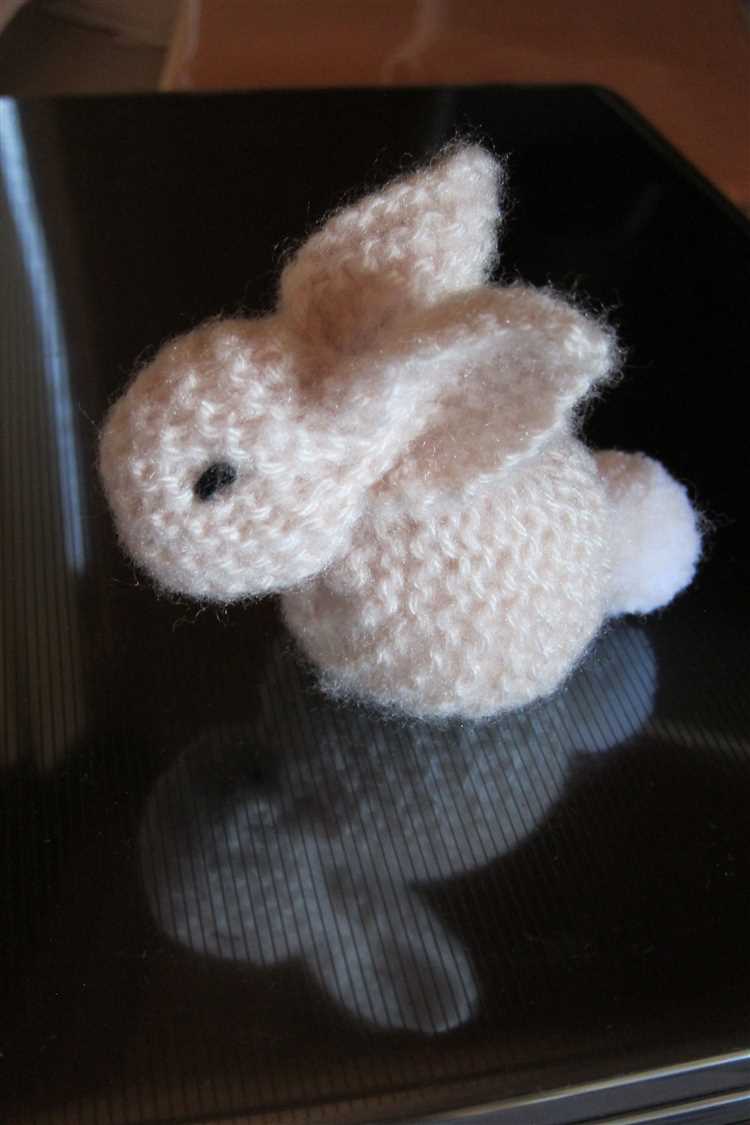
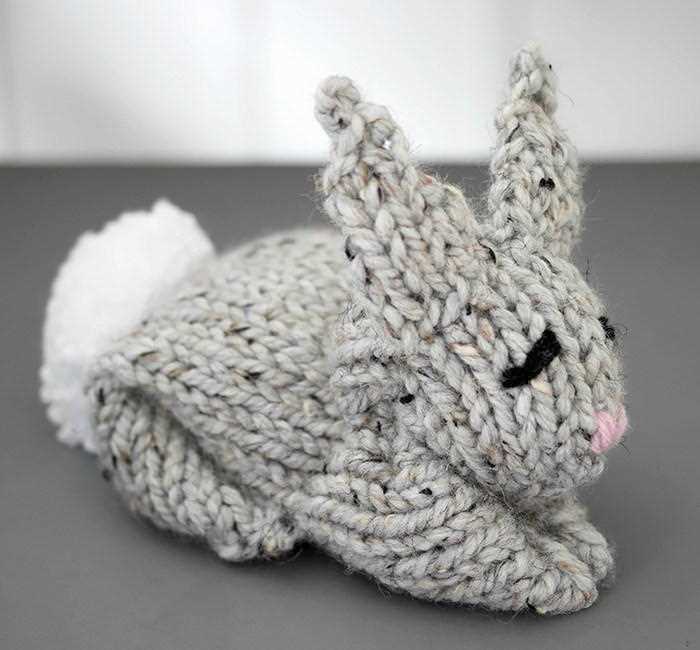
Knitting is a popular craft that allows you to create beautiful and personalized items. One fun project for knitters of all skill levels is knitting a bunny from a square. This adorable toy is made by simply folding and stitching a knitted square, making it a perfect project for beginners.
To knit a bunny from a square, you will need some basic knitting skills and a few materials. You will need yarn in the color of your choice, knitting needles, a tapestry needle, and stuffing. The size of your square will determine the size of your bunny, so choose your yarn and needles accordingly.
The first step in knitting a bunny from a square is to cast on and knit a square. This can be done using any type of knitting stitch, such as garter stitch or stockinette stitch. The size of your square will depend on how big you want your bunny to be, but a 6×6 inch square is a good starting point.
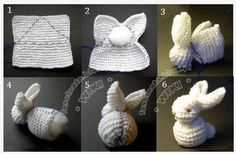
Once you have finished knitting your square, you will need to fold it and stitch it together to create the shape of a bunny. You can fold the square in half diagonally to create a triangle, and then fold the top corners down to meet in the middle. Use a tapestry needle and yarn to stitch the sides together. Leave a small opening to stuff the bunny before closing it up completely.
After you have stitched the sides together and stuffed the bunny, you can add some finishing touches. Embroider or sew on eyes and a nose using contrasting yarn or embroidery thread. You can also add a small pom-pom tail or some ribbon around the bunny’s neck to add some extra cuteness.
Knitting a bunny from a square is a fun and simple project that can be enjoyed by knitters of all skill levels. Whether you are a beginner or an experienced knitter, this project allows you to create a cute and cuddly toy that can be cherished for years to come.
Learn the art of knitting a cute bunny toy
Knitting can be a fun and rewarding hobby, allowing you to create unique and personalized items. One popular project for beginners is knitting a cute bunny toy. Not only is it a great way to practice your knitting skills, but it also makes a wonderful handmade gift for a child or loved one.
To get started, you’ll need some basic knitting supplies, including knitting needles, yarn, and a pair of scissors. Choose a soft and colorful yarn to bring your bunny to life.
Let’s dive into the step-by-step process of knitting a bunny toy:
- Cast on stitches: Start by casting on the desired number of stitches. The exact number will depend on the size of the bunny you want to make. For a small bunny, you might cast on around 40 stitches.
- Knit the first row: Knit across the entire row, using the basic knit stitch. This will create the foundation for your bunny’s body.
- Create the body: Continue knitting rows of the basic knit stitch until the piece measures the desired length for the bunny’s body. Remember to keep track of your rows so you know when to start shaping the head.
- Shape the head: To shape the head, you will gradually decrease stitches. Follow a pattern or decrease evenly across each row until you have the desired number of stitches left for the head.
- Finish the head and ears: Knit a few more rows to complete the head, and then switch to creating the bunny’s ears. You can make the ears as long or short as you like, simply by knitting more or fewer rows.
- Shape the ears: To shape the ears, you will gradually decrease stitches, just like you did for the head. Decrease on both edges of each row until you have a few stitches left, then bind off.
- Assemble the bunny: Once you have finished knitting all the pieces, it’s time to assemble your bunny toy. Use a darning needle to sew the body and head together, and attach the bunny’s ears.
- Add the finishing touches: Use additional yarn to embroider eyes, a nose, and a mouth onto your bunny toy. You can also add a small tail using a pom-pom or yarn tassel.
Following these steps, you’ll be able to create your very own knitted bunny toy. Don’t worry if your first attempt isn’t perfect – practice makes perfect, and each bunny you knit will become better than the last!
Materials needed
- Yarn: Choose a soft yarn in your preferred color. The bunny in the tutorial is made with worsted weight yarn.
- Knitting needles: Use a pair of knitting needles in a size appropriate for your chosen yarn. The tutorial recommends using US size 8 (5mm) needles.
- Tapestry needle: You will need a tapestry needle with a large eye to sew the bunny together and weave in the ends.
- Scissors: Keep a pair of scissors handy to cut the yarn.
- Stuffing: To give the bunny its shape, you will need stuffing. You can use polyester fiberfill, cotton stuffing, or any other soft material you have on hand.
Gather all the necessary supplies
- Knitting needles (size 8 or as recommended by your pattern)
- Yarn (worsted weight or as specified by your pattern)
- Scissors
- Tapestry needle
- Stuffing material
- Embroidery thread or yarn for sewing on the eyes and nose
- Stitch markers
Before you start knitting your bunny from a square, make sure you have all the necessary supplies ready. This will help ensure a smooth knitting process and avoid any unnecessary delays or interruptions. Here’s a checklist of the supplies you’ll need:
- Knitting needles: Choose a pair of knitting needles in the recommended size for your pattern. Size 8 needles are a common choice for worsted weight yarn.
- Yarn: Select a yarn in the appropriate weight for your pattern. Worsted weight yarn works well for most bunny projects.
- Scissors: Keep a pair of sharp scissors nearby for cutting yarn and trimming any loose ends.
- Tapestry needle: This needle with a large eye is perfect for sewing up seams and weaving in loose yarn ends.
- Stuffing material: Choose a soft and resilient stuffing material to fill your knitted bunny. Polyfil or cotton stuffing is commonly used.
- Embroidery thread or yarn: Prepare a small amount of embroidery thread or yarn in a color of your choice for sewing on the eyes and nose of the bunny.
- Stitch markers: Use stitch markers to mark your place in the knitting pattern or to indicate the beginning and end of rows.
Once you have gathered all the necessary supplies, you’ll be ready to start knitting your bunny from a square.
Step 1: Cast on stitches
Before you can begin knitting your bunny, you’ll need to cast on stitches to create the base of your project. The number of stitches you cast on will determine the size of your bunny.
Materials:
- Yarn
- Knitting needles
- Tapestry needle
Instructions:
- Hold the yarn in your hand, leaving a tail that is about 5 inches long.
- Make a slipknot by crossing the working end of the yarn over the tail end, creating a loop.
- Insert your knitting needle through the loop and tighten the knot by pulling on the working end of the yarn.
- Hold the knitting needle with the slipknot in your right hand.
- Using your left hand, wrap the working end of the yarn around your left thumb, then bring the yarn over the top of your left forefinger.
- Insert the knitting needle into the loop on your left thumb, going from front to back.
- Hook the working end of the yarn with the needle and pull it through the loop.
- Slide the newly formed stitch onto the needle, and tighten the yarn to secure the stitch.
- Repeat steps 5-8 until you have cast on the desired number of stitches.
Once you have cast on your stitches, you are ready to begin knitting the bunny from a square.
Start your project with the right foundation
Before you begin knitting your bunny, it’s important to start with the right foundation. This will ensure that your project turns out well and has the right shape.
The first step is to gather all the materials you’ll need:
- Yarn in your desired color
- Knitting needles in the appropriate size
- A pair of scissors
- A yarn needle
Once you have all your materials ready, you can start by making a square. The size of the square will determine the size of your bunny, so make sure to choose your desired dimensions.
To make the square, cast on the necessary number of stitches on your knitting needles. Then, work in the stitch pattern of your choice until the square reaches your desired size. You can use garter stitch, stockinette stitch, or any other stitch pattern that you prefer.
Once your square is the right size, you can bind off all the stitches and cut the yarn, leaving a tail for sewing. Your foundation is now complete!
Next, you’ll move on to shaping your bunny using the square as a base. Follow the step-by-step guide to continue creating your adorable knitted bunny!
Step 2: Knit the Square
Once you have gathered all the necessary materials, it’s time to start knitting the square that will eventually become your bunny.
Follow these step-by-step instructions:
- Begin by casting on 40 stitches onto your knitting needles.
- Work in garter stitch (knit every row) for 40 rows to create a square shape.
- Remember to keep your tension even and consistent throughout the knitting process.
- At the end of the 40th row, bind off all the stitches.
Congratulations! You have successfully knitted a square, which is the first crucial step in creating your knitted bunny.
In the next step, we will learn how to assemble and shape the square into a bunny shape. Make sure to keep your square handy for the next set of instructions.
Create the body of the bunny
Once you have completed knitting the square for the bunny, it’s time to start creating the body. Here’s how you can do it:
- Join the yarn – Take a new strand of yarn in a coordinating color and join it to one of the corners of the square. You can simply tie a knot to secure it in place.
- Begin knitting – Using the joined yarn, start knitting along one of the sides of the square. You can use the garter stitch or any other stitch pattern of your choice.
- Knit the desired length – Keep knitting until you have reached the desired length for the body of the bunny. This will depend on how big you want your bunny to be. You can measure it against the square to get an idea of the length.
- Bind off – Once you have knitted the desired length, bind off the stitches to secure the body.
You should now have a knitted body for your bunny. It will be in the shape of a rectangle. You can set it aside for now and move on to creating the other parts of the bunny, such as the head, ears, and tail. Once all the parts are ready, you can assemble them together to complete your knitted bunny!
Step 3: Shape the bunny’s head
Now that you have completed the body of the bunny, it’s time to shape the head. Follow these simple instructions:
- Take the top corner of the square and fold it down towards the center of the square. This will create a triangle shape.
- Next, take the bottom corner of the square and fold it up towards the center of the square. The triangle should be smaller than the previous one.
- Pinch the sides of the triangle together and secure them with a stitch or a safety pin to hold the shape in place.
- With a darning needle and some yarn, sew along the folded edges of the triangle to close it up and create the round shape of the bunny’s head.
- Once you have finished sewing, pull the yarn tight to close up the head completely.
Now your bunny has a cute little head! Proceed to the next step to add the final touches and complete your knitted bunny.
Add some character to your toy
Once you have knitted your bunny from a square, it’s time to add some character and make it your own. Here are a few ideas to help you personalize your toy:
- Embroider facial features: Using embroidery thread, stitch on eyes, a nose, and a mouth to give your bunny a cute and expressive face.
- Add accessories: You can knit or crochet little accessories like a bowtie, a hat, or a scarf to make your bunny look even more adorable.
- Experiment with different yarn colors: Instead of using a plain color for your bunny, try using different colors for different parts of its body. You can create a striped or multicolored bunny.
- Add some texture: You can use different knitting stitches or even add some crocheted elements to give your bunny some texture. This can make it more interesting to touch and play with.
- Create a unique name: Give your bunny a special name that reflects its personality. Write it down on a small tag and attach it to your toy.
Remember, the only limit to personalizing your bunny is your imagination. Get creative and have fun making your bunny truly one of a kind!
Step 4: Sew the bunny’s features
Now that you have your knitted bunny square, it’s time to give it some character by sewing on its features. This step will involve embroidery and sewing techniques to create the bunny’s face.
- Start by using a needle and embroidery thread to sew on the bunny’s eyes. Choose a contrasting color to make them stand out. You can use French knots or satin stitches to create the eyes.
- Next, sew on the bunny’s nose using a small piece of embroidery floss. You can use a satin stitch or a triangular-shaped stitch to create the nose.
- For the bunny’s mouth, you can use a straight stitch or a backstitch to create a simple smile. Experiment with different stitches to give your bunny a unique expression.
- If you want, you can also add some blush to the bunny’s cheeks using small circles or ovals of pink embroidery floss. Simply sew them onto the bunny’s face using a few small stitches.
- Lastly, sew on the bunny’s ears. Fold the top corners of the square down towards the middle to create two triangular ears. Use a sewing needle and thread to secure the corners in place. You can sew them flat against the head or leave them slightly floppy for a more playful look.
Take your time with the sewing process, as this is what will bring your bunny to life. Pay attention to the placement and size of the features to give your bunny a cute and expressive look. Once you’ve finished sewing on all the features, your knitted bunny is complete and ready to be enjoyed!
FAQ:
Can I knit a bunny from a square?
Yes, you can knit a bunny from a square. This step-by-step guide will show you how.
What materials do I need to knit a bunny from a square?
To knit a bunny from a square, you will need yarn, knitting needles, stuffing, a yarn needle, and scissors.
Do I need to know how to knit to make a bunny from a square?
Yes, basic knitting skills are required to make a bunny from a square. You should know how to cast on, knit, purl, and bind off.
How long does it take to knit a bunny from a square?
The time it takes to knit a bunny from a square depends on your knitting speed and skill level. It could take a few hours to a couple of days to complete.
Can I customize the bunny by adding different features?
Yes, you can customize the bunny by adding different features. You can embroider eyes, nose, and mouth, or sew on buttons or beads for eyes. You can also add a pom-pom tail or knit a little scarf for the bunny.


