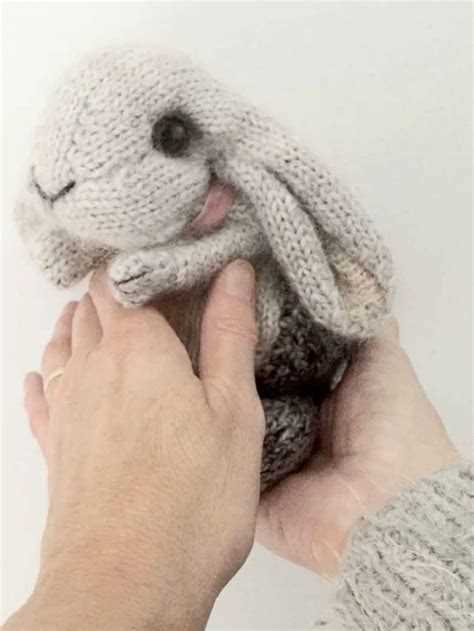
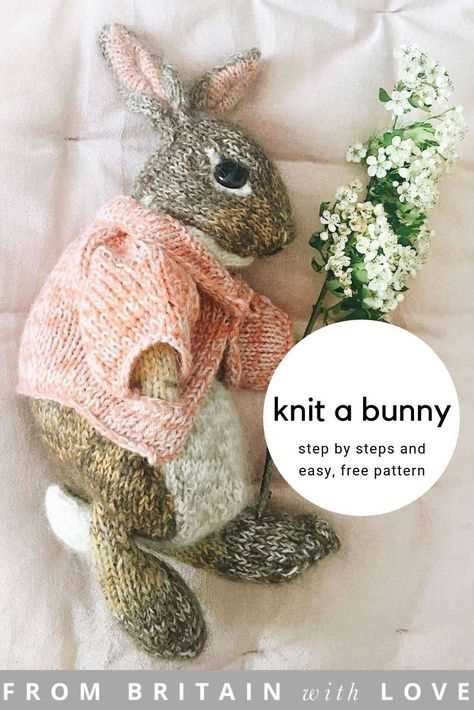
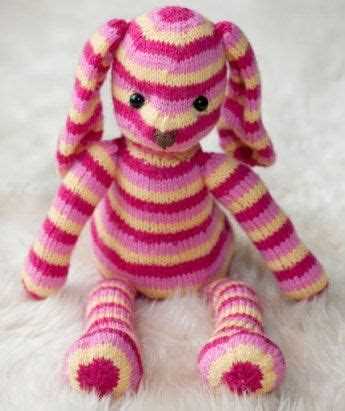
Are you interested in knitting but not sure where to start? Look no further! In this step-by-step guide, we will teach you how to knit a cute bunny from scratch. Whether you’re a complete beginner or have some knitting experience, this guide will help you create a soft and cuddly bunny that’s perfect for gifting or keeping for yourself.
Before we dive into the knitting process, let’s talk about the materials you will need. You will need a pair of knitting needles, a ball of yarn in your desired color, some stuffing for the bunny’s body, and a yarn needle for sewing up the finished project. You can find all of these materials at your local craft store or online.
Once you have your materials ready, we can start knitting! We will begin with the bunny’s body, which is knit in the round using a technique called circular knitting. Don’t worry if you’re not familiar with circular knitting – we’ll explain all the steps in detail to make it easy for you to follow along.
Throughout the guide, we will provide clear instructions and helpful tips to make the knitting process as smooth as possible. We’ll also include photos to illustrate each step, so you can see exactly what your project should look like at each stage.
Gathering the Materials
Before you begin knitting your bunny, you will need to gather all the necessary materials. Here is a list of what you will need:
- Yarn: Choose a soft, medium-weight yarn in the color of your choice. This will be the main color of your bunny.
- Knitting Needles: Select a pair of knitting needles that are appropriate for the thickness of your yarn. Size 8 or 9 needles are usually a good choice for medium-weight yarn.
- Tapestry Needle: This needle will be used for sewing up the seams and weaving in loose ends.
- Scissors: You will need a pair of scissors to cut the yarn.
- Stuffing: Choose a soft and fluffy material, such as polyester fiberfill, to stuff your bunny and give it shape.
- Buttons or Safety Eyes: If you would like to add eyes to your bunny, you can use buttons or safety eyes. Make sure they are securely attached.
- Embroidery Thread: If you want to add any additional details, such as a nose or mouth, you will need embroidery thread in a contrasting color.
Once you have gathered all these materials, you will be ready to start knitting your bunny. Make sure you have a comfortable and well-lit work area, and that you have read through the entire pattern before beginning. Happy knitting!
Casting On and Knitting the Body
To begin knitting the body of your bunny, you will first need to cast on the required number of stitches. In this pattern, we will be casting on 20 stitches. Follow these steps to cast on:
- Hold the knitting needle with the slipknot in your right hand, and the empty needle in your left hand. The working yarn should be coming from the slipknot.
- Insert the empty needle into the slipknot from front to back. The needles should now be crossed with the slipknot on the right-hand needle.
- Using your right hand, wrap the working yarn counterclockwise around the right-hand needle, forming a loop.
- With the right-hand needle, pull the loop through the slipknot, creating a new stitch. Slip this new stitch onto the left-hand needle, and you now have one stitch cast on.
- Repeat steps 2-4 until you have cast on the required number of stitches (in this case, 20 stitches).
Once you have cast on the required number of stitches, you can begin knitting the body of the bunny. Follow these steps:
- Hold the needle with the cast-on stitches in your left hand, and the empty needle in your right hand.
- Insert the right-hand needle into the first stitch on the left-hand needle, from left to right.
- Using your right hand, wrap the working yarn counterclockwise around the right-hand needle. This motion is called “yarn over.”
- With the right-hand needle, pull the loop of yarn through the stitch on the left-hand needle, creating a new stitch.
- Slide the stitch from the left-hand needle onto the right-hand needle, and you now have one stitch knitted.
- Repeat steps 2-5 until you have knitted all of the stitches on the left-hand needle. The stitches will now be on the right-hand needle.
- Turn the work so that the needle with the knitted stitches is in your left hand, and the empty needle is in your right hand. The opposite side of the knitting will now be facing you.
- Repeat steps 2-7 until the body of the bunny reaches the desired length.
By following these steps, you will have successfully cast on and started knitting the body of your bunny. Continue knitting in this manner until the body is complete and you are ready to move on to the next section of the pattern.
Shaping the Head and Ears
Now that you have completed the body of the bunny, it’s time to shape its head and ears. Follow these steps to shape the head:
- Take the remaining yarn and thread it through the tapestry needle. Make sure to leave a long tail for sewing.
- Starting from the bottom of the body, insert the needle into the stitches and sew around the opening, pulling the stitches tight to close it up. This will create a rounded shape for the head.
- Once the head is closed, pull the yarn through the stitches a few times to secure it, then cut off the excess.
Now, let’s move on to shaping the ears:
- Find the center stitch on the top of the head and mark it with a stitch marker.
- Count a few stitches to the left and right of the center stitch and mark those as well.
- Thread the yarn through the tapestry needle again and starting from one of the marked stitches, insert the needle into the body, leaving a small tail hanging out.
- Bring the needle up through the next marked stitch, pulling the yarn tight to create a straight line.
- Repeat this process for the other ear, making sure to keep the yarn tight.
- Once both ears are sewn, tie a knot at the bottom of each ear to secure the yarn.
After shaping the head and ears, your bunny is starting to take shape. Next, we’ll move on to adding the facial features and finishing touches.
Adding the Facial Features
Once you have finished knitting the body of the bunny, it’s time to add the facial features to give it some personality. Follow these steps to complete this final touch:
- Eyes: Using small buttons or beads, sew the eyes onto the bunny’s face. Place them in the desired position, and make sure they are evenly spaced.
- Nose: Cut out a small triangular piece of felt or fabric for the bunny’s nose. Sew it on just below the eyes, between them.
- Mouth: Using a contrasting color of yarn or embroidery floss, stitch a simple mouth onto the bunny’s face. You can embroider a small straight line for a neutral expression or experiment with different shapes to give it a specific expression.
- Whiskers: Cut small pieces of yarn and sew them onto either side of the bunny’s nose to create whiskers. Trim the ends to your desired length.
- Eyelashes: If you want to add eyelashes, use small pieces of yarn or embroidery floss and sew them just above the bunny’s eyes.
Remember to secure all the facial features properly to ensure they don’t come loose during play or handling. Once you have completed these steps, your knitted bunny will have a cute and expressive face!
Note: Be cautious when adding small parts to knitted toys if the bunny will be played with by young children, as they can pose a choking hazard.
Knitting the Arms and Legs
Once you have finished knitting the body of the bunny, it’s time to move on to the arms and legs. Here are the steps to knit them:
- Arm 1: Take the same yarn you used for the body and cast on 7 stitches onto one double-pointed needle.
- Row 1: Knit all stitches.
- Row 2: Purl all stitches.
- Row 3-18: Repeat rows 1 and 2 nine more times.
- Row 19: Knit all stitches.
- Row 20: Purl all stitches.
- Row 21: Knit all stitches.
- Row 22: Purl all stitches.
- Row 23: Knit all stitches.
- Row 24: Purl all stitches.
- Row 25: Knit all stitches.
- Row 26: Purl all stitches.
- Row 27: Knit all stitches.
- Row 28: Purl all stitches.
- Row 29: Knit all stitches.
- Row 30: Purl all stitches.
- Row 31: Knit all stitches.
- Row 32: Purl all stitches.
- Row 33: Knit all stitches.
- Row 34: Purl all stitches.
- Row 35: Knit all stitches.
- Row 36: Purl all stitches.
- Row 37: Knit all stitches.
- Row 38: Purl all stitches.
- Row 39: Knit all stitches.
- Row 40: Purl all stitches.
- Row 41: Knit all stitches.
- Row 42: Purl all stitches.
- Row 43: Bind off all stitches.
Repeat the above steps to knit the second arm. After completing the arms, you can start knitting the legs using the same pattern. Once you have finished knitting the arms and legs, you can proceed with assembling the bunny according to the instructions.
Joining the Body and Limbs
Now that you have completed knitting the body and limbs of your bunny, it’s time to join them together to bring your cuddly toy to life! Here’s a step-by-step guide on how to do it:
- Prepare the Body: Take the knitted body of your bunny and stuff it lightly with polyester fiberfill. Make sure to leave a bit of space at the bottom.
- Attach the Arms: Position the arms on either side of the body, about halfway down. Use yarn and a darning needle to sew the arms securely in place. Make sure to sew through both the arm and body stitches to ensure a strong attachment.
- Join the Legs: Place the legs at the bottom of the body, slightly angled outwards. Sew them securely in place using the same technique as described above for the arms.
- Add Facial Features: Use embroidery thread or black yarn to embroider the bunny’s eyes, nose, and mouth onto the face. You can get creative with the facial expressions to give your bunny some personality!
- Attach the Ears: Position the ears on either side of the head, about halfway up. Sew them securely in place using the same technique as described above.
Once you have completed these steps, you have successfully joined the body and limbs of your knitted bunny! Give it a gentle squeeze to fluff up the stuffing and shape the body. Your adorable bunny toy is now ready to be hugged and loved!
Finishing Touches and Embellishments
Once you have completed knitting your bunny, it’s time to add the finishing touches and embellishments to make it come alive. Here are some ideas to make your bunny extra special:
- Embroidered Details: Use embroidery thread or yarn to add details such as eyes, nose, mouth, or whiskers. You can use small, straight stitches or embroidery techniques like satin stitch or backstitch to bring your bunny’s face to life.
- Pom-pom Tail: Attach a small pom-pom at the back of your bunny to create a fluffy tail. You can either make a pom-pom using a pom-pom maker or use a store-bought one for convenience.
- Ribbon or Bow: Tie a ribbon or bow around your bunny’s neck to give it a cute and festive look. You can use a thin satin ribbon or a patterned fabric ribbon to match your bunny’s color scheme.
- Button Eyes: Sew small buttons as eyes for your bunny. Make sure they are securely attached so they don’t pose a choking hazard if the bunny is given to a young child.
- Accessories: Get creative and add accessories to your bunny, such as a tiny knitted scarf, a miniature hat, or even a tiny backpack. These little additions can add a lot of personality to your bunny.
Remember to use child-safe materials and avoid any embellishments that can easily come loose and pose a choking hazard for young children. Have fun adding the finishing touches to your knitted bunny and let your creativity shine!
Final Steps and Tips
Now that you have completed the main body, head, and ears of your knitted bunny, it’s time to finish up and add some final touches.
1. Sewing
Using a tapestry needle and the same color yarn as your bunny, sew the head onto the body. Start sewing from the bottom of the head and make your way around, securing it to the body with small stitches.
Next, sew the ears onto the top of the head. Position them according to your preference, making sure they are symmetrical.
2. Embroidery
Now it’s time to add the bunny’s facial features. Using black yarn and a tapestry needle, embroider two eyes onto the bunny’s face. You can make simple straight stitches or French knots for the eyes.
Next, embroider the bunny’s nose using pink yarn. You can use a straight stitch or a small triangle shape to create the nose.
3. Finishing Touches
Finally, add a cute little fluffy tail to your bunny. You can use a small piece of white yarn and attach it to the back of the bunny’s body using a tapestry needle.
Once all the sewing and embroidery is complete, trim any excess yarn and give your bunny a gentle fluff to make it look even cuter.
Tips:
- Use a stitch marker to keep track of your stitches and rows, especially when knitting the body and head.
- If you make a mistake, don’t be afraid to undo your stitches and start again. Knitting can be a trial-and-error process, especially for beginners.
- Experiment with different colors and yarn types to create unique bunnies. You can also add accessories like bows or scarves to personalize your bunnies.
- Take your time and enjoy the process of knitting. It’s a relaxing and creative hobby that can bring you joy and satisfaction.
Now that you have completed your knitted bunny, you can display it as a cute decoration or gift it to someone special. Happy knitting!
FAQ:
What materials do I need to knit a bunny?
To knit a bunny, you will need yarn, knitting needles, a tapestry needle, and stuffing for filling the bunny.
Is it difficult to knit a bunny?
Knitting a bunny can be a bit challenging for beginners, but with the step-by-step guide and some practice, you should be able to do it.
How long does it take to knit a bunny?
The time it takes to knit a bunny can vary depending on your knitting skills and the size of the bunny you want to make. It can take anywhere from a few hours to a couple of days.
Can I use different colors of yarn to make a multicolored bunny?
Yes, you can definitely use different colors of yarn to make a multicolored bunny. It can give your bunny a unique and colorful look.


