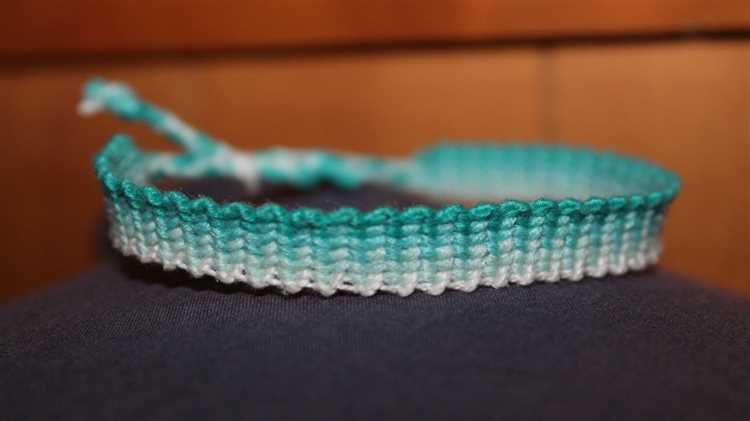
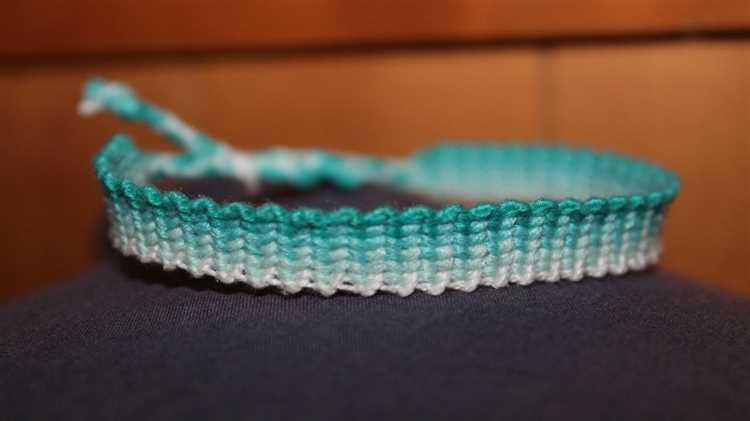
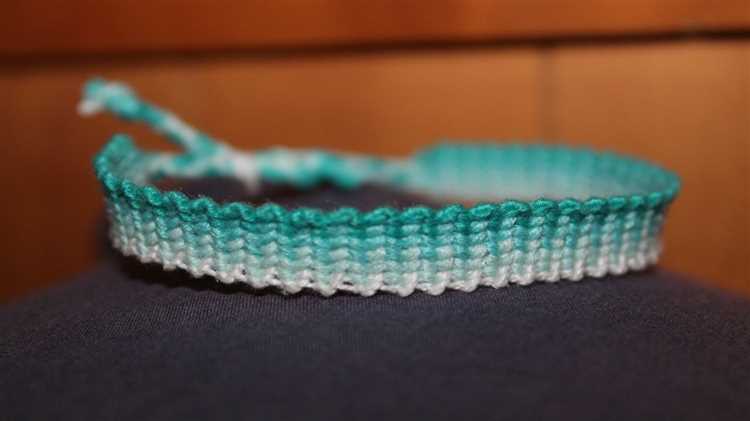
Knitting is a versatile and enjoyable craft that allows you to create beautiful and unique items. If you’re a beginner or looking for a quick and fun project, knitting a bracelet is a great choice. In this tutorial, we will guide you through the process of knitting a beautiful bracelet, step by step.
Before you begin, gather all the materials you will need. This includes knitting needles, a crochet hook, and a skein of your favorite yarn. You can choose any color or texture that suits your style. Once you have everything ready, you’ll be ready to dive into this fun knitting project!
To start, cast on the desired number of stitches using the long-tail cast-on method. This will form the foundation of your bracelet. Next, knit each row using the simple knit stitch. As you progress, you will see your bracelet taking shape.
Once you have reached the desired length for your bracelet, it’s time to finish off your work. Bind off your stitches using a basic bind-off technique. This will create a secure edge for your bracelet and ensure that it stays in place when worn.
Add a personal touch to your bracelet by incorporating different colors or stitch patterns. You can even add embellishments such as beads or buttons. Let your creativity flow and make it truly unique!
Remember, knitting is a skill that takes time and practice to master. Don’t be discouraged if it takes a few tries to get the hang of it. With these easy step-by-step instructions, you’ll be able to knit a beautiful bracelet in no time!
What You Will Need
To knit a beautiful bracelet, you will need the following materials and tools:
- Yarn: Choose a yarn of your choice in a color and texture that you like. Make sure it is suitable for knitting.
- Knitting Needles: Select a pair of knitting needles in a size appropriate for your chosen yarn. The needle size will be indicated on the yarn label.
- Tapestry Needle: You will need a tapestry needle with a large eye to weave in the loose ends of yarn.
- Scissors: Keep a pair of scissors handy to cut the yarn when needed.
- Measuring Tape: A measuring tape or ruler will help you ensure the correct length of your bracelet.
Once you have gathered all these materials and tools, you will be ready to start knitting your beautiful bracelet. Make sure to find a comfortable and well-lit space to work in, and follow the step-by-step instructions carefully.
Choosing the Right Yarn and Needles
When it comes to knitting a beautiful bracelet, choosing the right yarn and needles is essential. The yarn and needles you choose can greatly impact the final look and feel of your bracelet. Here are some tips to help you make the best choices:
- Consider the thickness: The thickness, or weight, of the yarn will determine the overall size and density of your bracelet. Thicker yarns will create a chunkier bracelet, while thinner yarns will result in a more delicate bracelet.
- Think about the material: Yarn can be made from a variety of materials, including cotton, wool, acrylic, and more. Each material has its own unique qualities and properties, so consider what look and feel you want for your bracelet. For example, cotton yarn is breathable and lightweight, while wool yarn is warm and cozy.
- Choose the right needles: The size and type of needles you use will also affect the outcome of your bracelet. Needle size is measured in millimeters and can range from very thin to very thick. Thinner needles will create tighter stitches, while thicker needles will create looser stitches. Choose a needle size that complements the thickness of your chosen yarn. Additionally, consider the type of needle – straight needles are commonly used for flat knitting, while circular or double-pointed needles are used for knitting in the round.
- Experiment and have fun: Don’t be afraid to experiment with different yarns and needles to find your perfect combination. Knitting is a creative and personal craft, so don’t be afraid to let your personality shine through in your choices. Have fun exploring different yarns, colors, and textures to create a bracelet that is unique to you.
By carefully considering your yarn and needle choices, you can create a beautiful knitted bracelet that is both enjoyable to make and stunning to wear.
Casting on and Making a Slip Knot
Before you can start knitting your bracelet, you need to cast on and make a slip knot. Casting on is the process of creating the first row of stitches on your knitting needle, while a slip knot is a type of knot that provides an anchor for your knitting project.
Casting On:
1. Start by holding your knitting needle in your right hand. Leave a tail of yarn measuring about 6 inches.
2. Take the end of the yarn attached to the ball and make a loop by crossing the yarn over itself.
3. Insert your knitting needle through the loop from front to back, making sure that the yarn tail is on the left side and the ball end is on the right side.
4. Pull the yarn tail to tighten the loop around the needle.
5. Insert your right hand index finger under the yarn tail and lift it up to create another loop.
6. With your left hand, bring the yarn tail between your thumb and index finger, creating a new loop.
7. Slip the new loop onto the knitting needle, making sure to keep the tension slightly loose.
8. Repeat steps 5-7 until you have cast on the desired number of stitches for your bracelet.
Making a Slip Knot:
1. Hold the end of the yarn in your right hand and leave a tail measuring about 4 inches.
2. Cross the end of the yarn over itself to form a loop.
3. Bring the end of the yarn through the loop and pull it tight. This creates a slip knot that can be adjusted by pulling the tail.
Now that you have successfully cast on and made a slip knot, you are ready to start knitting your beautiful bracelet!
The Basic Knitting Stitch
The basic knitting stitch is the foundation for all knitting projects. It is a simple repeating pattern that creates the fabric by interlocking loops of yarn.
To start the basic knitting stitch, you will need a pair of knitting needles and a ball of yarn. Follow these steps:
- Cast on: Begin by making a slipknot and placing it on your left-hand needle. Insert the right-hand needle into the slipknot from front to back, catching the yarn and pulling a loop through. Slide this new loop onto the left-hand needle and tighten the stitch. Repeat this step until you have the desired number of stitches, as instructed in your knitting pattern.
- Hold the needles: Hold one knitting needle in each hand, with the working yarn attached to the ball of yarn located on the right-hand needle. The left-hand needle should be empty, with the cast-on stitches looped around it.
- Insert the right-hand needle: Insert the right-hand needle from front to back through the first stitch on the left-hand needle. The right-hand needle should be behind the left-hand needle.
- Wrap the yarn: Take the yarn attached to the ball and wrap it from back to front around the right-hand needle.
- Pull through: Use the right-hand needle to pull the loop of yarn through the stitch on the left-hand needle, creating a new stitch on the right-hand needle.
- Slide the stitch: Slide the new stitch off the left-hand needle and onto the right-hand needle. At this point, you have completed one basic knitting stitch.
- Repeat: Repeat steps 3-6 for each stitch on the left-hand needle, until all stitches have been worked and transferred to the right-hand needle.
Once you have mastered the basic knitting stitch, you can explore different stitch patterns and techniques to create a variety of textures and designs in your knitting projects.
Increasing and Decreasing Stitches
To create different shapes and patterns in your knit bracelet, you may need to increase or decrease stitches. This allows you to add width or taper the bracelet, depending on your desired design. Here are some basic techniques for increasing and decreasing stitches:
Increasing Stitches:
- Knit into the front and back (KFB): Insert the right needle into the front of the stitch as if to knit, but instead of pulling the yarn through and slipping the old stitch off, bring the right needle to the back of the stitch and knit it again. This creates an additional stitch.
- Make one (M1): Lift the horizontal strand of yarn between two stitches with the left needle, and then knit into the back loop of this strand. This also creates an additional stitch.
- Increase at the beginning or end of a row: For a decorative increase, you can make a yarn over (YO) before or after the first or last stitch of the row. This creates a small eyelet and adds a stitch.
Decreasing Stitches:
- Knit two together (K2tog): Insert the right needle into the next two stitches as if to knit, and then knit them together as one stitch. This decreases the stitch count by one.
- Purl two together (P2tog): Insert the right needle into the next two stitches as if to purl, and then purl them together as one stitch. This also decreases the stitch count by one.
- Slip, slip, knit (SSK): Slip the next two stitches, one at a time, from the left needle to the right needle as if to knit. Insert the left needle into the front loops of these slipped stitches, and then knit them together through the back loops. This decreases the stitch count by one.
- Decrease at the beginning or end of a row: You can simply knit or purl the first or last two stitches together to decrease the stitch count. This creates a neat edge.
By using these increasing and decreasing techniques, you can create different shapes and designs in your knit bracelets. Experiment with these techniques to add your personal touch and make unique bracelets every time!
Adding Beads for a Beautiful Touch
Adding beads to your knitted bracelet can give it an extra touch of beauty and sophistication. Here are some easy steps to incorporate beads into your knitting project:
- Choose the right beads: Look for beads that complement the color and style of your bracelet. Make sure the holes in the beads are large enough to fit your knitting needle through.
- Prepare your materials: Gather your knitting needles, yarn, beads, and a small crochet hook or beading needle.
- Select the placement: Decide where you want to place your beads in your bracelet. You can add them in a specific pattern or randomly throughout the project.
- Add the beads: When you reach the stitch where you want to add a bead, slide a bead onto your crochet hook or beading needle. Slip the next stitch off the left needle onto the crochet hook or beading needle, then slide the bead onto the stitch. Slip the stitch back onto the left needle.
- Knit the beaded stitch: Knit the beaded stitch as usual, making sure the bead sits on the front of the work. The bead will be securely attached to the stitch.
- Continue knitting: Knit the remaining stitches in your row or round.
- Repeat: Repeat steps 4-6 for each bead you want to add to your bracelet.
- Finishing touches: Once you have added all the beads, continue knitting according to your pattern or desired length. Bind off your stitches and weave in any loose ends.
Adding beads to your knitted bracelet can be a fun and creative way to personalize your project. Experiment with different colors, sizes, and patterns to create a unique and beautiful bracelet.
Finishing Off and Fastening the Bracelet
Once you have finished knitting the bracelet, it’s time to finish it off and fasten it securely so that it can be worn. Here are the steps to follow:
- Cut the yarn: Start by cutting the yarn, leaving a tail of about 6-8 inches.
- Weaving in the ends: Take the tail of yarn and thread it onto a tapestry needle. Insert the needle into the back of the bracelet and weave it in and out of the stitches for about 1 inch. This will secure the end of the yarn and prevent it from unraveling.
- Creating a slipknot: To fasten the bracelet, create a slipknot at one end. Take the tail of the yarn and make a loop. Bring the tail through the loop, and pull it tight. This will create a secure knot that can be adjusted to fit the wrist comfortably.
- Adjusting the size: If the bracelet is too loose or too tight, you can adjust the size by sliding the slipknot along the yarn. Make sure it fits snugly but is still comfortable to wear.
- Trimming the excess yarn: Once you are satisfied with the size and fit of the bracelet, trim any excess yarn, leaving a small tail of about 1-2 inches. This will help prevent the yarn from unraveling and give the bracelet a clean, finished look.
Your bracelet is now finished and ready to be worn! If desired, you can also add embellishments such as buttons, beads, or charms to personalize it. Simply sew or attach them to the bracelet using a needle and thread or glue.
FAQ:
What materials do I need to knit a bracelet?
To knit a bracelet, you will need a pair of knitting needles, yarn, a tapestry needle, and a button for closure.
Is knitting a bracelet difficult?
No, knitting a bracelet is not difficult. With the step-by-step instructions provided, you will be able to easily knit a beautiful bracelet.
How long does it take to knit a bracelet?
The time it takes to knit a bracelet depends on your knitting speed and the complexity of the pattern. However, on average, it can take a few hours to complete a bracelet.
Can I customize the design of the bracelet?
Yes, you can definitely customize the design of the bracelet. You can choose different colors of yarn, experiment with different stitch patterns, and even add embellishments to make it unique to your style.


