Knitting is a popular craft that allows you to create beautiful and functional items, such as scarves, hats, and sweaters. One of the basic techniques in knitting is the k2tog, or knit two stitches together. This technique is used to decrease the number of stitches in a row, resulting in shaping and creating interesting textures in your knitting projects.
The k2tog is a simple stitch that involves knitting two stitches together as if they were one. It is commonly used to shape sleeves, decrease the size of a neckline, or create a smooth edge in a garment. Learning how to k2tog is essential for any knitter who wants to take their skills to the next level.
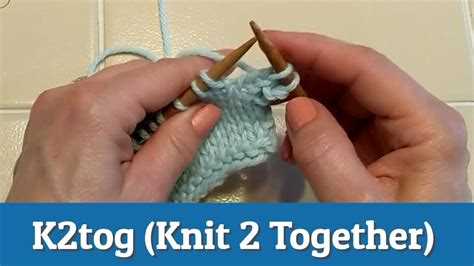
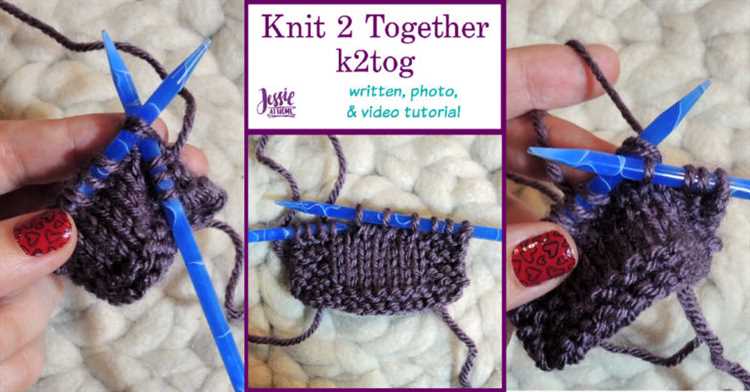
To k2tog, you will need a pair of knitting needles and yarn of your choice. Start by inserting the right needle through the next two stitches on the left needle, from left to right. Wrap the yarn around the right needle, just like you would for a regular knit stitch. Then, pull the right needle with the new stitch through the two stitches on the left needle, creating one stitch.
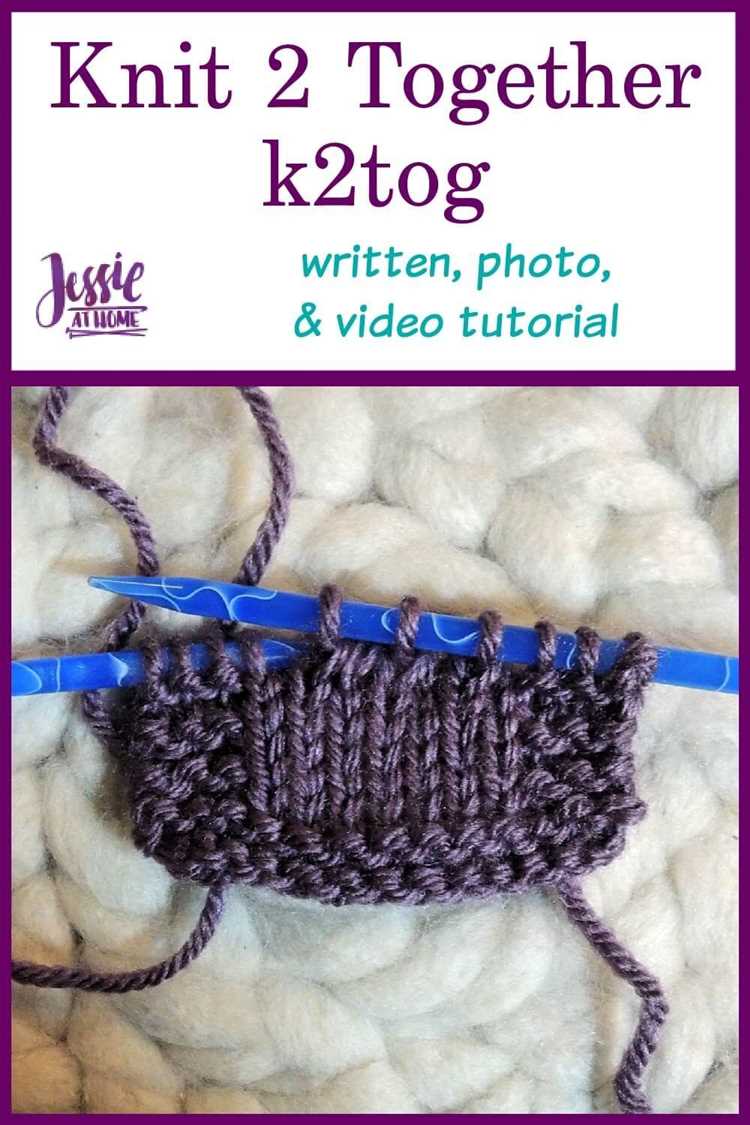
It’s important to note that the k2tog is a right slanting decrease, meaning it leans towards the right side of your work. When you k2tog multiple times in a row, it creates a diagonal line that can be an interesting design element in your knitting projects. Practice this stitch on a swatch before incorporating it into your actual knitting project to ensure accuracy and consistency.
What is k2tog in knitting?
In knitting, k2tog stands for “knit two stitches together”. It is a commonly used decrease stitch that helps create shaping in knitting projects.
When you k2tog, you are essentially reducing the number of stitches on your needles. By knitting two stitches together as one, you create a single stitch from two stitches, which helps shape the fabric in a desired way.
K2tog is commonly used in patterns to shape necklines, sleeves, and other areas of garments. It creates a smooth and seamless decrease that slants to the right when viewed from the right side of the work.
To k2tog, follow these steps:
- Insert the right-hand needle into the next two stitches on the left-hand needle as if to knit.
- Wrap the yarn around the right-hand needle from back to front.
- Pull the needle and yarn through the two stitches on the left-hand needle, creating a new stitch.
- Slide the two original stitches off the left-hand needle.
It’s important to note that k2tog is not the same as knitting two stitches separately and then twisting them together. When you k2tog, you are creating a single stitch by working through two stitches at once.
Practice k2tog on a swatch or sample project to become comfortable with the technique. Once you master it, you can incorporate it into a wide variety of knitting projects.
Why is k2tog important?
The k2tog (knit two together) stitch is an essential technique in knitting that is used to decrease the number of stitches in a row. It is an important skill to learn because it allows you to create shaping and different stitch patterns in your knitting projects.
Here are a few reasons why learning k2tog is important:
1. Shaping:
K2tog is commonly used to decrease stitches and shape your knitting. By decreasing stitches, you can create curves, angles, and contours in your knitting projects. This is particularly important when working on garments, hats, and other items that require shaping to fit a specific form or size.
2. Stitch Patterns:
K2tog is often used as part of stitch patterns to create unique textures and designs on your knitting. It can be combined with other stitches, such as yarn overs and slip stitches, to create intricate lace patterns, cable designs, and more. Learning k2tog expands your possibilities for creating beautiful and interesting stitch patterns.
3. Balancing Increases:
When you are working on a project that requires both increasing and decreasing stitches, it is important to have a balanced approach. By incorporating k2tog decreases alongside yarn overs or other increase stitches, you can maintain the correct stitch count and keep your project balanced.
4. Correcting Mistakes:
Knowing how to k2tog also comes in handy when you make mistakes in your knitting. If you accidentally increase the number of stitches, you can easily decrease them by working a k2tog. It’s a useful skill to fix errors and maintain consistent stitch counts.
In conclusion, k2tog is an important knitting technique that allows you to shape your projects, create beautiful stitch patterns, balance increases and decreases, and correct mistakes. Learning this technique opens up a world of possibilities for your knitting projects and enhances your overall knitting skills.
Step-by-Step Guide to k2tog
k2tog is a basic knitting decrease that stands for “knit two stitches together.” It is commonly used to decrease the number of stitches and create shaping in knitting projects. Here is a step-by-step guide to help you learn how to k2tog.
- Start with the required number of stitches on your knitting needle.
- Hold your knitting needle with the stitches in your right hand.
- Insert the right-hand needle into the next two stitches as if you were going to knit them individually.
- Wrap the yarn around the right-hand needle, from back to front, as you would for a regular knit stitch.
- With the right-hand needle, pull the loop of the second stitch through the loop of the first stitch, transferring both stitches to the right-hand needle together.
- Slide the resulting loop off the left-hand needle, completing the k2tog decrease.
- Repeat the process of k2tog across the row, as instructed in your knitting pattern.
Here are a few tips to keep in mind while working the k2tog decrease:
- Make sure to insert your right-hand needle into both stitches, not just the first stitch, to ensure a correct decrease.
- Keep the tension of your yarn consistent throughout the decrease to avoid loose or tight stitches.
- Practice the k2tog decrease on a swatch or scrap piece of knitting before incorporating it into your project.
- Pay attention to the position of the decrease in your knitting pattern, as it can affect the overall design and shape of your project.
By following this step-by-step guide and practicing the k2tog decrease, you’ll soon master this essential knitting technique. Happy knitting!
Step 1: Insert the needle into the next two stitches
The first step in performing a k2tog (knit two together) in knitting is to insert the needle into the next two stitches that you want to knit together. This stitch is commonly used to decrease the number of stitches in a row and create shaping in knitting projects.
To begin, hold your knitting needle with the stitches in your left hand. Insert the right knitting needle from left to right through the front loops of the next two stitches on the left needle.
Tip: Make sure to insert the needle through both stitches as if you were going to knit them separately.
Once the needle is inserted, you should have a total of four loops on the right needle – the two loops from the stitches you just worked and the two loops from the stitches that haven’t been worked yet.
Example:
| Left Needle | Right Needle |
| Stitch A | |
| Stitch B | |
| Stitch A | |
| Stitch B |
This completes Step 1 of the k2tog knitting technique. Next, you will proceed to Step 2: Complete the k2tog stitch.
Step 2: Wrap the yarn around the needle
Once you have inserted the right needle into the next stitch on the left needle, it’s time to wrap the yarn around the needle to complete the k2tog stitch.
Take the yarn that is connected to the ball and bring it forward between the two needles.
Now, wrap the yarn counterclockwise around the right needle, starting from the back and moving towards the front. This motion will create a loop of yarn around the right needle.
Make sure to keep the tension of the yarn firm but not too tight, as it should flow smoothly around the needle.
Wrapping the yarn around the needle in this manner is essential for creating the correct stitches and ensuring the finished project looks neat and even.
Once you have wrapped the yarn around the needle, you are ready to move on to the next step of the k2tog stitch.
Step 3: Pull the needle through the stitches
Now that you have inserted your right-hand needle into the two stitches on your left-hand needle, it’s time to pull the needle through the stitches.
Hold both needles in your hands, ensuring that the right-hand needle is behind the left-hand needle. Using your right hand, gently pull the right-hand needle towards you, pulling the stitches through the loops on the left-hand needle.
Make sure to keep the tension even as you pull the needle through the stitches. It’s important to be gentle and not pull too tightly, as this can cause the stitches to become too tight and difficult to work with.
Continue pulling the needle through until the right-hand needle is completely through the stitches and the loop of the left-hand needle is now on the right-hand needle.
Once you have pulled the needle through, you have successfully completed a k2tog stitch! Congratulations! Now you can continue knitting the rest of your row or follow the pattern instructions.
Step 4: Slip the original stitches off the needle
After you have completed the k2tog stitch, you will need to slip the original stitches off the needle. This step is important to ensure that your knitting remains neat and organized.
Here’s how to slip the stitches off the needle:
- Hold the needle with the stitched row in your left hand.
- Use your right hand to slide the stitches off the left needle one by one. Be careful not to drop any stitches.
- As you slip each stitch off, let it rest comfortably on the right needle.
- Continue until all the stitches have been slipped off the left needle and are now on the right needle.
Slipping the stitches off the needle completes the k2tog stitch and prepares you to continue knitting your project. Make sure to keep your tension even and consistent as you slip the stitches off to maintain the correct stitch size.
Tips for k2tog:
- Use sharp needles: When working the k2tog stitch, it’s best to use sharp-tipped needles. This will make it easier to insert the needle into the stitch and create a clean and tidy decrease.
- Keep your tension even: Pay attention to your tension while working the k2tog stitch. If you pull the yarn too tightly, the stitch may become tight and difficult to work. If you keep the tension too loose, the stitch may be loose and not hold its shape. Practice keeping an even tension to ensure consistent results.
- Practice on scrap yarn: It’s always a good idea to practice new stitches or techniques on scrap yarn before working on your actual project. This will help you familiarize yourself with the stitch and allow you to perfect your technique before moving on to your project.
- Count your stitches: To ensure accuracy and maintain the proper stitch count, it’s important to count your stitches after working a k2tog decrease. This will help you stay on track and avoid any mistakes in your pattern.
- Read the pattern instructions carefully: Different patterns may use k2tog in different ways, such as working the decrease on the right side or on the wrong side. Be sure to read the pattern instructions carefully to understand how and when to work the k2tog stitch.
FAQ:
What is k2tog in knitting?
K2tog is a knitting technique that stands for “knit two stitches together”. It is used to decrease the number of stitches in a row.
How do I k2tog in knitting?
To k2tog, insert the right needle into the next two stitches on the left needle as if to knit, and then knit them together as one stitch. This decreases the stitch count by one.
What is the purpose of k2tog in knitting?
K2tog is commonly used in knitting patterns to create shaping, decrease stitches, and create different stitch patterns. It helps create a neater and more professional-looking knitted fabric.
Can k2tog be used in all knitting projects?
Yes, k2tog can be used in most knitting projects where decreasing stitches is required. However, it is important to follow the instructions in the knitting pattern to determine when and how to use it.
Can I use k2tog for lace knitting?
Yes, k2tog is commonly used in lace knitting to create decreases and intricate lace patterns. It is a versatile technique that can be adapted to different lace knitting techniques.
Are there any alternatives to k2tog in knitting?
Yes, there are several alternatives to k2tog in knitting, such as ssk (slip, slip, knit), skp (slip, knit, pass), and k3tog (knit three stitches together). These techniques create similar results, but have slightly different effects on the fabric.


