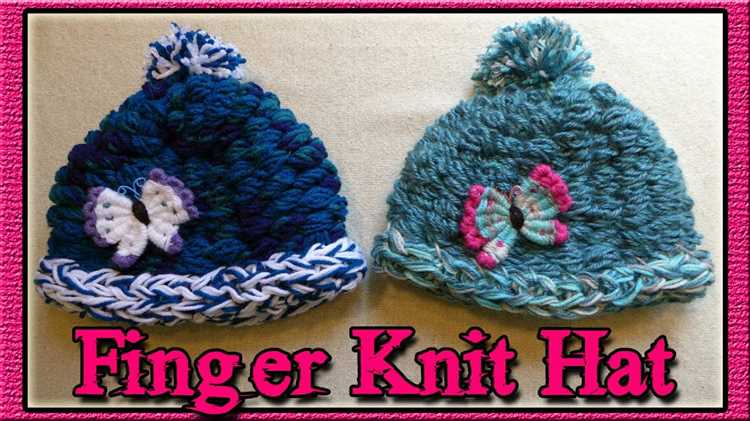
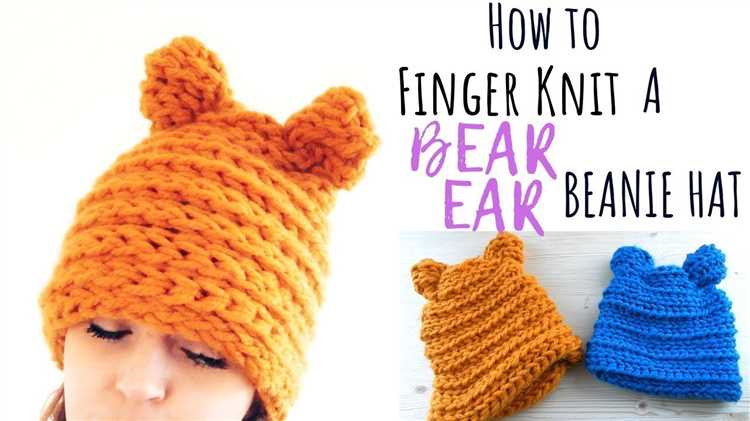
Are you interested in learning a new craft that is both fun and practical? Look no further than finger knitting! In this step-by-step tutorial, we will guide you through the process of finger knitting a cozy hat. Finger knitting is a great activity for all ages and skill levels, and it requires no special tools or equipment.
To get started, all you need is some yarn in your favorite color and your fingers! If you’re new to finger knitting, don’t worry – we’ll cover all the basics. Finger knitting is a technique that involves creating knitted stitches using only your fingers as the knitting needles. It’s a simple and intuitive process that allows you to create beautiful, handmade items without the need for traditional knitting needles.
In this tutorial, we will walk you through the steps of casting on, knitting, and casting off to create a warm and stylish hat. We’ll also share some tips and tricks to help you troubleshoot any challenges you may encounter along the way. By the end of this tutorial, you’ll have a finished hat that you can proudly wear or give as a gift.
So, grab your yarn and let’s get started on your finger knitting adventure! Whether you’re a seasoned knitter looking to try something new or a beginner eager to explore the world of fiber crafts, finger knitting is a versatile and enjoyable skill to learn. Let’s dive in and create a one-of-a-kind hat together!
Section 1: Supplies You Will Need
- Yarn: Choose a yarn in your favorite color or a color that matches your style. Make sure it is a chunky or bulky weight yarn for a warm and cozy hat.
- Knitting Needles: You won’t need knitting needles for this project! Finger knitting is done using only your fingers.
- Scissors: You will need a pair of scissors to cut the yarn at the end of your project.
- Measuring Tape: A measuring tape will help you determine the circumference of your head and ensure the hat fits you perfectly.
- Stitch Marker: A stitch marker can be helpful to mark the beginning of each round if you find it difficult to keep track of your progress.
Section 2: Learn the Basic Finger Knitting Stitch
Before you start knitting your hat, it’s essential to learn the basic finger knitting stitch. This stitch forms the foundation of your knitting project and will be used throughout.
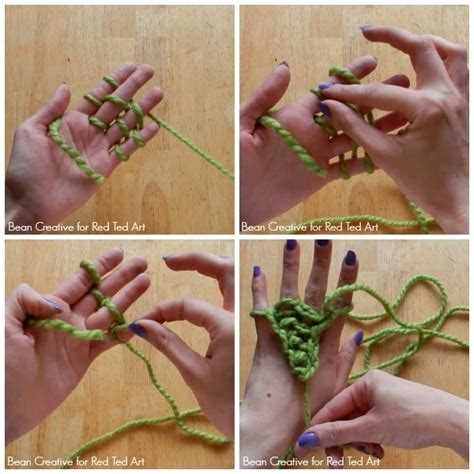
Here’s a step-by-step tutorial on how to do the basic finger knitting stitch:
- Start by making a slipknot at the end of your yarn. Insert your finger into the loop and tighten the knot around your finger.
- Hold the working end of the yarn in your other hand.
- Insert your finger into the slipknot, making sure the yarn is behind your finger.
- Reach behind the yarn and grab the working yarn with your finger.
- Pull the working yarn through the slipknot, bringing it to the front.
- Release the loop from your finger and pull the yarn tight to form a stitch.
- Repeat steps 3 to 6 to create additional stitches.
Remember to keep the tension of the stitches consistent throughout to ensure a neat and even knitted fabric.
Practice the basic finger knitting stitch until you feel comfortable with the technique. Once you have mastered this stitch, you’ll be ready to start knitting your hat!
Section 3: How to Increase and Decrease Stitches
Increasing and decreasing stitches is an important skill in knitting, as it allows you to shape your hat and create different designs. In this section, we will learn how to increase and decrease stitches while finger knitting a hat.
Increasing Stitches
To increase stitches, you will simply add more loops to your fingers. Here’s how:
- Start with your working yarn attached to your finger.
- Insert your finger into the first loop on your finger and pull the working yarn through, creating a new loop.
- Keep adding loops to your fingers in the same manner, increasing the number of stitches you have.
Increasing stitches can be done at any point in your knitting, depending on the design you want to create.
Decreasing Stitches
To decrease stitches, you will remove loops from your fingers. Here’s how:
- Start with your working yarn attached to your finger.
- Insert your finger into the first two loops on your finger and pull the working yarn through, creating a new loop.
- Remove the original two loops from your finger.
- Continue removing loops from your fingers in the same manner, decreasing the number of stitches you have.
Decreasing stitches is typically done when you want to shape your hat or create a tapered effect.
Working with Increases and Decreases
Once you are comfortable with increasing and decreasing stitches, you can start incorporating them into your finger knitting projects. By combining different increases and decreases, you can create a wide variety of patterns and shapes in your knitted hats.
Experiment with different techniques and patterns to see what works best for the design you have in mind. Remember, practice makes perfect, so don’t be afraid to try new things and make mistakes along the way. Soon enough, you’ll be creating beautiful hats with unique designs!
Section 4: Choosing the Right Yarn for Your Hat
When it comes to finger knitting a hat, choosing the right yarn is crucial. The yarn you select will affect not only the overall look and feel of your hat but also its warmth and durability. Here are a few factors to consider when choosing the right yarn:
Inexpensive vs. High-Quality Yarn
The first decision you need to make is whether you want to use inexpensive yarn or invest in high-quality yarn. Inexpensive yarn can be a good option if you’re just starting out or want a budget-friendly project. However, keep in mind that cheap yarn may not be as soft or durable compared to higher-quality options. On the other hand, investing in high-quality yarn can result in a hat that feels luxurious and lasts longer.
Fiber Content
The fiber content of the yarn will determine its properties, such as softness, warmth, and breathability. Common yarn fiber options include acrylic, wool, cotton, and blends.
- Acrylic: Acrylic yarn is a popular choice for beginners and those on a budget. It is soft, lightweight, and comes in a wide variety of colors. However, it may not be as warm as other fibers.
- Wool: Wool yarn is known for its warmth and excellent insulation properties. It is a great option if you’re looking for a cozy and warm hat. However, keep in mind that some people may find wool itchy or have allergies to it.
- Cotton: Cotton yarn is breathable and lightweight, making it a good choice for hats in warmer climates or for those who prefer a lighter feel. However, cotton may not be as warm as wool.
- Blends: Yarn blends combine different fibers to achieve a balance of properties. For example, an acrylic-wool blend may provide the warmth of wool with the added softness of acrylic.
Yarn Weight and Gauge
The weight of the yarn and the gauge it produces will affect the size and texture of your hat. Yarn weight is categorized into different classes, such as fine, medium, and bulky. The pattern you’re following will usually specify the recommended yarn weight and gauge to achieve the desired results. Make sure to check the yarn label to ensure it matches the pattern’s requirements.
Color and Texture
Lastly, consider the color and texture of the yarn. Choose a color that matches your personal style or complements your wardrobe. Additionally, the texture of the yarn can add visual interest to your hat. You can opt for a smooth yarn for a classic look or a textured yarn for a more unique and dimensional effect.
With these factors in mind, take your time to browse through various yarn options and choose the one that best fits your preferences and the style you want to achieve with your finger-knit hat.
Section 5: Casting On and Casting Off
Once you have mastered the basic finger knitting technique, it’s time to learn how to cast on and cast off, which are essential steps in creating a knitted hat. These steps will help ensure that your hat stays securely in place and has a clean, finished edge.
Casting On
To cast on, you will need to begin with an extra long strand of yarn, approximately 4 feet in length. This will provide enough yarn to complete the casting on process.
- Begin by making a slipknot at one end of the yarn.
- Place the slipknot on your finger and pull the yarn through the loop to create a new loop. This is your first stitch.
- Continue making stitches by repeating step 2. Slide each new stitch onto your finger, making sure to keep them loose but not too loose.
- Repeat step 3 until you have the desired number of stitches for your hat. Typically, a hat will require around 60 stitches, but this may vary depending on your yarn and desired fit.
Casting Off
Once you have completed the knitting portion of your hat, it’s time to cast off and secure the stitches.
- Knit two stitches onto your finger.
- Using your free hand, lift the first stitch over the second stitch and off your finger. You are essentially passing the first stitch over the second stitch.
- Continue knitting one stitch and passing the previous stitch over until you have only one stitch left.
- Cut the yarn, leaving a tail that is long enough to weave through the last stitch.
- Gently pull the tail through the last stitch, tightening it to secure the stitches.
With the casting on and casting off techniques mastered, you are now ready to create your own finger-knit hat! Experiment with different yarn colors and patterns to make unique and stylish hats for yourself and others.
Section 6: Adding Additional Colors and Patterns
Once you’ve mastered the basic finger knitting technique and created a solid-colored hat, you can take your project to the next level by adding additional colors and patterns. This section will guide you through the process of incorporating different colors and creating intricate patterns in your finger-knitted hat.
1. Selecting the colors:
Choose the colors you want to incorporate into your hat. You can opt for a complementary color scheme or experiment with contrasting shades. Consider using yarns with different textures to add visual interest to your design.
2. Planning the pattern:
Before you start knitting, plan out the pattern you want to create. Sketch it out on a piece of paper or create a digital design to visualize how the colors will blend together. This step will help you stay organized during the knitting process.
3. Changing colors:
To change colors, simply drop one yarn and pick up the new color. Leave a tail of about 5-6 inches from each color change, which you can later weave in for a neater finish. Remember to secure the loose ends of the yarn to prevent them from unraveling.
4. Knitting with multiple colors:
When knitting with multiple colors, hold both strands of yarn together to create a blended effect or alternate between the two colors to create stripes. Be mindful of maintaining an even tension to ensure a consistent appearance throughout your knitting.
5. Creating patterns:
To create patterns, introduce additional colors following your planned design. This could involve knitting rows or sections in different colors or incorporating simple patterns such as stripes, chevrons, or diamonds. Experiment with different combinations to achieve the desired effect.
6. Charting your pattern:
For more complex patterns, consider charting your design on a grid using symbols to represent each color. This method helps visualize your pattern and makes it easier to follow the instructions as you finger knit.
7. Finishing touches:
Once you’ve completed your finger-knitted hat, weave in any loose ends to secure the yarn and create a neat finish. You can also add embellishments such as pom-poms, buttons, or patches to further personalize your creation.
By adding additional colors and patterns to your finger-knitted hat, you can showcase your creativity and take your knitting skills to new heights. Have fun experimenting with different color combinations and patterns to create unique and eye-catching designs.
Section 7: Shaping and Finishing Your Finger Knit Hat
Once you have finished knitting the desired length for your hat, it’s time to shape and finish it. Follow these steps to complete your finger knit hat:
- Shaping the crown: Start by carefully closing the top of your hat. Insert your finger through the loops of the last row and pull the working yarn through all the loops. This will create a gathered top.
- Secure the yarn: Once you have pulled the yarn through the loops, secure it tightly by tying a knot. This will prevent the top of the hat from unraveling.
- Weaving in ends: Use a yarn needle to weave in the loose ends of yarn from both the starting and ending points. This will give your hat a clean and finished look.
- Adjust the fit: Try on the hat to check the fit. If it’s too loose, you can stitch the bottom edge to make it tighter. If it’s too tight, you can undo a few rows to create more room.
- Adding a pom-pom (optional): To add a playful touch to your finger knit hat, you can attach a pom-pom. You can either buy a pre-made pom-pom or make one using yarn and a pom-pom maker.
- Final touches: Give your hat a final inspection and make any necessary adjustments. Trim any excess yarn and ensure all the stitches are secure.
- Show off your creation: Now that your finger knit hat is complete, you can proudly wear it or gift it to someone special. Share your creation with friends and family and inspire others to give finger knitting a try.
Enjoy the warmth and style of your handmade finger knit hat!
FAQ:
What materials do I need to finger knit a hat?
To finger knit a hat, you will need a skein of chunky yarn, your fingers, and a pair of scissors.
Is finger knitting suitable for beginners?
Yes, finger knitting is a great option for beginners. It’s a simple technique that doesn’t require any special tools or equipment.
How long does it take to finger knit a hat?
The time it takes to finger knit a hat will vary depending on your knitting speed and the complexity of the pattern. On average, it can take a few hours to complete a finger-knitted hat.
Can I finger knit a hat with different colors?
Yes, you can definitely finger knit a hat using different colors of yarn. This can create a fun and unique look for your hat.


