Knitted texture is a popular trend in art and design, adding a cozy and nostalgic feel to any project. Whether you’re a beginner or an experienced artist, this step-by-step guide will show you easy techniques to create a realistic knitted texture in your drawings.
To start, gather your materials. You will need a pencil, a sketchbook, and an eraser. If you want to add color, colored pencils or markers can also be used.
Begin by drawing the outline of the object or surface you want to give a knitted texture to. This could be a sweater, a blanket, or even a basket. Use bold and confident lines to create the basic shape.
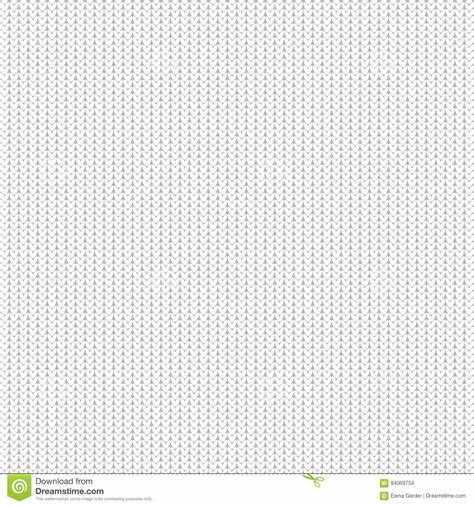
Next, use short, dash-like strokes to create the appearance of knit stitches. Start at one edge of the object and work your way across. Pay attention to the direction of the stitches, as they usually go from top to bottom or left to right. Vary the length and spacing of your strokes to add depth and dimension to the texture.
To add more realism, create some areas of shadow and highlights. Use darker pencil strokes or cross-hatching to indicate areas that would be in shadow, while adding lighter strokes or leaving areas blank for highlights. This will make your knitted texture appear more three-dimensional.
Finally, add any additional details or embellishments. You can draw buttons, pockets, or patterns on your knitted texture to make it more interesting and unique. Remember to take your time and practice to improve your skills with each drawing.
With these easy techniques, you can create a realistic knitted texture in your drawings and bring coziness and warmth to your art. Have fun experimenting with different colors and styles to make your knitted textures truly your own.
Step-by-Step Guide on How to Draw Knitted Texture Easy Techniques
Creating a realistic knitted texture can add depth and dimension to your artwork. Whether you’re drawing clothing, accessories, or even a cozy background, this step-by-step guide will show you easy techniques to achieve a knitted texture in your drawings. Follow these steps and get ready to bring warmth and texture to your artwork!
- Start with a Base Shape: Begin by drawing the outline of the object you want to have a knitted texture. It could be a sweater, a scarf, or any other knitted accessory.
- Mark the Stitches: Using short, curved lines, mark the individual stitches on the surface of the object. These lines should be slightly wavy and uneven to give a realistic knitted look. You can vary the lengths and angles of the lines to add more texture.
- Add Detail to the Stitches: To make the stitches stand out, add shading or hatching to each individual stitch. Shade the portion of the stitch that is closer to the light source and leave the opposite side lighter. This will create the illusion of depth and volume.
- Create the Knitted Pattern: Choose a specific knitted pattern you want to replicate, such as a rib stitch or a cable pattern. Use short, parallel lines to create the pattern within the stitches. Repeat the pattern across the entire surface of the object.
- Emphasize the Texture: To enhance the knitted texture, add highlights and shadows. Use a lighter shade to add highlights on the ridges and raised areas of the stitches. Shade the areas in between the stitches to create shadows and depth.
- Blend and Smooth: Use a blending tool, such as a blending stump or a small brush, to blend and smooth out the shading and highlights. This will give a more cohesive and realistic look to the knitted texture.
- Final Touches: Take a step back and assess your drawing. Make any necessary adjustments or add additional details to enhance the knitted texture further. Experiment with different shading techniques or add extra texture to make it truly unique.
With these easy techniques, you can draw a realistic knitted texture that adds interest and realism to your artwork. Practice and experiment with different stitch patterns and shading techniques to perfect your skills. Have fun incorporating knitted textures into your drawings and watch as your artwork comes to life!
Sketching the Outline
Before you start drawing the knitted texture, it’s important to sketch the outline of the object you want to add the texture to. This will give you a guide to follow as you start creating the knitted texture.
Here’s a step-by-step guide on how to sketch the outline:
- Choose your object: Decide on the object you want to draw the knitted texture on. It could be a sweater, a scarf, a hat, or any other knitted item.
- Draw the basic shape: Start by drawing the basic shape of the object. Use simple lines and shapes to create the outline. For example, if you’re drawing a sweater, you could start with a rectangle for the body and two smaller rectangles for the sleeves.
- Add details: Once you have the basic shape, start adding details to make the object look more realistic. Draw the neckline, the cuffs, and any other elements that are specific to the object you’re drawing.
- Refine the outline: Take a closer look at the outline and make any necessary adjustments. Smooth out any rough lines and make sure the proportions are accurate.
Remember, the outline doesn’t have to be perfect at this stage. It’s just a rough guide that you’ll use as you add the knitted texture later on. Take your time and make sure you’re happy with the overall shape before moving on to the next step.
Selecting Colors
When creating a knitted texture, selecting the right colors is essential to achieving a realistic and visually appealing result. Here are some tips for choosing the perfect color palette for your knitted texture:
1. Consider the Material:
Think about the type of yarn or material you want to represent in your knitted texture. Different types of yarn come in various colors, so it’s important to select colors that mimic the material you have in mind.
2. Choose a Base Color:
Selecting a base color will help establish the overall tone of your knitted texture. Consider using neutral colors such as gray, brown, or cream for a more traditional look. Alternatively, you can opt for bold and vibrant colors to create a more playful and modern texture.
3. Use Gradient Colors:
Add depth and dimension to your knitted texture by incorporating gradient colors. Gradient colors involve shades or tints of the same hue, creating a smooth transition from light to dark or vice versa. This technique will make your texture appear more realistic and dynamic.
4. Consider the Background:
When selecting colors for your knitted texture, be mindful of the background or the object on which the texture will be applied. The colors should complement the overall design and ensure that the texture stands out.
5. Experiment with Contrast:
Contrasting colors can add visual interest to your knitted texture. Consider using complementary colors (opposite colors on the color wheel) or colors with a high contrast to create a dramatic effect.
6. Test the Colors:
Before diving into your final drawing, it’s a good idea to test your color choices. Create small color swatches using the selected colors and see how they interact with each other. This will help you determine if any adjustments need to be made.
Remember, selecting the right colors is a creative and subjective process. Don’t be afraid to experiment and trust your artistic instincts when choosing colors for your knitted texture.
Creating the Base
The first step in creating a knitted texture is to create a base for your pattern. This will serve as the foundation for the knitted texture and give you a reference for where to add your details.
To create the base, start by drawing a simple shape or outline that will represent the overall knitted piece. This could be a square, rectangle, or any other shape that you want your texture to have. Make sure to keep the edges of the shape straight and clean.
Next, divide the shape into smaller sections to represent the individual stitches in the knitted fabric. This can be done by drawing horizontal and vertical lines inside the shape, creating a grid-like pattern.
Once you have divided the base into sections, you can start adding the details that will make it look like a knitted texture. One of the easiest ways to create the look of knitting is to draw diagonal lines within each section, alternating the direction of the lines to mimic the appearance of knitted stitches.
Another technique to add texture is to draw small arcs or curves within the sections, representing the loops and twists of the knitted fabric.
Experiment with different patterns and techniques to achieve the desired knitted texture. You can also vary the spacing between the stitches and the sizes of the sections to create different effects.
Remember to be patient and take your time as you create the base for your knitted texture. The more attention to detail you put into this step, the more realistic and accurate your final result will be.
Adding Stitch Patterns
Once you have created the basic knitted texture by drawing rows of loops, you can enhance the texture by adding stitch patterns. Stitch patterns are different techniques that create various textures and designs on the knitted fabric.
Here are some popular stitch patterns you can use:
- Garter Stitch: This is the simplest stitch pattern, created by knitting every row. It creates a bumpy texture.
- Stockinette Stitch: This stitch pattern is created by alternating between knitting one row and purling the next row. It creates a smooth texture on one side and a bumpy texture on the other side.
- Ribbing: Ribbing is commonly used for cuffs, hems, and collar edges. It involves alternating between knitting and purling in a specific pattern, such as knit 2, purl 2.
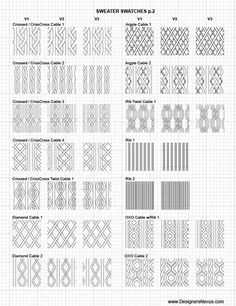
- Cable Stitch: Cable stitch creates a twisted pattern that resembles braided cables. It is achieved by crossing stitches over each other.
- Lace Stitch: Lace stitch creates an open and delicate pattern with decorative holes. It involves yarn overs and decreases to create the lacy effect.
To incorporate these stitch patterns into your knitted texture drawing, you can use different styles of lines, shading, and textures to represent each stitch. For example, garter stitch can be represented by short horizontal lines, while cable stitch can be represented by twisted lines.
Experiment with different stitch patterns and techniques to achieve the desired texture and design for your knitted texture drawing. Remember to practice and be patient as it may take some time to master each stitch pattern.
Introducing Texture
Texture is an important element in art and design. It refers to the way an object or surface feels or appears to feel when touched or seen. In drawing, texture can be created using different techniques to mimic the look and feel of various materials, such as fabric, wood, or metal.
When it comes to creating a knitted texture, the goal is to capture the cozy and soft appearance of knitted fabric. The texture of knitting is made up of rows of interlocking loops, which create a pattern that is both intricate and comforting.
In this step-by-step guide, we will explore easy techniques for drawing knitted texture. Whether you are a beginner or an experienced artist, these techniques will help you capture the essence of knitted fabric and add depth and interest to your drawings.
Enhancing the 3D Effect
To enhance the 3D effect of the knitted texture, you can add shading and highlights. This will give the illusion of depth and make the texture appear more realistic. Here are some techniques you can try:
- Shading: Use a darker shade of thread or pencil to add shadows to the creases and folds of the knitted fabric. Start by identifying the areas that would naturally cast a shadow, such as the valleys between the knitted stitches. Use short, curved lines to indicate the shadows, following the contours of the fabric.
- Highlights: To create highlights, use a white or lighter shade of thread or pencil. Add these highlights to the areas that would catch the light, such as the raised parts of the knitted stitches. Use short, curved lines or dots to indicate the highlights. Be careful not to overdo it – a few well-placed highlights can make a big difference.
- Texture: Consider adding texture to your drawing to make it look even more like a knitted fabric. You can do this by creating small, irregular shapes or lines that mimic the texture of the yarn. Be sure to vary the size and direction of these shapes to make the texture look more realistic.
Experiment with different shading and highlighting techniques to find the ones that work best for you. Remember to observe real knitted fabric to get a better understanding of how light interacts with the texture.
Combining these techniques with the ones mentioned earlier in this guide will help you create a stunning and realistic knitted texture. Take your time, practice, and have fun with it!
Highlighting the Details
Once you have established the basic texture of the knitted fabric, it’s time to add some detail to make it look more realistic.
Here are a few techniques you can use to highlight the details:
- Shadowing: Use a slightly darker shade of the base color to create shadows between the stitches. This will give the impression of depth and add dimension to your drawing.
- Highlights: Use a lighter shade of the base color to add highlights on the top of the stitches. This will make them appear raised and catch the light.
- Texture lines: Draw thin, curved lines along the rows of stitches to simulate the texture of the yarn. These lines can be wavy, straight, or even zigzag, depending on the type of knitting you are trying to depict.
- Detailing stitches: Add some tiny dashes or dots within the stitches to represent the individual loops of yarn. This will give the impression of a tightly-knit fabric.
Remember to use these techniques sparingly and strategically. Too much shadowing or highlighting can make the drawing look cluttered or unrealistic. Take a step back every now and then to assess the overall effect and make adjustments as needed.
Practice these techniques and experiment with different knitting patterns to improve your skills. With time and patience, you’ll be able to create beautifully detailed drawings of knitted textures.
Finishing Touches
Once you have completed the main steps of drawing the knitted texture, it’s time to add some finishing touches to make it look even more realistic. These additional details can make a big difference in the overall appearance of your drawing.
Here are some tips for adding the finishing touches to your knitted texture:
- Highlight the Stitches: Use a fine-tip pen or a thin brush to add highlights to the top parts of the stitches. This will create a sense of depth and dimension in your drawing.
- Add Shadows: Use a darker shade of the color you used for the yarn to create shadows between the stitches. This will enhance the three-dimensional look of the knitted texture.
- Emphasize the Edges: Go over the edges of the knitted fabric with a slightly darker color to make them stand out. This will give your drawing a more defined look.
- Include Details: Add some subtle details such as loose threads or small imperfections in the knitting. This will make the texture look more natural and realistic.
- Use Reference Images: Look at reference images of real knitted fabrics to get a better understanding of how the stitches and patterns should look. This will help you add more accurate and realistic details to your drawing.
Remember, practice is key when it comes to learning how to draw knitted texture. Don’t be afraid to experiment with different techniques and styles to find what works best for you. With time and patience, you’ll be able to create stunning drawings that truly capture the beauty of knitted textures.
FAQ:
What materials do I need to draw knitted texture?
You will need a drawing paper, pencils in different shades, an eraser, and a blending tool.
Is it difficult to draw knitted texture?
It can be a bit challenging at first, but with the right techniques and practice, you will be able to create realistic knitted textures in your drawings.
What are some easy techniques to draw knitted texture?
Some easy techniques to draw knitted texture include using hatching and cross-hatching techniques to create the appearance of individual loops, blending the shading with a blending tool to create a smooth texture, and using highlights and shadows to add depth to the texture.
Can I apply the same techniques to draw other fabric textures?
Yes, many of the techniques used to draw knitted texture can be applied to other fabric textures as well. The key is to observe the patterns and details of the fabric and then recreate them with pencil strokes, shading, and blending.


