Knitting is a wonderful craft that allows you to create beautiful and cozy items using just a pair of needles and some yarn. If you’re new to knitting, one of the first things you’ll need to learn is how to cast on stitches. Casting on is the process of starting a new knitting project by creating the first row of stitches on your needle.
Casting on can be a bit tricky at first, but with a little practice, you’ll quickly get the hang of it. In this beginner’s guide, we’ll walk you through the basic steps of casting on knitting stitches, so you can start your knitting journey with confidence.
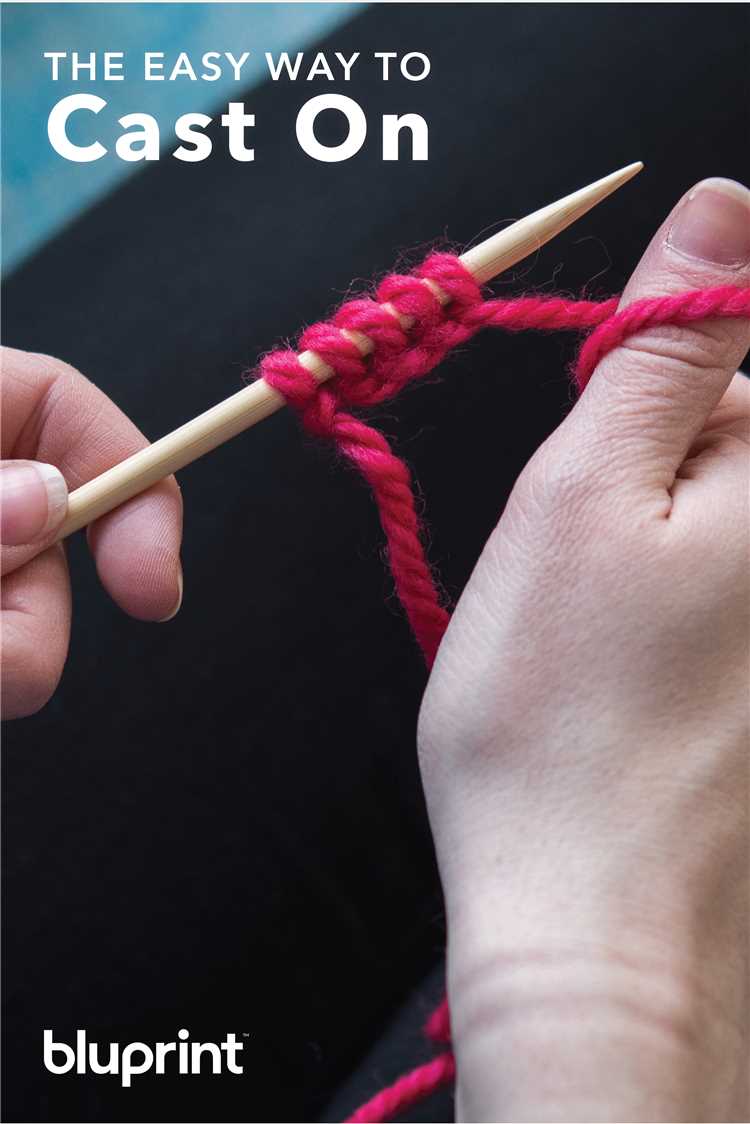
There are several methods for casting on, but in this guide, we’ll focus on the long-tail cast on, which is one of the most versatile and commonly used methods. This cast on creates a neat and flexible edge, making it a great choice for a variety of knitting projects.
Note: Before you begin casting on, make sure you have a pair of knitting needles and some yarn of your choice. Choose a yarn that is suitable for your project and a needle size that matches the yarn weight.
Step 1: Gather Your Materials
Before you can start casting on knitting stitches, you’ll need to gather the necessary materials. This includes:
- Yarn: Choose a yarn that suits your project. Consider the weight, color, and fiber content of the yarn. For beginners, it’s best to start with a medium-weight yarn in a solid color.
- Knitting Needles: Select a pair of knitting needles that are suitable for the yarn you have chosen. The size of the needles will typically correspond to the recommended needle size on the yarn label.
- Scissors: You’ll need a pair of scissors to cut the yarn once you have finished casting on.
- Tapestry Needle: A tapestry needle will be used to weave in your yarn ends after you have completed your knitting project.
It’s important to have all these materials ready before you begin casting on, as it will make the process much smoother. Make sure your yarn is wound into a ball or skein and your knitting needles are clean and free from any defects.
Step 2: Make a Slip Knot
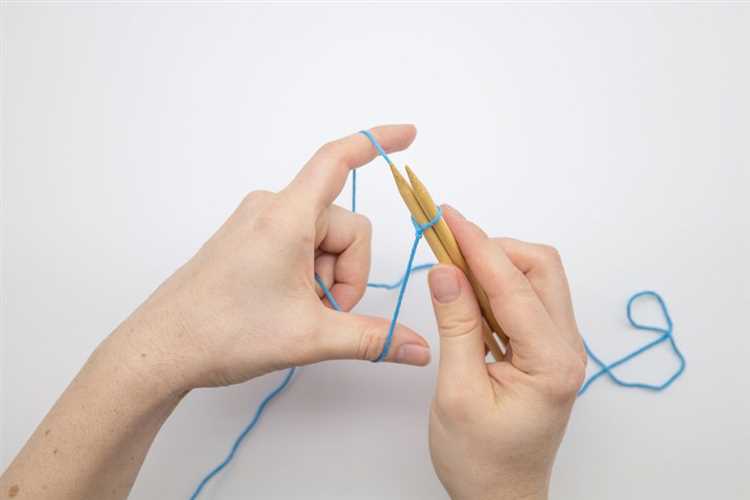
Before you can start casting on your knitting stitches, you need to make a slip knot. This knot will create a loop that you can use as the first stitch on your knitting needle.
Follow these easy steps to make a slip knot:
- Hold the end of the yarn in your hand, leaving a tail of about 6 inches.
- Cross the yarn over itself to form a loop.
- Insert your hand through the loop from underneath.
- Grasp the working end of the yarn that is attached to the yarn ball.
- Pull the working end through the loop, creating a new loop.
- Tighten the loop by pulling on both ends of the yarn.
Once you have made the slip knot, you can proceed to the next step of casting on your knitting stitches.
Step 3: Hold the Needle
Once you have your slip knot in place and your yarn ready, it’s time to hold the knitting needle.
Take one knitting needle in your dominant hand. Make sure to hold it comfortably and securely, with a relaxed grip. You don’t want to hold it too tight or too loose, as it may affect your tension and control.
Place the tip of the knitting needle with the slip knot between your thumb and index finger. The rest of the needle should rest on top of your other fingers.
Hold the yarn with your non-dominant hand. Wrap it around your little finger and then bring it up and over your index finger. Keep the tension of the yarn firm but not overly tight.
By holding the needle and yarn in this way, you will have better control over the knitting process and be ready to start casting on stitches.
Step 4: Insert the Needle into the Slip Knot
Now that you have created a slip knot, it’s time to insert the needle into it. Follow these steps:
- Hold the slip knot in your left hand, making sure the tail end is on the left side.
- With your right hand, grip the knitting needle and insert the point into the slip knot from front to back.
- Once the needle is inserted, use your left hand to pull the working yarn (the yarn attached to the ball) to tighten the slip knot around the needle. Make sure it is snug, but not too tight.
- You should now have the needle inserted into the slip knot, with the working yarn extending from the slip knot to the ball of yarn.
Double-check that the needle is securely in the slip knot before moving on to the next step. This will ensure that your stitches don’t unravel as you begin knitting.
Step 5: Wrap the Yarn Around the Needle
Now that you have your slip knot on the needle, it’s time to start wrapping the yarn around the needle to create your first stitch. Follow these simple steps:
- Hold the needle with the slip knot in your right hand.
- Using your left hand, hold the end of the yarn (known as the working yarn) and bring it up and over the needle from back to front.
- With your left hand, take the yarn and wrap it around the needle in a counterclockwise direction.
- Make sure to keep a firm grip on the yarn to ensure that it stays in place.
At this point, you should have one loop of yarn wrapped around the needle. This loop will be your first stitch. It may feel a bit loose, but don’t worry, you can easily tighten it later on.
Continue repeating these steps to create additional stitches, depending on the number required for your knitting project. As you practice, you will become more comfortable and the process will become quicker and easier.
Remember, practice makes perfect! Keep practicing this casting on technique until you feel confident with it.
Step 6: Pull the Yarn Through the Loop
Now that you have created a loop on your needle, it’s time to pull the yarn through it. This step will secure your first stitch and is essential for beginning your knitting project.
- Take your working yarn, which is connected to the ball or skein of yarn, and hold it in your right hand.
- Insert your right hand needle into the loop from front to back, making sure the needle is under the left hand needle.
- With your right hand, bring the working yarn under the right hand needle and pull it through the loop on the left hand needle.
- As you pull the yarn through, you will create a new loop on your right hand needle.
- Tighten the new loop by gently pulling on the working yarn.
- Continue to pull the yarn through the loop until the loop is completely pulled through and resting on the right hand needle.
- Congratulations! You have successfully casted on your first knitting stitch.
Repeat these steps for each stitch that you need to cast on for your project. Remember to keep the tension of the yarn consistent as you go along.
Once you have casted on all the desired stitches, you are ready to start knitting your project!
Step 7: Repeat Steps 4-6
Now that you have successfully completed steps 1-6, you are ready to move on to the next set of stitches. Repeat steps 4-6 to continue casting on additional stitches. Here’s a quick recap of what you need to do:
-
Place the needle with the loop in your right hand.
-
Insert the left needle into the loop from left to right.
-
Bring the working yarn from behind through the loop and towards you.
-
Transfer the new loop onto the right needle.
By repeating these steps, you will continue to add new stitches to your needle. Make sure to keep a consistent tension on the yarn as you work and check that your stitches are not too tight or too loose.
It’s important to practice this process until you feel comfortable with it. Casting on is the first step in any knitting project, so it’s essential to get it right. Take your time and don’t be discouraged if it takes a few tries to master.
Step 8: Finish Casting On
Now that you have completed the cast on stitches, it’s time to finish the process and prepare for knitting. Follow these final steps to complete the casting on:
- Check your stitches: Before moving forward, take a moment to make sure all your stitches are even and not too tight or loose. Adjust them as needed.
- Count your stitches: Count the number of stitches you have cast on to ensure it matches the pattern or desired number of stitches.
- Secure the working yarn: Take the working yarn and tie a slipknot at the end to secure it. This will prevent the stitches from unraveling.
- Trim excess yarn: If you have a long tail leftover from the cast on, you can trim it to a shorter length, leaving enough to weave in later.
Once you have completed these steps, you are ready to begin knitting your first row. Congratulations, you have successfully cast on your stitches!
FAQ:
What is casting on in knitting?
Casting on in knitting is the process of creating the first row of stitches on the knitting needle. It is the first step in starting a knitted project.
Why is casting on important in knitting?
Casting on is important in knitting because it creates a foundation row of stitches that will determine the size and shape of your knitted project. It is the starting point for any knitting project.
What are the different methods of casting on in knitting?
There are several methods of casting on in knitting, including the long tail cast on, the knitted cast on, the cable cast on, and the backward loop cast on. Each method has its own advantages and is suitable for different situations.
What materials do I need to cast on in knitting?
To cast on in knitting, you will need knitting needles in the correct size for your project, and yarn that matches the weight and color of your desired finished project. You may also need a knitting gauge to ensure the correct tension.
Can I cast on using circular knitting needles?
Yes, you can cast on using circular knitting needles. The process is the same as casting on with straight knitting needles, but you will be working in the round instead of back and forth.
How do I know how many stitches to cast on for my project?
The number of stitches you need to cast on for your project will depend on the size and gauge of the pattern. The pattern should provide instructions on how many stitches to cast on, or you can use a knitting gauge to determine the correct number of stitches.
What is the easiest method of casting on for beginners?
The easiest method of casting on for beginners is the long tail cast on. It is simple to learn and creates a neat and flexible edge. It is also a versatile method that can be used for a wide range of knitting projects.


