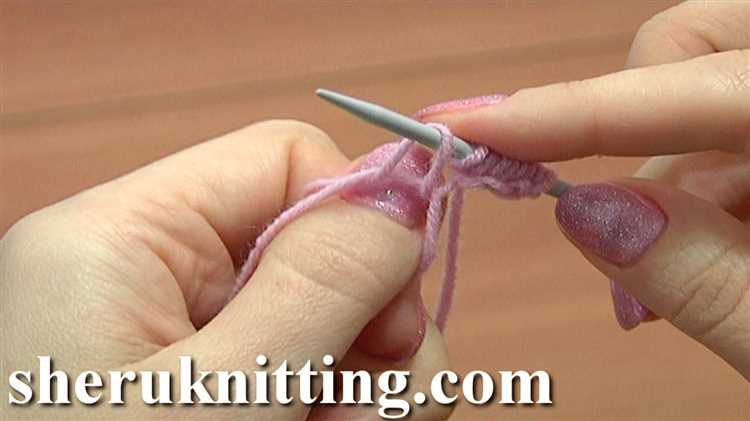
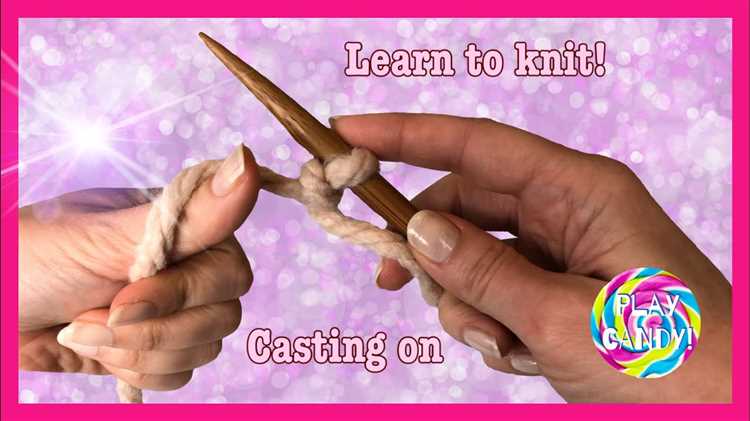
Knitting is a wonderful craft that allows you to create beautiful and cozy items with just a pair of needles and some yarn. Whether you’re a beginner or an experienced knitter, learning how to cast on is an essential skill to master. In this step-by-step tutorial, we will guide you through the process of casting on using a Youtube video tutorial.
Youtube is a treasure trove of knitting tutorials, and there are countless videos available that demonstrate different casting on methods. However, with so many options, it can be overwhelming to find the right tutorial for you. That’s why we have handpicked a reliable and easy-to-follow video tutorial that will help you learn how to cast on with confidence.
Before we dive into the tutorial, it’s important to understand the basics of casting on. Casting on is the process of creating the first row of stitches on your knitting needle. There are several methods of casting on, including the long-tail cast on, the cable cast on, and the knitted cast on. Each method has its own advantages and is suitable for different knitting projects.
Whether you’re planning to knit a cozy blanket, a warm scarf, or a cute baby sweater, this Youtube tutorial will guide you through the casting on process step by step. You will learn how to hold your yarn and needles, how to create a slipknot, and how to make the first stitches on your needle. By the end of the tutorial, you will be ready to start your knitting project with confidence and excitement.
Master the Art of Casting On with this Step-by-Step Tutorial
Are you ready to learn how to cast on for knitting? Casting on is the first step in starting any knitting project, and it’s essential to get it right. This step-by-step tutorial will guide you through the process and help you master the art of casting on.
Step 1: Start with a Slip Knot
To begin casting on, start with a slip knot. Take the end of your yarn and create a loop. Pull the tail of the yarn through the loop to create a slip knot. Place the slip knot on one of your knitting needles, leaving a short tail.
Step 2: Hold the Needle and Yarn
Hold the knitting needle with the slip knot in your right hand. Use your left hand to hold the working yarn, which is the yarn attached to the ball or skein. Rest the working yarn over your left index finger, allowing it to run freely through your hand.
Step 3: Insert the Needle
With the slip knot on your needle, insert the needle into the slip knot from front to back. Use your right hand to hold the needle, while your left hand controls the working yarn.
Step 4: Create a Stitch
Loop the working yarn around the tip of the needle, moving from back to front. This loop will create a new stitch. Pull the loop through the slip knot with your right hand, transferring the stitch onto the needle.
Step 5: Repeat
Continue to repeat steps 3 and 4 until you have cast on the desired number of stitches. Make sure to keep your stitches even and not too tight or loose.
Step 6: Count Your Stitches
After you have cast on the desired number of stitches, count them to ensure you have the correct amount. This step is crucial, especially if you are following a knitting pattern.
Step 7: You’re Ready to Start Knitting
Once you have successfully cast on, you’re ready to start knitting! The cast-on stitches will serve as the foundation for your knitting project.
Congratulations! You have now mastered the art of casting on. With this essential skill, you can start tackling various knitting projects with confidence. Remember to practice and remain patient, as casting on may take some time to perfect. Happy knitting!
Why Choosing Youtube as a Tutorial Platform is a Great Idea
Youtube is an excellent platform for learning various skills, including knitting. It offers a unique combination of visual and auditory learning that makes it ideal for beginners. Here are a few reasons why choosing Youtube as a tutorial platform for learning how to knit is a great idea:
- Visual Demonstrations: Youtube allows instructors to provide step-by-step visual demonstrations of each knitting technique. By watching the video, learners can easily follow along and visually understand how stitches are created, how to hold the needles, and how to manipulate the yarn.
- Access to Expert Knitters: Youtube has a vast community of knitting enthusiasts and experts who share their knowledge and expertise through video tutorials. Learners can find tutorials from experienced knitters with different styles and techniques, allowing them to explore different approaches and find the one that suits them best.
- Pause, Rewind, and Replay: Unlike in-person classes or written instructions, Youtube tutorials provide the convenience of pausing, rewinding, and replaying specific sections. This feature allows learners to go at their own pace, review tricky steps, and ensure they fully understand each technique before moving on.
- Wide Range of Skill Levels: Youtube offers knitting tutorials suitable for all skill levels, from absolute beginners to advanced knitters. Learners can easily find videos specifically tailored to their level and gradually progress to more complex techniques as they gain confidence and experience.
- Community and Interaction: Youtube encourages interaction between learners and instructors through comments and discussion sections. This creates a sense of community and allows learners to ask questions, get personalized advice, and share their progress with others.
In conclusion, Youtube is a fantastic platform for learning how to knit. Its visual demonstrations, access to expert knitters, convenience of pausing and replaying, wide range of skill levels, and community interaction make it an ideal choice for anyone interested in learning this craft.
Understanding the Casting On Technique: A Crucial First Step
When embarking on your knitting journey, learning the casting on technique is a crucial first step. This technique lays the foundation for your knitting project by creating the initial row of stitches on your needles. Mastering this technique is essential to ensure a proper start and a successful knitting experience.
The casting on technique involves creating a series of loops on your knitting needles, forming the first row of stitches. There are various methods of casting on, each with its own unique characteristics and uses. However, the basic principle remains the same – creating loops that can be worked into stitches.
Here are a few popular methods of casting on:
- Long tail cast on: This method is versatile and widely used. It creates a sturdy and elastic edge, making it suitable for a wide range of knitting projects.
- Knitted cast on: This technique is simple and beginner-friendly. It produces a neat and firm edge, making it ideal for projects that require a clean finish.
- Cable cast on: This method is commonly used for adding stitches in the middle of a row or for creating a decorative edge. It results in a firm and slightly stretchy edge.
Each method requires a different set of steps and techniques, but they all serve the same purpose of creating the initial row of stitches. It’s important to choose the casting on method that best suits your project’s requirements and desired outcome.
Once you’ve chosen the appropriate casting on method, it’s time to get started. Follow the step-by-step instructions in the knitting tutorial video to learn how to cast on using your preferred method. Take your time and practice the technique until you feel comfortable with it. Remember, practice makes perfect!
By mastering the casting on technique, you’ll be well on your way to becoming a skilled knitter. It sets the stage for the rest of your knitting project and determines the overall success. So don’t rush through this crucial first step – take the time to learn and practice the technique, and soon you’ll be creating beautiful knitted items to enjoy or share with others.
Materials You’ll Need for a Successful Casting On
Before you begin learning how to cast on for knitting, it’s important to gather all the necessary materials. Here are the items you’ll need:
- Knitting Needles: Choose a pair of knitting needles appropriate for the type of yarn you’re using. The size of the needles will depend on the thickness of the yarn and the desired tension of your project.
- Yarn: Select a yarn that matches your project’s requirements. Different projects may call for different types of yarn, such as wool, acrylic, or cotton.
- Tapestry Needle: A tapestry needle will be used for finishing your knitting project, such as weaving in loose ends.
- Scissors: A pair of scissors is needed to cut the yarn after finishing your casting on.
Additionally, you may find the following items helpful:
- Stitch Markers: Stitch markers can be useful for marking specific stitches or sections of your knitting.
- Row Counter: A row counter can help you keep track of the number of rows you have knitted.
- Measuring Tape: A measuring tape is useful for checking gauge or measuring the size of your project.
By having these materials on hand, you’ll be well-prepared to successfully cast on and start your knitting project. Happy knitting!
Step 1: Making a Slip Knot to Start Your Knitting Journey
Before you can start knitting, you will need to learn how to make a slip knot. The slip knot is the first step in casting on stitches and is used to create a secure loop on your needle.
To make a slip knot, follow these steps:
- Start by holding the end of your yarn in one hand.
- Form a small loop by crossing the yarn over itself.
- Take the end of the yarn and pass it through the loop.
- Adjust the knot by pulling on the ends of the yarn.
Once you have made a slip knot, you can place it on one of your knitting needles. Hold the tail of the yarn in your hand and use your other hand to hold the needle with the slip knot. You are now ready to proceed with casting on stitches for your knitting project.
Note: The slip knot counts as the first stitch of your cast on. If your pattern calls for a specific number of cast on stitches, remember to include the slip knot in your count.
Now that you have successfully made a slip knot, you are ready to move on to the next step in learning how to knit.
Step 2: Positioning Your Needles for the Casting On Technique
Once you have your yarn and two knitting needles ready, it’s time to position them correctly for the casting on technique. Follow these steps:
- Hold one needle in your dominant hand. This will be the needle where you will be creating the stitches.
- Hold the other needle in your non-dominant hand. This needle will be used to hold the stitches as you create them.
- Position your hands comfortably. Hold the needles loosely with a relaxed grip, making sure they are parallel to each other and pointing upward.
- Place the yarn on your non-dominant hand. Hold the end of the yarn between your thumb and index finger, allowing it to drape over your other fingers.
- Ensure the yarn is under the needle in your dominant hand. The yarn should be positioned under the needle and hanging down loosely.
By placing your needles and yarn in the correct positions, you are now ready to begin the casting on technique. This proper hand and needle placement will help you create even and consistent stitches as you learn how to knit.
Step 3: Demonstrating the Long-Tail Cast On Method
The long-tail cast on method is a versatile and commonly used technique in knitting. It creates a neat and elastic edge for your knitting project. In this step, we will demonstrate how to do the long-tail cast on method.
Here are the step-by-step instructions:
- Start by making a slipknot on your knitting needle, leaving a long tail that is approximately three times the width of your knitting project.
- Hold the knitting needle with the slipknot in your right hand, and the long tail in your left hand.
- With your left hand, bring the long tail over the knitting needle, creating a loop.
- Insert the knitting needle through the loop from front to back.
- With your left hand, grab the long tail and pull it through the loop, creating a new loop on the knitting needle.
- Repeat steps 3-5 for the desired number of stitches.
Once you have completed the long-tail cast on method, you will have a row of stitches on your knitting needle ready to start your project. It is important to keep the tension of the stitches even, not too tight or too loose, to ensure a consistent edge.
Remember to practice this technique until you feel comfortable with it. With time and practice, you will become more proficient in the long-tail cast on method and be able to start your knitting projects with ease.
Wrap It Up: Tips and Tricks for Perfecting Your Casting On Skills
Learning how to cast on is an essential skill for any knitter. It’s the first step to creating beautiful hand-knit projects. While the basic concept of casting on is simple, there are a few tips and tricks that can help you perfect your technique and achieve professional-looking results.
Choose the Right Cast-On Method
There are several cast-on methods to choose from, including the long-tail cast on, the knitted cast on, and the cable cast on. Each method creates a slightly different edge and has its own advantages and disadvantages. Experiment with different methods to find the one that works best for your project.
Use the Right Amount of Yarn
When casting on, it’s important to estimate the right amount of yarn needed. If you use too little yarn, you may not have enough stitches for your project. If you use too much yarn, you may end up with a loose and sloppy edge. Practice measuring the yarn needed for casting on to ensure a clean and even edge.
Tension is Key
Consistent tension is crucial for a neat and uniform cast-on edge. Avoid pulling the yarn too tightly or leaving it too loose. Experiment with different tension levels to find what works best for you. Keep practicing to improve your tension control and create professional-looking edges.
Count Your Stitches
Counting your stitches as you cast on is important to ensure you have the correct number for your pattern. It can be easy to lose track, especially when casting on a large number of stitches. Use stitch markers or a row counter to help you keep track of your stitch count.
Practice and Patience
Like any skill, casting on takes practice and patience to master. Don’t get discouraged if your first few tries don’t turn out perfectly. Keep practicing, watching tutorials, and seeking advice from experienced knitters. With time and dedication, your casting on skills will improve.
Use a Casting On Tutorial
Watching a casting on tutorial, like the “Learn How to Knit Youtube Casting On: Step-by-Step Tutorial,” can be incredibly helpful for visual learners. Follow along with the tutorial, pausing and replaying as needed, until you feel confident in your casting on abilities.
In conclusion, perfecting your casting on skills is essential for any knitter. By choosing the right method, using the right amount of yarn, maintaining consistent tension, counting your stitches, practicing, and seeking guidance from tutorials and experienced knitters, you’ll be well on your way to casting on like a pro.
FAQ:
What is the purpose of casting on in knitting?
The purpose of casting on in knitting is to create the first row of stitches on the needle, providing a foundation for the rest of the knitting project.
Is casting on difficult for beginners?
Casting on can be a bit tricky for beginners, but with practice and patience, it can be mastered. There are different methods of casting on, and it’s important to find a method that feels comfortable for you.
What are the different methods of casting on in knitting?
There are several different methods of casting on in knitting, including the long-tail cast on, the knitted cast on, the cable cast on, and the provisional cast on. Each method has its own unique technique and purpose.
Can I use circular needles for casting on?
Yes, you can use circular needles for casting on. Circular needles can be used for both flat knitting and knitting in the round. They are a versatile tool that can be used for a variety of knitting projects.
How do I fix a mistake when casting on?
If you make a mistake when casting on, you can simply unravel the stitches and start again. Depending on the method you are using, you may need to undo the entire cast on row or just a few stitches. It’s important to take your time and be patient when fixing a mistake.


