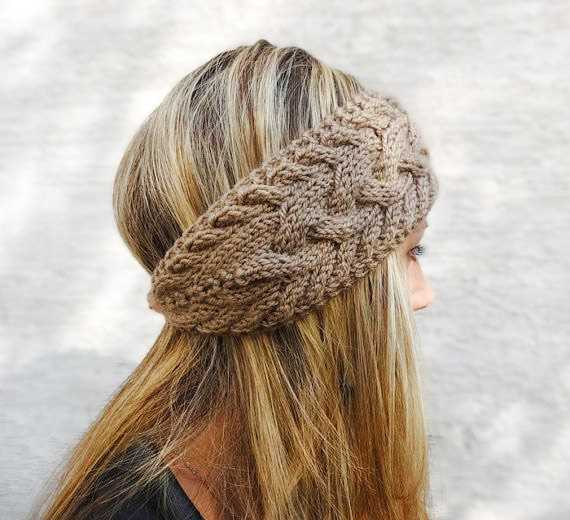
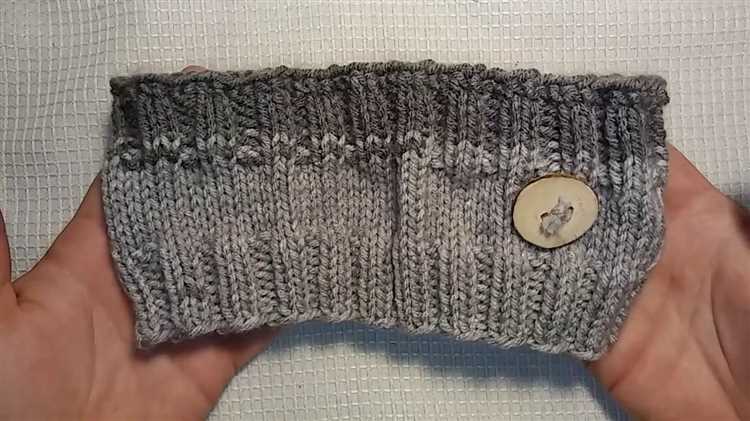
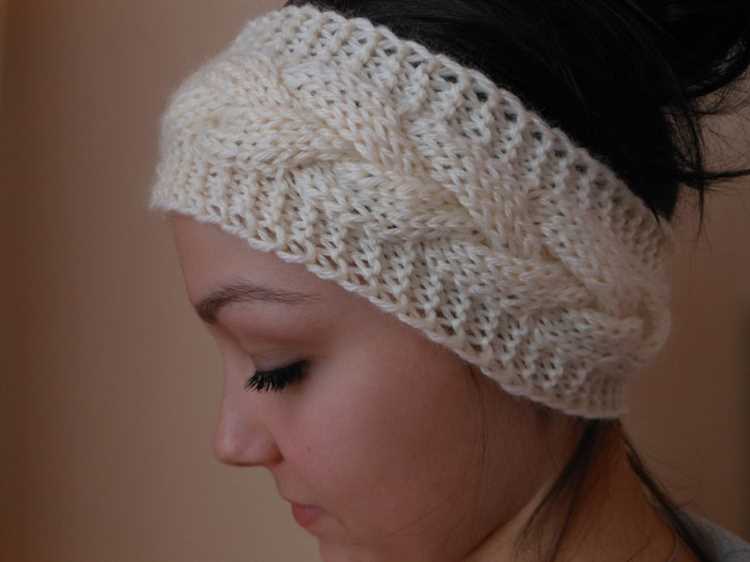
Are you tired of bundling up with a bulky hat every winter? If so, why not try knitting your own ear warmer? Not only are ear warmers stylish and practical, but they are also a fun and easy knitting project for beginners. In this step-by-step guide, we will walk you through the process of knitting your own ear warmer.
Step 1: Gather your materials
Before you begin knitting your ear warmer, you will need to gather a few basic materials. You will need a pair of knitting needles, preferably size 8 or 9, and a skein of soft and warm yarn. Choose a yarn color that matches your personal style and taste. You may also want to have a tape measure and a yarn needle on hand for finishing touches.
Step 2: Cast on stitches
To start your ear warmer, cast on the desired number of stitches. This will depend on the width you want your ear warmer to be. A typical ear warmer is about 3-4 inches wide. If you are unsure how many stitches to cast on, you can start with about 10-12 stitches and adjust as needed. Use the long tail cast on method or your preferred cast on method.
Step 3: Knit in ribbing pattern
Once you have cast on your stitches, it’s time to begin knitting. Knit every row in a ribbing pattern to create a stretchy and comfortable ear warmer. The ribbing pattern can be as simple as knitting one stitch, purling one stitch, and repeating this pattern until the end of the row. Continue knitting in this pattern until your ear warmer reaches your desired length.
Step 4: Bind off stitches
When your ear warmer has reached the desired length, it’s time to bind off your stitches. To bind off, simply knit two stitches, then use your left-hand needle to lift the first stitch over the second stitch and off the needle. Continue this process until you have bound off all of your stitches. Cut the yarn, leaving a long tail, and pull it through the last stitch to secure.
Step 5: Finishing touches
Finally, it’s time to add the finishing touches to your ear warmer. Use a yarn needle to weave in any loose ends and secure them. You can also add any embellishments, such as buttons or a decorative stitch pattern, to personalize your ear warmer. Once you are satisfied with the final result, your handmade ear warmer is ready to be worn!
Knitting your own ear warmer is not only a practical way to keep your ears warm in the winter, but it is also a creative and rewarding hobby. By following this step-by-step guide, you can create a stylish and cozy accessory that reflects your personal style. So grab your knitting needles and yarn, and start creating your own custom ear warmer today!
Choosing the right yarn and needles for your project
When it comes to knitting an ear warmer, choosing the right yarn and needles is essential to ensure that your project turns out as expected. Here are a few factors to consider when making your selection:
- Yarn weight: The yarn weight refers to the thickness of the yarn. For an ear warmer, you’ll want to choose a yarn that is medium to bulky weight. This will provide the necessary warmth and structure for the accessory.
- Material: Yarn can be made from various materials, such as wool, acrylic, cotton, or a blend. Consider your personal preferences and the intended use of the ear warmer when choosing the material. Wool offers excellent warmth, while acrylic is often more affordable and easy to care for.
- Texture: The texture of the yarn can also affect the look and feel of the finished ear warmer. Smooth yarns will give a clean and polished look, while yarns with texture, such as bouclé or tweed, can add visual interest.
- Color: Choosing the right color for your ear warmer will depend on personal preference and the intended use. For a versatile accessory, you may opt for a neutral color that matches with various outfits. Alternatively, you can choose a bold and vibrant color to make a statement.
Once you have chosen the yarn, you’ll need to select the appropriate knitting needles. Here are some considerations:
- Needle size: The size of the needles will depend on the yarn weight and the desired gauge. Usually, the yarn label will recommend a needle size range. You can also refer to a standard knitting needle size chart. For an ear warmer, you’ll typically need needles in the range of US size 7 to 10.
- Type of needles: There are various types of knitting needles, including straight needles, circular needles, and double-pointed needles. For an ear warmer, circular needles with a length of 16 inches or shorter are recommended for easier knitting in the round.
- Material: Knitting needles can be made from different materials, such as bamboo, aluminum, or plastic. The material can affect the weight, flexibility, and overall feel of the needles. Choose a material that feels comfortable and suits your knitting style.
Remember, the right yarn and needles can greatly contribute to the success of your knitting project. Take the time to consider these factors and select materials that you enjoy working with and will result in a beautiful ear warmer.
Casting on stitches for your ear warmer
Before you can start knitting your ear warmer, you will need to cast on stitches. Casting on is the process of creating the foundation row of stitches. Follow the step-by-step guide below to cast on stitches for your ear warmer:
- Hold the knitting needle in your right hand and leave a tail of yarn measuring about 6 inches.
- Make a slipknot by crossing the yarn end over the working yarn. Insert your needle through the loop from front to back, and then tighten the slipknot by pulling the working yarn.
- Hold the needle with the slipknot in your right hand, and use your left hand to hold the working yarn.
- With your right hand, insert the needle into the slipknot from front to back and then bring it over the working yarn.
- Use your right hand to grab the yarn under the needle and pull it through the slipknot, creating a new loop.
- Slide the new loop onto the needle, keeping it loose enough so you can easily move it along the needle.
- Repeat steps 4-6 until you have cast on the desired number of stitches for your ear warmer. Make sure to count the stitches as you go.
Once you have cast on all the stitches, you are ready to start knitting your ear warmer. Make sure to keep the tension of your stitches even to ensure a neat and uniform project.
Knitting the main body of the ear warmer
To begin knitting the main body of the ear warmer, you will need to cast on a certain number of stitches depending on your desired width. A typical ear warmer is about 3-4 inches wide, so you may want to cast on around 15-20 stitches for a medium size.
Once you have cast on the desired number of stitches, you can start knitting the rows. The main body of the ear warmer is usually worked in a rib stitch pattern, which gives it a stretchy and snug fit.
To create a rib stitch, you will need to alternate between knitting and purling stitches in each row. You can start with a row of knit stitches, followed by a row of purl stitches, and continue this pattern until the desired length is reached.
To knit a stitch, insert the right needle into the front of the first stitch on the left needle, from left to right, and loop the yarn around the right needle. Then, pull the right needle through the stitch, slipping the stitch off the left needle, and completing a knit stitch.
To purl a stitch, insert the right needle into the front of the first stitch on the left needle, from right to left, and loop the yarn around the right needle. Then, pull the right needle through the stitch, slipping the stitch off the left needle, and completing a purl stitch.
Continue knitting rows in the rib stitch pattern until the main body of the ear warmer reaches the desired length, typically around 18-20 inches. Remember to keep track of your rows to ensure an even length and prevent mistakes.
Once the desired length is reached, you can bind off the stitches to secure the edges and complete the main body of the ear warmer. Simply knit the first two stitches, then use the left needle to lift the first stitch over the second stitch and off the right needle. Repeat this process until only one stitch remains, and then cut the yarn, leaving a tail to weave in later.
With the main body of the ear warmer completed, you can now move on to adding any additional embellishments or finishing touches, such as a decorative edging or buttons. Enjoy your new handmade ear warmer!
Creating a decorative pattern for your ear warmer
Once you have mastered the basic knitting stitches for your ear warmer, you can begin to add a decorative pattern to make it unique. Here are a few ideas to get you started:
- Cable stitch: The cable stitch adds a beautiful twisted effect to your ear warmer. To create a cable stitch, simply cross a few stitches over each other either to the left or right. Repeat this pattern every few rows to create a stunning cable design.
- Ribbing: Ribbing is a classic and versatile pattern that adds texture and stretch to your ear warmer. To create ribbing, alternate between knitting and purling stitches in a specific pattern, such as knit 2, purl 2. This will create a ribbed effect that looks great on ear warmers.
- Fair Isle: Fair Isle is a traditional knitting technique that involves using multiple colors in a single row to create intricate patterns. You can incorporate Fair Isle patterns into your ear warmer by selecting two or more colors and following a pattern chart. This will add a pop of color and complexity to your design.
- Lace stitch: Lace knitting involves creating intricate patterns with holes or eyelets. This adds a delicate and feminine touch to your ear warmer. Find a lace stitch pattern that you like and incorporate it into your design, placing it either in the middle or along the edges.
Remember to practice these decorative patterns on a small swatch before incorporating them into your ear warmer. This will help you become familiar with the pattern and ensure that the sizing is correct. Have fun experimenting with different patterns and make your ear warmer truly one-of-a-kind!
Shaping the ear warmer for a snug fit
To ensure a snug fit for your ear warmer, it’s important to shape it properly. Follow these steps to shape your ear warmer:
- Once you have finished knitting the ear warmer, lay it flat on a surface.
- Fold the ear warmer in half lengthwise, with the wrong sides together. This will create a crease down the center.
- Using a tape measure or ruler, measure the width of the folded ear warmer. This will give you the desired width of the final ear warmer.
- Pin the folded ear warmer in place along the sides to hold it together temporarily.
- Try on the pinned ear warmer to see if it fits comfortably around your head and ears. If it feels too loose, you can adjust the width by folding it in slightly more.
- Once you are satisfied with the fit, use a yarn needle or a sewing needle to sew the sides of the ear warmer together using a whipstitch. Make sure to sew as close to the edges as possible to achieve a clean finish.
- After sewing the sides, remove the pins and flatten the ear warmer to ensure it lies flat and maintains its shape.
By shaping the ear warmer to your desired fit, you can ensure that it will be comfortable to wear and provide the necessary warmth during colder months.
Binding off and finishing the edges of your ear warmer
Once you have completed the desired length of your ear warmer, it’s time to bind off and finish the edges to give it a polished look. Follow these steps to complete your ear warmer:
- Knit the first two stitches.
- Insert the left-hand needle into the first stitch you knitted.
- Lift the first stitch over the second stitch and off the right-hand needle.
- Knit one more stitch.
- Repeat steps 2-4 until you have reached the end of the row.
Once you have bound off all the stitches, you can finish the edges of your ear warmer. Here are a few options to consider:
- Single crochet: With a crochet hook, create a single crochet stitch along the entire edge of your ear warmer. This will create a neat and finished look.
- I-cord edge: Using the I-cord technique, create a small cord-like edge along the sides of your ear warmer. This adds a decorative touch to the finished piece.
- Ribbed edge: Knit a few rows of ribbing (knit 1, purl 1) at the beginning and end of your ear warmer to create a stretchy and visually appealing edge.
Choose the finishing technique that best suits your style and preference. Once you have completed the edge finishing, weave in any loose ends and trim any excess yarn.
Now your ear warmer is ready to be worn and enjoyed! Remember to personalize it with additional embellishments or embroidery if desired. Happy knitting!
Adding optional embellishments to your ear warmer
If you want to add a little extra flair to your ear warmer, there are several optional embellishments you can incorporate into your design. Experiment with different techniques to create a unique and personalized accessory.
- Buttons: Sew on a decorative button or multiple buttons to the side or center of your ear warmer. Choose buttons that complement the yarn color or add a pop of contrasting color for visual interest.
- Flowers: Crochet or knit small flowers using a different colored yarn and attach them to your ear warmer. You can sew them on or use a hot glue gun for a quick and secure attachment.
- Pom-poms: Make small pom-poms using a pom-pom maker or your fingers, and attach them to each end of your ear warmer. This adds a playful and fun touch to your accessory.
- Ribbons: Sew on a ribbon to one side of your ear warmer, tying it into a bow for a feminine and elegant look. Choose a ribbon that complements your yarn color and texture.
- Embroidery: Use embroidery floss to add decorative stitching to your ear warmer. Create simple patterns or intricate designs to make your accessory truly one-of-a-kind.
Remember to secure any additional embellishments firmly to your ear warmer using a needle and thread or a hot glue gun. This will ensure that they stay in place and withstand regular wear.
FAQ:
How long does it take to knit an ear warmer?
The time it takes to knit an ear warmer can vary depending on your knitting speed and experience. On average, it can take a few hours to complete a simple ear warmer.
Do I need any special knitting needles to make an ear warmer?
You can use regular knitting needles to make an ear warmer. However, if you want a tighter, more defined stitch, you may want to use smaller needles.
What type of yarn is best for knitting an ear warmer?
The type of yarn you use for your ear warmer will depend on your personal preference. However, a soft and warm yarn, such as merino wool or a wool blend, is often recommended for winter accessories like ear warmers.
Can I customize the size of the ear warmer?
Yes, you can customize the size of the ear warmer to fit your needs. To make it smaller or larger, simply adjust the number of stitches you cast on or the number of rows you knit.
Is knitting an ear warmer difficult for beginners?
Knitting an ear warmer can be a great project for beginners. It typically involves basic knitting techniques, such as casting on, knitting, and binding off. With a little practice, even beginners can successfully knit an ear warmer.


