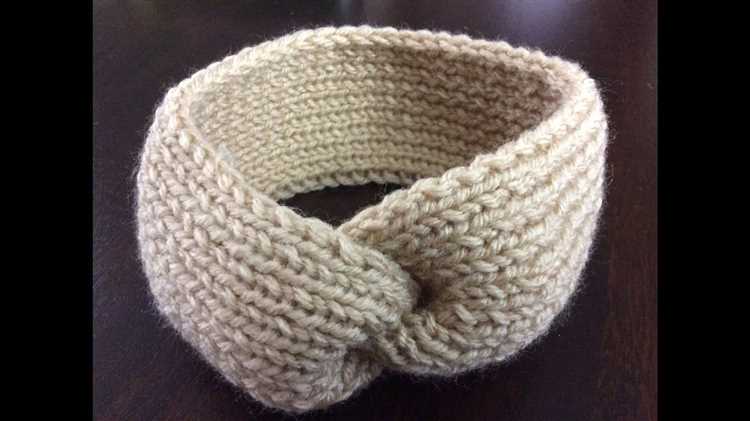
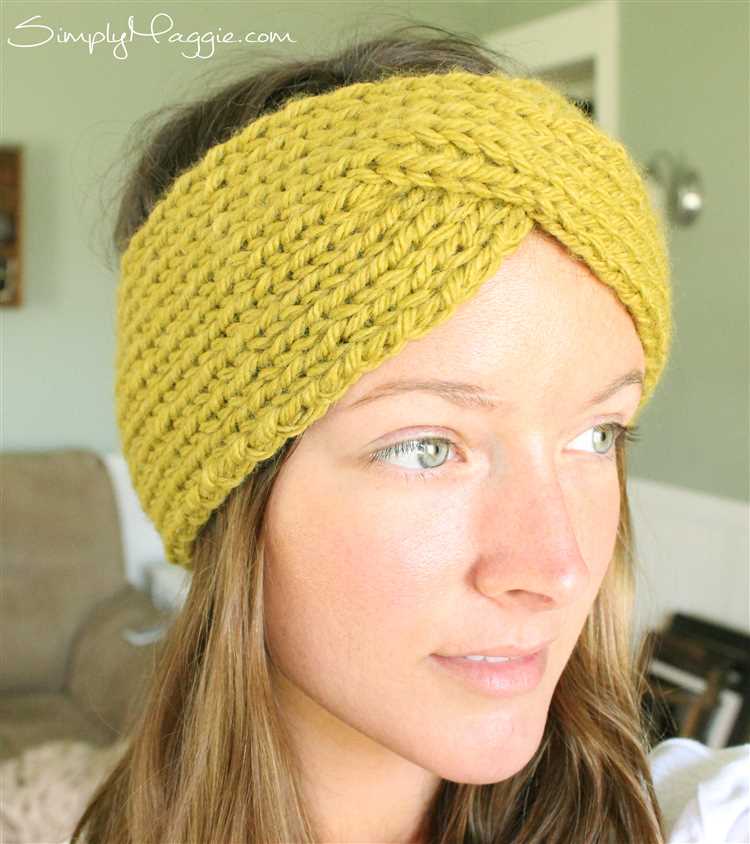
Knitting is a timeless craft that allows you to create beautiful and functional items with just a few simple tools, a little patience, and some creativity. If you’re new to knitting and looking for a beginner-friendly project, a headband is a great place to start.
In this step-by-step guide, we’ll walk you through the process of knitting a headband from start to finish. Even if you’ve never picked up knitting needles before, don’t worry! We’ll explain all the basic techniques you need to know and provide clear instructions to help you along the way.
Before we dive into the knitting process, let’s talk about materials. To knit a headband, you’ll need a pair of knitting needles, yarn in your choice of color and weight, and a yarn needle for finishing. Choosing the right yarn and needle size is important as it will influence the size and stretchiness of your headband.
Once you have your materials ready, we’ll start by casting on stitches and then move on to the basic knit stitch. Don’t worry if these terms sound unfamiliar – we’ll explain everything in detail and provide helpful illustrations to guide you. By the end of this tutorial, you’ll have a cozy and stylish headband that you can proudly wear or gift to a friend! So let’s get started on this knitting adventure together!
Choosing the Right Yarn and Needles
When it comes to knitting a headband for beginners, choosing the right yarn and needles is essential for a successful project. Here are some tips to help you select the perfect materials:
1. Yarn Weight: Yarn comes in different weights, ranging from super fine to super bulky. For a headband, it’s best to choose a medium weight yarn, also known as worsted weight or #4 yarn. This weight is easy to work with and gives a good balance between warmth and comfort.
2. Fiber Content: When selecting yarn, consider the fiber content. Different fibers have different properties, such as warmth, softness, and durability. Common yarn fibers include wool, acrylic, cotton, and blends. Wool is a great choice for warmth, acrylic for affordability and durability, and cotton for breathability.
3. Needle Size: The needle size you choose will depend on the yarn weight you’ve selected. Most worsted weight yarns recommend using US size 8-10 (5-6mm) knitting needles. However, it’s important to check the specific label or pattern instructions for needle size recommendations.
4. Circular or Straight Needles: For a headband, you can use either circular or straight needles. Circular needles are especially useful if you prefer to knit in the round, but straight needles can also be used for knitting a flat headband and seaming the ends together.
5. Gauge: Before starting your project, it’s a good idea to create a gauge swatch. A gauge swatch helps you determine if your knitting tension matches the recommended gauge provided on the yarn label or pattern instructions. This step ensures that your headband will be the correct size and fit.
6. Personal Preference: Ultimately, the choice of yarn and needles depends on your personal preference and the desired outcome. Experiment with different yarns and needles to find the combination that works best for you and creates the look and feel you want for your headband.
By carefully selecting the right yarn and needles, you’ll set yourself up for success in knitting a beautiful and comfortable headband. Happy knitting!
Casting On and Creating the Foundation Row
Before you can begin knitting your headband, you’ll need to cast on and create the foundation row. This is the first row of stitches that will establish the width of your headband.
To cast on, start by making a slipknot. Simply create a loop with your yarn and pull the end through to secure it. Place this loop onto one of your knitting needles, leaving a tail of yarn to work with.
Hold the needle with the slipknot in your right hand, and use your left hand to hold the other knitting needle.
Now, insert the tip of your right-hand needle into the slipknot loop, going from front to back. With your left hand, use your thumb and index finger to hold the yarn that is attached to the ball, creating tension.
Take the yarn that is attached to the ball and wrap it around the tip of the right-hand needle in a counterclockwise direction. This will create a new loop on the right-hand needle.
Slide the right-hand needle under the loop that is on the left-hand needle, and then pull the new loop through the old loop, transferring it from the left-hand needle to the right-hand needle.
Repeat this process until you have cast on the desired number of stitches for your headband. This will depend on the width you want your headband to be and the thickness of your yarn.
Once you have finished casting on, you will have created the foundation row for your headband. The loops on your right-hand needle will be the first row of stitches that you will work with as you begin knitting.
It’s important to pay attention to your tension as you cast on to ensure that your stitches are not too tight or too loose. This will help to create an even and professional-looking headband.
Now that you have cast on and created the foundation row, you’re ready to start knitting your headband!
Knitting the Body of the Headband
Once you have cast on your stitches, it’s time to start knitting the body of the headband. Follow these steps:
- Hold the knitting needle with the cast-on stitches in your right hand and the empty needle in your left hand.
- Insert the point of the left needle into the first stitch on the right needle, from left to right.
- Using the working yarn attached to the ball, wrap it around the right needle and pull it through the stitch on the left needle, creating a new stitch on the right needle.
- Slide the original stitch off the left needle, completing the knit stitch.
- Continue knitting each stitch in the same way until you reach the desired length of the headband. You can measure the length of the headband by wrapping it around your head or using a measuring tape.
- If you want a ribbed effect, you can alternate between knitting and purling rows. To purl a stitch, insert the right needle from right to left into the next stitch on the left needle, wrap the yarn around the right needle, and pull it through the stitch to create a new stitch on the right needle. Slide the original stitch off the left needle. Repeat this for each purl stitch.
- Continue knitting or alternating between knitting and purling until the headband is the desired width.
- When you’ve reached the desired length and width, you’re ready to bind off the stitches. See the next section for instructions on how to bind off.
Remember to take breaks and stretch your hands and fingers to prevent cramping or fatigue. Enjoy the process of creating your own knitted headband!
Adding Decorative Stitches or Patterns
Once you have mastered the basic knitting stitches and have gotten comfortable with knitting a headband, you may want to add some decorative stitches or patterns to your project. This will give your headband a unique and personalized touch.
Here are a few ideas to get you started:
- Lace Stitch: Lace stitches add a delicate and feminine touch to your headband. You can find lace stitch patterns in knitting books or online. These patterns usually involve yarnovers, which create the holes in the lace work.
- Cable Stitch: Cable stitches create a twisted, braided pattern in your knitting. This technique is perfect for adding texture and visual interest to your headband. Cable stitch patterns can range from simple to complex, so you can choose one that suits your knitting skills.
- Colorwork: Colorwork involves using different colors of yarn to create patterns in your knitting. You can use techniques like Fair Isle or intarsia to create intricate designs. Colorwork can be a bit more challenging, but the results are definitely worth it.
- Bobble Stitch: Bobble stitches create small, raised bumps on your knitting, adding a fun and playful element to your headband. These stitches are created by knitting a group of stitches into one stitch, then increasing them again on the next row.
Here are some tips for adding decorative stitches or patterns:
- Use stitch markers: When working on a pattern with multiple repeats or complex stitches, using stitch markers can help you keep track of your progress and make sure you don’t make any mistakes.
- Read and understand the pattern: Before you start knitting a decorative stitch or pattern, take the time to read through the instructions and make sure you understand them. It’s also a good idea to practice the stitch on a small swatch before incorporating it into your headband.
- Experiment with yarn and needle size: Different yarns and needle sizes can give your stitches and patterns a different look and feel. Don’t be afraid to try out different combinations to see what works best for your project.
Adding decorative stitches or patterns to your headband can take it from simple to stunning. Have fun experimenting with different techniques and designs to create a headband that is uniquely yours.
Shaping the Headband
Once you have completed the desired length of your headband, it’s time to shape it to fit your head.
Here are the steps to shape the headband:
- Measure your head: Use a measuring tape to measure the circumference of your head at the point where you want the headband to sit. This will help you determine how many stitches you need to decrease or increase for a snug fit.
- Calculate the number of stitches to decrease or increase: Divide the head circumference measurement by the gauge (stitches per inch) that you have achieved in your knitting. This will give you the number of stitches you need to decrease or increase.
- Decreasing stitches: If you need to decrease stitches, you can use various methods such as knitting two stitches together (k2tog), slipping stitches, or using a specific decrease stitch pattern. Choose a method that suits your desired look and decrease the appropriate number of stitches evenly across your row.
- Increasing stitches: If you need to increase stitches, you can use methods like yarn overs or make one (M1) increases. Again, choose a method that matches your desired look and increase the appropriate number of stitches evenly across your row.
- Try on the headband: Once you have shaped the headband, try it on to ensure a proper fit. It should fit snugly but not too tight. Make any necessary adjustments by adding or removing stitches.
Remember to keep track of your stitch count and refer to the pattern instructions for any specific shaping details.
Now that you’ve shaped your headband, it’s time to finish it off with any desired edging or embellishments.
Binding Off and Finishing the Edges
Once you have reached your desired length for the headband, it’s time to bind off and finish the edges. Follow these steps to complete your knitting project:
- Begin by knitting two stitches as you normally would.
- Take the first stitch on your right-hand needle and pass it over the second stitch and off the needle. You will now have one stitch left on your right-hand needle.
- Knit one stitch.
- Repeat steps 2 and 3 until you have only one stitch left on your right-hand needle.
- Cut the yarn, leaving a tail that is about 6 inches long.
- Take the tail of the yarn and thread it through the last stitch on your needle.
- Pull the tail tight to secure the stitch.
Now that you have bound off your stitches, it’s time to finish the edges of your headband. Here are a few different methods you can use:
- Single Crochet Edging: With a crochet hook, insert it into the first stitch along the edge of your headband. Yarn over and pull through both the stitch and the loop on your hook. Continue this process along the entire edge of your headband.
- Slip Stitch Edging: Insert your right-hand needle into the first stitch on the left-hand needle as if to knit. Instead of knitting, slip the stitch onto the right-hand needle without knitting it. Repeat this process along the entire edge of your headband.
- I-Cord Edging: With a double-pointed needle, pick up and knit a few stitches along the edge of your headband. Then, without turning your work, slide the stitches to the other end of the needle and knit them again. Repeat this process along the entire edge of your headband.
Choose the edge finishing method that you prefer and continue along the entire edge of your headband. Once you have finished, weave in any loose ends of yarn and your headband is complete!
Styling and Wearing Your Knitted Headband
Once you have completed your knitted headband, it’s time to style and wear it! Here are some tips and ideas to help you make the most of your new accessory.
1. Choosing the Right Outfit:
Consider the color and style of your headband when selecting your outfit. Neutral-colored headbands can easily be paired with a variety of outfits, while bold and vibrant headbands can add a pop of color to your look.
2. Positioning:
Decide how you want to wear your headband. You can position it on your forehead for a bohemian look, or wear it higher up for a more traditional headband style. Experiment with different placements to find the one that suits you best.
3. Hairstyles:
There are endless hairstyle options that can be paired with a knitted headband. You can wear your hair down, in a loose braid, or in a messy bun. The headband adds a stylish and functional touch to any hairstyle.
4. Complementing Accessories:
Consider other accessories that can complement your knitted headband. For example, you can pair it with a matching scarf, gloves, or even a knitted sweater to create a coordinated look.
5. Layering:
If you live in a colder climate, you can layer your knitted headband over a cozy hat or under a hood for added warmth. This allows you to continue wearing your headband even during the winter months.
6. Different Knitting Patterns:
Experiment with different knitting patterns to create headbands with unique textures and designs. You can try using different stitches, such as ribbing or cables, to add interest to your headbands.
7. Customization:
Add your personal touch to your knitted headband by attaching buttons, beads, or fabric flowers. This allows you to make your accessory even more unique and reflective of your style.
Remember, the most important thing is to have fun and enjoy wearing your knitted headband! Whether you’re knitting it for yourself or as a gift, it’s a versatile accessory that can add a touch of warmth and style to any outfit.
FAQ:
What materials do I need to knit a headband?
To knit a headband, you will need a pair of knitting needles, yarn in your desired color, a yarn needle, and a set of stitch markers.
Is knitting a headband difficult for beginners?
No, knitting a headband is a great project for beginners. It only involves basic knitting stitches such as knit and purl, and you can easily learn these stitches with practice.
Can I use any type of yarn to knit a headband?
You can use any type of yarn that is appropriate for your knitting needles and provides the desired thickness and texture for your headband. It’s a matter of personal preference.
How long does it take to knit a headband?
The time it takes to knit a headband can vary depending on your skill level and the complexity of the pattern. On average, it can take a few hours to complete a headband.
Can I customize the size of the headband?
Yes, you can easily customize the size of the headband by adjusting the number of stitches and rows in your knitting. This allows you to make a headband that fits your head perfectly.
Are there any special techniques I need to know for knitting a headband?
For knitting a basic headband, you only need to know how to cast on, knit, purl, and bind off. These are the fundamental knitting techniques that you can easily learn with a bit of practice.
Can I add embellishments to my knitted headband?
Yes, you can definitely add embellishments to your knitted headband to make it more unique and personalized. You can use decorative buttons, beads, or even crochet flowers to add a touch of style to your headband.


