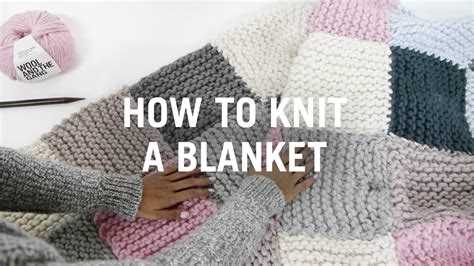
Knitting is a popular craft that allows you to create beautiful and functional items using just a few simple tools. If you’re a beginner knitter looking to tackle your first big project, knitting a blanket with straight needles is a great place to start. In this step-by-step guide, we’ll walk you through the process of knitting a cozy blanket from start to finish.
Before diving into the project, it’s important to gather all the necessary materials. You’ll need a pair of straight knitting needles, yarn in the color and weight of your choice, scissors, a tapestry needle, and a tape measure. Make sure to choose a yarn that is soft and durable, as it will provide the comfort and warmth you’re looking for in a blanket.
Once you have your materials ready, it’s time to cast on and get started. We’ll begin by casting on the desired number of stitches, which will determine the width of your blanket. The number of stitches you cast on will depend on the width you want your blanket to be and the gauge of your yarn. A larger gauge will require fewer stitches, while a smaller gauge will require more stitches.
As you work through the pattern, you’ll learn basic knitting techniques such as the knit stitch, purl stitch, and yarn over. These stitches will create the desired texture and design on your blanket. Don’t worry if you make mistakes at first – knitting is a forgiving craft and you can always unravel and start over if needed. With practice and perseverance, you’ll soon be on your way to completing your first knitted blanket.
Getting Started: Gather Your Supplies
Before you begin knitting your blanket, it’s important to gather all the necessary supplies. Here’s a list of what you’ll need:
- Straight knitting needles: Choose a pair of knitting needles that are suitable for the yarn weight you’ll be using. Generally, larger needles are recommended for beginners as they are easier to handle.
- Yarn: Select a soft and chunky yarn that is suitable for blankets. Acrylic or wool blends are good choices for beginners.
- Tape measure: You’ll need a tape measure to check the size of your blanket as you knit.
- Scissors: Keep a pair of scissors handy to cut the yarn as needed.
- Tapestry needle: A tapestry needle is useful for weaving in ends and seaming your blanket together
- Stitch markers: Stitch markers can help you keep track of your progress and mark important points in your pattern.
- Knitting gauge: A knitting gauge ruler or tool will help you measure your stitches per inch and ensure consistent sizing.
- Pattern or instructions: Find a beginner-friendly pattern or follow step-by-step instructions to guide you through the knitting process.
Once you have gathered all your supplies, you’ll be ready to start knitting your blanket. Make sure you have a comfortable and well-lit space to work in, and take your time to familiarize yourself with the knitting needles and yarn before you begin. Happy knitting!
Choosing the Right Yarn and Needles
When it comes to knitting a blanket, selecting the right yarn and needles is essential to achieve the desired results. Here are some tips to help you make the best choices:
- Consider the yarn weight: The weight of the yarn determines the thickness and warmth of the blanket. Bulky or chunky yarns are great for quick projects, while lighter yarns like fingering or sport weight are ideal for more delicate blankets.
- Check the yarn composition: Yarns can be made from different materials such as acrylic, wool, cotton, or a blend of fibers. Consider the characteristics of each material, such as softness, warmth, or washability, to choose one that suits your needs and preferences.
- Look for the recommended gauge: The gauge refers to the number of stitches and rows per inch in a knitted swatch. By matching the gauge suggested on the yarn label, you’ll ensure that your blanket turns out the right size and has an even appearance.
- Choose the appropriate needle size: The needle size affects the tension and drape of the knitted fabric. Thicker yarns require larger needles, while thinner yarns need smaller ones. Check the yarn label for the recommended needle size or make a gauge swatch to determine the best fit.
Remember, the choice of yarn and needles can greatly influence the outcome of your blanket. Take your time to explore different options and consider the specific qualities you desire in the finished project. Experimenting with different yarns and needles can also lead to unique textures and patterns in your blanket.
Casting On: Starting Your Blanket
Before you can begin knitting your blanket, you’ll need to cast on stitches. Casting on is the process of creating the first row of stitches on your needle.
Here’s a step-by-step guide to help you cast on for your blanket:
- Hold the end of the yarn in your right hand and place it over your left index finger, allowing a 6-inch tail to hang down. This tail will be woven in later to secure the beginning of your blanket.
- Make a loop with the yarn by crossing the yarn over itself. Hold the loop in place with your thumb and middle finger of your left hand. The yarn should be positioned behind your hand.
- Insert the needle through the loop from front to back. Hold the needle with your right hand and pass it through the loop, making sure the needle is under the yarn.
- With your right hand, wrap the yarn around the needle from back to front. This creates a new loop on the right-hand needle.
- Use the right-hand needle to pull the new loop through the old loop. Insert the needle into the loop on your left index finger and pull the right-hand needle with the new loop through the old loop. This creates your first cast-on stitch.
- Repeat steps 3-5 to cast on the desired number of stitches for your blanket. Keep casting on stitches until you have the required number of stitches on your needle. You can count the stitches by gently running your fingers along the edge of the needle.
Once you have cast on all the stitches for your blanket, you can begin knitting the first row. Remember to keep the tension of your stitches consistent and to take your time as you work through the knitting process.
Now that you know how to cast on, you’re ready to start knitting your blanket!
Knitting the First Row: Basic Stitches
Once you have cast on your stitches using the long-tail cast on method, you are ready to start knitting the first row of your blanket. In this step, you will learn the basic knit and purl stitches.
To begin, hold the knitting needles with the cast-on stitches in your right hand. Insert the right needle into the first stitch on the left needle, going from left to right behind the left needle.
Hold the yarn in your left hand and wrap it counterclockwise around the right needle, crossing it over the left needle.
With your right hand, pull the right needle through the loop of yarn, bringing it through the stitch on the left needle.
Slide the stitch off the left needle, transferring it to the right needle. Congratulations! You have just completed your first knit stitch.
To purl a stitch, insert the right needle into the first stitch on the left needle, going from right to left in front of the left needle.
Hold the yarn in your left hand and bring it between the two needles, crossing it over the right needle.
With your right hand, pull the right needle through the loop of yarn, bringing it through the stitch on the left needle.
Slide the stitch off the left needle, transferring it to the right needle. Well done! You have just completed your first purl stitch.
Continue knitting the first row, alternating between knit and purl stitches, according to your desired pattern. Remember to take your time and practice, as knitting will become easier with experience.
Creating the Pattern: Knit and Purl Stitches
Before you start knitting your blanket, it’s important to understand the basic knit and purl stitches. These two stitches are the foundation of knitting and will be used throughout your project.
Knit Stitch:
The knit stitch is the most basic and commonly used stitch in knitting. It creates a smooth, V-shaped pattern on the right side of your work.
- Insert the right needle into the first stitch on the left needle, going from left to right.
- Wrap the yarn around the right needle, crossing it over the left needle from back to front.
- Using the right needle, pull the wrapped yarn back through the first stitch, sliding it off the left needle.
- Repeat these steps for each stitch until you reach the end of the row.
Note: In patterns, the knit stitch is often represented by the letter “K”.
Purl Stitch:
The purl stitch is another basic stitch in knitting. It creates a textured, bumpy pattern on the right side of your work, and a smooth, V-shaped pattern on the wrong side.
- Insert the right needle into the first stitch on the left needle, going from right to left.
- Wrap the yarn around the right needle, crossing it under the left needle from front to back.
- Using the right needle, pull the wrapped yarn back through the first stitch, sliding it off the left needle.
- Repeat these steps for each stitch until you reach the end of the row.
Note: In patterns, the purl stitch is often represented by the letter “P”.
By alternating these two stitches (knit and purl) in different combinations, you can create a wide variety of patterns and textures in your knitting. For example, a simple stockinette stitch pattern is created by knitting one row and then purling the next row.
Tip: It’s helpful to keep track of your stitches by using stitch markers or counting your stitches periodically. This will help ensure that your pattern stays consistent and that any mistakes can be easily identified and corrected.
Continuing the Rows: Increasing and Decreasing Stitches
Once you have mastered the basic knit stitch and purl stitch, you can start expanding your skills by increasing and decreasing stitches in your knitting project. These techniques allow you to create interesting patterns and shapes in your blanket.
Increasing Stitches:
To increase stitches, you can use various methods such as knitting into the front and back of a stitch, making yarn overs, or using the “make one” (M1) technique.
- Knitting into the front and back of a stitch: Insert your right needle into the front loop of the stitch as if to knit, but instead of pulling the yarn through and dropping the stitch off the left needle, bring the yarn to the back and insert the right needle into the back loop of the same stitch. Knit through the back loop and drop the stitch off the left needle.
- Yarn Over (YO): To create a yarn over, simply bring the yarn to the front of your work between the needles and then continue knitting the next stitch as usual. This creates an extra loop on your needle which counts as an increased stitch.
- Make One (M1): The M1 increase involves picking up the horizontal loop between two stitches and knitting into it. This creates a new stitch without leaving a visible hole. There are various ways to do the M1 increase, such as the “knitwise” or “purlwise” method.
Decreasing Stitches:
To decrease stitches, there are also several techniques you can use, including knitting two stitches together and slipping stitches.
- Knit Two Together (K2Tog): Insert your right needle through the next two stitches on the left needle as if you were going to knit them, and then knit them together as one stitch. This decreases the number of stitches by one.
- Slip, Slip, Knit (SSK): Slip the next two stitches one at a time as if to knit onto the right needle. Then insert the left needle into the front loops of these two slipped stitches and knit them together through the back loops. This also decreases the number of stitches by one.
By using these increasing and decreasing techniques, you can create various patterns and shapes in your knitted blanket. Experiment with different stitch combinations and try out different methods to see what works best for your project.
Finishing Your Blanket: Binding Off
Once you have completed your rows and have reached the desired length for your blanket, it’s time to finish it off by binding off. Binding off is the process of closing your stitches and creating a finished edge.
Here is a step-by-step guide on how to bind off your blanket:
- Start by knitting the first two stitches as you normally would.
- Insert the left needle into the first stitch on the right needle.
- Lift the first stitch over the second stitch and off the right needle. You should now have one stitch remaining on the right needle.
- Knit another stitch and repeat steps 2 and 3. Continue this process until you reach the end of the row.
- Once you have one stitch remaining, cut the yarn, leaving a tail that is long enough to weave in later.
- Thread the tail of yarn through the last stitch and pull tight to secure.
- Using a tapestry needle, weave in the loose ends of yarn along the edge of the blanket to hide them.
Now that you have bound off your blanket, it is complete! You can admire your finished project or give it as a gift to someone special. Enjoy the warmth and comfort of your knitted blanket!
Finishing Touches: Blocking and Weaving in Ends
Once you have finished knitting your blanket, there are a few important finishing touches to give it a polished look. Blocking and weaving in ends are necessary steps to ensure that your blanket looks its best and will hold up well over time.
Blocking:
Blocking is the process of shaping and evening out your knitted piece to give it a more professional appearance. To block your blanket, follow these steps:
- Fill a basin or sink with lukewarm water and add a small amount of wool wash or mild detergent.
- Gently submerge your knitted blanket in the water and let it soak for about 15 minutes.
- Remove the blanket from the water and gently squeeze out the excess water. Do not wring or twist the blanket.
- Lay the blanket on a clean, dry towel and roll it up tightly to remove more water.
- Unroll the towel and place the blanket on a flat surface, such as a blocking mat or clean towels.
- Use T-pins or blocking wires to pin the edges of the blanket into the desired shape and size, being careful not to stretch the stitches too much.
- Leave the blanket to dry completely, which may take several days depending on the thickness of the yarn.
- Once dry, unpin the blanket and it will retain its blocked shape.
Weaving in Ends:
Weaving in ends is the process of securing the loose yarn ends from your knitting to prevent them from unraveling. To weave in the ends of your blanket, follow these steps:
- Thread a tapestry needle with one of the loose ends.
- Insert the needle under several stitches on the backside of the blanket, making sure to follow the direction of the stitches.
- Pull the yarn through and cut off any excess.
- Repeat with any remaining loose ends, making sure to weave them in securely.
By blocking your blanket, you can even out any irregularities in your stitches and give it a professional finish. Weaving in ends ensures that your blanket remains intact and prevents any loose yarn from getting caught or snagged.
With these finishing touches, your knitted blanket will be ready to use or gift to someone special!
FAQ:
What materials do I need to knit a blanket?
To knit a blanket, you will need a pair of straight needles, a ball of yarn in the color of your choice, and a tapestry needle.
Do I need any previous experience in knitting to make a blanket?
No, this step-by-step guide is designed for beginners, so no previous knitting experience is required.
How long does it usually take to knit a blanket?
The time it takes to knit a blanket can vary depending on factors such as size, pattern complexity, and your knitting speed. On average, it may take several weeks to a few months to complete a blanket.
Can I use circular needles instead of straight needles?
Yes, you can use circular needles to knit a blanket if you prefer. However, this step-by-step guide specifically focuses on using straight needles.
What is the best type of yarn for knitting a blanket?
The best type of yarn for knitting a blanket will depend on your personal preference and the desired characteristics of the blanket. Generally, a soft and cozy yarn that is machine washable is a good choice for a blanket.
Can I customize the size and pattern of the blanket?
Yes, you can customize the size and pattern of the blanket according to your preference. This step-by-step guide provides a basic pattern, but you can modify it to suit your needs.


