Are you looking to stay warm during the colder months? Knitting your own balaclava is a fun and practical project that will keep you cozy when the temperature drops. Whether you’re a beginner knitter or looking for a new challenge, this step-by-step tutorial will guide you through the process of creating your own balaclava.
This beginner-friendly tutorial will cover everything you need to know to get started. We will go over the basic knitting stitches, materials you’ll need, and provide detailed instructions for each step of the process. Don’t worry if you’re new to knitting – we’ll break it down so it’s easy to understand.
Before we dive in, let’s talk about what exactly a balaclava is. A balaclava is a form-fitting headpiece that covers the head, face, and neck. It’s a versatile accessory that can be worn in various ways, providing warmth and protection in cold weather. Knitting your own balaclava allows you to customize it to your liking, from selecting the perfect yarn to adding embellishments.
So, whether you’re an experienced knitter looking for a new project or a beginner wanting to try something new, this step-by-step tutorial will help you create your very own balaclava. Grab your knitting needles and let’s get started!
What is a Balaclava?
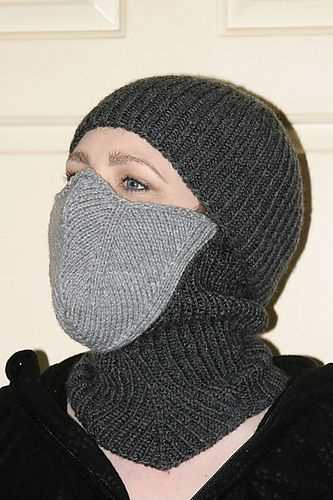
A balaclava is a type of headgear that covers the head, neck, and face, leaving only the eyes exposed. It is typically made of a knitted fabric, such as wool or acrylic, that provides warmth and insulation in cold weather conditions.
Originally, balaclavas were worn by soldiers during World War I to protect their faces from harsh weather conditions, particularly in the trenches. The name “balaclava” comes from the town of Balaklava in Crimea, where British troops are believed to have started using the headgear.
Nowadays, balaclavas serve a variety of purposes and are popular not only among military personnel but also among outdoor enthusiasts, winter sports participants, and those looking for added protection in cold climates. They provide coverage for the entire head and can be worn under helmets, hoods, or other headgear to provide extra warmth and protection from the elements.
Why knit a balaclava?
Knitting a balaclava can be a practical and fun project for several reasons:
- Winter Protection: A balaclava is designed to cover your head, neck, and face, providing excellent insulation and protection from cold weather. It keeps you warm and helps prevent frostbite and windburn.
- Customizable Fit: By knitting your own balaclava, you have the freedom to adjust the size and shape to fit your head perfectly. This ensures a comfortable fit and allows you to tailor it to your personal preferences.
- Unique Style: Knitting a balaclava allows you to create a one-of-a-kind accessory. You can choose different yarn colors, stitch patterns, and embellishments to make it reflect your personal style. It’s a great way to show off your creativity and stand out from the crowd.
- Portable Project: Knitting a balaclava can be a compact and portable project. You can easily carry it with you wherever you go, making it a great option for keeping your hands busy while traveling or waiting. It’s also a suitable choice for knitters who prefer smaller, quicker projects.
- Gift Idea: A handmade balaclava can make a thoughtful and practical gift for family and friends. You can create personalized designs for each recipient, making it a unique and cherished present.
These reasons make knitting a balaclava a worthwhile endeavor, whether you’re a beginner or an experienced knitter. Not only will you end up with a functional and stylish accessory, but you’ll also gain the satisfaction of creating something with your own hands.
Materials Needed
To knit a balaclava, you will need the following materials:
- Size 8 knitting needles
- Yarn in your desired color. It’s recommended to use a bulky weight yarn for warmth.
- Tapestry needle
- Scissors
- Measuring tape
- Stitch markers
- Stitch holder or scrap yarn
- Buttons or other embellishments (optional)
Make sure to choose a yarn that is suitable for the season and climate you live in. If you’re knitting for cold weather, look for wool or acrylic blends that provide warmth.
Once you have gathered all the necessary materials, you’ll be ready to start knitting your balaclava!
Yarn
Yarn is a crucial component in knitting a balaclava. It is the material you will use to create the fabric of the balaclava. There are various types of yarn available, each with its own characteristics and qualities. Here are some important factors to consider when choosing yarn for your balaclava:
- Fiber: Yarn can be made from various types of fibers, such as wool, cotton, acrylic, or a blend of different fibers. Each fiber has its own properties, affecting the warmth, softness, and durability of the finished balaclava.
- Weight: Yarn comes in different weights, ranging from lace weight to super bulky. The weight of the yarn will determine the thickness and heaviness of the balaclava. For a balaclava, it is generally recommended to use a medium-weight yarn.
- Color: Yarn comes in a wide variety of colors, allowing you to choose the perfect shade for your balaclava. Consider choosing a color that complements your outfit or matches your personal preference.
- Texture: Yarn can have different textures, such as smooth, fluffy, or textured. The texture of the yarn will affect the appearance and feel of the balaclava. Consider the texture you prefer and whether it suits the design of the balaclava.
Before starting your balaclava project, it is important to check the yarn label for information on recommended needle size, gauge, and washing instructions. This will ensure that you choose a yarn that is compatible with your knitting pattern and that you can properly care for the finished balaclava.
If you are a beginner knitter, it is recommended to choose a yarn that is easy to work with, such as a smooth medium-weight yarn. This will make it easier to see your stitches and avoid any potential frustration. As you gain more experience, you can start experimenting with different types of yarns and textures to create unique balaclavas.
Needles
When it comes to knitting a balaclava, choosing the right needles is essential. The type and size of needles you use can greatly affect the outcome of your project. Here are some things to consider when selecting your needles:
- Type of Needles: There are various types of knitting needles available, such as straight needles, double-pointed needles, and circular needles. For a balaclava, circular needles are recommended as they allow you to easily knit in the round, avoiding the need for seaming.
- Material: Knitting needles can be made from different materials, including metal, wood, and plastic. The choice of material is a matter of personal preference. Metal needles are commonly used for their durability, while wooden needles provide a warmer feel and are ideal for those who have sensitive hands. Plastic needles can be a budget-friendly option.
- Size: The size of your knitting needles will determine the gauge and overall size of your balaclava. The recommended needle size for a balaclava can vary depending on the yarn weight used and your desired tension. Check the yarn label for a recommended needle size range and use a needle that gives you the desired tension, as indicated in your knitting pattern.
Once you have chosen the right needles for your balaclava project, you can start knitting and following the step-by-step tutorial to create your cozy and functional headwear.
Other Supplies
Aside from the knitting needles and yarn, there are a few other supplies that you will need to complete your balaclava project.
- Scissors: You will need a pair of scissors to cut the yarn and any excess thread.
- Tapestry Needle: A tapestry needle is used for sewing in loose ends and finishing the project.
- Stitch Markers: Stitch markers are helpful in keeping track of your stitches and marking important points in the pattern.
- Measuring Tape: A measuring tape is useful for ensuring that your balaclava fits properly.
- Row Counter: A row counter can be used to keep track of the number of rows you have knitted.
- Blocking Materials: Blocking materials such as a foam mat and blocking pins may be needed to shape and block your finished balaclava.
Having these supplies on hand will make the knitting process smoother and more enjoyable. It’s always a good idea to gather all your supplies before starting a project to ensure that you have everything you need.
Choosing the Right Pattern
When it comes to knitting a balaclava, choosing the right pattern can make a big difference in the final result. Here are some factors to consider when selecting a pattern:
- Skill Level: Consider your knitting skills before choosing a pattern. If you’re a beginner, look for simple and straightforward patterns with clear instructions. If you’re more experienced, you can try more complex patterns with intricate details.
- Size: Balaclavas come in different sizes, so make sure to choose a pattern that matches your intended recipient’s head size. Some patterns may include multiple sizes, while others may require adjustments to fit properly.
- Style: Balaclavas can have different styles, such as full face coverage, partial face coverage, or even just a neck warmer. Consider the style you prefer and choose a pattern that matches your desired look.
- Yarn Type: Take into account the type of yarn you want to use for your balaclava. Some patterns may recommend specific yarn weights or fiber types. Make sure to choose a pattern that matches your yarn choice or be prepared to make adjustments to accommodate the chosen yarn.
- Pattern Source: There are many sources for knitting patterns, including books, magazines, and online platforms. Consider the source of the pattern and whether it provides clear instructions and support if needed. Read reviews or seek recommendations from other knitters to ensure you select a reliable pattern.
Remember, choosing the right pattern is an important step in knitting a balaclava. Take your time to find a pattern that aligns with your skill level, desired style, and yarn choice. Once you have the perfect pattern, you’ll be on your way to knitting a cozy and stylish balaclava.
Considerations
Before starting your knitting project, there are a few things to consider:
- Materials: Choose the right yarn and knitting needles for your balaclava project. Wool or acrylic yarns are popular choices due to their warmth and durability. Make sure to check the recommended needle size for the yarn you select.
- Gauge: Check the gauge before you start knitting to ensure that your finished balaclava will have the correct fit. The gauge refers to the number of stitches and rows per inch. Use a swatch to measure your gauge and adjust your needle size if necessary.
- Pattern: Find a suitable pattern or create your own. Look for a pattern that matches your skill level and provides clear instructions for each step. If you’re a beginner, opt for a simple pattern with basic stitches.
- Size: Consider the size of the balaclava you want to knit. Take measurements of the wearer’s head circumference and use them as a guide to determine the number of stitches to cast on. You can also refer to a size chart if available.
- Shape and Style: Decide on the shape and style of your balaclava. Some balaclavas have a full-face coverage, while others have an opening for the eyes and mouth. Think about the purpose of the balaclava and the desired level of warmth and protection.
- Color and Design: Choose the color and design for your balaclava. Consider the wearer’s preferences and any additional features you would like to incorporate, such as stripes or patterns. Keep in mind that darker colors may provide better sun protection.
- Additional Features: Think about any additional features you would like to add to your balaclava, such as a ribbed edge, ear flaps, or tassels. These elements can add style and functionality to your finished project.
Suggested Patterns
If you’re a beginner knitter, it’s best to start with some simple patterns. Here are a few pattern suggestions to help you get started:
- Basic Balaclava: This pattern is perfect for beginners. It uses basic knit and purl stitches and is a great way to practice your skills.
- Ribbed Balaclava: This pattern adds a bit of texture to the balaclava by incorporating ribbing. It’s still beginner-friendly, but gives your finished piece a more unique look.
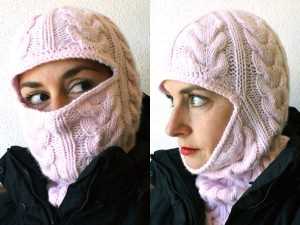
- Cabled Balaclava: If you’re feeling more adventurous, try a cabled balaclava. This pattern uses cable stitches to create a more intricate design. It’s a great way to challenge yourself and learn new techniques.
When choosing a pattern, make sure to consider your skill level and the amount of time you have to dedicate to the project. It’s important to choose a pattern that matches your abilities and time constraints to ensure a successful knitting experience.
| Website | Description |
|---|---|
| Ravelry | A popular knitting and crochet community with a large collection of patterns. |
| Lion Brand Yarn | A website that offers a variety of knitting patterns, along with helpful tutorials and resources. |
| LoveCrafts | An online marketplace for all things knitting, including patterns, yarn, and supplies. |
Remember to always read through the pattern before starting to ensure you have all the necessary skills and materials. Happy knitting!
Casting On
Before you can start knitting your balaclava, you’ll need to cast on your stitches. Casting on is the process of creating the foundation row of stitches on your knitting needle.
There are several methods you can use to cast on, but for this project, we recommend using the long-tail cast on method. This method creates a neat and stretchy edge that is perfect for the balaclava.
To cast on using the long-tail method, follow these steps:
- First, measure out a length of yarn that is approximately three times the width of your finished balaclava. This will be the “long tail” that you will use to create your stitches.
- Make a slipknot at one end of your yarn, leaving a small loop.
- Hold the slipknot in your right hand, with the yarn tail over your thumb and the working yarn over your index finger.
- Insert the knitting needle into the slipknot from left to right, going under the yarn tail and over the working yarn.
- Bring the needle over the top of the yarn tail and under the working yarn, creating a loop on the needle.
- Repeat steps 4 and 5 until you have cast on the desired number of stitches. It can be helpful to count the stitches as you go to ensure accuracy.
Once you have completed the cast on, you are ready to start knitting the balaclava according to the pattern instructions. Remember to maintain an even tension as you work and keep track of your stitches.
Note: Casting on is an essential skill in knitting, and there are many different methods you can explore. If the long-tail cast on doesn’t work for you, feel free to experiment with other methods and find one that feels comfortable and suits your knitting style.
FAQ:
Why would I want to knit a balaclava?
A balaclava is a versatile accessory that can keep your head, neck, and face warm in cold and windy weather. It is particularly useful for outdoor activities like skiing, snowboarding, or hiking.
Is knitting a balaclava difficult?
Knitting a balaclava can be a bit challenging for beginners, but with some practice and patience, it is definitely achievable. The step-by-step tutorial will guide you through the process and help you learn the necessary techniques.
What materials do I need to knit a balaclava?
To knit a balaclava, you will need yarn, knitting needles, a tapestry needle, and scissors. The type of yarn and needle size will depend on the pattern you choose to follow. It’s best to consult the pattern for specific recommendations.
Do I need any specific knitting skills to knit a balaclava?
Basic knitting skills are recommended for knitting a balaclava. You should know how to cast on, knit, purl, increase, decrease, and bind off. If you are not familiar with these techniques, it would be helpful to learn them before attempting to knit a balaclava.
Can I customize the balaclava to fit my own head?
Yes, you can easily customize the balaclava to fit your own head by adjusting the size and adding or subtracting stitches. The tutorial will provide guidance on how to make these modifications.
Are there any tips for avoiding common knitting mistakes?
Some tips for avoiding common knitting mistakes include counting your stitches regularly, checking your gauge, using stitch markers to keep track of specific sections, and taking your time to read and understand the instructions before starting a new part of the project.
How long does it typically take to knit a balaclava?
The time it takes to knit a balaclava can vary depending on your knitting speed and experience level. On average, it may take several days to a week or more to complete the project, especially if you are a beginner. It’s important to be patient and enjoy the process.


