Knitting in the round is a popular technique used by many knitters to create seamless projects such as hats, socks, and sweaters. When working in the round, it’s important to know how to join a new ball of yarn to ensure a smooth transition without any gaps or loose ends.
Joining yarn may seem intimidating at first, but with a few simple steps, you’ll be able to seamlessly add a new ball of yarn to your knitting in no time. Here’s a step-by-step guide to help you join yarn when knitting in the round.
Step 1: When you’re ready to join a new ball of yarn, leave a tail of about 6 inches on both the old and new yarns. This will give you enough length to weave in the ends later. Hold the old yarn and the new yarn together with your fingers.
Step 2: Knit the first stitch with both yarns held together. This will help secure the new yarn in place and prevent any gaps in your knitting. You can also choose to tie a small knot with the old and new yarns to ensure they stay together securely.
Step 3: Continue knitting with the new yarn, leaving the old yarn hanging at the back of your work. As you knit, be sure to keep the tension consistent to avoid any loose stitches.
By following these simple steps, you’ll be able to join yarn seamlessly and continue knitting in the round without any interruptions. Happy knitting!
Gather Your Materials
Before you start joining yarn when knitting in the round, make sure you have all the necessary materials:
- Yarn: Choose the yarn that you want to use for your project. Make sure you have enough yarn to complete the project, as well as an extra length for joining.
- Knitting Needles: Select the appropriate size of knitting needles based on your yarn and desired gauge.
- Tapestry Needle: You will need a tapestry needle to weave in the yarn tails after joining.
- Stitch Marker: A stitch marker will help you keep track of your rounds and prevent any mistakes.
- Scissors: Have a pair of scissors handy to cut the yarn when joining.
Once you have gathered all your materials, you are ready to start joining yarn when knitting in the round. Make sure to have them all within reach before you begin.
Prepare Your Yarn Ends
Before you begin joining your yarn when knitting in the round, you need to prepare your yarn ends. Here are the steps to follow:
- Cut your yarn: Start by cutting the old yarn, leaving a tail that is about 6 inches long.
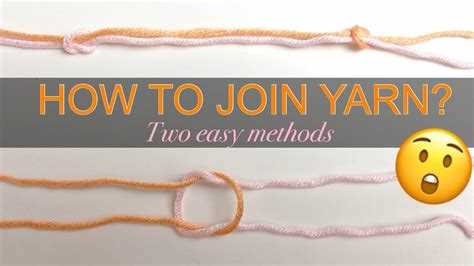
- Join the new yarn: Take the new yarn and tie it to the old yarn tail using a simple knot. Make sure the knot is secure but not too tight.
- Weave in the old yarn end: Use a tapestry needle to weave the old yarn end into the back of your work. This helps secure the yarn and prevents it from unraveling.
- Weave in the new yarn end: Take the new yarn end and weave it into the back of your work as well. Make sure to weave it in securely so it doesn’t come undone.
By preparing your yarn ends properly, you can ensure that your join is secure and that your work looks neat and professional. Remember to always leave a tail of yarn when cutting, as this makes it easier to weave in the ends later on.
Identify the Joined Stitch
When joining yarn in the round, it’s important to identify the first stitch that you need to work with. This stitch is known as the joined stitch and will help ensure that your joined yarn is secure and blends seamlessly with your existing work.
To identify the joined stitch:
- Look for an obvious marker or tie-off point where the previous yarn was joined or finished.
- Check the tail end of the new yarn to see if there is a knot or a distinct change in color or texture.
- Inspect the stitches on your needle and locate the stitch that is closest to the tail end of the new yarn.
- Place a stitch marker or create a small loop in the tail end of the new yarn to visually mark the joined stitch.
Identifying the joined stitch is essential because it ensures that your knitting pattern continues correctly from the point of joining. It also helps to prevent mistakes such as skipping or duplicating stitches when you start working with the new yarn.
By clearly identifying the joined stitch, you can confidently continue knitting in the round, knowing that your yarn has been securely joined and your project will maintain a consistent appearance.
Insert the New Yarn
Once you have determined that it is time to join a new yarn, follow these steps to insert the new yarn:
- Hold the new yarn next to your work, leaving a tail about 6 inches long.
- Insert the needle into the next stitch as if you were going to knit, but instead of using the old yarn, use the new yarn.
- Bring the new yarn over the right needle from back to front, creating a loop.
- Use the right needle to pull the loop through the stitch, completing the knit stitch with the new yarn.
- Tighten the stitch by gently pulling on both ends of the new yarn.
- Repeat these steps for the rest of the stitches in the round, ensuring that each new yarn is properly inserted and tightened.
Inserting the new yarn correctly is crucial to ensure that your knitting is secure and there are no loose ends. By following these steps, you will be able to seamlessly join a new yarn and continue working on your project.
Secure the Yarn Ends
Once you have joined the new yarn to your project, you’ll want to secure the loose ends to prevent them from unraveling. There are a few different methods you can use to secure the yarn ends:
- Weaving in the ends: This is the most common method and involves using a yarn needle to weave the loose ends into the fabric of your knitting. Insert the needle under the stitches on the wrong side of your work, following the path of the yarn. Weave the yarn in for a few inches, then cut off any excess.
- Knotting the ends: Another option is to tie the loose ends together in a secure knot. Make sure to leave a small tail above the knot to prevent it from coming undone. Trim any excess yarn after knotting.
- Using a Russian join: If you prefer a seamless finish, you can try a Russian join. This involves splitting the plies of the old and new yarn, then intertwining them to create a secure join. This method works best with plied yarns.
Whichever method you choose, make sure to secure the yarn ends tightly to ensure they don’t come loose during wear or washing. It’s also a good idea to check the security of your ends periodically to make sure they’re still intact.
Continue Knitting
Once you have joined your yarn and completed the necessary steps, you can continue knitting in the round. Here are a few tips to help you continue knitting smoothly:
- Hold your working yarn correctly: Make sure to hold the working yarn in your dominant hand and the knitting needles in your other hand. This will allow you to easily move the yarn over the needles as you continue knitting.
- Follow the pattern: If you are following a knitting pattern, continue following the instructions provided. Pay attention to any changes in stitches or stitch counts as you progress.
- Remember your stitch marker: If you placed a stitch marker at the beginning of your round, make sure to continue knitting until you reach it. This will help you keep track of your rounds and maintain an even stitch pattern.
- Check your tension: As you continue knitting, make sure to check your tension periodically. This will help ensure that your stitches are not too tight or too loose, resulting in a more even and polished finished project.
- Take breaks if needed: Knitting in the round can be a repetitive process, so it’s important to take breaks if you start to feel any discomfort or tension in your hands or wrists. This will help prevent any strain or injuries.
Weave in the Yarn Ends
Once you have finished knitting in the round and have joined your new yarn, you will need to weave in the ends to secure them and give your project a neat finish. Here are the steps to weave in the yarn ends:
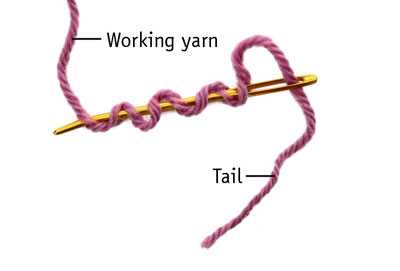
- Start by threading the yarn end onto a yarn needle. Make sure to leave a tail that is long enough to be woven in without unraveling.
- Insert the needle through the wrong side of your knitting, close to where the yarn end starts.
- Weave the needle through the stitches, following the path of the yarn to create an invisible line.
- If you are weaving in a natural fiber yarn, like wool, it is best to weave the yarn end in a different direction than the yarn itself to prevent unraveling. For synthetic yarns, you can weave in the yarn end in the same direction.
- Weave the yarn end back and forth through the stitches for a few inches or until you feel it is secure.
- Gently tug on the yarn end to make sure it is secure.
- Trim any excess yarn, leaving a small tail that is hidden within the stitches.
Once you have woven in all the ends, your knitting project will have a professional and finished look. Take care to weave in the yarn ends neatly and securely to ensure that they won’t come undone with use or washing. Happy knitting!
Enjoy Your Finished Knitting Project
Congratulations! After all your hard work and dedication, you have finally completed your knitting project. Now it’s time to sit back, relax, and enjoy the fruits of your labor. Here are a few tips to help you fully appreciate your finished creation:
- Inspect your work: Take a close look at your finished project and admire the intricate details and stitches. Check for any mistakes or areas that might need some touch-up. Don’t be too critical of yourself, though – remember that handmade items are meant to have a unique and personal touch.
- Try it on: Put on your completed knitted piece, whether it’s a sweater, hat, scarf, or something else. Feel how it fits your body and explore how it complements your style. Take some time to appreciate how your knitting skills have transformed a simple ball of yarn into a wearable item.
- Show it off: Proudly display your finished project to others. Share it with friends, family, or fellow knitting enthusiasts. Post a photo on social media and bask in the compliments and admiration you receive. Take pride in your accomplishment and encourage others to try their hand at knitting.
- Extend its life: To ensure that your knitted item stays in good condition for a long time, take proper care of it. Follow the washing instructions specific to the type of yarn used and store it in a safe place. Consider adding a moth repellent to protect it from damage.
- Experiment with new projects: Now that you have completed one project, don’t be afraid to challenge yourself with new and more complex ones. Use the skills you’ve acquired and the confidence gained from this project to tackle bigger knitting adventures. The possibilities are endless!
Remember, knitting is not just a means to an end; it is also a journey that brings joy and fulfillment. Cherish every stitch and savor the satisfaction that comes with completing a knitting project.
FAQ:
How do I join yarn when knitting in the round?
Joining yarn when knitting in the round is a necessary technique for connecting a new yarn to the existing yarn. To join yarn, you have to start by leaving a tail of about 6 inches. Then, insert the needle into the first stitch of the new round, place the new yarn over the needle, and pull it through the stitch. Lastly, knit the next stitch with the new yarn, making sure to leave a small tail to weave in later.
What is the purpose of joining yarn when knitting in the round?
Joining yarn when knitting in the round allows you to continue working on your project without interruption. It is essential for adding a new ball of yarn when the old one runs out or when you want to change colors. This technique ensures that your knitting remains continuous and seamless.
Should I use a knot to join yarn?
No, it is generally not recommended to use a knot when joining yarn. Knots can create bulk and may be visible in your finished knitting. Instead, it is better to use a technique called “spit splicing” for joining yarn in natural fibers like wool. For synthetic fibers, you can use the method described earlier, where you weave the ends in later.
Can I join yarn in the middle of a round?
Yes, you can join yarn in the middle of a round if you need to add a new color or if you run out of yarn. To do this, simply follow the same steps as joining yarn at the beginning of a round. Make sure to leave a short tail to weave in later. The join may be slightly more noticeable in the middle of a round, but it can be hidden with careful weaving and placement of the join.
Why is it important to leave a tail when joining yarn?
Leaving a tail when joining yarn is essential for securing the join and preventing it from unraveling. By leaving a tail of about 6 inches, you have enough length to weave in the ends later and ensure that the join is secure. Without a tail, the join may come undone while you are knitting or when washing the finished project.
What should I do with the unused yarn when joining a new ball?
When joining a new ball of yarn, leave the unused yarn attached to your work. As you continue knitting with the new yarn, it will catch and secure the unused yarn, preventing it from coming loose. Once you have finished knitting, you can weave in the tail of the unused yarn to hide it and ensure a neat finish.
Is it okay to join different weights of yarn?
It is generally not recommended to join different weights of yarn when knitting in the round. Unevenly joining different weights can create an uneven tension and affect the appearance and drape of your project. It is best to work with yarns of the same weight to ensure a consistent and professional-looking finish.


