Joining knit squares is an essential skill for any knitter. Whether you’re working on a blanket, a scarf, or any other project that involves multiple squares, knowing how to join them seamlessly is important to create a polished finished product. In this step-by-step guide, we will walk you through the process of joining knit squares with ease.
Before we get started, it’s important to note that there are several methods you can use to join knit squares. The method we will be focusing on is called the mattress stitch. This technique creates an invisible seam that blends the squares together, creating a professional-looking result.
To begin, lay out your squares in the desired pattern. This will help you visualize how they will come together and ensure that you have the correct orientation. Once you have your squares arranged, thread a tapestry needle with a strand of yarn that matches the color of your squares.
Pro Tip: If you want your seam to be extra secure, you can double up your yarn by using two strands together.
Starting at the bottom corner of one square, insert the needle under the first horizontal bar of the edge stitch. Pull the needle through, leaving a tail of yarn on the backside. Repeat this step on the corresponding corner of the adjacent square.
Continue working your way up the edge, stitching under the horizontal bar of each stitch. Be sure to keep your tension even, neither too tight nor too loose, to create a smooth seam. When you reach the top corner of the squares, secure the yarn by weaving the needle through the stitches on the backside before cutting the excess.
Repeat this process for the remaining sides of the squares, making sure to match the corners and maintain even tension as you go. Once all the squares are joined, weave in any remaining loose ends and give your finished product a gentle block to even out the stitches.
With this step-by-step guide, you can confidently join knit squares and create beautiful, seamless projects. Practice your mattress stitch technique, and soon you’ll be able to create stunning blankets, scarves, and more.
Gather Your Materials
Before you start joining your knit squares, make sure you have everything you need:
- Knit squares – This guide assumes you have already finished knitting your individual squares.
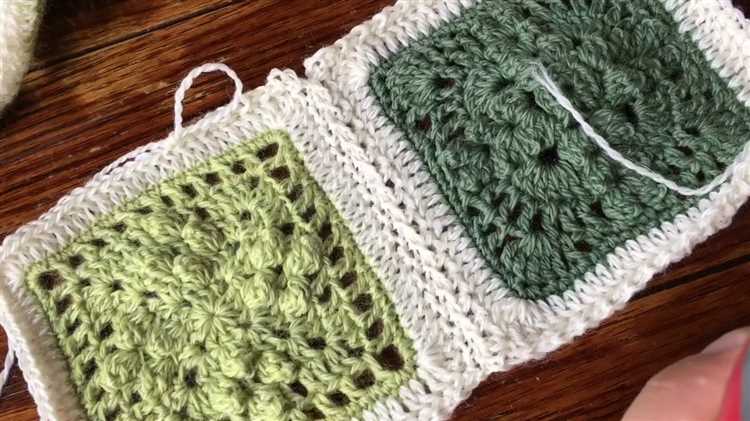
- Yarn – Choose a yarn that matches the colors of your squares or opt for a contrasting color for a unique look.
- Yarn needle – A blunt-ended needle will make it easier to weave in the yarn tails and join the squares.
- Scissors – You’ll need a pair of scissors to cut the yarn. Make sure they are sharp and suitable for cutting yarn.
Having all these materials ready will ensure a smooth and hassle-free process of joining your knit squares.
Lay out your squares
Before you start joining your knit squares, lay them out in the desired formation to ensure that the pattern and colors are visually appealing. This step will help you plan the layout and achieve the desired aesthetic for your finished project.
If you have a large number of squares, you can use a table or a clean and flat surface to arrange them. If you prefer, you can also use a design software or app to create a virtual representation of your layout. This can help you visualize the final result and make any necessary adjustments before you start joining the squares.
Consider factors such as color distribution, pattern symmetry, and overall design balance as you arrange the squares. You may want to alternate colors, create a gradient effect, or arrange them randomly for a more eclectic look. Take your time and experiment with different layouts until you find the one that suits your project best.
If you have a specific pattern or design in mind, refer to any diagrams or charts provided with the pattern. These resources can guide you in laying out the squares in the correct order to achieve the desired look.
Choose a joining method
Once you have all your knit squares ready, it’s time to choose a joining method. There are several options available, so you can pick the one that suits your preferences and the look you want to achieve for your final project.
1. Whipstitch: This is the most common and simple method of joining knit squares. With a blunt needle and yarn in a contrasting color, sew a running stitch along the edges of the squares, working from the right side of the fabric. This method creates a visible seam on the right side of the project.
2. Mattress stitch: This method creates an invisible seam on the right side of the project. With matching yarn and a blunt needle, insert the needle under the V-shaped stitches along the edge of the squares, alternating sides. This technique creates a smooth and nearly undetectable seam.
3. Slip stitch: This method is similar to the whipstitch, but instead of sewing through the fabric, you slip the needle under the top loops of the stitches. This creates a decorative raised seam on the right side of the project.
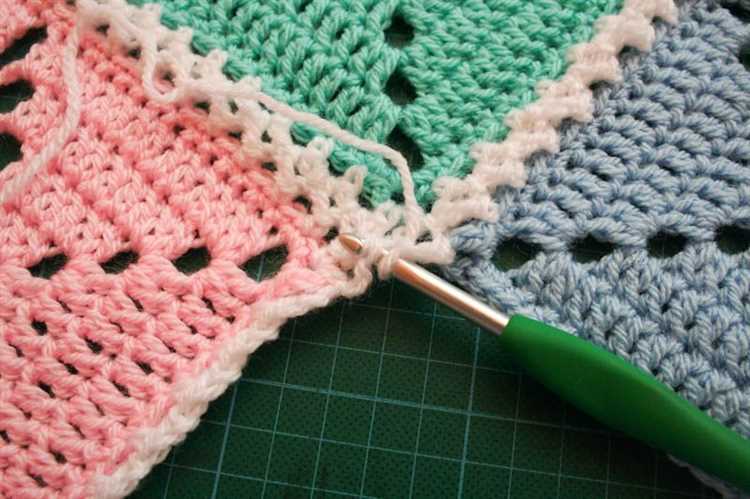
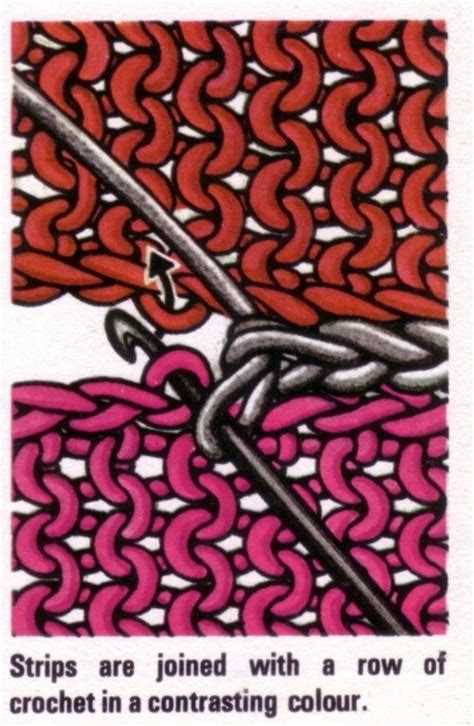
4. Crochet join: If you know how to crochet, you can use this technique to join your knit squares. With a crochet hook and yarn, work slip stitches or single crochet stitches through the loops along the edge of the squares. This method creates a decorative and sturdy seam.
5. Three-needle bind off: This is a knitting technique used to join live stitches together. It creates a neat and sturdy seam without the need for sewing. With three knitting needles, hold the squares with the right sides facing each other and knit the stitches from both needles together as if you were binding off.
6. Latch hook: This method requires a latch hook tool. Insert the hook through the loops along the edges of the squares, pull a loop of yarn through, and attach it to the corresponding loop on the other square. This creates a secure and decorative join.
No matter which joining method you choose, make sure to take your time and ensure that the squares are aligned and the tension is consistent. Practice on a smaller sample before joining your final project to ensure you are happy with the result.
Start joining your squares
Now that you have all your knit squares ready, it’s time to start joining them together. Follow these steps to join your squares with ease:
- Lay out your squares: Arrange your squares in the desired pattern or layout. This will help you visualize how they will come together.
- Choose a joining method: There are several methods you can use to join your squares, including mattress stitch, whip stitch, and slip stitch. Choose the method that you are most comfortable with or try out different methods to see which one you prefer.
- Prepare your yarn and needles: Cut a long length of yarn that is longer than the seam you need to make. Thread the yarn onto a yarn needle. If you prefer using knitting needles for joining, make sure you have the appropriate needle size for your yarn.
- Joining the squares: Start at one corner of the first square and insert your needle or knitting needle into the corresponding stitch of the second square. Pull the yarn through, leaving a small tail for weaving in later if needed. Continue to join the squares together stitch by stitch, following the line of stitches or pattern on each square.
- Continue the process: Repeat the joining process with the remaining squares until all the squares are connected. Take your time and make sure the seams are neat and even.
Once all the squares are joined together, you can weave in any loose ends or trim them if necessary. Give your finished project a gentle blocking if desired to help relax the stitches and even out the seams. Congratulations, you have successfully joined your knit squares!
Secure the ends
Once you have finished joining all of your knit squares, it’s time to secure the ends. This step is essential to ensure that your squares do not come undone and create a messy final result.
To secure the ends, you have a few options:
- Weaving in the ends: This method involves using a yarn needle to thread the loose ends of yarn from each square back through the stitches. Start by threading the needle with the loose end, then insert the needle under a few stitches, going in the opposite direction of the knitting. Repeat this process for each loose end, making sure to pull the yarn tight to secure it.
- Knotting the ends: If you prefer a more secure method, you can tie small knots at the end of each square. Take the loose ends and tie them together tightly, making sure to leave a small tail. Trim the excess yarn.
Whichever method you choose, be sure to test the strength of your joins by gently tugging on the squares. If any squares feel loose, go back and reinforce the join.
Once you have secured all of the ends, your knit squares will be joined securely and ready for further knitting or finishing touches.
Block your finished project
Blocking is an essential step in the finishing process of a knitted project. It helps to even out stitches, smooth the fabric, and give the project its final shape. Here are the steps to block your finished project:
- Prepare your materials: You will need blocking pins or wires, a blocking board or mat, and a spray bottle filled with water.
- Soak your project: Fill a basin or sink with lukewarm water and gently submerge your project. Let it soak for about 15 minutes to allow the fibers to fully absorb the water.
- Remove excess water: Carefully lift your project out of the water and gently squeeze out the excess water. Avoid wringing or twisting the fabric as this can damage the fibers.
- Pin or shape your project: Lay your project flat on a clean towel or blocking mat. Use blocking pins or wires to pin the edges of your project to the desired shape and size. Make sure to measure and align the edges to achieve a symmetrical result.
- Mist with water: Use the spray bottle to mist your project with water. This will help the fibers relax and conform to the desired shape.
- Leave to dry: Allow your project to air dry completely. Avoid moving or disturbing it until it is completely dry to maintain the shape.
- Remove the pins: Once your project is fully dry, carefully remove the pins or wires. The fabric should hold its shape and the stitches should be more even and defined.
Blocking may seem like an extra step, but it can make a huge difference in the finished appearance of your project. It is well worth the time and effort to achieve professional-looking results.
Add finishing touches
Once you have joined all your knit squares together, it’s time to add the finishing touches to your project. Here are some steps to help you complete your project with ease:
- Weave in loose ends: Use a tapestry needle to weave in any loose ends of yarn that may be sticking out from your joins. This will give your project a clean and polished look.
- Block your project: Depending on the type of yarn you used, it may be beneficial to block your project. Blocking helps to shape and even out the squares, making them more uniform in size and appearance.
- Add a border: Consider adding a border to your project to give it a more finished look. You can use a contrasting color of yarn or the same color as your squares. There are many different border stitch patterns to choose from, so pick one that complements your project.
- Finishing touches: Lastly, take a moment to inspect your project for any loose threads or imperfections. Snip any excess yarn and make any necessary adjustments to ensure your project is looking its best.
Once you have completed these finishing touches, your knit squares project is ready to be enjoyed. Whether it’s a cozy blanket, a decorative pillow, or any other creative endeavor, the joining process is an important step that gives your project its final form. Sit back, relax, and admire your handiwork!
Enjoy your completed project
Congratulations on completing your project! Now that you have joined all your knit squares, you can enjoy the final result of your hard work. Take a moment to admire your finished product and share your accomplishment with friends and family.
If it’s a blanket or a pillowcase, you can now use it to keep warm and cozy during chilly evenings or decorate your living space. If it’s a garment or accessory, you can wear it with pride and showcase your knitting skills.
Here are a few tips to help you make the most of your completed project:
- Take care of your item by following the care instructions for the yarn you used. This will help ensure that your project stays in good condition for as long as possible.
- Consider gifting your creation to someone special. Handmade gifts are always appreciated and cherished.
- Show off your project on social media or in a knitting community. Joining a community of fellow knitters can provide you with inspiration for future projects and a chance to connect with others who share your passion.
- Experiment with different yarns, textures, and patterns for your next project. Knitting is a versatile craft, and there are endless possibilities to explore.
- Lastly, don’t forget to relax and reward yourself for a job well done. Treat yourself to a cup of tea or a favorite treat while you enjoy your finished project.
Remember, knitting is a skill that improves with practice, so don’t be discouraged if your first project isn’t perfect. The more you knit, the better you’ll become, and the more beautiful and complex your future creations will be.
Happy knitting and enjoy your completed project!
FAQ:
What is the purpose of joining knit squares?
The purpose of joining knit squares is to create a larger piece of fabric or a finished project, such as a blanket or a sweater.
What tools do I need to join knit squares?
You will need a tapestry needle and some yarn that matches the color of your squares to join them together.
What is the most common method of joining knit squares?
The most common method of joining knit squares is using the mattress stitch, which creates an invisible seam.
Can I use a different stitch to join my knit squares?
Yes, you can use a whipstitch or a slip stitch to join your knit squares if you prefer a more visible seam.
Do I need to block my knit squares before joining them?
It is recommended to block your knit squares before joining them to ensure that they are all the same size and shape.


