If you’re an aspiring knitter or looking to expand your knitting skills, learning how to yarn over is an essential technique to master. Yarn overs are used to create eyelet patterns, increase stitch counts, or create decorative holes in your knitting. This technique involves wrapping the yarn around your needle in a specific way, creating an extra stitch and an elongated stitch in the process.
Yarn overs are commonly used in lace knitting and can add a delicate and airy feel to your projects. They can be used to create beautiful shawls, scarves, or even intricate stitch patterns in sweaters. With a little practice, you’ll be able to incorporate yarn overs into your knitting projects effortlessly.
In this easy step-by-step guide, we’ll walk you through the process of how to yarn over. You’ll learn the different methods to execute this technique, whether you’re a continental or English knitter. We’ll also provide tips on how to fix common mistakes and troubleshoot any issues you may encounter along the way.
So grab your knitting needles and yarn, and let’s dive into the world of yarn overs. With a little practice and patience, you’ll soon master this technique and be able to create beautiful, intricate designs in your knitting projects.
What is Yarn Over?
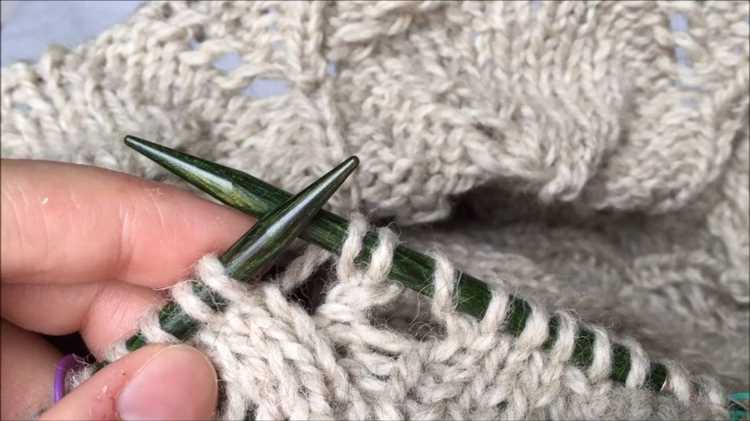
In knitting, a yarn over (abbreviated as YO) is a technique used to create an extra stitch on your knitting needle. It is commonly used in lace knitting patterns and creates an open and airy effect in the fabric.
When you perform a yarn over, you are essentially wrapping the yarn around the needle to create a loop. This loop will be treated as a regular stitch in your pattern and can be used to create decorative motifs, increases, or eyelet holes.
Yarn overs are usually paired with other knitting techniques such as knitting stitches together, purling, or working decreases to create a desired effect in your knitting project.
Here’s a step-by-step guide on how to yarn over:
- Bring the working yarn to the front of your work if you are knitting or to the back if you are purling.
- Take the working yarn over the top of the right-hand needle from back to front.
- Continue with the next stitch in your pattern.
When reading a knitting pattern, you will often come across the abbreviation “YO” or “YO twice”. These indicate that you need to perform a yarn over to create the desired effect in your project.
It’s important to note that yarn overs do not use any additional yarn. Instead, you are simply repositioning the working yarn to create the loop.
Yarn overs can be used in various ways to add texture and interest to your knitting projects. They can be used to create lacy patterns, decorative accents, or even to increase the number of stitches you have on your needle.
Ultimately, yarn overs are a versatile knitting technique that can be easily mastered with a little practice. They add a beautiful touch to your projects and allow you to create unique and eye-catching designs.
Importance of Yarn Over in Knitting
Yarn over is an essential technique in knitting that creates an extra stitch and an eyelet hole in your fabric. It is commonly used in lace knitting patterns and is also known as “yo” in knitting abbreviations. While it may seem like a simple technique, mastering the yarn over is crucial for achieving certain stitch patterns and designs.
1. Creating decorative designs: Yarn overs are often used to create decorative designs in knitted garments. By strategically placing yarn overs in your pattern, you can create lace motifs, openwork patterns, and intricate details that add visual interest to your knitting. Yarn overs are particularly popular in shawls, scarves, and delicate accessories.
2. Increasing stitches: Yarn overs are also used to increase stitches in your knitting. By wrapping the yarn around the needle and creating an extra loop, you effectively add a new stitch to your work. This is especially useful when shaping garments or creating patterns that require increasing the number of stitches in specific areas.
3. Transitioning between different stitch patterns: Yarn overs are often used as a transition between different stitch patterns in knitting. They provide a smooth and elegant way to move from one stitch pattern to another, creating a seamless flow in your knitting. Yarn overs can act as a bridge between lace motifs, cable patterns, and stockinette stitch, making your knitted fabric appear cohesive.
4. Adding drape and lightness: Yarn overs create openwork in your knitting, resulting in a fabric that is lightweight and has excellent drape. This makes them ideal for knitting garments that need to be breathable and airy, such as summer tops, lightweight shawls, and lacy cardigans. Yarn overs allow the fabric to have more movement and give a delicate and feminine touch to your knitting.
5. Enhancing stitch definition: Yarn overs create eyelet holes in your knitting, which can enhance the visibility of certain stitch patterns. When combined with other stitches, such as knit and purl stitches, yarn overs create unique textures and patterns. This is especially true in lace knitting, where yarn overs can highlight the intricate lace motifs and make them stand out.
In conclusion, learning how to yarn over is essential for knitters who want to explore and create beautiful lace patterns, increase stitches, add drape and lightness, and enhance the stitch definition in their knitting. By mastering this simple technique, you open up a world of possibilities for creating stunning and intricate knitted fabric.
Benefits of Mastering Yarn Over Technique
Mastering the yarn over technique can greatly enhance your knitting skills and open up a whole new range of possibilities for your projects. Here are some of the benefits of learning and incorporating the yarn over technique into your knitting repertoire:
1. Creating decorative holes and eyelets
One of the main uses of the yarn over technique is to create decorative holes and eyelets in your knitting. This can be useful for adding visual interest to a pattern or creating lace-like designs. By mastering yarn over, you can easily incorporate these elements into your projects, whether it’s a shawl, scarf, or sweater.
2. Increasing stitches and shaping
Another benefit of the yarn over technique is its ability to increase stitches and create shaping in your knitting. By placing a yarn over between stitches, you can increase the stitch count and create a wider fabric. This is particularly useful when knitting garments that require shaping, such as increases for sleeves or shaping for a fitted waist.
3. Adding texture to your knitting
Yarn overs can also be used to add texture to your knitting. By strategically placing yarn overs in specific patterns or sequences, you can create unique textures and patterns in your fabric. This can help differentiate your knitting from plain stockinette or garter stitch, and add an extra element of interest to your projects.
4. Creating lace patterns
Lace knitting often relies on yarn overs to create the airy and delicate appearance of the lace motifs. By mastering the yarn over technique, you can confidently tackle lace knitting patterns, as you will already be comfortable with the yarn over stitch. This opens up a whole new world of intricate lace designs that you can incorporate into your knitting projects.
5. Improving your overall knitting skills
Learning and mastering the yarn over technique will improve your overall knitting skills. It will allow you to become more familiar with different stitch patterns and techniques, and expand your knitting knowledge. By challenging yourself to learn new techniques, such as yarn overs, you will become a more confident and skilled knitter.
In conclusion, mastering the yarn over technique has numerous benefits for knitters. It allows you to create decorative holes and eyelets, increase stitches and shape your knitting, add texture, create lace patterns, and improve your overall knitting skills. So, don’t hesitate to practice and incorporate this technique into your knitting projects. Happy knitting!
Tools and Materials Needed for Yarn Over Knitting
- Knitting Needles: You will need a pair of knitting needles appropriate for the type of yarn you are using. The size of the needles will depend on the desired tension and the thickness of your yarn.
- Yarn: Choose a yarn of your choice. It can be any type of yarn, such as acrylic, wool, or cotton, depending on your preference. Make sure to choose a yarn that is compatible with your knitting needles.
- Tapestry Needle: This needle is used for weaving in loose ends and finishing your knitting project.
- Scissors: You will need a pair of scissors to cut yarn and trim loose ends.
- Stitch Markers: Stitch markers can be useful for keeping track of specific stitches or pattern repeats.
- Row Counter: A row counter is optional but can be helpful for keeping track of the number of rows you have worked.
- Knitting Pattern: If you are following a specific knitting pattern that requires yarn overs, make sure to have the pattern on hand.
These are the basic tools and materials you will need to get started with yarn over knitting. Once you have gathered all the necessary supplies, you will be ready to learn and practice the yarn over technique.
Step-by-Step Guide to Yarn Over Knitting
Yarn over knitting is a technique used to create an extra stitch and create decorative lace patterns. Understanding how to yarn over is crucial for knitters who want to create intricate patterns and add texture to their projects. Follow these simple steps to learn how to yarn over in knitting:
- Start with the working yarn in front of your work. Hold the knitting needle with the stitches in your left hand and the empty needle in your right hand.
- Move the yarn over the right needle. Take the working yarn and cross it over the right needle, from back to front. The yarn should now be positioned in front of your work.
- Continue knitting as usual. Insert the right needle into the next stitch on the left needle and knit it as you normally would. The yarn over becomes the next stitch on your needle.
Repeat these steps as necessary to create as many yarn overs as required for your pattern. You can also combine yarn overs with other knitting techniques to create unique lace patterns and designs. It’s important to note that the placement and frequency of yarn overs will vary depending on your pattern and desired outcome.
Yarn overs can be used to create eyelets, drop stitches, and decorative lace motifs. They add an airy and delicate effect to your knitting, making them perfect for shawls, scarves, and other lightweight accessories. Practice the yarn over technique and experiment with different stitch combinations to create beautiful and intricate designs in your knitting projects.
Tips and Tricks for Perfect Yarn Overs
Yarn overs are an important technique in knitting that create an eyelet or hole in your fabric. They are commonly used in lace patterns and can also be used to create decorative designs. Here are some tips and tricks to help you achieve perfect yarn overs:
- Understanding the Basics: Before attempting yarn overs, it’s important to have a good understanding of basic knitting stitches such as knit and purl. Make sure you are comfortable with these stitches before moving on to yarn overs.
- Consistent Tension: Maintaining a consistent tension is crucial when making yarn overs. If your tension is too tight, it will be difficult to work the next stitch. If it’s too loose, your yarn over may become too large and distort the pattern.
- Remembering Yarn Placement: Always bring the yarn to the front of your work before making a yarn over. This ensures that the yarn over is created in the correct spot and doesn’t interfere with other stitches.
- Using the Right Yarn: The type and thickness of yarn you use can greatly affect the appearance of your yarn over. Experiment with different yarns to find the one that gives you the desired effect.
- Counting Your Stitches: Keep track of how many yarn overs you have made in a row or pattern. This will help you stay on track and avoid mistakes.
- Practicing with Scrap Yarn: If you’re new to yarn overs or want to improve your technique, practice with scrap yarn before starting a project. This will give you the opportunity to experiment and make adjustments as needed.
- Blocking: After completing your project, blocking can help smooth out any uneven stitches and enhance the appearance of your yarn overs. Follow the blocking instructions specific to your yarn to achieve the best results.
By following these tips and tricks, you’ll be able to create beautiful and crisp yarn overs in your knitting. Remember, practice makes perfect, so don’t be afraid to try new patterns and techniques. Happy knitting!
Common Mistakes to Avoid When Yarn Over Knitting
Yarn over knitting is a technique used to create an intentional hole or an increase in your knitting project. While it may seem simple, there are a few common mistakes that beginners often make. Whether you’re new to knitting or just need a refresher, here are some common mistakes to avoid when yarn over knitting:
- Forgetting the yarn over: One of the most common mistakes is simply forgetting to yarn over. It’s easy to get caught up in the rhythm of knitting and accidentally skip this step. Always double-check that you have created a yarn over before continuing with your pattern.
- Yarning over in the wrong direction: Another common mistake is yarning over in the wrong direction. When yarning over, the yarn should always go from the back to the front over the right-hand needle. If you yarn over in the opposite direction, it can twist your stitches and create a messy look.
- Yarning over too tightly: Yarn overs are meant to create an open space in your knitting, but if you yarn over too tightly, it can close up the hole or create a tight stitch. Make sure to keep your yarn over loose enough to create the desired effect.
- Yarning over too loosely: On the other hand, yarning over too loosely can result in a large hole or loose stitch. It’s important to find the right balance between too tight and too loose when yarning over.
- Not counting the yarn over as a stitch: In some patterns, the yarn over is counted as a stitch. It’s important to follow the pattern instructions and include the yarn over in your stitch count. Skipping this step can throw off the entire pattern and lead to uneven rows.
- Confusing the yarn over with other knitting techniques: Yarn over knitting can be similar to other techniques, such as increasing or creating eyelets. It’s important to understand the differences and use the correct technique for your desired outcome.
- Not practicing: Yarn over knitting is a skill that takes practice to master. Don’t get discouraged if your first few attempts don’t turn out perfectly. Keep practicing and soon you’ll be able to yarn over with ease.
Avoiding these common mistakes will help you achieve clean and consistent yarn overs in your knitting projects. With practice and attention to detail, you’ll be able to incorporate this technique into your knitting repertoire and create beautiful and intricate designs.
FAQ:
What is yarn over in knitting?
Yarn over is a technique in knitting that involves bringing the yarn from the back of the work to the front, creating an extra stitch on the needle. It is commonly used to create eyelets or decorative holes in the fabric.
Why is yarn over important in knitting?
Yarn over is important in knitting because it allows you to create decorative holes or eyelets in your fabric. It can be used in lace knitting patterns to create intricate designs and add texture to your project.
How do you perform a yarn over in knitting?
To perform a yarn over in knitting, you simply bring the working yarn from the back of the work to the front, creating an extra loop on the right needle. This creates a new stitch and creates a decorative hole in the fabric.


