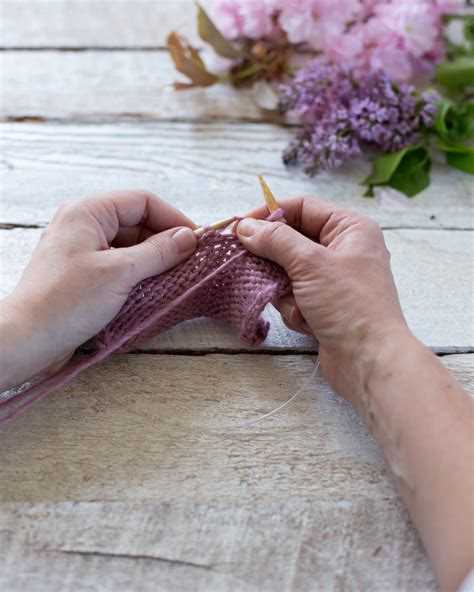
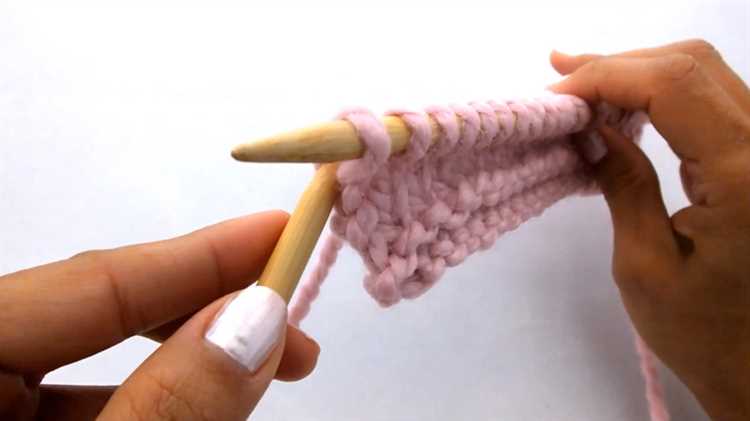
Knitting is a popular craft that allows you to create beautiful and cozy items. Whether you’re a beginner or an experienced knitter, mistakes can happen. One of the most common mistakes in knitting is making a wrong stitch. Don’t worry, though, because undoing a knit stitch is easier than you might think!
To undo a knit stitch, you’ll need a pair of knitting needles and a crochet hook. Start by identifying the stitch you want to undo, which will be the one on top of the needle. Insert the crochet hook into the stitch from right to left, and carefully pull the yarn through the stitch, creating a loop on the hook.
Next, slide the loop off the knitting needle and onto the crochet hook. Gently pull the crochet hook to unravel the stitch, being careful not to pull too tightly. Repeat this process for each stitch you want to undo until you reach the desired point in your knitting.
Undoing a knit stitch is a useful skill to have in your knitting repertoire. It allows you to fix mistakes without having to start your project over from the beginning. With a little practice, you’ll be able to confidently undo any knit stitch and continue on with your knitting project.
Remember, knitting is a journey of learning and exploration. Embrace your mistakes and use them as opportunities to improve your skills. Undoing a knit stitch is just another step in becoming a better knitter. So don’t be afraid to try new techniques and challenge yourself!
Undoing a Knit Stitch: Step-by-Step Instructions
Learning how to undo a knit stitch can be a useful skill when you make a mistake in your knitting project. It allows you to fix errors and correct any issues before continuing with your pattern. Here are step-by-step instructions on how to undo a knit stitch:
- Identify the knit stitch you want to undo. Look for the V-shaped stitch on the right-hand needle.
- Insert the left-hand needle into the stitch from left to right, going behind the right-hand needle. This will position the stitch on the left-hand needle.
- Using the left-hand needle, lift the stitch over the top of the right-hand needle.
- Slide the stitch off the right-hand needle and onto the left-hand needle, undoing the knit stitch.
- Repeat steps 1-4 for each knit stitch you want to undo.
It is important to be careful while undoing knit stitches to avoid any damage to your knitting project. Take your time and work patiently to avoid dropping any stitches or creating additional mistakes.
Once you have undone the knit stitches, you can continue with your knitting project as desired. Remember to pay attention to your pattern and count your stitches as you go.
Undoing a knit stitch is a valuable skill for any knitter to have. By following these step-by-step instructions, you can easily fix any mistakes and continue with your knitting project smoothly.
Gather Your Materials
Before you begin undoing a knit stitch, make sure you have all the necessary materials. This way, you’ll be fully prepared and won’t need to stop in the middle of the process to go gather something.
Here’s what you’ll need:
- Knitting needles: You’ll need a pair of knitting needles appropriate for the yarn you’re working with.
- Yarn: Gather the yarn that you used to create the knit stitch you want to undo.
- Scissors: You’ll need a pair of scissors handy in case you need to cut the yarn.
- Tapestry needle: This needle will be used to weave in any loose ends once you’ve undone the stitch.
Once you have all your materials, find a comfortable and well-lit workspace where you can work on undoing the stitch without any distractions.
Identify the Knit Stitch
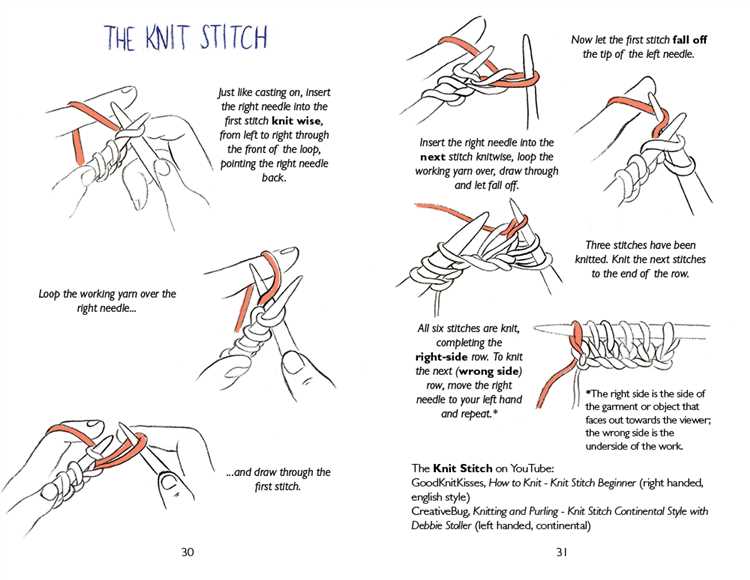
The knit stitch is one of the basic stitches used in knitting. It is the most common stitch and creates a “V” shape on the right side of the fabric. Identifying the knit stitch is crucial when it comes to undoing or fixing mistakes in your knitting project.
To identify the knit stitch, look for the following characteristics:
- V-shaped pattern: The knit stitch creates a series of “V” shapes on the right side of the fabric. These V-shaped loops are formed by looping the yarn around the needle and pulling it through the previous stitch.
- Smooth texture: The knit stitch has a smooth texture compared to other stitches like the purl stitch. It creates a neat and even surface on the right side of the fabric.
- Right-leaning slant: If you look closely at the V-shaped loops, you’ll notice that they lean to the right. This slant is a characteristic of the knit stitch and helps differentiate it from other stitches.
By familiarizing yourself with the characteristics of the knit stitch, you’ll be able to easily identify it in your knitting project. This knowledge will come in handy when you need to undo or fix a knit stitch mistake.
Prepare your Knitting Tools
Before you begin undoing a knit stitch, you will need a few tools to help you along the way. Here are the essential knitting tools you’ll need:
- Knitting needles: You will need a pair of knitting needles that matches the size of the yarn you are using.
- Yarn: Make sure you have the same yarn that you used for the knitted project you are working on.
- Tapestry needle: This needle will be used to weave in the loose ends of the yarn and secure them.
- Scissors: You will need a pair of scissors to cut the yarn if necessary.
- Stitch marker: A stitch marker can be helpful to mark a specific stitch if you need to keep track of it.
- Row counter: If you want to keep track of the rows you have undone, a row counter can be useful.
Having these tools ready will make the process of undoing a knit stitch much easier and more efficient. Make sure you have them on hand before you start.
Insert the Left Needle
To undo a knit stitch, you will need to insert the left needle into the stitch you want to undo. Make sure you identify the stitch correctly before proceeding.
- Hold the knitting needle with the stitches in your right hand.
- Take the left needle and insert it into the stitch from left to right, going from the front to the back of the stitch.
- Gently slide the left needle through the stitch, keeping it parallel to the right needle.
- Once the left needle is fully inserted, you can release the stitch from the right needle, allowing it to rest on the left needle.
Make sure you don’t drop any other stitches while inserting the left needle. Take your time and be careful during this step.
Note: The process of undoing a knit stitch can vary slightly depending on the knitting pattern and the specific stitch you are undoing. However, the general steps remain the same.
Slip the Right Needle Under the Loop
Once you have identified the stitch that you want to undo, you need to insert the right needle into it. To do this, follow these steps:
- Hold the working yarn in your right hand and the left needle in your left hand.
- Insert the right needle under the loop of the stitch from left to right.
- Make sure the right needle is positioned behind the left needle.
This will create a new loop on the right needle, with the previous stitch still intact.
Note: If you are undoing several stitches, you should repeat this process for each stitch in reverse order, starting from the most recent stitch.
Slipping the right needle under the loop is an essential step in undoing a knit stitch, as it allows you to unravel the stitch without damaging the surrounding stitches or the knitted fabric.
Remove the Working Needle
After you have successfully picked up the dropped stitch, it’s time to remove the working needle from the stitch that is on it.
Here are the steps to remove the working needle:
- Hold the working needle with the stitch in your left hand. Make sure to keep a firm grip on the stitch to prevent it from unraveling.
- Use your right hand to gently pull the working needle out of the stitch.
- Be careful not to unravel or drop any other stitches while removing the needle.
Once you have removed the working needle, the stitch will be left on the other needle and you can continue knitting or fixing any mistakes in your project.
Remember: Removing the working needle is just one step in the process of undoing a knit stitch. Make sure to follow the previous steps as well to ensure a successful undoing of the stitch.
Pull the Yarn Through
Now that you have inserted the tip of your left-hand needle into the front of the stitch you want to undo, you are ready to pull the yarn through. This step is crucial in undoing a knit stitch, as it will unravel the stitch and allow you to fix any mistakes or make adjustments to your work.
To pull the yarn through, simply grab the working yarn with your right hand and gently pull it through the stitch. Make sure to hold onto the stitch with your left hand to prevent it from slipping off the needle.
- Hold the working yarn with your right hand.
- Gently pull the yarn through the stitch.
- Continue pulling the yarn until the stitch is completely unraveled.
It is important to maintain tension on the yarn as you pull it through the stitch. This will ensure that the stitch unravels smoothly and does not become tangled or snagged.
Once the stitch is completely unraveled, you can move on to the next stitch and repeat the process if needed. Keep in mind that when undoing multiple knit stitches, you will need to repeat these steps for each individual stitch.
By pulling the yarn through the knit stitch, you are effectively undoing the stitch and giving yourself the opportunity to correct or adjust your knitting. This skill is essential for any knitter to learn, as mistakes and changes are bound to happen during the knitting process.
Now that you know how to pull the yarn through, you can confidently fix any knit stitch mistakes or make adjustments to your knitting projects.
Finishing Touches and Practice
Once you’ve successfully undone a knit stitch, you’ll want to finish off any loose ends and neaten up your work.
If you’re using yarn, you can simply trim the excess yarn and weave the end into your project using a yarn needle. This will prevent any unraveling and give your finished piece a polished look.
For knitting projects that require seaming or joining pieces together, make sure to properly secure the ends and weave them in before moving on to the next step. This will ensure that your seams are strong and won’t come apart.
Once you’re comfortable with undoing a single knit stitch, you can practice undoing multiple stitches in a row. This skill is useful if you make a mistake in a large section of your knitting and need to rip back several rows.
Start by identifying the first stitch you want to undo, and carefully unravel it by pulling on the working yarn. If you need to undo multiple rows, continue unraveling one stitch at a time until you reach the desired point. Take your time and be patient, as this process can be a bit time-consuming.
Remember to keep track of your pattern and stitch count as you undo your work. It can be helpful to use stitch markers or notes to mark key points in your project, especially if you need to go back several rows.
Finally, don’t be discouraged if you make mistakes along the way. Knitting is a skill that requires practice and patience. Even experienced knitters make errors from time to time. The key is to learn from your mistakes and keep practicing.
By following these step-by-step instructions and practicing regularly, you’ll become more confident in your knitting abilities and be able to undo and fix mistakes with ease. So keep those knitting needles handy and happy knitting!
FAQ:
What is a knit stitch?
A knit stitch is a basic stitch used in knitting, where the yarn is pulled through a loop to create a new stitch on the needle.
Why would I need to undo a knit stitch?
You may need to undo a knit stitch if you made a mistake in your knitting or if you want to change the design or pattern in your project.
Does undoing a knit stitch affect the rest of the row?
No, undoing a knit stitch only affects the stitches you are undoing. The rest of the row remains unchanged.
Is it possible to undo multiple knit stitches at once?
Yes, it is possible to undo multiple knit stitches at once. Simply follow the step-by-step instructions for each stitch you want to undo, starting from the most recent stitch and working your way back.
Can I use the same method to undo a purl stitch?
No, the method to undo a purl stitch is slightly different. To undo a purl stitch, you need to insert the left-hand needle into the back of the stitch and follow the same steps as undoing a knit stitch.


