Seaming is an essential skill for any knitter, as it allows you to join your knitted pieces together to create a finished project. Whether you’re making a sweater, a hat, or a scarf, knowing how to seam knitting properly will ensure that your project looks polished and professional.
In this step-by-step tutorial, we will walk you through the process of seaming knitting with clear and easy-to-follow instructions. We will cover the most common seaming techniques, including mattress stitch and whip stitch, and provide tips and tricks to help you achieve seamless and invisible seams.
First, we will start by explaining the tools and materials you will need for seaming knitting, such as a yarn needle, scissors, and stitch markers. Then, we will guide you through the process of preparing your knitted pieces for seaming, including blocking and aligning your stitches.
Next, we will dive into the actual seaming techniques, breaking down each step with detailed descriptions and accompanying illustrations. We will highlight common mistakes to avoid and offer troubleshooting tips for when things don’t go as planned.
By the end of this tutorial, you will have the knowledge and confidence to seam knitting like a pro. Whether you’re a beginner knitter looking to expand your skills or an experienced knitter wanting to perfect your seaming technique, this tutorial will be a valuable resource for you.
Understanding the Basics of Seaming
Seaming is an essential technique in knitting that involves joining knitted pieces together to create a finished project. It is often used to connect sleeves to a sweater, attach panels of a blanket, or close the sides of a hat or mittens.
To successfully seam your knitting, it is important to understand the basic principles and techniques involved. Here are some key points to keep in mind:
1. Choosing the Right Seam
There are several types of seams you can use, depending on the look and function you want to achieve.
- Mattress Stitch: This is the most common and invisible type of seam. It is often used for joining side seams on garments or sewing panels together. Mattress stitch creates an almost invisible seam that blends in with the knitting.
- Backstitch: Backstitch is a strong and visible seam that is suitable for projects where durability is important, such as bags or cushions. It creates a definite line of stitching on the right side of the fabric.
- Whip Stitch: Whip stitch is a simple and decorative seam that is often used for joining crochet motifs or smaller knitted pieces together.
2. Stitch and Row Alignment
When seaming, it is important to align the stitches and rows of the pieces you are joining. This helps create a neater and more seamless finished look.
For mattress stitch, you will be seaming along the edge of the fabric, inserting your needle under two bars between stitches. For backstitch and whip stitch, you will be sewing through both layers of fabric.
3. Tension and Evenness
One of the challenges when seaming is maintaining an even tension throughout the seam. It is important to pay attention to the tension of your stitches and ensure they are consistent.
You should also avoid pulling the yarn too tightly or leaving it too loose, as this can affect the overall appearance and fit of your finished project.
4. Blocking and Finishing
Once you have finished seaming your knitting, it is important to block and finish your project. Blocking helps even out any inconsistencies in tension and allows the seam to settle into place.
You can use wet blocking or steam blocking, depending on the fiber content of your yarn. Also, don’t forget to weave in any loose yarn ends and trim them neatly for a professional finish.
By understanding these basic principles and techniques, you’ll be well-equipped to seam your knitting projects with confidence. Practice and experimentation will help you find the seam that works best for your specific project, ensuring a beautiful and durable finished result.
Choosing the Right Seaming Technique
When it comes to seaming knitted pieces together, there are several techniques you can use. The choice of technique will depend on the specific project and the desired finish. Here are a few common seaming techniques to consider:
- Whipstitch: This is the most basic and commonly used seaming technique. It involves sewing the edges of the pieces together with a needle and yarn in a whipstitch motion. This technique creates a visible seam but is relatively easy to do.
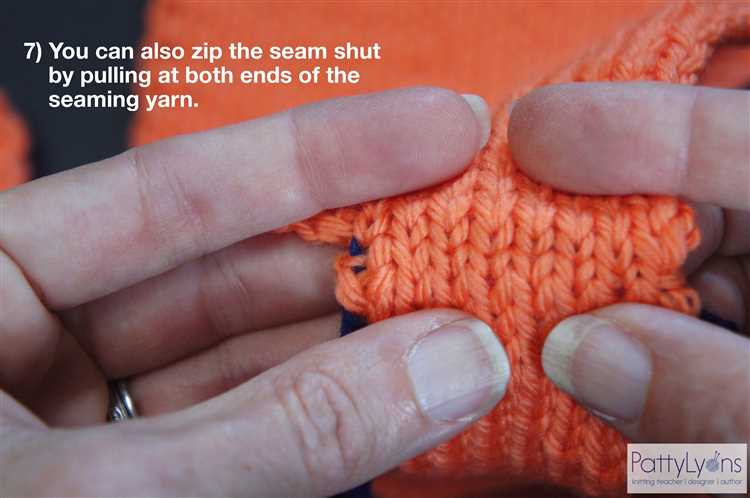
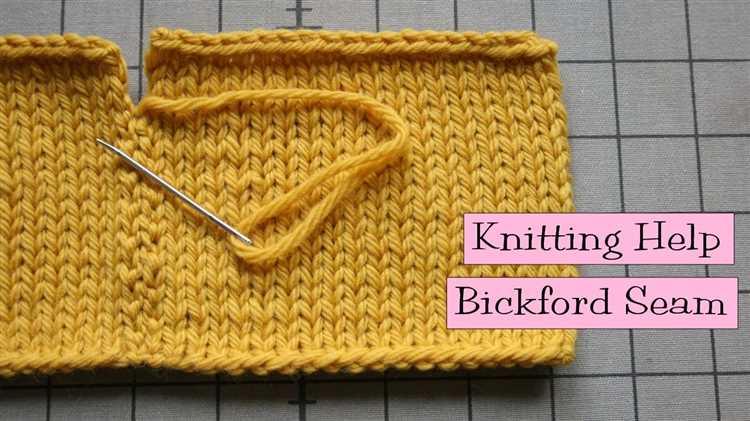
- Matress Stitch: This technique creates an invisible seam, making it ideal for garments or any project where you want the seam to be as discreet as possible. It involves sewing the edges together using a mattress stitch, which creates a flat vertical seam.
- Backstitch: Backstitch is another technique that creates a visible seam. It involves sewing the edges together by overlapping the stitches in a back-and-forth motion. This technique is commonly used for joining pieces that require extra strength or stability.
It’s important to choose the right seaming technique based on your project’s desired finish and the type of yarn used. Some techniques may work better with certain yarns or stitch patterns. Experiment with different techniques to find the one that works best for you and your project.
Gathering the Necessary Materials
Before you begin the process of seaming knitting, it’s important to gather all the necessary materials. Having everything you need on hand will make the process go smoother and faster.
Here is a list of materials you will need:
- Knitting Needles: You will need a pair of knitting needles in the same size as the ones you used to knit your project. This will ensure that your seams have the same gauge as your project.
- Yarn: You will need yarn in the same color and weight as your project. Make sure you have enough yarn to complete the seams.
- Tapestry Needle: A tapestry needle, also known as a yarn needle, is used to sew the seams together. Make sure you have a needle with a large eye that is easy to thread.
- Scissors: You will need a pair of scissors to cut the yarn when sewing the seams.
- Pins or Stitch Markers: Pins or stitch markers can be used to hold the pieces in place before sewing. This will help ensure that the seams are even and straight.
- Ruler or Measuring Tape: A ruler or measuring tape will help you measure the length of the seams and make sure they are the same on both sides.
Once you have gathered all the necessary materials, you are ready to begin seaming your knitting project.
Preparing Your Knitting for Seaming
Before you can start seaming your knitted pieces together, you’ll need to prepare the pieces by blocking and trimming any excess yarn. Here are the steps to get your knitting ready for seaming:
- Block your pieces: Start by washing and blocking your knitted pieces according to the instructions for your specific yarn. This step helps to even out the stitches and ensure that the pieces will fit together smoothly.
- Trim any excess yarn: Carefully examine each piece of knitting and trim any loose ends or excess yarn tails. It’s important to have a clean edge to work with when seaming, so take the time to tidy up any stray yarn.
- Lay out your pieces: Arrange your knitted pieces in the desired order and orientation, making sure to line up the edges that need to be seamed together. This will help you visualize how the finished project will look and ensure that you seam the correct edges.
- Follow the pattern: If you’re using a pattern, refer to the instructions for any specific seams or techniques that need to be used. Each pattern may have different requirements, so be sure to double-check before you start seaming.
- Prepare your materials: Gather the necessary materials for seaming, including a yarn needle, matching yarn, and any additional tools or notions your pattern may recommend. Having everything at hand will make the seaming process smoother and more efficient.
By properly preparing your knitting for seaming, you’ll set yourself up for success in achieving a beautifully finished project. Take the time to block, trim, and organize your pieces before moving on to the actual seaming process.
Aligning and Pinning Your Knitting
Before you begin seaming your knitting, it’s important to align the edges of your pieces and hold them in place with pins. This will ensure that your finished seam is neat and even. Here are the steps to align and pin your knitting:
- Lay your knitting pieces flat: Start by laying your pieces on a flat surface with the right sides facing up. Make sure the edges that need to be seamed are lined up and matching in length.
- Pin the corners: Begin by pinning the corners of your knitting pieces together. Insert a pin at each corner of the pieces, going through both layers of fabric. This will prevent the pieces from shifting as you work on aligning the rest of the edges.
- Continue pinning: With the corners secured, continue pinning along the edges of your knitting pieces. Place the pins about 1-2 inches apart, depending on the size of your stitches. Insert each pin perpendicular to the edge, going through both layers of fabric.
- Check alignment: Once you’ve finished pinning, check the alignment of your pieces. Make sure the edges are still matching up and that the tension is even across the seam. Adjust the pins if needed.
- Secure with additional pins: If your knitting pieces are long or heavy, consider using additional pins to provide extra support. Insert these pins diagonally across the seam, spacing them out evenly.
Now that you have aligned and pinned your knitting pieces, you’re ready to start seaming. Always double-check the alignment before sewing the pieces together to ensure a professional finish.
Joining the Pieces Together
After you have finished knitting all of the individual pieces for your project, it’s time to join them together. This process is called seaming or sewing, and it involves using a needle and thread to stitch the pieces together.
Here is a step-by-step guide on how to seam knitting:
- Gather your materials: You will need a yarn needle and a length of yarn in a similar color to your knitting project. Make sure the yarn is long enough to sew all the seams without needing to join a new piece.
- Arrange the pieces: Lay out the knitted pieces on a flat surface in the position they will be seamed together. This will help you visualize the final product and ensure that everything lines up correctly.
- Thread the yarn needle: Take the length of yarn and thread it through the eye of the needle. Tie a knot at the end of the yarn to prevent it from slipping out while sewing.
- Start seaming: Begin by placing the right sides of the knitting pieces together. This means that the front side of the knitting will be facing each other. Insert the needle through the first stitch of one piece, and then through the corresponding stitch of the other piece.
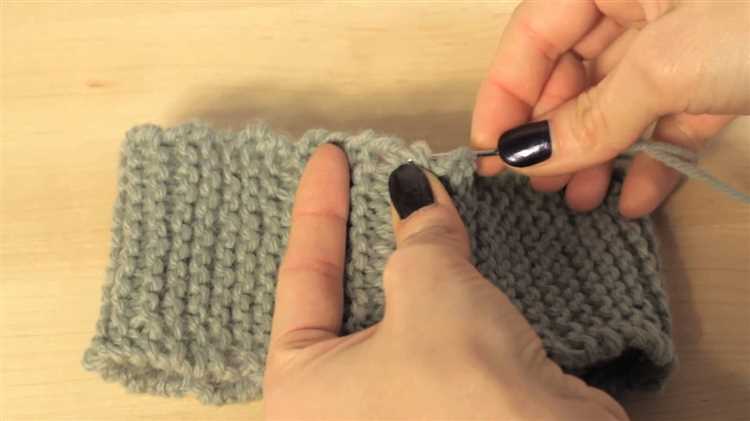
- Continue sewing: Using a whipstitch or mattress stitch, sew through the fabric, bringing the needle up and down through the stitches on both knitting pieces. Make sure to maintain an even tension as you sew to ensure that the seam is secure but not too tight.
- Tie off and hide the yarn: Once you have sewn all the way down the seam, tie off the yarn with a knot. Then, weave in the loose ends of yarn into the fabric to hide them. This will give your finished project a professional and polished look.
Remember to take your time and sew with care. It’s important to sew all the seams in the same manner to maintain a consistent look. With practice and patience, you will become more skilled at seaming and your finished knitting projects will look seamless and beautiful.
Finishing and Concealing Seams
Once you have finished knitting your project and all the pieces are ready to be assembled, it’s important to take the time to seam them together neatly and securely. Here are some step-by-step instructions to help you finish and conceal seams:
- Prepare your materials: Before you begin seaming, make sure you have the correct yarn and a yarn needle or tapestry needle. Choose a needle that is appropriate for the weight of your yarn.
- Lay out your pieces: Place the knitted pieces on a flat surface as they will appear when the project is completed. This will help you visualize how the pieces should be seamed together.
- Start with a secure stitch: Begin seaming by inserting the needle through the first stitch on one piece and then through the corresponding stitch on the other piece. Pull the yarn through, leaving a small tail. This will create a secure starting point for your seam.
- Choose your seam: There are several different methods for seaming knitting, including mattress stitch, whipstitch, and backstitch. Choose the method that is best suited for your project and desired aesthetic.
- Follow the seam pattern: Regardless of the method you choose, follow the seam pattern consistently as you work your way across the pieces. This will ensure a neat and even seam.
- Conceal yarn ends: As you seam, be sure to weave in any loose yarn ends to conceal them. This will give your project a clean and professional finish.
- Secure and finish: Once the seam is complete, secure the yarn by weaving it through several stitches on the wrong side of the fabric. Trim any excess yarn to finish.
Remember, practice makes perfect when it comes to seaming knitting. Take your time, be patient, and don’t be afraid to experiment with different techniques to find the one that works best for you and your project. With practice, you’ll be able to create beautiful, seamless knitted garments.
Final Tips and Tricks for Seamless Knitting
Seamless knitting can be a challenging technique for beginners, but with practice and the right strategies, you can achieve beautiful, professional-looking results. Here are some final tips and tricks to help you perfect your seamless knitting skills:
- Use stitch markers: To keep track of your stitches and ensure your knitting stays seamless, use stitch markers. Place them at the beginning and end of each section or pattern repeat.
- Count your stitches: Counting your stitches regularly will help you catch any mistakes or dropped stitches early on. It’s much easier to fix a mistake in a few rows instead of realizing it later when the knitting is complete.
- Block your knitting: Blocking your finished knitting can help even out any inconsistencies and improve the overall appearance. Follow the instructions for blocking specific to your yarn and project.
- Choose the right yarn: Certain yarns are better suited for seamless knitting than others. Look for yarns with good stitch definition and that are easy to work with. Avoid yarns that split easily or are too slippery.
- Take breaks when needed: Seamless knitting can be time-consuming, so it’s important to take breaks when you start to feel tired or frustrated. Taking breaks will help you maintain focus and prevent mistakes.
- Learn the various joining methods: There are different methods for joining your knitting, such as grafting or three-needle bind off. Experiment with different methods to find the one that works best for your project.
- Use blocking wires or pins: For projects with more complex shaping, such as sweaters or shawls, blocking wires or pins can be helpful to achieve a smooth and even finish.
- Practice, practice, practice: As with any new skill, practicing is key to improving your seamless knitting technique. Start with small projects and gradually work your way up to larger and more complex ones.
By following these tips and tricks, you’ll be well on your way to mastering seamless knitting. Don’t get discouraged if it takes some time to perfect your technique – with patience and persistence, you’ll be creating seamless garments and accessories that you’ll be proud to wear or give as gifts.
FAQ:
What is seaming in knitting?
Seaming in knitting is the process of joining two knitted pieces together using a sewing method.
Why is seaming important in knitting?
Seaming is important in knitting because it allows you to create a finished garment or project by joining different pieces together.
What are the different methods of seaming in knitting?
There are several methods of seaming in knitting, including mattress stitch, whip stitch, backstitch, and slip stitch.
How do I seam knitting using the mattress stitch?
To seam knitting using the mattress stitch, begin by placing the two pieces to be joined side by side with the right sides facing up. Thread a sewing needle with yarn, and starting at the bottom edge, insert the needle into the first stitch on one side, then into the corresponding stitch on the other side, creating a vertical line of stitches. Continue this process, pulling the yarn tight after each stitch, until the seam is complete.
Can I use a sewing machine to seam knitting?
While it is possible to use a sewing machine to seam knitting, it is generally not recommended as the stitches created by a sewing machine may not be as flexible or durable as hand-sewn stitches. Additionally, a sewing machine may stretch or distort the knitted fabric.


