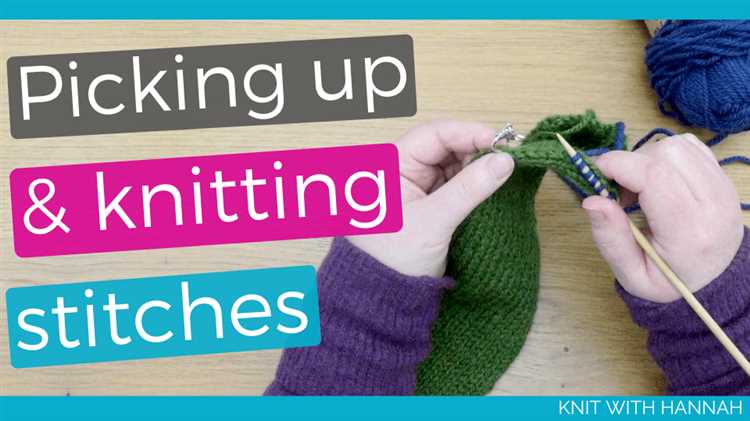
Do you enjoy knitting and want to expand your skills? One technique that every knitter should learn is how to pick up and knit stitches. This simple technique is used to add new stitches to your knitting project, whether it’s to create buttonholes, add decorative details, or fix mistakes. In this step-by-step tutorial, we will walk you through the process of picking up and knitting stitches, so you can confidently tackle any knitting project.
What does it mean to pick up and knit stitches?
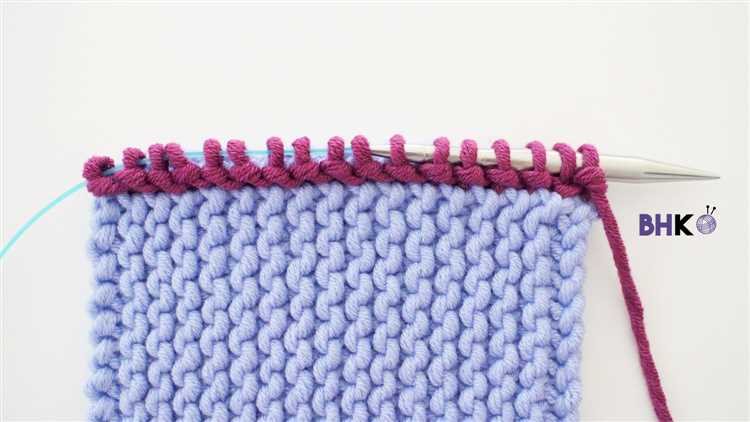
Picking up stitches involves using a knitting needle to create new stitches along the edge of your knitting. This edge can be a cast-on edge, a bound-off edge, or the edge of a knitted piece. By picking up and knitting stitches, you can create seamless transitions, add decorative borders, or fix mistakes within your project.
Why is it important to learn how to pick up and knit stitches?
Knowing how to pick up and knit stitches opens up a world of possibilities in your knitting. It allows you to add decorative elements to your projects, such as buttonholes, borders, or appliques. It also enables you to fix mistakes, like dropped stitches or uneven edges. By mastering this technique, you can take your knitting skills to the next level and confidently tackle more complex patterns.
“Learning how to pick up and knit stitches is an essential skill for any knitter. It allows you to add beautiful details to your projects and correct mistakes with ease.”
If you’re ready to enhance your knitting skills, let’s dive into this step-by-step tutorial on how to pick up and knit stitches. Grab your knitting needles and yarn, and let’s get started!
Basic Knitting Supplies
In order to get started with knitting, you will need a few basic supplies:
- Yarn: Choose a yarn that is suitable for the project you have in mind. There are many different types of yarn available, including different weights and fiber compositions. It’s important to choose a yarn that is appropriate for the intended use of your finished project.
- Knitting Needles: Knitting needles come in different sizes and styles. The size of the needles you need will depend on the yarn you are using and the gauge you want to achieve. The most common types of knitting needles are straight needles, which have a point at one end and a stopper at the other, and circular needles, which have a flexible cable connecting two needle tips.
- Tape Measure: A tape measure is a useful tool for measuring your knitting as you go. It can help you check your gauge and ensure that your project is the correct size.
- Scissors: You will need a pair of scissors to cut your yarn when you have finished a project or need to change colors. Make sure to keep them handy while knitting.
- Stitch Markers: Stitch markers are small, removable rings or clips that can be placed on your knitting needles to mark specific stitches or sections of your project. They can be helpful for keeping track of where you are in a pattern or reminding you to perform a certain action.
- Yarn Needle: A yarn needle, also known as a tapestry needle, is a large-eye needle used for weaving in loose ends of yarn and finishing your knitting projects.
These are the basic supplies you will need to get started with knitting. As you gain more experience and tackle different projects, you may find that you need additional tools or accessories. Happy knitting!
Choosing the Right Yarn
When learning how to pick up and knit, one of the most important decisions you will need to make is choosing the right yarn. The type of yarn you choose will have a big impact on the outcome of your knitting project.
Consider the fiber:
Yarn can be made from a variety of different fibers, each with its own unique qualities. Some common yarn fibers include:
- Wool: Wool yarn is known for its warmth and elasticity. It is a great choice for items like sweaters and hats.
- Cotton: Cotton yarn is light and breathable, making it ideal for summer garments and accessories.
- Acrylic: Acrylic yarn is budget-friendly and easy to care for. It is a versatile choice for a wide range of projects.
- Alpaca: Alpaca yarn is known for its softness and warmth. It creates luxurious garments and accessories.
Consider the weight:
The weight of the yarn refers to its thickness. Yarns are typically categorized into several weight classes, including:
- Fingering weight: Very fine yarn used for delicate projects like lacework.
- Sport weight: Lightweight yarn appropriate for garments and accessories.
- Worsted weight: Medium-weight yarn suitable for a wide range of projects.
- Bulky weight: Thick yarn that creates warm and cozy items.
- Hold the knitting needle with the cast-on stitches in your left hand, and insert the empty knitting needle into the first stitch from left to right.
- Wrap the yarn around your right-hand needle, bringing it to the front of your work.
- Using the right-hand needle, pull the wrapped yarn through the stitch, creating a new loop on the right-hand needle.
- Slide the original stitch off the left-hand needle, leaving only the new loop on the right-hand needle.
- Repeat steps 1-4 for each stitch until you have completed a row.
- Hold the knitting needle with the cast-on stitches in your left hand.
- Insert the right needle into the first stitch from right to left, just as you would for a knit stitch.
- With the yarn in front of the needles, bring it over the right needle, towards the back of the work.
- Wrap the yarn around the right needle counter-clockwise, from back to front.
- Using the right needle, pull the yarn through the stitch, creating a new loop on the right needle.
- Slide the original stitch off the left needle.
- Repeat steps 2 to 6 for each stitch until all the stitches have been purled.
- Knit Front and Back (KFB): This is one of the easiest methods to increase stitches. To do a KFB, knit into the front of the next stitch as you normally would, but don’t slide it off the left needle. Instead, insert the right needle into the back of the same stitch and knit it again. Then, slide both newly formed stitches off the left needle.
- Make One (M1): The M1 increase is nearly invisible and creates a smooth and uninterrupted fabric. To do an M1, insert the left needle from front to back into the horizontal strand that runs between the stitch just worked and the next stitch on the left needle. Then, knit into the back of this loop.
- Yarn Over (YO): YO is often used to create decorative holes in a knitted fabric. To do a YO, simply bring the yarn over the right needle from back to front before knitting the next stitch. On the next row, you’ll work into the YO as if it were a regular stitch.
- Bar Increase: The bar increase is a simple and quick method to add stitches. To do a bar increase, locate the horizontal strand that runs between two stitches. Insert the right needle from front to back under this strand, then knit into the back loop of this strand.
- Knit into Front and Back of Same Stitch (K1FB): Similar to the KFB increase, the K1FB creates two stitches out of one. To do a K1FB, knit into the front of the stitch as usual, but don’t slide it off the left needle. Instead, insert the right needle into the back of the same stitch and knit it again. Finally, slide both newly formed stitches off the left needle.
- Weaving in Ends: Use a tapestry needle to carefully weave in the loose ends of your yarn. This will help secure them and prevent any unraveling.
- Blocking: Depending on the type of yarn you used and the desired shape and size of your project, you may need to block it. Wet blocking involves soaking your project and gently reshaping it to the desired dimensions. Dry blocking involves steaming or pressing your project to achieve the same effect.
- Seaming: If you have knit multiple pieces, you will need to seam them together. This can be done using a mattress stitch, which creates an almost invisible seam.
- Adding Buttons or Fasteners: If your project requires closures, such as buttons or a zipper, now is the time to attach them. Make sure to place them evenly and securely.
Casting On
Casting on is the first step in starting a knitting project. It involves creating the foundation row of stitches on the knitting needle. There are several different ways to cast on, but the most common method for beginners is the long-tail cast on.
To begin the long-tail cast on, you will need to estimate the amount of yarn that you need. This can be done by measuring a length of yarn approximately three times the width of the finished piece. Make sure to leave a tail between 6 and 12 inches long.
Once you have measured the yarn, make a slipknot by crossing the yarn over itself and pulling one end through the loop. Place the slipknot on the needle, holding the tail end and the working end together.
Hold the needle in your right hand and the tail end of the yarn in your left hand. Insert the needle from right to left through the loop of the slipknot, then catch the working yarn with the tip of the needle and pull it through the loop.
Now you have one cast on stitch on your needle. Repeat this process for the desired number of stitches, making sure to keep the yarn tension consistent. Remember to hold the needle with the new stitch in your right hand and the yarn in your left hand as you work.
As you cast on more stitches, slide them down towards the base of the needle to give yourself more room. Keep practicing the long-tail cast on until you are comfortable with the technique. It may take a few tries to get the tension and stitch size right, but with practice, you will improve.
Once you have cast on all your stitches, you are ready to begin knitting your project! The cast on stitches will serve as the foundation for your work, allowing you to start creating the pattern or design.
Remember to take your time and be patient as you learn how to cast on. It is an essential skill in knitting, and with practice, you will become more confident in your abilities.
Knit Stitch
The knit stitch is one of the basic stitches in knitting. It forms a V-shaped pattern and is also known as the “knit stitch” or the “plain stitch.” This stitch is commonly used to create the main fabric in knitting projects, including scarves, sweaters, and blankets.
To knit a stitch, you will need a pair of knitting needles and a ball of yarn. Follow these steps to create the knit stitch:
Remember to keep your tension consistent and avoid pulling the yarn too tightly or too loosely.
The knit stitch creates a smooth and even fabric. It is reversible, meaning both sides of the work will look the same. This stitch is often used as a foundation for more advanced knitting techniques, such as ribbing, cables, and lace patterns.
Purl Stitch
The purl stitch is another basic knitting stitch that is commonly used in knitting patterns. It creates a bumpy texture on the right side of the fabric, opposite to the smooth texture of the knit stitch.
To purl, follow these steps:
Remember to keep the tension of the yarn consistent as you purl, and to keep the stitches on the needle from slipping off. Practicing the purl stitch will help you develop a smooth and even tension.
Increasing Stitches
Increasing stitches is an important technique in knitting that allows you to add extra stitches to your work. There are several ways to increase stitches, each resulting in a slightly different look. Here are a few common methods:
When increasing stitches, it’s important to follow your pattern instructions. The pattern may specify a particular method or placement for increasing. Pay attention to the desired outcome and choose the increase method accordingly. Practice these techniques to become comfortable with increasing stitches and create beautiful projects.
Finishing Techniques
Once you have completed your knitting project, it’s time to finish it off with some final touches. Here are a few finishing techniques to consider:
Remember, taking the extra time to properly finish your knitting project will ensure that it looks polished and professional. Don’t rush through these final steps!
FAQ:
What materials do I need to pick up and knit?
To pick up and knit, you will need knitting needles, yarn, and a crochet hook.
How do I pick up and knit stitches?
To pick up and knit stitches, insert the knitting needle into the desired stitch on the edge of your work, wrap the yarn around the needle, and pull it through the stitch to create a new loop on your needle.
What is the purpose of picking up and knitting?
Picking up and knitting is a technique used to add new stitches to your work, either for shaping or for joining different pieces together.
Can you pick up and knit on any type of knitting project?
Yes, you can pick up and knit on any type of knitting project, whether it’s a garment, an accessory, or a home decor item.
Is picking up and knitting difficult for beginners?
Picking up and knitting can be a bit challenging for beginners, but with practice and patience, you can master the technique.
Are there any tips or tricks for picking up and knitting?
Some tips for picking up and knitting include using a crochet hook to help pick up the stitches, making sure to maintain an even tension, and practicing on a scrap piece of fabric before attempting it on your actual project.


