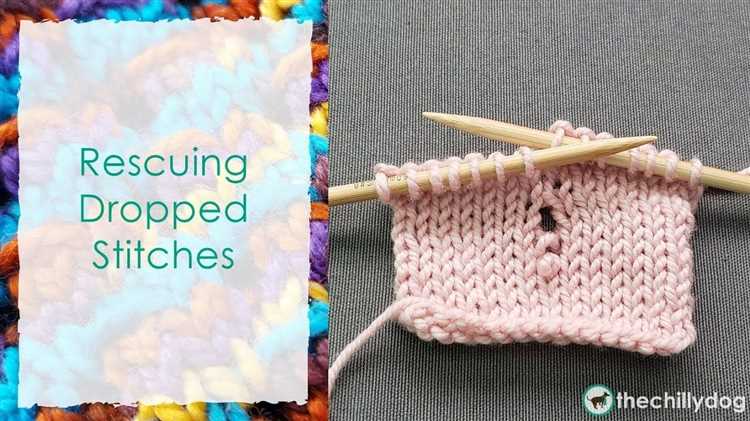
Knitting is a wonderfully relaxing and creative hobby, but it can be frustrating when you drop a stitch. Don’t worry! Picking up a dropped knit stitch is easier than you might think. With just a few simple steps, you’ll be able to salvage your work and keep knitting like a pro.
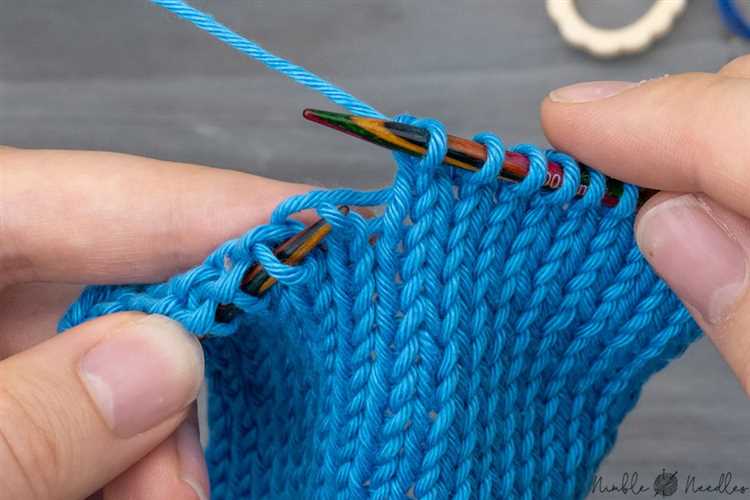
The first step is to identify the dropped stitch. Look for a loose loop in your knitting, usually a few rows down from your current row. This loop will be hanging out and not attached to any other stitches. Once you’ve found it, gently pull the loop to the right side of the work and place it on your knitting needle.
Next, carefully unravel the row directly above the dropped stitch until you reach the loop you just placed on your needle. As you unravel, be sure to catch the stitches with your other hand to prevent further damage. Once you’ve reached the loop, place it back on your needle, making sure it’s oriented correctly.
Finally, with your needle and yarn, recreate the missing stitches by carefully inserting your needle into the stitch below the one you just placed on your needle. Loop the yarn over the needle and pull it through to create a new stitch. Repeat this process for each dropped stitch until your work is intact. Remember to maintain an even tension throughout.
Pro tip: If you’re having trouble recreating the exact tension of the rest of your work, try using a smaller needle size for picking up the stitches. This can help create a tighter tension and prevent puckering.
Now that you know how to pick up a dropped knit stitch, don’t let a little mishap ruin your knitting project. With these easy steps, you’ll be able to fix any dropped stitch and continue knitting with confidence.
Step 1: Identify the dropped stitch
To fix a dropped knit stitch, the first step is to identify where the stitch has been dropped. Look for a small gap or extra yarn between two adjacent stitches. The dropped stitch will often be lower than the surrounding stitches.
It can be helpful to spread out the fabric and gently pull on the neighboring stitches to see if any of them are loose or have extra slack. This will indicate that a stitch has been dropped and needs to be picked up.
Tip: If you are having trouble identifying the dropped stitch, try using a stitch marker or safety pin to mark the spot where you think the dropped stitch is. This will help you keep track and prevent any further unraveling of the fabric.
Step 2: Stop knitting and secure the dropped stitch
When you notice a dropped stitch, it’s important to stop knitting immediately to prevent the dropped stitch from unraveling further. By stopping your knitting, you can focus on securing the dropped stitch before continuing with your project.
To secure the dropped stitch, follow these steps:
- Hold on to your work: Keep a firm grip on your knitting project to prevent any additional unraveling.
- Identify the dropped stitch: Locate the stitch that has been dropped. It will typically be a loop below the current row.
- Place a stitch marker or safety pin: Insert a stitch marker or safety pin through the dropped stitch to keep it in place temporarily.
- Prevent further unraveling: Use a spare piece of yarn or a stitch holder to secure the loop of the dropped stitch.
By following these steps, you can ensure that the dropped stitch is secured and won’t unravel any further while you continue with your knitting project. Once you have secured the dropped stitch, you can move on to the next step of fixing the stitch.
Step 3: Insert a crochet hook into the stitch below
Once you have identified the dropped stitch, you will need to insert a crochet hook into the stitch below it. This will allow you to pull the dropped stitch back up and fix the mistake. Here’s how you can do it:
- Hold your knitting needle with the stitches in your left hand and the crochet hook in your right hand.
- Insert the crochet hook from front to back and from right to left into the stitch below the dropped stitch.
- Make sure to catch the entire stitch with the crochet hook.
- Gently pull the crochet hook and the stitch up through the dropped stitch, bringing it back to the working position.
Remember to be careful and gentle when using the crochet hook to avoid causing any damage to your knitting. Take your time and make sure the stitch is secure before moving on to the next step.
Step 4: Hook the dropped stitch with the crochet hook
Once you have identified the dropped stitch, take your crochet hook and insert it into the loop of the dropped stitch from the front side.
Make sure that you are inserting the hook from the bottom up, going through the horizontal bar and catching the dropped stitch.
Once the crochet hook is inserted, gently pull the hook up, catching the dropped stitch and pulling it through the loop.
Always remember to be gentle and careful when working with dropped stitches, as you don’t want to cause any further damage to your knitting.
Continue to the next step to secure the dropped stitch and incorporate it back into your knitting.
Step 5: Pull the stitch through the loop
Once you have inserted the crochet hook through the dropped stitch, it’s time to pull the stitch through the loop.
- Hold onto the working yarn: Keep the tension on the working yarn with your left hand so that it doesn’t slip out.
- Gently pull the stitch: Use the crochet hook to pull the dropped stitch through the loop. Make sure to do it slowly and carefully to avoid any snags or tangles.
- Check the tension: Once the stitch is pulled through, check the tension of the stitch to ensure it matches the surrounding stitches. Adjust the tension as necessary.
- Continue knitting: After you have successfully picked up the dropped stitch, continue knitting as usual.
Remember, practice makes perfect! Don’t be discouraged if it takes a few tries to master this technique. With some patience and perseverance, you’ll be able to pick up dropped knit stitches like a pro.
Step 6: Slip the stitch back onto the knitting needle
Now that you have picked up the dropped stitch, it’s time to slip it back onto your knitting needle. This step will ensure that the stitch is in the correct position and ready to be worked.
- Hold your knitting needle with the pointed end facing the direction you are knitting.
- Insert the left-hand needle into the loop of the dropped stitch, from back to front.
- Slide the loop onto the left-hand needle, making sure it is sitting correctly on the needle.
- If necessary, adjust the tension of the stitch so that it matches the surrounding stitches.
Once the dropped stitch is securely back on the knitting needle, you can continue knitting as normal. Remember to check your work and make any necessary adjustments to ensure a professional-looking finish.
Step 7: Double-check your work
Once you have picked up the dropped knit stitch and completed the necessary steps to secure it, it is important to double-check your work to ensure that everything looks correct and in place.
Start by examining the area where the dropped stitch was located. Take a close look at the newly formed stitches and make sure they are aligned properly with the surrounding stitches. Ensure that the tension is consistent and matches the rest of your knitting.
Next, check the overall fabric for any signs of damage or irregularities. Look for any dropped stitches or twisted stitches that may have been missed during the repair process. This is especially important if you were working on a complex pattern or intricate stitch design.
If you notice any issues during your double-checking process, carefully go back and correct them. It’s better to make any necessary adjustments now rather than discovering them later when the piece is finished or when it’s too late to fix them.
Once you are satisfied with the results and everything appears to be in order, continue knitting or crocheting with confidence, knowing that you have successfully picked up and fixed a dropped knit stitch like a pro!
Step 8: Continue knitting as usual
Once you have successfully picked up the dropped stitch and secured it on the needle, you can continue knitting as you normally would. Make sure to insert the needle into the next stitch correctly and follow your knitting pattern.
If you are working on a stockinette stitch, continue knitting all the stitches in the row. If you are working on a pattern stitch, make sure to follow the pattern instructions for the next row.
Take your time and be mindful of your knitting tension as you continue working. It’s important to maintain an even tension to ensure that your finished project looks neat and professional.
Remember, mistakes happen to even the most experienced knitters. Don’t let a dropped stitch discourage you from completing your project. With practice and patience, you can easily fix dropped stitches and continue knitting with confidence.
FAQ:
What should I do if I drop a knit stitch?
If you drop a knit stitch, the first thing you should do is not panic. Take a deep breath and assess the situation. Then, using a crochet hook or a stitch holder, gently pick up the dropped stitch from the row below. Make sure to secure it properly, so it doesn’t unravel further.
Is it easy to fix a dropped knit stitch?
Fixing a dropped knit stitch is not as difficult as it may seem. With a little practice and patience, you can easily pick up the dropped stitch and continue knitting. Just make sure to take your time and be gentle, so you don’t create any additional mistakes.
Can I use a crochet hook to fix a dropped knit stitch?
Yes, using a crochet hook is one of the easiest and most effective ways to fix a dropped knit stitch. Simply insert the hook through the dropped stitch from the row below and pull it up to the level of your current row. Then, place the stitch back onto the left-hand needle and continue knitting as usual.
What other tools can I use to fix a dropped knit stitch?
Aside from a crochet hook, you can also use a stitch holder or a smaller knitting needle to fix a dropped stitch. The process is similar – just insert the tool through the dropped stitch from the row below and pull it up to the level of your current row. Then, place the stitch back onto the left-hand needle and continue knitting as usual.

