If you’re a beginner knitter or just starting to expand your knitting skills, learning how to make one, or m1, is an essential technique to master. M1 is a common increase in knitting that creates a new stitch and helps shape your knitting projects. Whether you’re working on a sweater, a hat, or a pair of socks, knowing how to m1 will give your projects a more professional finish.
M1 is short for “make one” and is a type of increase that adds a stitch to your knitting. It’s used to create new stitches where there would otherwise be a gap or hole in the fabric. This technique is often used when shaping garments or creating decorative patterns.
There are several methods for making one, but the most common method is the “m1 knitwise” technique. To make one knitwise, you’ll need to pick up the strand of yarn that lies between the stitches on your left-hand needle and knit into the back of it. This creates a new stitch, and you can continue knitting as usual.
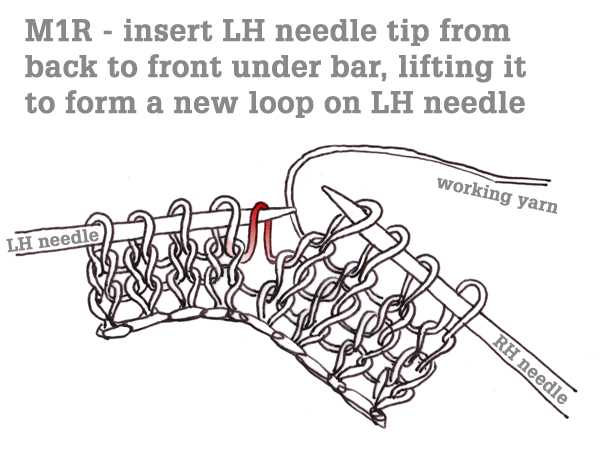
Once you’ve mastered the basic m1 knitwise, you can also explore other variations, such as the “m1 purlwise” or the “m1L” and “m1R” methods. These techniques create slightly different effects and are often used in more advanced knitting patterns.
Learning how to m1 in knitting is an important skill to have in your knitting toolkit. With practice, you’ll be able to create beautifully shaped projects and tackle more intricate patterns. So grab your knitting needles and yarn, and let’s get started!
How to m1 in Knitting: Step-by-Step Tutorial
The m1 (make one) is an increase technique in knitting that is used to add stitches to your knitting. It is commonly used to create shaping in your project, such as shaping a neckline or adding width to a garment.
To m1, you will need your knitting needles and yarn.
- Start by knitting until you reach the point where you want to make the increase.
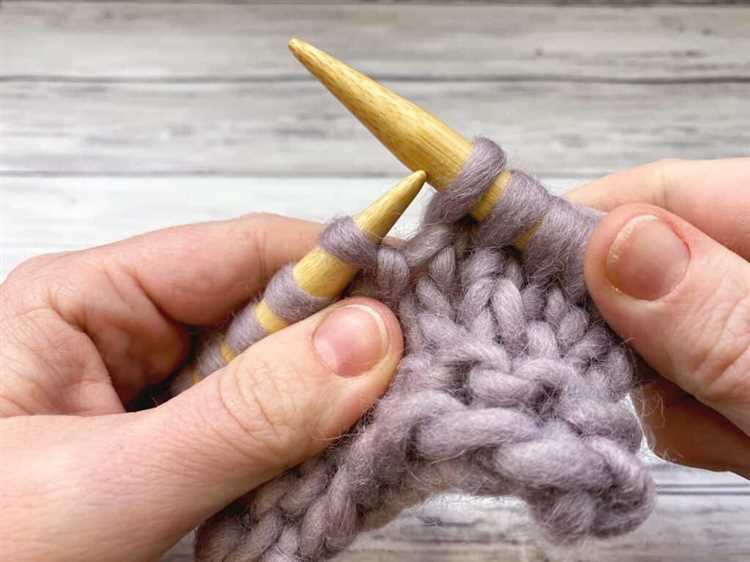
- Take the left needle and insert it from the front to the back into the horizontal strand of yarn that runs between the stitch on your right needle and the next stitch.
- Bring the yarn to the front of your work, crossing it over the left needle.
- Insert the right needle into the loop that was just created on the left needle, from front to back.
- Knit into the loop, just as you would knit a regular stitch.
- Slip the new stitch onto the right needle.
You have now successfully m1’d a stitch! Repeat these steps as necessary to create the desired number of increases.
It is important to note that there are different variations of the m1 increase, such as the “m1l” (make 1 left) and “m1r” (make 1 right). These variations create slightly different results and are used depending on the pattern instructions.
Here is a table summarizing the different variations of m1 increases:
| Technique | Description |
|---|---|
| m1 (make 1) | Insert the left needle into the horizontal strand of yarn between stitches, from front to back, and knit into the loop. |
| m1l (make 1 left) | Insert the left needle into the horizontal strand of yarn between stitches, from back to front, and knit into the loop. |
| m1r (make 1 right) | Insert the left needle into the horizontal strand of yarn between stitches, from front to back, and knit into the back of the loop. |
When following a pattern that calls for a m1 increase, make sure to refer to the pattern instructions to determine which variation of the m1 increase to use.
Practice m1 increases on a swatch before incorporating them into your project. With practice, you will become comfortable with this technique and be able to add increases seamlessly to your knitting.
Understanding the M1 Increase Stitch
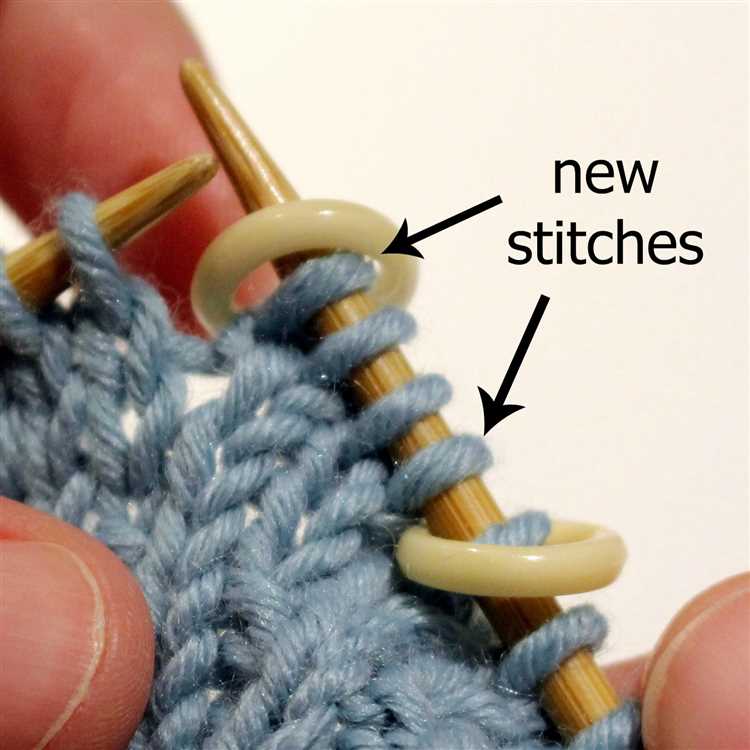
The M1 increase stitch, also known as Make One, is a common technique used in knitting to add stitches to your work. This increase is often used to create shaping or add width to a knitted piece.
There are several different methods for making a M1 increase, but the most common method is the “lifted bar” method. This method involves picking up the horizontal loop of yarn that runs between the stitches on your needle, and knitting into it to create a new stitch.
To make a M1 increase using the lifted bar method, follow these steps:
- Insert your right needle from front to back under the horizontal loop of yarn that runs between the stitches on your left needle.
- Lift the loop onto the left needle, creating a new stitch.
- Knit into the lifted loop as you would a regular stitch.
It’s important to note that the direction in which you lift the loop will determine whether the new stitch is “left-leaning” or “right-leaning”. To create a left-leaning increase, insert your right needle from back to front under the loop. To create a right-leaning increase, insert your right needle from front to back under the loop.
M1 increases can be used in a variety of knitting projects, including sweaters, hats, and shawls. They can be used to add decorative elements, create shaping for sleeves or collars, or even create lace patterns. By understanding the M1 increase stitch, you’ll have a valuable skill that will enhance your knitting repertoire.
Materials You Will Need
To knit the M1 stitch, you will need the following materials:
- Yarn: Choose a yarn that matches your project. The weight and fiber content of the yarn may vary depending on your project’s requirements.
- Knitting needles: Use a needle size appropriate for your yarn. The recommended needle size is usually listed on the yarn label.
- Tapestry needle: This needle is used for weaving in ends and seaming.
- Scissors: You will need a pair of scissors to cut the yarn at the end of the project or to correct any mistakes.
Optional materials:
- Stitch markers: These can be helpful for marking specific stitches or sections of your project.
- Row counter: A row counter can help you keep track of your progress throughout the project.
- Measuring tape: This can be useful for checking your gauge or measuring your finished project.
Note: The specific materials you will need may vary depending on the pattern and project you are working on.
Step 1: Making a Loop
To start the m1 stitch in knitting, you first need to create a loop on your left-hand needle. This loop will serve as the new stitch that you will work with.
- Hold the right-hand needle with the stitches in your right hand, and the left-hand needle with the loop in your left hand.
- With your right hand, bring the right-hand needle from the front to the back of the left-hand needle.
- Insert the right-hand needle into the loop on the left-hand needle, going from front to back.
- With your right-hand needle, grab the working yarn, which is connected to your ball of yarn, and bring it through the loop on the left-hand needle.
- Gently pull the loop through, creating a new loop on the right-hand needle.
Congrats! You have successfully made a loop, which will be the new stitch in your knitting project.
Step 2: Inserting the Right Needle
Once you have made a slip knot and cast on the desired number of stitches, you are ready to start knitting. The next step is to insert the right needle into the first stitch on the left needle.
- Hold the left needle with the cast on stitches in your left hand.
- With your right hand, take the right needle and insert it into the first stitch on the left needle from left to right.
- Make sure to go through the center of the stitch, not the top or bottom loop.
- Hold the right needle between your fingers, keeping a firm grip on it.
- Make sure both needles are parallel to each other, with the tips pointing in the same direction.
Now that the right needle is inserted into the first stitch, you are ready to move on to the next step: making a knit stitch.
Step 3: Knitting Through the Back Loop
Now that you have completed the first two steps of making a knit stitch, it’s time to move on to the next step: knitting through the back loop.
Knitting through the back loop creates a twisted stitch, which can add a beautiful texture to your knitting project. This technique is commonly used in various stitch patterns, such as ribbing or cables.
- Insert the right-hand needle into the next stitch on the left-hand needle, but instead of inserting it through the front loop, insert it through the back loop.
- Make sure the left-hand needle is in front of the right-hand needle.
- Wrap the yarn counterclockwise around the right-hand needle, just like in a regular knit stitch.
- With the yarn still wrapped around the right-hand needle, use the right-hand needle to pull the loop of yarn through the back loop of the stitch on the left-hand needle.
- Slide the new stitch from the left-hand needle to the right-hand needle, and you have successfully completed a knit stitch through the back loop!
- Repeat these steps for each stitch until you reach the end of your row.
Knitting through the back loop can be a bit more challenging than the regular knit stitch, especially for beginners. It may take some practice to get the tension and movement right, so don’t get discouraged if it doesn’t look perfect right away.
Once you have mastered this technique, you can experiment with different stitch patterns that involve knitting through the back loop to create unique and intricate designs in your knitting projects.
Step 4: Complete the Stitch
Once you have looped the working yarn over the needle and pulled it through the loop on the left needle, you have completed the “M1” stitch. This stitch increases the number of stitches on your needle by one.
Here are the steps to complete the M1 stitch:
- Insert the right needle into the new stitch that was created from the M1 increase.
- With the working yarn, wrap it over the right needle from left to right, just like you would for a regular knit stitch.
- Use the right needle to pull the yarn through the new stitch, creating a loop on the right needle.
- Slip the loop onto the left needle, completing the M1 stitch.
Repeat these steps for each M1 increase stitch that you need to make in your pattern. Remember to keep track of your stitches and follow any specific instructions or stitch counts provided in your knitting pattern.
Completing the M1 stitch accurately is important to ensure that your knitting project turns out as intended. Take your time and practice this increase stitch until you feel comfortable with it.
M1P: The Purl Equivalent of M1
When working on a knitting project, you may come across the instruction to “m1” or make one. This is a common increase technique that adds a new stitch to your knitting. However, what do you do if you need to increase a stitch on the purl side of your work? That’s where the “m1p” or make one purl comes in handy.
M1p is the purl equivalent of m1, and it is used to create a new stitch on the purl side of your work. It is especially useful when you want to increase the number of stitches evenly across a row or when you need to increase a stitch on the wrong side of your knitting.
Here’s how you can work the m1p increase:
- Begin with your working yarn in front of your work, positioned as if you were about to purl a stitch.
- Insert your left-hand needle from back to front into the horizontal strand that runs between the stitch just worked and the next stitch on the left-hand needle. This strand should be in front of your work.
- Take your working yarn and bring it between the needles and over the left-hand needle, creating a loop around the left-hand needle.
- Purl this new loop as you would normally purl a stitch, slipping the original strand off the left-hand needle.
- You have now successfully worked the m1p increase, creating a new purl stitch.
It’s important to note that the m1p increase creates a purl stitch, so be sure to follow the specific pattern instructions for when and how to work this increase. As with any new technique, it may take a bit of practice to get comfortable with the motion, but with time and patience, you’ll be able to confidently work the m1p increase in your knitting.
So the next time you encounter the need for an increase on the purl side of your work, remember the m1p technique and confidently create new stitches in your knitting.
Tips and Tricks for a Perfect M1 Stitch
When it comes to creating a perfect M1 (Make One) stitch in knitting, a little bit of technique goes a long way. Whether you are a beginner or an experienced knitter, here are some tips and tricks to help you achieve a flawless M1 stitch:
1. Choose the Right Method
There are various methods to make a M1 stitch, including the M1L (Make One Left) and M1R (Make One Right) methods. Experiment with different methods to find the one that works best for you and produces the desired effect in your knitting project.
2. Make Sure to Twist the Stitch
When creating a M1 stitch, it is important to twist the new stitch by picking up the yarn from the back or front to prevent a hole from forming. This will create a more seamless and professional-looking result.
3. Use the Correct Needle Placement
Proper needle placement is crucial for a clean M1 stitch. Make sure to insert the needle into the correct loop or strand of yarn to prevent any irregularities or inconsistencies in your knitting.
4. Maintain Tension
Consistency in tension is key to creating a neat M1 stitch. Be mindful of your tension throughout the knitting process to avoid loose or tight stitches. Practice maintaining a steady tension to achieve a professional finish.
5. Practice, Practice, Practice
Like any knitting technique, mastering the M1 stitch takes practice. Set aside some time to practice this stitch on a swatch or scrap yarn, experimenting with different methods and needle placements until you feel comfortable and confident with the technique.
6. Keep a Knitting Journal
Keeping a knitting journal can be incredibly helpful when learning new techniques like the M1 stitch. In your journal, make notes about the methods and needle placement that work best for you, as well as any adjustments or modifications you find helpful. This way, you can refer back to your journal for future projects or when you need a refresher on the M1 stitch.
7. Take Breaks
Knitting can be a relaxing and enjoyable activity, but it can also be repetitive and tiring. Take regular breaks to stretch your hands and relax your muscles. This will help maintain your focus and prevent any unnecessary mistakes or frustrations while working on your M1 stitches.
Conclusion
By implementing these tips and tricks, you can achieve a perfect M1 stitch in your knitting projects. Remember to choose the right method, twist the stitch, use correct needle placement, maintain tension, practice regularly, keep a knitting journal, and take breaks. With time and practice, you’ll become a pro at creating flawless M1 stitches.
FAQ:
What is m1 in knitting?
M1 in knitting stands for “make one” and it is an increase technique that creates a new stitch on your needles.
Why would I need to use the m1 increase in knitting?
You might need to use the m1 increase in knitting when you want to add stitches to your work without creating any noticeable holes or gaps.
Are there any variations of the m1 increase technique?
Yes, there are different ways to do the m1 increase depending on the desired outcome. Some variations include the lifted increase (also known as the make-one-below), the yarn-over increase, and the bar increase.
Which yarn is best to use for the m1 increase?
It is recommended to use the same yarn that you are using for your knitting project when performing the m1 increase, as this will ensure consistency in the appearance and texture of your work.
Can I use the m1 increase for lace knitting?
Yes, the m1 increase can be used for lace knitting. However, depending on the specific lace pattern, you may need to use other increase techniques that create different effects and shapes.


